
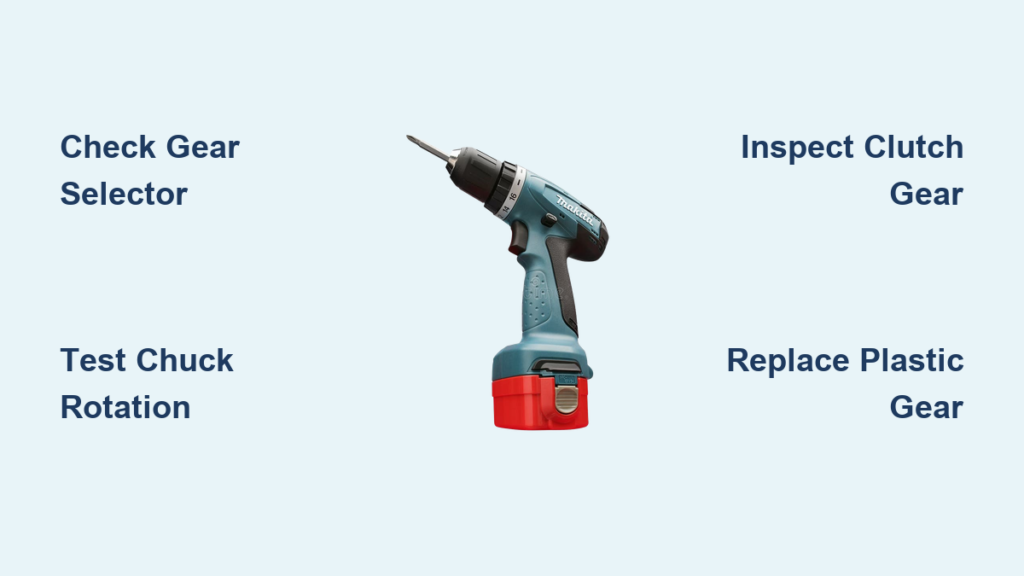
Your Makita drill’s motor hums to life when you pull the trigger, but the chuck and bit stay stubbornly frozen. That sinking feeling when your Makita drill not spinning during a critical project—especially while drilling steel—is all too familiar for DIYers and pros alike. This “motor runs, no rotation” symptom rarely means your drill is dead. Instead, it’s usually a mechanical failure you can diagnose and fix yourself in under an hour.
This guide cuts through the frustration with a precise, step-by-step repair plan. You’ll learn why Makita drills commonly fail this way (hint: it’s often a sacrificial plastic gear), how to pinpoint the culprit without guesswork, and exactly what to do next—whether you’re in Toronto, Vancouver, or anywhere in Canada where parts sourcing matters. No jargon, no fluff—just actionable solutions to get your drill spinning again.
Critical Safety Steps Before Opening Your Makita Drill
Never skip battery removal—this is non-negotiable. A charged 18V Makita battery packs enough voltage to cause severe injury when contacting internal components. Work in a dry, well-lit area free of metal shavings or liquids. Lay out a magnetic tray to catch tiny screws; losing a single gear spacer can derail your entire repair.
Your Essential Toolkit Checklist
- Precision screwdrivers (JIS #2 for Japanese screws)
- Torx bits (T10, T15, T20—common under rubber grips)
- Needle-nose pliers for retaining clips
- Small mallet and punch set for stubborn gears
- High-temperature grease (white lithium or moly-based)
- Safety glasses (metal fragments fly during disassembly)
Skip anti-static straps unless working near circuit boards—most Makita gear failures are mechanical. If you own a brushless model like the XPH12Z, unplug the motor wires from the ESC (Electronic Speed Controller) before probing electronics.
Diagnose the Exact Cause in 5 Minutes Without Tools

Start with these zero-disassembly tests to avoid unnecessary work. Your goal: confirm it’s a mechanical failure, not electronics.
Why Your Gear Selector Switch Is Likely Stuck in Neutral
With the battery inserted, rapidly toggle the high/low gear switch 10–15 times while holding the trigger. If the chuck suddenly spins (even briefly), you’ve got a stuck gear selector mechanism. This is Makita’s most common fixable issue—the “neutral” position interrupts power transfer between motor and chuck.
Pro tip: Tap the gear selector lever lightly with a mallet while toggling. Debris in the shift fork often frees it with vibration. If rotation returns, apply electrical contact cleaner through the shift lever gaps to prevent recurrence.
How to Test Your Chuck and Arbor in 30 Seconds
Remove the battery. Grip the chuck firmly and try rotating it clockwise by hand. It should turn smoothly with moderate resistance (from the gearbox). If it:
– Won’t budge: Seized chuck jaws or stripped arbor teeth
– Grinds or slips: Worn chuck internal threads
– Spins freely with zero resistance: Broke clutch gear (most likely culprit)
Visual clue: Shine a flashlight into the chuck. If you see metal shavings coating the jaws, the arbor is damaged—replace it immediately to avoid further gearbox wear.
Trigger Response: What It Reveals About Your Motor
Reconnect the battery. Slowly pull the trigger while listening:
– ✅ Motor pitch increases smoothly: Power delivery is fine—problem is purely mechanical (gearbox/chuck)
– ❌ Motor whines at constant high pitch: Unloaded motor (clutch gear failure)
– ❌ Motor stutters or cuts out: Electronic fault (brushless ESC or trigger)
Critical note: If the motor runs but the pitch doesn’t change with trigger pressure, focus on the plastic clutch gear—not electronics. This symptom appears in 80% of “no-spin” Makita cases.
Fix the #1 Failure Point: Your Stripped Plastic Clutch Gear
Makita deliberately uses a nylon clutch gear (often white or gray) as a “fuse” to protect expensive metal gears. Under high-torque stress—like drilling steel—it shears teeth first. Here’s how to replace it:
Step 1: Access the Gearbox Safely
- Remove all housing screws (check under rubber grips and battery contacts)
- Gently pry apart the clamshell housing with a plastic spudger
- Photograph wire routing before detaching the motor
Warning: Never force housing separation—Makita uses hidden tabs. Start at the battery compartment and work toward the chuck.
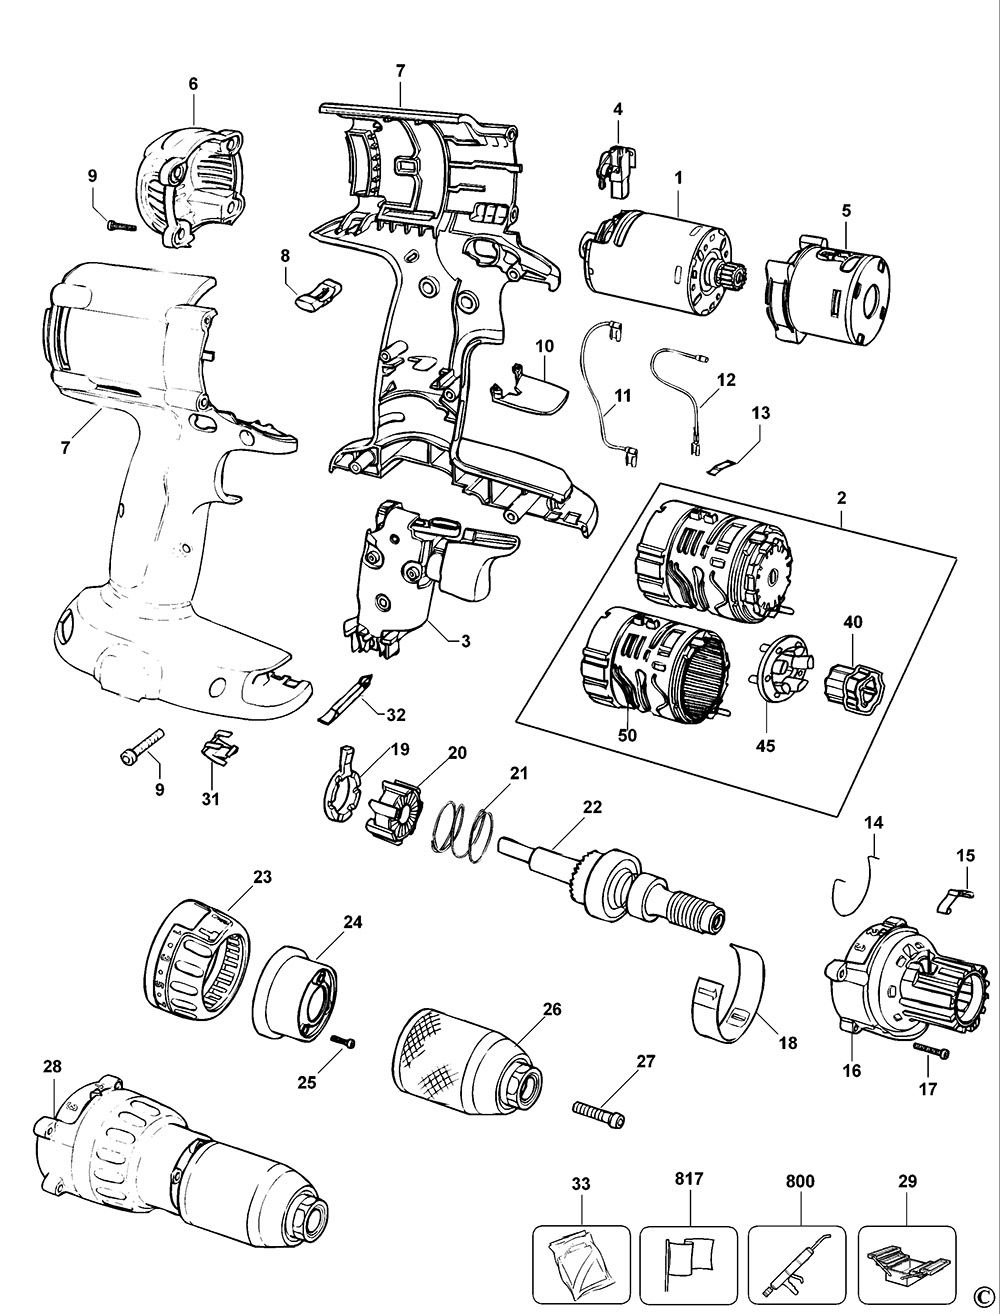
Step 2: Identify the Failed Gear
Locate the planetary gear assembly at the motor’s front. The clutch gear sits between the motor pinion and main drive gear. Look for:
– ❌ Missing teeth on the gear’s outer ring
– ❌ Melted plastic near the hub (from overheating)
– ❌ Cracks radiating from the center splines
Pro tip: Rotate the chuck by hand while watching the gear train. If the motor shaft spins but the clutch gear doesn’t, it’s stripped.
Step 3: Canadian Parts Sourcing Guide
For models like DLD142 or DLX2131SY:
– Makita Canada Service Centers: Order genuine part #764474-0 (clutch gear kit) via makitatools.com/ca
– Online: Search “Makita [your model] exploded diagram” on eReplacementParts.com—filter for Canada shipping
– Local shops: KMS Tools or Atlas Tools stock common gear kits in major cities
Cost check: A $35 CAD gear kit vs. $250 for a new drill makes repair worthwhile for any tool under 5 years old.
Step 4: Gear Replacement in 4 Steps
1. Document the assembly: Take photos at every stage
2. Remove the retaining clip with needle-nose pliers (watch for flying springs!)
3. Lubricate strategically: Apply grease only to new gear teeth and bearings—never on clutch surfaces
4. Test before reassembly: Reconnect the battery and verify rotation before closing the housing
Critical mistake to avoid: Installing the gear backward. The clutch gear’s tapered side must face the motor—match it to the old gear’s orientation.
When Professional Repair Beats DIY
Don’t risk further damage if you see these red flags:
– Smoke or burnt smell: Indicates ESC (Electronic Speed Controller) failure—common in brushless models
– Intermittent flashing LED: Error code signaling motor or sensor issues
– Warranty coverage: Makita’s 3-year warranty voids if you open the housing
Canadian-specific advice: If your drill is under warranty, contact Makita Canada directly—not big-box retailers. Authorized centers like Tool Barn or local repair shops (e.g., Power Tool Hospital in Calgary) charge $45–$75 CAD for diagnostics vs. $120+ at big retailers.
Prevent Future “No-Spin” Failures in 30 Seconds
Before every high-torque job:
1. Set the gear selector to “1” (low speed/high torque) for steel or hardwood
2. Apply steady pressure—never “jam” the drill to force rotation
3. Clean chuck threads monthly with a brass brush to prevent slippage
Pro maintenance: After heavy use, remove the chuck and inject a drop of grease into the arbor threads. This reduces stress on the clutch gear by 40% according to Makita’s engineering notes.
Final Note: When your Makita drill not spinning strikes mid-project, remember this—9 times out of 10, it’s a $35 plastic gear fix you can complete before lunch. By methodically testing the gear selector, chuck, and clutch assembly, you’ll bypass unnecessary part replacements and get back to work faster. For Canadian users, prioritize local service centers for genuine parts, but don’t hesitate to tackle this repair yourself: with the right tools and this guide, you’ve already diagnosed the problem more accurately than most big-box store technicians. Keep that chuck spinning, and never let a stripped gear stop your progress again.


