

That slow-draining sink or backed-up toilet has defeated your plunger and chemical drain cleaners. When water refuses to flow and traditional methods fail, it’s time to bring out the big guns: your electric drain auger. This powerful motorized tool can tackle deep clogs caused by hair, grease, soap scum, and even tree roots that manual snakes can’t reach. Learning how to use an electric drain auger properly transforms you from a frustrated homeowner into someone who can handle plumbing emergencies confidently. In this guide, you’ll discover the precise steps to operate your electric drain snake safely and effectively, avoiding common mistakes that could damage pipes or leave you with a bigger mess.
Critical Safety Steps Before Powering Up Your Electric Drain Snake
Your personal safety must come before clearing any clog. Electric drain augers combine moving parts with potential contact with contaminated water, creating serious hazards if mishandled.
Essential Safety Gear Checklist:
* Safety goggles or face shield to protect eyes from dangerous splashes of contaminated water
* Heavy-duty waterproof gloves to shield hands from sharp cable strands and biological hazards
* Steel-toed boots for foot protection against dropped equipment
* Hearing protection since many models exceed 85 decibels during operation
Electrical Safety Protocol:
* Verify your power source uses a GFCI (Ground-Fault Circuit Interrupter) outlet to prevent electrocution
* Inspect the electrical cord thoroughly for any damage or fraying before plugging in
* Never operate the auger in standing water or with wet hands
* Keep all electrical connections well away from potential water contact
Matching Cable Diameter to Pipe Size for Effective Clog Removal
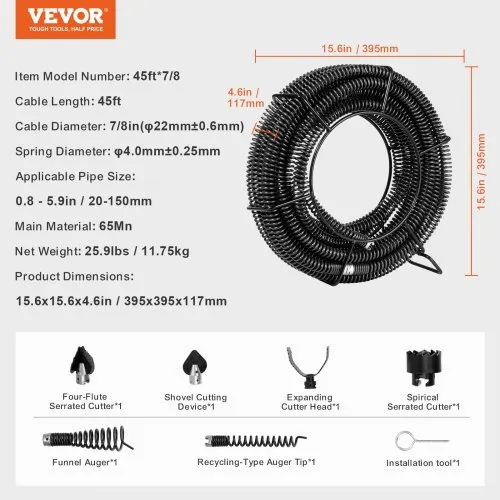
Choosing the wrong cable size can damage pipes or fail to clear the blockage. Your electric drain auger’s effectiveness depends entirely on selecting the correct cable diameter for your plumbing system.
- 1.5″ to 2″ household drains (sinks, showers, bathtubs): Use a 3/8″ to 1/2″ diameter cable
- 3″ to 4″ main lines (toilets, kitchen drains): Opt for a 5/8″ to 3/4″ diameter cable
- 4″ to 6″ building drains: Requires a 3/4″ to 1″ diameter cable for proper clearing
Critical inspection step: Lay your cable flat and examine its entire length for kinks, frays, or broken strands before each use. If more than 10% of the wire strands are broken, replace the cable immediately—continuing to use it risks snapping inside your pipes.
How to Securely Attach Your Drain Auger Cutter Head Without It Coming Loose
A loose cutter head can become lodged in your plumbing, creating a much worse problem than the original clog. Follow these precise steps to ensure your attachment stays secure during operation.
Proper Cutter Head Attachment Process
-
Select the right cutter for your clog type:
* Bulb head cutter: Best for hair and paper clogs in bathroom sinks
* Arrow cutter: Essential for cutting through tree roots in main lines
* C cutter: Most effective for grease and soap scum buildup
* Spade cutter: Ideal for pushing through soft, muddy blockages -
Secure attachment procedure:
* With the motor completely off and unplugged, attach the cutter head to the cable end
* Tighten the 1/4″ Allen head set screw firmly using the proper wrench
* Apply thread-locking compound to prevent loosening during operation
* Wrap a small piece of duct tape over the screw head as additional security
Pro tip: Mark the end of your cable with colored electrical tape every 5 feet. This helps you track how far you’ve fed the cable and identify where clogs typically occur in your plumbing system.
The Correct Way to Feed Your Electric Auger Cable Into Clogged Pipes
Initial Cable Insertion Without Damaging Pipes
- Start with the machine OFF and feed the first 3-6 feet of cable manually into the drain
- Turn on the machine at the lowest speed setting before applying forward pressure
- Use steady, gentle pressure—never force the cable through the pipes
- Spray cable lubricant on the first few feet to reduce friction in tight bends
Warning: Forcing the cable around pipe bends is the #1 cause of kinks and pipe damage. If you meet resistance, reverse slightly (1-2 seconds maximum), then continue feeding. Never apply excessive pressure.
Navigating Problematic Pipe Configurations
- For vertical drops: Use a cable guide for the first 2-3 feet of entry to direct the cable downward
- For horizontal runs: Keep the cable straight behind the machine and apply continuous pressure
- For tight 90-degree bends: Use the “pecking” technique—advance 12-18 inches, pause, retract 6 inches, repeat
Breaking Through Roots and Grease Blockages With Your Electric Drain Auger
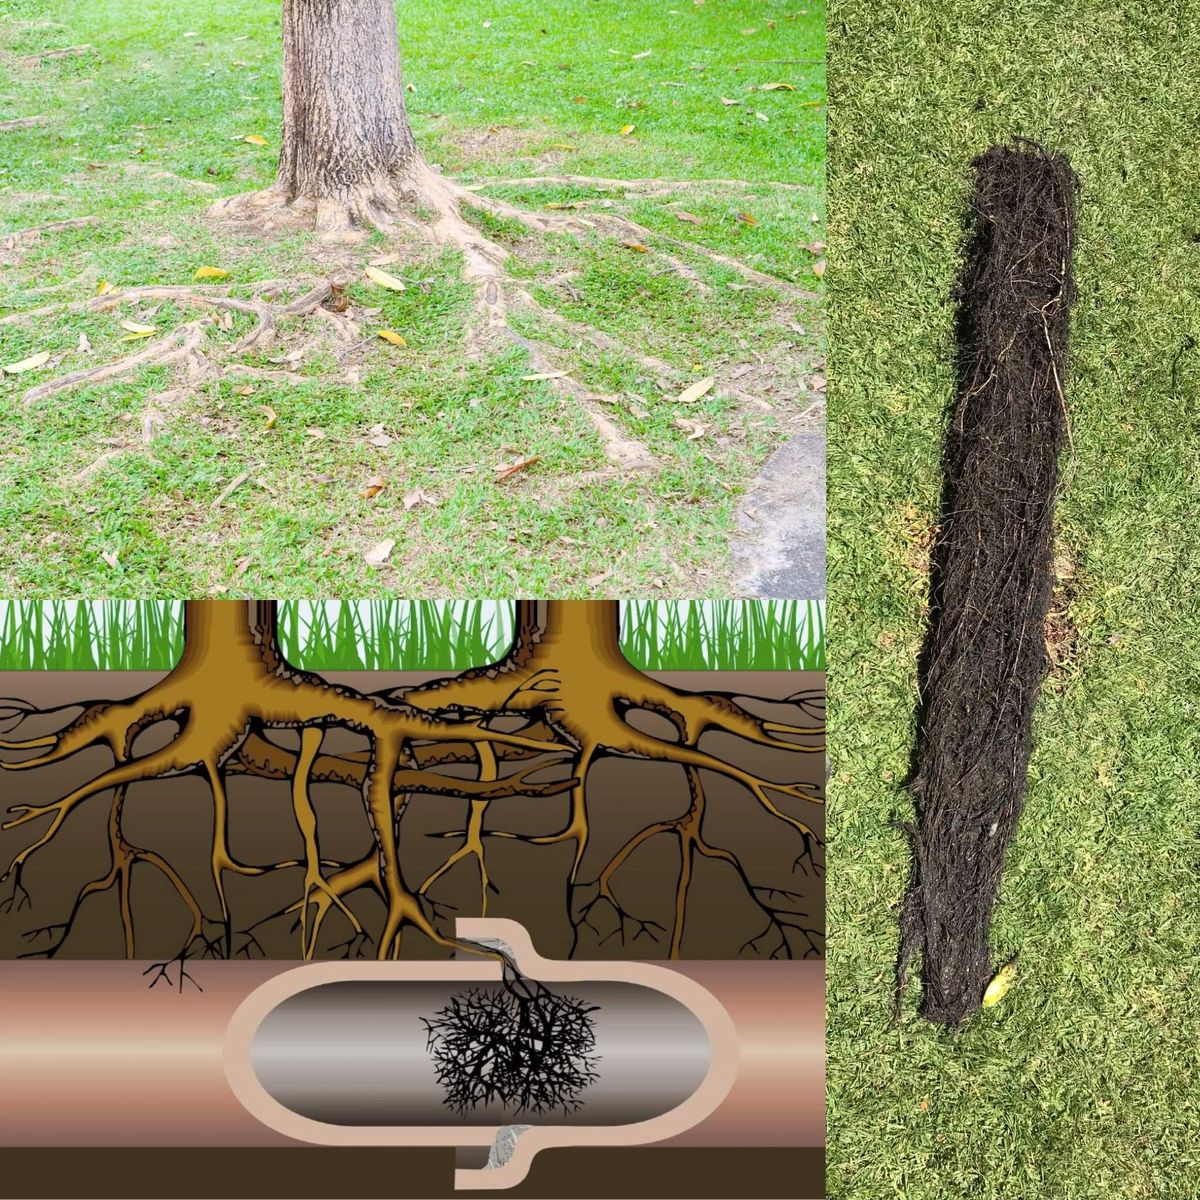
When you feel significant resistance, you’ve likely reached the clog. How you handle this moment determines whether you clear the blockage or create a bigger problem.
Effective Clog-Clearing Technique
- Hold steady pressure while letting the rotating cutter head do the work
- Listen to the motor: Straining indicates you’re hitting something solid
- For tough clogs: Use a high-torque, low-speed approach rather than forcing the cable
- When breakthrough occurs: You’ll feel sudden release of resistance and hear gurgling water
Critical step: After clearing the clog, continue feeding the cable 2-3 additional feet to ensure complete clearing before retrieval. Running hot water for 5-10 minutes afterward flushes remaining debris from the pipes.
Retrieving Your Electric Auger Cable Without Dragging Debris Back Into Pipes
Safe Cable Retrieval Process
- Switch to reverse mode after clearing the clog
- Retrieve slowly while wiping debris from the cable with rags
- Keep tension on the cable to prevent coiling or kinking
- Clean thoroughly with mild detergent before storage
Never skip this step: Failing to clean the cable immediately after use allows grease and debris to harden, making future use difficult and promoting rust on metal components.
Troubleshooting: Why Your Drain Auger Cable Won’t Feed or Retract
Common Feeding Problems and Solutions
- Cable won’t feed forward:
- Check for kinks in the first 10 feet of cable
- Verify the cutter head isn’t too large for your pipe size
-
Ensure adequate lubrication on the cable
-
Cable retracts spontaneously:
- Increase feed pressure slightly
- Check that the auto-feed mechanism is engaged
- Verify the cable is properly seated in the drum
Emergency Stop Protocol
If the motor overheats or the cable binds completely:
1. Release feed handles immediately
2. Turn power switch to “OFF”
3. Unplug the machine before attempting to clear jams
4. Let the motor cool for 15 minutes before retrying
Warning: Never continue operating if the cable is kinked—this can damage both the cable and your pipes. Stop immediately and address the kink before proceeding.
When to Stop Using Your Electric Drain Snake and Call a Plumber
Knowing your limits prevents costly damage to your plumbing system. Stop immediately and call a professional if you encounter:
- Cast iron pipes (more brittle and prone to damage)
- Multiple cleanouts with blockages in the main sewer line
- Complete cable binding that won’t feed or retract after troubleshooting
- Suspected collapsed pipes (identified by camera inspection)
- Clogs beyond 50 feet (indicates a main line issue)
Pro tip: If you can’t clear the clog after 15-20 minutes of proper technique, the problem likely requires professional equipment like camera inspection or hydro-jetting. Continuing to force the issue risks damaging pipes and creating expensive repairs.
Post-Auger Maintenance: Flushing Drains and Cleaning Your Equipment
Essential Post-Operation Steps
- Flush with hot water for 5-10 minutes to remove residual debris
- Apply enzyme-based cleaner for 24 hours to prevent future buildup
- Clean cable thoroughly with rags and mild detergent
- Apply light oil to prevent rust before storage
- Check all fasteners for tightness and wear
Critical maintenance: Store your electric drain auger with the cable fully extended and rewound properly—never leave it partially unwound. This prevents kinks and extends the life of both your cable and drum mechanism.
Following these precise steps transforms your electric drain auger from a potentially dangerous tool into your most valuable plumbing ally. Remember that proper technique—not brute force—is key to clearing clogs without damaging pipes. When used correctly, your electric drain snake can save you hundreds in emergency plumbing calls while giving you confidence to handle future drain emergencies. For persistent problems beyond your equipment’s capabilities, don’t hesitate to call a licensed professional—knowing when to stop is just as important as knowing how to operate your auger.

