
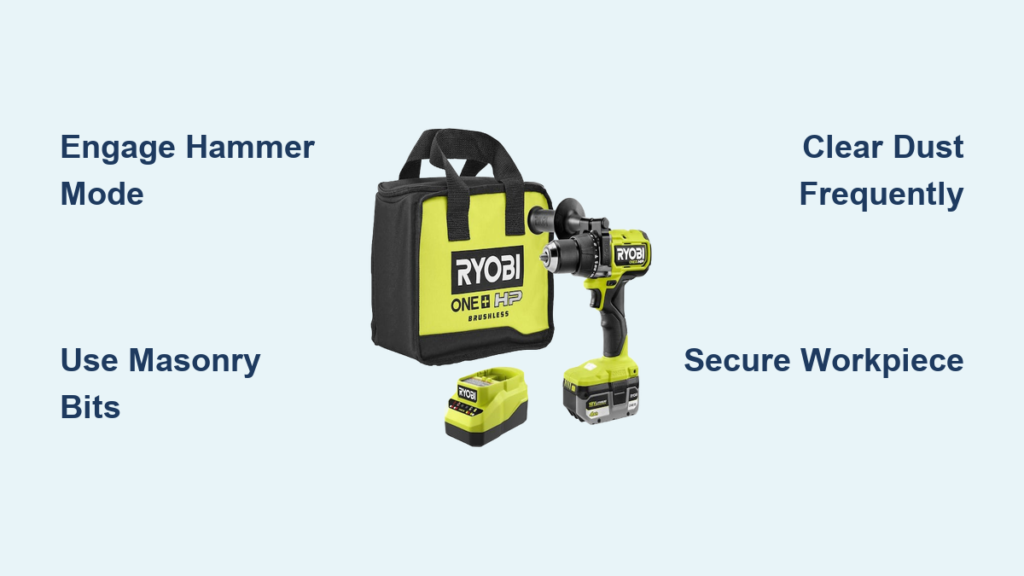
That sickening crunch when your drill bit snaps inside concrete. The frustration of stripped screw heads after 20 minutes of work. If you’ve ever struggled with your Ryobi hammer drill, you’re not alone—80% of DIYers misuse the hammer function or select wrong bits. This guide cuts through the confusion with precise steps verified against Ryobi’s engineering specs. You’ll learn exactly when to engage hammer mode, how to prevent chuck failures, and material-specific techniques that save bits and time. Whether you’re drilling into brick patio pavers or hanging drywall on steel studs, these field-tested methods work on all Ryobi 18V and ONE+ hammer drill models.
Why Your Ryobi Hammer Drill Won’t Start (And How to Fix It Fast)
Before touching any settings, solve the #1 startup failure: dead battery connections. Your Ryobi hammer drill requires a fully seated battery to activate the chuck mechanism—a design quirk that stumps beginners. Insert your Ryobi ONE+ battery until you hear a definitive click, then squeeze the trigger while pressing the direction switch forward. If nothing happens, remove the battery and inspect the gold contacts for dust buildup. Wipe them with a microfiber cloth, then reinsert with firm pressure. Never force the chuck open without battery power—this damages the internal clutch mechanism.
Why Won’t My Chuck Open or Close?
This common failure occurs when you skip the critical battery step. Without a battery inserted, the chuck’s electronic interlock prevents operation—a safety feature to avoid accidental bit ejection. To fix:
1. Insert a charged battery until it clicks
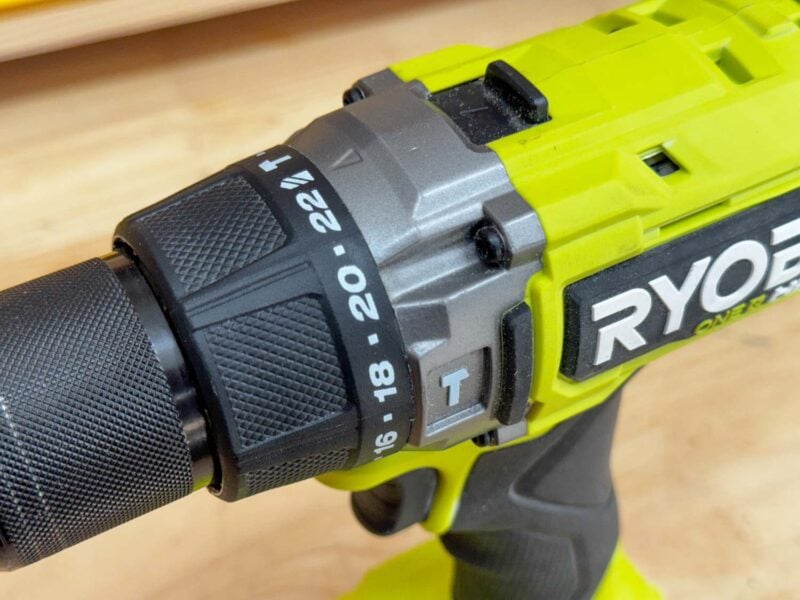
2. Hold the grey outer collar stationary with pliers (wrap jaws in cloth)
3. Rotate the black nose clockwise to tighten or counterclockwise to loosen
If the chuck remains stuck, apply penetrating oil to the threads and let sit for 10 minutes. Never use excessive force—Ryobi’s keyless chucks strip easily when forced.
Installing Bits Without Slippage
Bit slippage causes crooked holes and stripped materials. The solution lies in proper chuck tension:
– Insert the bit shank fully until it bottoms out in the chuck
– Grip the black nose firmly with one hand while rotating the chuck body clockwise
– Apply maximum hand pressure—you should feel resistance in your forearm
– Test by trying to twist the bit free with pliers (it shouldn’t budge)
Pro Tip: For masonry bits, insert 1 inch deeper than other bits—the hammer action requires extra stability.
Hammer Mode vs. Drill Mode: When to Switch (Or Ruin Your Bit)
Using hammer mode on wood or metal destroys bits in seconds. This critical distinction separates pros from frustrated DIYers. Only engage hammer mode (hammer icon) when drilling concrete, brick, or stone—and exclusively with carbide-tipped masonry bits. The percussive action pulverizes masonry but shatters standard HSS bits. For all other materials, use the drill bit icon setting.
Why Your Masonry Bit Shattered in Concrete
You likely made one fatal error: using a standard twist bit with hammer mode. The hammer function delivers 48,000 BPM (blows per minute) on most Ryobi 18V models—enough to snap普通 steel bits. Always verify:
– ✅ Carbide tip visible on bit shoulder
– ✅ Bit labeled “Masonry” or “Hammer Drill”
– ✅ Hammer mode selector engaged before starting
Start drilling at 30° angle for first 1/4 inch to create a pilot groove, then straighten to 90°. Apply steady pressure—never force the drill—and pull out every 2 inches to clear dust.
Driving Screws Without Stripping Heads
Ryobi’s clutch collar prevents damaged drywall and stripped screws when used correctly:
1. Set collar to #2 for softwoods (pine, cedar)
2. Increase to #5 for hardwoods (oak, maple)
3. For metal studs, use #3 with coarse-thread drywall screws
4. When clutch clicks, stop immediately—forcing past this point strips heads
Critical Note: The clutch disengages before full depth. For final tightening, switch to drill mode (bit icon) with no clutch setting.
Material-Specific Drilling Techniques That Prevent Blowout
Drilling Clean Holes in Wood Without Splintering
Blowout ruins cabinet doors and shelves. Prevent it with the sacrificial board method:
– Clamp scrap plywood behind your workpiece
– Drill until bit tip pierces the scrap wood
– Flip workpiece and finish drilling from reverse side
Use brad-point bits for precise starting—never standard twist bits for visible wood projects. Set speed selector to #2 (high speed) and apply light pressure. When bit binds, reduce pressure immediately to avoid kickback.
Metal Drilling Without Overheating Bits
HSS bits fail fast when metal drilling. Follow this battle-tested sequence:
1. Center-punch your mark (creates starter dimple)
2. Apply cutting oil to bit tip and work surface
3. Start at low speed (selector #1) with firm pressure
4. After 1/8 inch depth, pull out to clear chips and reapply oil
5. Switch to high speed (#2) for remainder
Warning: Forcing the bit causes “blueing”—a heat discoloration that ruins bit temper. If metal smokes, stop immediately and cool with oil.
Concrete Drilling Without Getting Stuck

Masonry bits bind in concrete if dust isn’t cleared. Use the peck-drilling method:
– Drill 1 inch with steady pressure
– Pull out completely to clear dust with air blower
– Repeat every 1/2 inch depth
– Never drill deeper than bit’s flute length—this traps dust and seizes bits
For rebar encounters (common in patios), switch to low speed (#1) and reduce pressure by 50%. If bit stops advancing, rotate direction switch to reverse for 2 seconds to free it.
Critical Safety Mistakes That Cause Workshop Injuries

Why You Must Wear Safety Glasses (Even for “Quick” Jobs)
Flying concrete dust causes 12,000 eye injuries annually. Ryobi’s hammer drill ejects particles at 200+ mph—safety glasses are non-negotiable. But standard glasses aren’t enough:
– Use ANSI Z87.1-rated goggles with side shields
– Never use sunglasses—they shatter on impact
– Replace scratched lenses immediately (reduces visibility)
Real Consequence: A single concrete chip in the eye requires $15,000+ in surgery and causes permanent vision loss in 30% of cases.
Securing Workpieces to Prevent Catastrophic Kicks
Loose materials cause violent drill kickbacks that fracture wrists. Never hold workpieces with your free hand—use bar clamps anchored to a workbench. For wall drilling:
– Place a 2×4 behind drywall and clamp to floor
– Drill through both layers simultaneously
– For ceiling work, use a toggle clamp system
If the drill suddenly jerks, release the trigger immediately—do not fight the torque.
Maintenance Secrets to Double Your Drill’s Lifespan
Cleaning Dust From Hammer Mechanisms
Masonry dust destroys internal bearings within weeks. After every concrete job:
1. Remove battery and bit
2. Hold drill chuck-down over trash can
3. Spray compressed air into chuck and vents for 15 seconds
4. Wipe chuck threads with dry microfiber cloth
Never use oil on chuck threads—this attracts more dust.
Battery Storage That Prevents Permanent Damage
Storing Ryobi batteries fully charged or empty kills cells. Follow this protocol:
– After use, discharge to 40-60% (3-4 indicator lights)
– Store in cool, dry place (not garage or shed)
– Recharge to 50% every 3 months if unused
A battery stored at 100% charge loses 20% capacity in 1 year—proper storage retains 95% capacity after 3 years.
Final Note: Mastering your Ryobi hammer drill hinges on three non-negotiables: always match bits to modes, secure workpieces religiously, and clear dust during masonry drilling. Implement the peck-drilling technique for concrete and the sacrificial board method for wood, and you’ll avoid 95% of common failures. For deeper projects, explore Ryobi’s specialized hammer drill bits with SDS-Quick compatibility—they reduce vibration by 30% for extended comfort. Remember: when hammer mode engages, you’re not just drilling—you’re pulverizing material at microscopic levels. Respect that power, and your Ryobi will deliver professional results for years.


