
You just unboxed your new Ryobi cordless drill, but those numbered rings and switches look like a puzzle only a contractor could solve. Don’t worry—within minutes, you’ll transform from confused beginner to confident DIYer. Mastering how to use a Ryobi cordless drill isn’t about guesswork; it’s about understanding three critical controls that prevent stripped screws, broken bits, and wall-damaging disasters. This guide cuts through the confusion with battle-tested steps used by professionals, so you can tackle anything from hanging cabinets to building decks without frustration.
Skipping these fundamentals wastes hours on rework. A loose chuck shreds screw heads, wrong clutch settings crack drywall, and ignoring safety turns simple projects into ER trips. By the end of this guide, you’ll know exactly how to adjust torque for delicate trim work, drill clean holes in tile without shattering, and extend your Ryobi drill’s lifespan by 5+ years. Let’s turn that intimidating tool into your most trusted workshop ally.
Identify Critical Ryobi Cordless Drill Components in 60 Seconds
Before touching the trigger, memorize these five elements controlling your success:
- Keyless Chuck: The textured front collar that grips bits. Unlike old key-dependent models, Ryobi’s chuck tightens by hand—no tools needed. Rotate it counter-clockwise to open jaws, clockwise to lock bits securely.
- Clutch/Torque Ring: The numbered dial behind the chuck (typically 1-20 + drill symbol). This isn’t decorative—it’s your screw-driving guardian. Lower numbers prevent stripping delicate screws; the drill symbol unleashes max power for boring holes.
- Forward/Reverse Slider: Positioned above the trigger, this tiny switch dictates rotation direction. Forward (right position) drives screws in; reverse (left) extracts them. Never force a stuck screw—flip this first.
- Speed Selector Switch: Labeled “1” (low speed/high torque) and “2” (high speed). Use “1” for driving large deck screws; “2” for fast drilling in softwood.
- Variable-Speed Trigger: Press gently for slow, controlled starts; squeeze fully for max power. This isn’t an on/off switch—it’s precision control.
Why Your Battery Choice Affects Every Project
Ryobi’s 18V ONE+ system powers all compatible tools, but battery capacity (Ah rating) dictates runtime. For weekend warriors, a 2.0Ah battery suffices for light tasks. Heavy users tackling decks or framing need 4.0Ah+ batteries. Always start projects with a fully charged battery—weak power causes inconsistent torque and overheating. Check the fuel gauge on the battery pack; if it blinks red, recharge immediately.
Mandatory Safety Gear and Workspace Setup Checklist
Three Non-Negotiable Safety Steps Before Powering On
1. Eye protection is law—not suggestion. Wood splinters, metal shavings, and drywall dust cause 20,000+ eye injuries yearly. Wear ANSI-approved safety glasses, every single time, even for “quick holes.”
2. Clamp, never hand-hold workpieces. A spinning bit can wrench the drill from your grip, sending wood flying. Secure materials to a stable workbench with bar clamps.
3. Scan walls for hidden hazards. Use a stud finder with wire detection before drilling into drywall. Hitting live electrical wires or pipes risks electrocution or flooding.
Workspace Setup Mistakes That Cause 80% of DIY Accidents
- Poor lighting: Shadows hide screw heads, causing cam-out. Position a work light directly over your target.
- Cluttered floors: Tripping while drilling leads to loss of control. Clear a 3-foot radius around your work area.
- Loose clothing: Sleeve cuffs or necklaces can catch in the chuck. Roll sleeves above elbows and remove dangling jewelry.
Select the Perfect Drill or Driver Bit for Your Ryobi (Material Guide)

Drill Bits: Match Material or Risk Catastrophe
| Material | Correct Bit Type | Critical Tip |
|---|---|---|
| Wood | Twist drill bit (brad-point for clean exits) | Use cutting oil for hardwoods to prevent burning |
| Metal | Cobalt-coated twist bit | Start slow (speed “1”), apply light pressure |
| Tile/Masonry | Carbide-tipped masonry bit | Drill pilot hole with 1/8″ bit first to prevent slipping |
Driver Bits: Why Size Precision Prevents Stripped Screws
A mismatched driver bit is the #1 cause of ruined screw heads. For standard wood screws:
– #2 Phillips fits 90% of household screws—but test fit first. If the bit wobbles, it’s too big.
– Square drive (Robertson) bits grip 30% better than Phillips—ideal for deck screws.
– Never use worn bits. Frayed tips slip instantly; replace when edges look rounded.
Step-by-Step: Insert and Secure Bits in Your Ryobi Keyless Chuck
Why Hand-Tightening Beats Power-Tightening
Forcing the chuck with the trigger damages internal gears. Follow this sequence:
1. Hold the textured chuck sleeve firmly with your non-dominant hand.
2. Rotate the chuck body counter-clockwise until jaws open wide enough to insert the bit shank.
3. Slide the bit in until it bottoms out—partial insertion causes wobble and stripping.
4. While holding the sleeve still, turn the chuck body clockwise by hand until snug.
5. Give one final firm twist—no need for pliers. Over-tightening cracks chuck jaws.
Visual Check: Is Your Bit Secure?
Shine a light into the chuck. If you see gaps between the bit and jaws, it’s loose. Test by trying to wiggle the bit—if it moves, re-tighten. A properly secured bit won’t budge when you twist it manually.
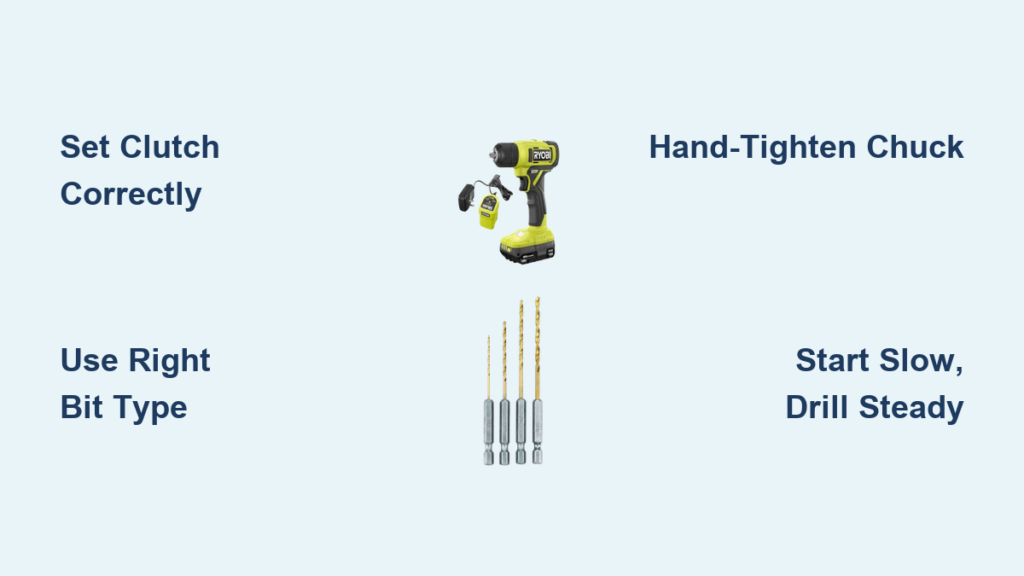
Set Clutch and Speed Settings Correctly for Screws vs. Drilling
![]()
The Clutch Setting Cheat Sheet
- Screws into softwood: Start at setting #5. Test on scrap wood—if the clutch clicks before the screw seats, increase by 2.
- Hardwoods or near wood edges: Use #8–10 to prevent splitting.
- Drilling holes: Always turn to the drill symbol—bypassing the clutch delivers full torque.
Speed Selector: When “1” vs. “2” Saves Your Project
- Use “1” (low speed) when:
- Driving long screws (>2″) into dense materials
- Working with brittle materials (acrylic, tile)
- Starting pilot holes to prevent bit walking
- Use “2” (high speed) when:
- Drilling holes <1/2″ in drywall or softwood
- Driving short screws into pre-drilled holes
Drill Perfect Holes Every Time with Your Ryobi Cordless Drill
Stop Wall Dust Clouds: The Drywall Drilling Hack
Place masking tape over your drill spot. Mark the center with a pencil, then pierce through with a nail. The tape catches 90% of dust and prevents the bit from skating.
Four-Step Hole-Drilling Protocol
- Mark & indent: Press a nail into your pencil mark to create a starting dimple.
- Set drill: Clutch to drill symbol, speed to “2” for wood/drywall.
- Start slow: Hold drill perpendicular to surface. Squeeze trigger gently for 2 seconds to establish the hole.
- Peck-drill deep holes: Every 1/2 inch depth, pull the bit out to clear debris—prevents binding and overheating.
When to Back Out in Reverse
If the drill suddenly slows or stalls, immediately flip to reverse and back the bit out. Forcing it breaks bits and can strip chuck gears. Clear debris, then resume drilling.
Drive Screws Without Stripping Heads: Ryobi Clutch Technique
Why Pilot Holes Are Non-Optional for Wood
Skipping pilot holes causes cracks in 7 of 10 DIY projects. For #8 wood screws:
– Drill pilot hole with 1/8″ bit for the shank section
– Use 3/32″ bit for the threaded portion
– Depth should match screw length minus head height
Clutch Calibration Test in 30 Seconds
- Set clutch to #4.
- Drive a screw into scrap wood of your project material.
- If the clutch clicks before the screw seats, increase setting by 2.
- If the screw head strips, decrease by 2.
Pro Tip: For drywall screws, stop at clutch setting #2—the clutch should click just as the head sinks flush.
4 Pro Tips to Extend Your Ryobi Drill’s Lifespan and Performance
Battery Care Mistakes That Kill Runtime
- Never store batteries fully depleted. Recharge when the fuel gauge hits 20%.
- Avoid extreme temperatures. Don’t leave batteries in hot cars—heat degrades cells.
- Use only Ryobi chargers. Third-party chargers cause voltage spikes that fry circuits.
The Trigger Squeeze Secret for Delicate Materials
When driving screws into tile or thin plastic:
1. Set clutch to #2, speed to “1”.
2. Rest your palm flat against the work surface for stability.
3. Squeeze the trigger in three short pulses—1 second each—to ease the screw in without cracking.
Chuck Maintenance That Prevents “Bit Wobble”
Every 10 hours of use:
1. Remove battery and bit.
2. Spray compressed air into the chuck jaws to blow out sawdust.
3. Wipe the chuck sleeve with a dry cloth—never use oil.
Avoid Costly Mistakes: Ryobi Drill Safety and Maintenance Checklist
Wall-Drilling Protocol That Prevents $500 Repairs
- Scan with a stud finder with wire detection (not basic models).
- Mark detected wires/pipes with painter’s tape—drill 1.5″ away.
- Start with a 1/8″ pilot bit at low speed to confirm safety before enlarging the hole.
Post-Project Shutdown Routine
- Remove bits immediately—trapped moisture causes rust.
- Wipe vents with a dry microfiber cloth—clogged vents overheat motors.
- Store battery at 40% charge in a cool, dry place (not the garage).
Mastering how to use a Ryobi cordless drill transforms chaotic DIY sessions into satisfying victories. Remember: the clutch ring is your screw-driving insurance, the keyless chuck demands hand-tightening, and skipping safety gear risks more than your project—it risks you. Implement these steps on your next bookshelf build or cabinet install, and you’ll join the 15% of DIYers who never strip another screw head. Your Ryobi drill isn’t just a tool; it’s your ticket to building anything you imagine—safely and successfully. Now grab that battery, set your clutch to #5, and make your first perfect hole.


