
That gritty cloud of concrete dust isn’t just messy—it’s a silent health hazard containing crystalline silica. And when your standard drill stalls against concrete, leaving a useless divot, you know you need the right technique. How to use a hammer drill in concrete separates DIYers who get clean, anchor-ready holes from those battling broken bits and failed projects. Forget guesswork. This guide delivers the precise steps, tool choices, and safety protocols used by professionals for flawless concrete drilling—whether you’re mounting a shelf or installing conduit. You’ll learn to avoid dangerous dust exposure, prevent rebar disasters, and drill faster with half the effort.
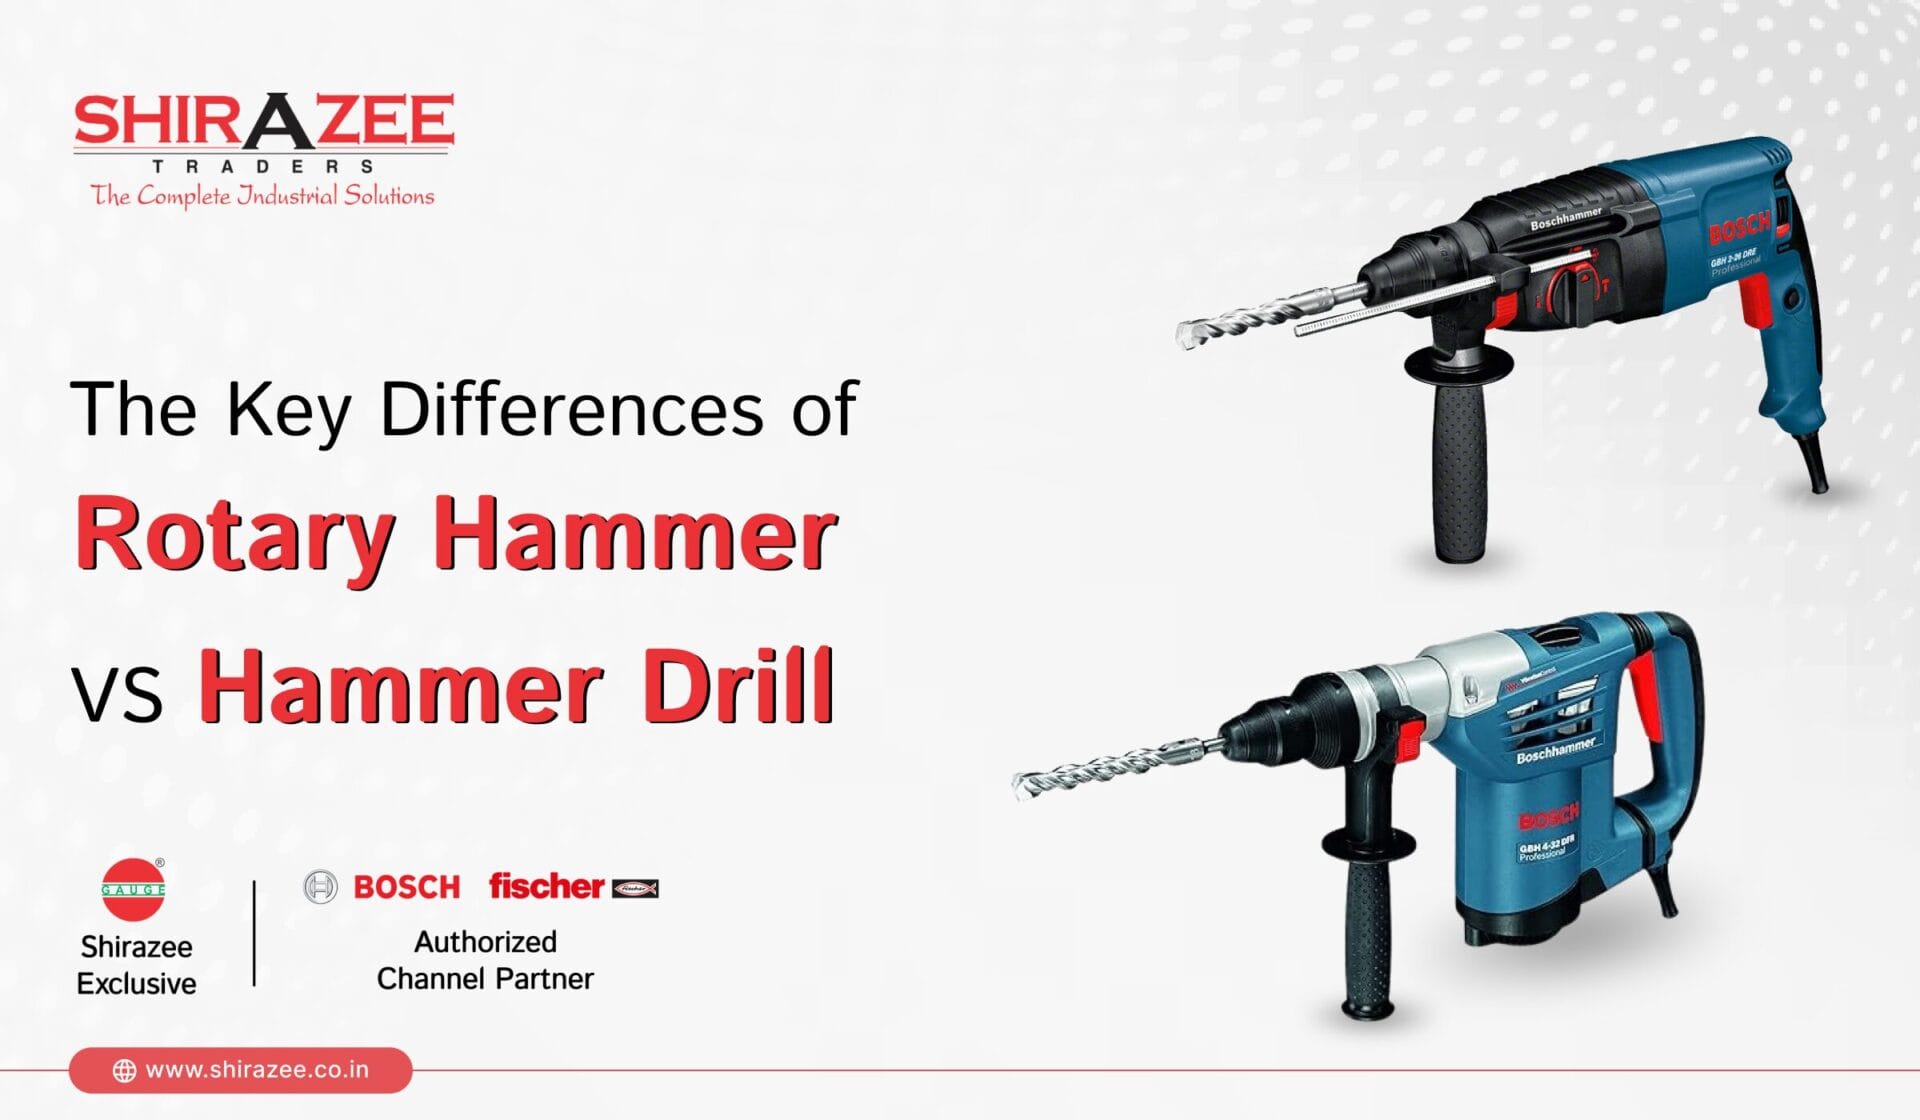
Hammer Drill vs. Rotary Hammer: Pick the Right Tool for Your Concrete Job
Your project’s success starts here. Choosing the wrong tool risks ruined bits, stalled motors, and shattered concrete edges.
Standard Hammer Drill: When It’s Your Best (and Only) Option
Use a standard hammer drill for light-duty tasks: drilling holes up to 1/2 inch in diameter for Tapcon screws, plastic anchors, or electrical boxes in walls or floors. These drills deliver 10,000-30,000 BPM (Blows Per Minute) through a clutch mechanism that hammers while rotating. Critical detail: Only use 3-flute carbide-tipped masonry bits with straight shanks. Never force it—excessive pressure overheats the motor. If you’re drilling more than 10 holes or hitting rebar, stop. A standard hammer drill will burn out.
Rotary Hammer (SDS): The Heavy-Duty Concrete Solution
For holes larger than 1/2 inch, reinforced concrete, or professional jobs, rotary hammer drills (SDS-plus/SDS-max) are non-negotiable. Their piston-driven hammering delivers 2-3x more impact energy than standard hammer drills. Why this matters: SDS bits slide in the chuck during hammering, transferring full force directly to the bit tip. You’ll drill a 3/4-inch hole in concrete 60% faster with an SDS rotary hammer than a standard hammer drill. If your project involves structural walls, foundations, or multiple deep holes, skip the standard hammer drill entirely.
Concrete Drilling Safety: Non-Negotiable Gear to Protect Your Lungs and Eyes

Skipping PPE here isn’t lazy—it’s dangerous. Concrete dust contains crystalline silica, a carcinogen causing silicosis (irreversible lung scarring). One hour of drilling without protection can exceed OSHA’s safe exposure limit.
Essential Safety Checklist Before Powering On
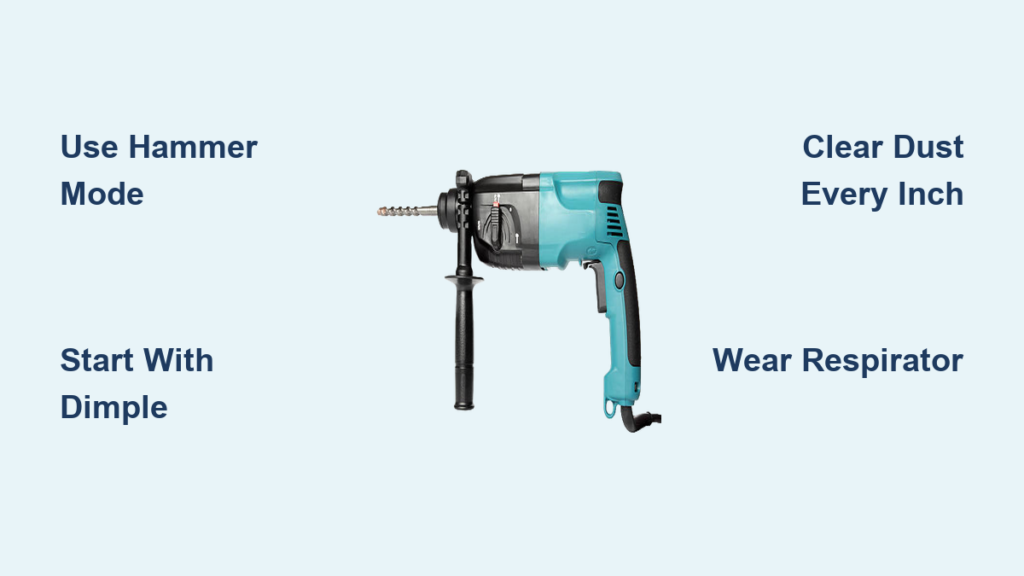
- Respirator: An N95 mask only works for short tasks (<15 minutes). For any sustained drilling, wear a half-face respirator with P100 filters. Fit-testing is mandatory for true protection.
- Eye Protection: Safety glasses aren’t enough. Concrete chips ricochet at high speed—use sealed safety goggles or a full face shield.
- Hearing Protection: Hammer drills hit 90+ dBA. Double up with earplugs under earmuffs for critical jobs.
- Gloves & Clothing: Heavy-duty nitrile gloves prevent blisters from vibration and protect against hot bits. Wear long sleeves and pants—concrete dust causes skin irritation.
Pro Tip: Attach a HEPA-filtered shop vacuum to a dust shroud before starting. This captures 95% of silica dust at the source—critical for indoor jobs.
Step-by-Step Concrete Drilling Technique That Prevents Bit Breakage
This method works for both standard hammer drills and rotary hammers. Deviate, and you’ll face overheating, wandering bits, or dangerous kickback.
Locate Hidden Hazards: Avoid Electrocution and Rebar
Never skip this step. Use a stud finder with AC wire detection to scan 2 inches around your mark. For structural concrete, add a rebar detector—hitting rebar stalls drills and shatters bits. If wires or rebar are present, move your hole at least 1.5 inches away. Mark the new spot clearly.
Start the Hole Perfectly: Stop Bit “Walking” in 10 Seconds
Concrete’s smooth surface makes bits skid. Fix this: Place a center punch on your mark and tap once with a hammer to create a 1/16-inch dimple. No center punch? Hold the drill at a 45-degree angle, start at low speed, and rotate to 90 degrees as the bit bites. Warning: Forcing a straight start guarantees a crooked hole.
Execute the Drill: Pressure, Speed, and Debris Control Secrets
Hold the drill firmly with both hands, using the side handle for stability. Start at low speed (400-600 RPM) in hammer + drill mode (never “drill only” mode). Apply steady, moderate pressure—just enough to keep the bit engaged. Key indicators:
– ✅ Correct pressure: Dust flows freely from flutes; drill hums steadily.
– ❌ Too much pressure: Motor whines; dust stops flowing; bit overheats (smells burnt).
Every inch drilled, pull the bit out completely to clear dust. For holes deeper than 2 inches, pause every 30 seconds to let the bit cool. Never spray water on standard hammer drills—it damages internal mechanisms (rotary hammers often allow it; check your manual).
Finish Strong: Why 90% of Failed Anchors Come From Dirty Holes
Blowing dust out with your breath is useless—and dangerous. Proper hole cleaning:
1. Insert a shop vacuum nozzle deep into the hole for 10 seconds.
2. Blast with compressed air (hold the can upright to avoid propellant residue).
3. Repeat vacuuming.
Test: Shine a flashlight into the hole. If you see dust, repeat. Anchor failure almost always traces back to inadequate cleaning.
Troubleshooting Concrete Drilling Nightmares (and How to Fix Them)

“My Bit Won’t Bite—It Just Skids Across the Surface!”
Cause: No starter dimple, or dull carbide tip.
Fix: Stop immediately. Create a dimple with a center punch. Replace the bit if the carbide tip shows white metal (exposed steel). Never use a masonry bit that’s lost its carbide coating—it will shatter.
“The Drill Suddenly Stopped—Did I Hit Rebar?”
Diagnosis: If the bit grinds to a halt with a metallic “clunk,” you hit rebar. SDS rotary hammers can sometimes cut thin rebar, but standard hammer drills cannot.
Action: Withdraw the bit. Use a metal detector to confirm rebar location. Move your hole at least 2 inches away—rebar grids are typically spaced 12-18 inches apart.
“The Hole Is Crumbling at the Edges!”
Cause: Excessive speed (>800 RPM) or a worn bit.
Solution: Reduce RPM. Use a sharp bit with a 3-flute design (better dust removal). For brittle concrete, start with a 1/8-inch pilot hole before drilling the final size.
Critical Mistakes That Destroy Tools and Waste Hours
Using “Drill Mode” on Concrete: The #1 Bit Killer
Hammer drills have three settings: drill only, hammer only, and hammer + drill. Using “drill only” mode on concrete melts carbide tips in seconds. Always verify the hammer icon is engaged—most drills have a physical mode switch near the chuck.
Skipping Debris Clearance: The Silent Overheater
Dust clogs flutes, causing the bit to overheat and lose temper. Every 1 inch drilled, withdraw the bit fully. For deep holes (over 4 inches), drill in 1-inch increments, clearing after each.
Forcing the Drill: Why Leaning In Slows You Down
Physics fact: Concrete drilling relies on impact energy, not downward force. Pushing harder stalls the hammer mechanism. Let the drill’s weight do the work. If progress stops, withdraw and clear dust—don’t lean in.
Pro Maintenance: Extend Bit Life and Prevent Costly Failures
Sharpen masonry bits? Never. Carbide tips require industrial grinding. Instead:
– Store bits in a dedicated case—chuck impacts chip carbide.
– Replace bits at the first sign of wear: White metal showing, reduced cutting speed, or excessive vibration.
– Clean shanks weekly with a wire brush—dust buildup causes slippage in SDS chucks.
For rotary hammers: Lubricate the chuck with SDS-specific grease every 20 hours of use. Dry chucks cause bit wobble and inaccurate holes.
Final Note: Drilling concrete safely and effectively demands respect for the material and the tool. By selecting the right hammer drill or rotary hammer, wearing full PPE (especially a respirator), and mastering the pressure-and-pause technique, you’ll create anchor-ready holes in minutes—not hours. Never skip hole cleaning; it’s the difference between a secure mount and a catastrophic failure. For projects involving structural concrete or post-tensioned slabs, consult a professional—your safety isn’t worth the risk. Now grab your SDS rotary hammer, fit that respirator, and drill with confidence.


