
That frustrating moment when your drill bit skates across wood, shatters tile, or gets stuck mid-hole? It’s almost always a drill bit technique issue—not your tool’s fault. How to use a drill bit properly separates DIY novices from confident makers. A drill bit is the removable cutting component that actually creates holes, and selecting the right one while applying correct pressure transforms frustrating projects into clean, professional results. Whether you’re mounting shelves, assembling furniture, or tackling home repairs, this guide reveals the exact techniques professionals use to drill perfect holes every time—avoiding stripped bits, material damage, and safety hazards.
How to Install a Drill Bit in a Keyless Chuck
Modern cordless drills use keyless chucks that tighten securely without tools. Start by setting your drill to low speed and reverse rotation (counter-clockwise). Grip the chuck’s knurled collar firmly with your nondominant hand while squeezing the trigger for 1-2 seconds. You’ll feel the jaws release with a distinct click. Insert your new bit’s smooth shank until only ¼ to ½ inch remains visible—this ensures maximum grip without risking bit slippage. Now switch to forward rotation, hold the chuck steady, and trigger the drill briefly to self-tighten. Give the bit a firm hand-twist to confirm security. Never operate a drill with a loose bit; the spinning force will eject it violently.
Why Shallow Bit Insertion Prevents Catastrophic Failures
Inserting too much of the bit’s shank into the chuck seems logical for stability, but it’s dangerously counterproductive. When over-inserted, the chuck jaws can’t compress fully around the shank, causing the bit to wobble or eject during drilling. This wobble creates oval-shaped holes in wood and shatters brittle materials like tile. For metal drilling, an insecure bit generates heat that anneals (softens) the cutting edges, ruining the bit permanently. Always leave that critical ¼-inch shank exposed—it’s the sweet spot for jaw compression.
How to Install a Drill Bit in a Keyed Chuck
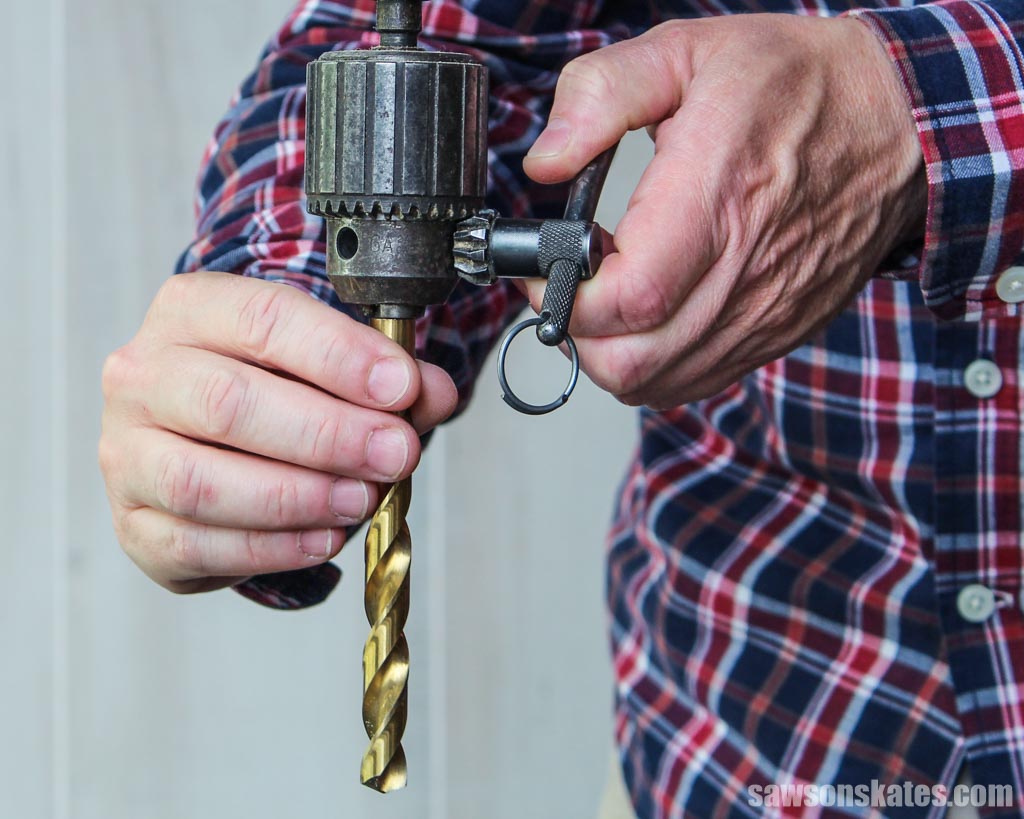
Heavy-duty drills and drill presses use three-jaw chucks requiring a hex key. Insert the key into any of the three evenly spaced holes on the chuck collar. Rotate the key counter-clockwise while applying light inward pressure until the jaws open wide enough to accept your bit. Position the bit’s shank dead-center in the chuck, then rotate the key clockwise to close the jaws. Tighten each hole sequentially in a star pattern—don’t just crank one hole—until all jaws grip evenly. Give the bit a sharp tug; zero movement means it’s secure. Skip this star-pattern tightening, and uneven jaw pressure will cause bit wobble that ruins hole accuracy.
How to Choose the Right Drill Bit for Wood, Metal, and Masonry
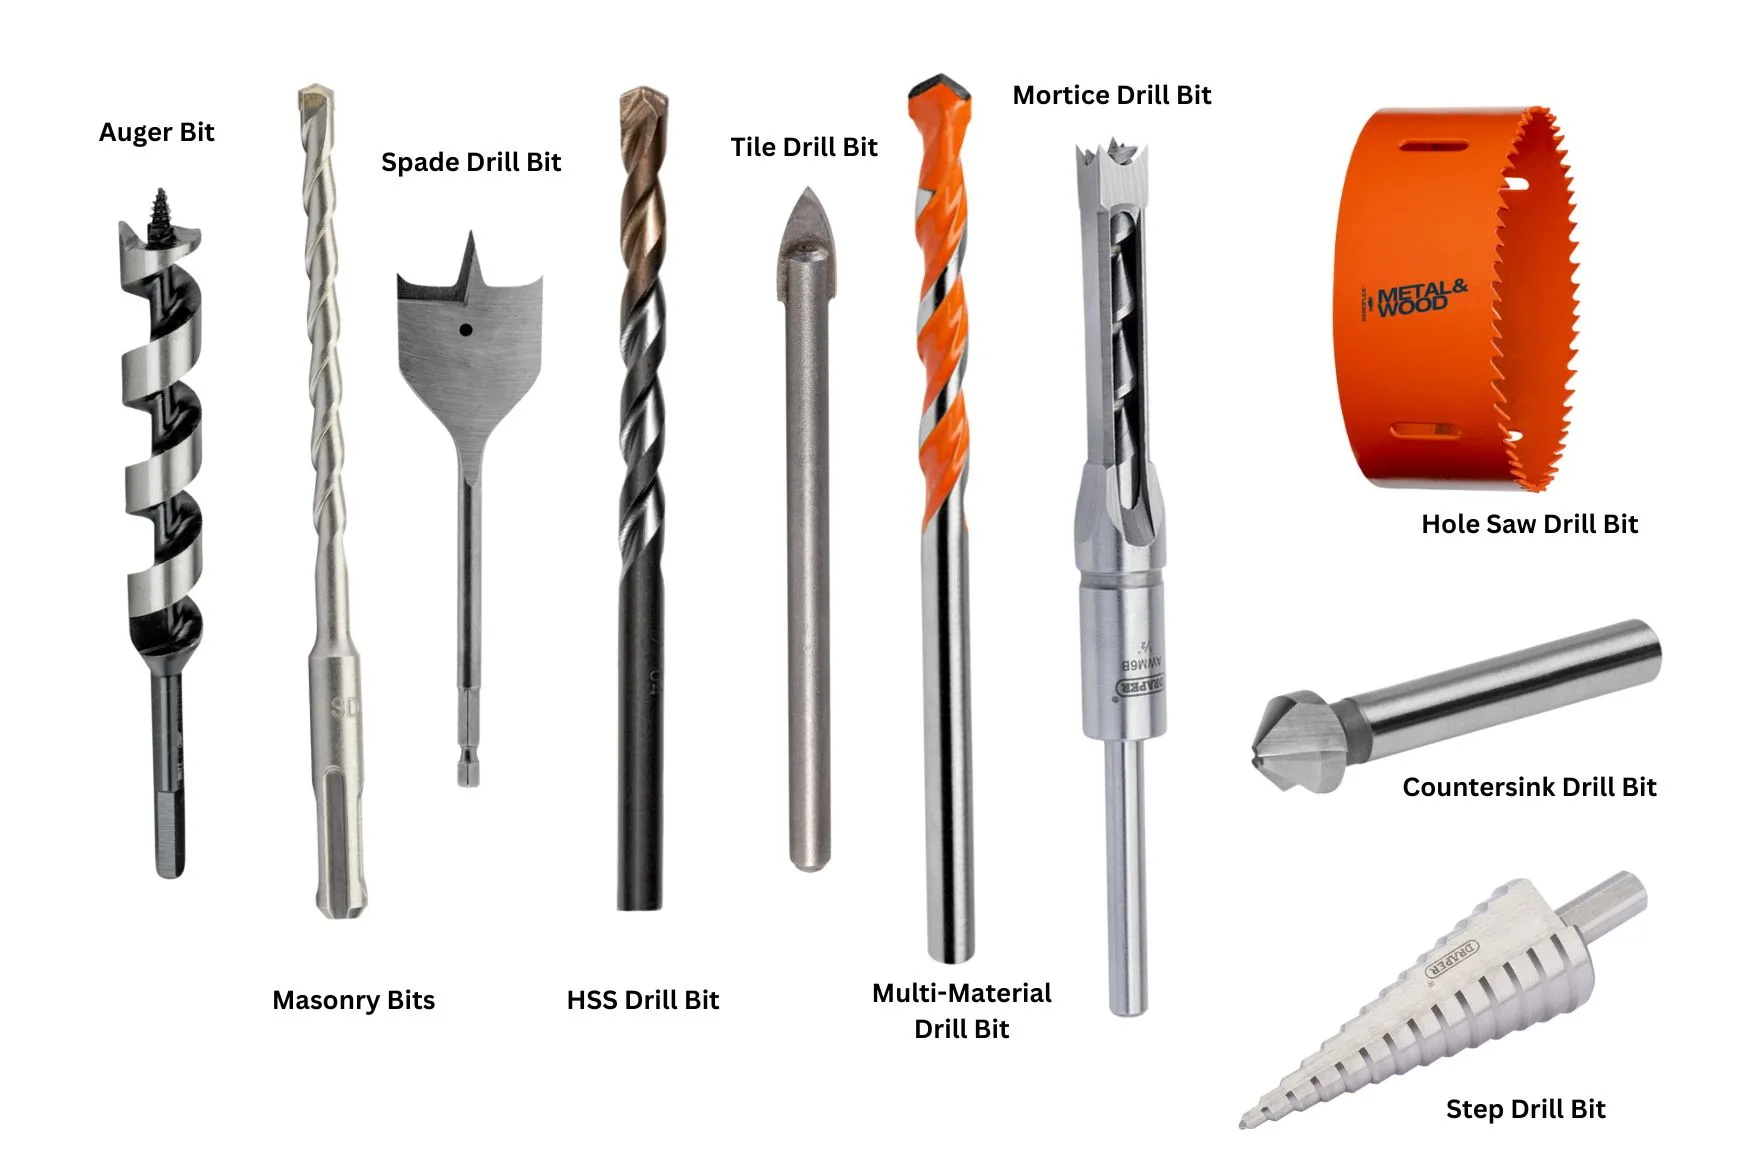
Using a masonry bit on metal or a wood bit on tile guarantees disaster. Twist bits (with spiral flutes) work for wood, plastic, and soft metals like aluminum but shatter on steel. For hardwoods or thick lumber, switch to spade bits—their flat paddle shape clears chips faster, preventing burn marks. Drilling into metal? Cobalt HSS bits resist heat buildup on steel while brad-point bits prevent walking on polished surfaces. Concrete or brick demands carbide-tipped masonry bits used exclusively with a hammer drill’s percussive action. Drywall anchors need sharp-tipped twist bits sized precisely to the anchor—oversized holes cause mounts to pull out.
Critical Mistake: Ignoring Bit Sharpness
A dull drill bit requires excessive pressure, causing tear-out in wood and work-hardening in metals. Test sharpness by gently dragging the tip across scrap wood—if it doesn’t bite cleanly, sharpen it. Never force a dull bit; the heat generated can melt plastic or warp thin metal sheets. Keep a diamond file handy to refresh cutting edges during long projects.
How to Drill a Hole: Step-by-Step Without Blowout
Start by marking your hole location with an X, not a single dot—this gives visual alignment guides. For wood or metal, create a starter dimple using a center punch angled at 45 degrees, then straighten for the final tap. Without this, bits skate dangerously across smooth surfaces. Clamp your workpiece to a sacrificial backer board; this prevents blowout when the bit exits. Position the drill perpendicular to the surface, resting your palm against the workpiece for stability. Begin drilling at low speed with minimal pressure—let the bit’s rotation do the work. As the hole deepens, gradually increase pressure until the bit’s flutes engage the material fully. When nearing breakthrough (you’ll hear a pitch change), reduce pressure by 70% and back out frequently to clear chips.
How to Prevent Tear-Out in Plywood and Tile
Tear-out—splintered edges where the bit exits—is the #1 frustration in woodworking. Solve it by taping both sides of the material with painter’s tape over your mark. For tile, place masking tape in an X pattern across the drilling spot. The tape fibers bind the surface material, preventing chips. Drill the initial 1/8-inch at ultra-low speed before resuming normal pressure.
How to Drill Perfectly Straight Holes Without a Drill Press
Even slight angle errors compound with depth, making shelf brackets wobble or hinges misalign. Create instant alignment using a speed square: press its shoulder flush against your workpiece and rest the drill’s base plate against the square’s blade. For overhead drilling, clamp a scrap 2×4 to your work surface as a perpendicular guide rail—slide the drill base along it. No tools handy? Sight your alignment from two perpendicular angles: first look directly down the drill barrel, then move 90 degrees to check side-to-side straightness. A single misalignment check guarantees angled holes.
How to Drill Into Walls Without Hitting Wires or Pipes
This is non-negotiable: always scan with a stud finder that detects live wires before drilling. Standard stud finders miss electrical hazards—use one with AC detection like the Franklin Sensors ProSensor. For drywall, drill pilot holes at 15-degree angles above and below your target height; wires run vertically near outlets but horizontally between studs. When drilling into studs, stay within 1.25 inches of the wall surface—this is the plumbing and electrical “no-drill zone” per building codes. For masonry walls, use a masonry bit 1/16-inch smaller than your anchor to ensure snug fit. Drill in 1-inch increments, blowing out dust with compressed air to prevent bit binding.
Why Drywall Anchors Fail (and How to Fix It)
Anchors pull out when holes are oversized or drilled too close to edges. Measure anchor diameter—then select a bit 1/32-inch smaller. Drill straight in (not angled) to full anchor depth. For heavy objects like TVs, skip anchors entirely and drill directly into a stud using a 3-inch #10 screw.
How to Drill Into Concrete Without Destroying Your Bit
Standard drills lack the percussive action needed for masonry. You must use a hammer drill mode—look for the hammer icon on the selector ring. Carbide-tipped bits are non-negotiable; standard HSS bits will snap on first impact. Mark your spot with a permanent marker, then place the bit tip precisely on the mark. Hold the drill at firm, consistent pressure (no jerking) and start at low speed. Listen for the rapid “tack-tack-tack” of the hammer mechanism—this pulverizes concrete rather than grinding it. Every 1/2 inch, pull the bit out completely to clear dust; trapped debris overheats bits. For deep holes, spray water sparingly into the hole to suppress silica dust (wear an N95 mask regardless).
The 30-Second Concrete Drill Test
If your bit isn’t advancing after 30 seconds of steady hammer-drilling, stop immediately. Continuing risks bit shattering from heat buildup. Possible causes: incorrect hammer mode, dull bit, or rebar obstruction. Switch to a rotary hammer for rebar encounters.
Mastering how to use a drill bit transforms your DIY success rate overnight. Remember: secure the workpiece, match the bit to the material, create a starter dimple, and let the tool do the work. For wall projects, scanning for hazards isn’t optional—it’s what separates safe installations from catastrophic mistakes. Maintain sharp bits, respect material limitations, and always prioritize alignment over speed. These techniques work whether you’re hanging a picture frame or installing cabinetry. Now grab your drill, apply these steps, and drill with the confidence of a seasoned pro.


