
Your new DeWalt drill-driver sits unused in the toolbox while you wrestle with stripped screws and crooked holes. You’re not alone—most beginners misapply torque settings or choose wrong bits, ruining projects before they begin. But within 10 minutes, you’ll transform from hesitant novice to confident user who drills straight holes and drives perfect screws every time. This guide cuts through confusing manuals to deliver exactly how to use a DeWalt drill driver for wood, metal, and concrete projects. You’ll learn clutch adjustments that prevent stripped screw heads, speed settings that avoid bit breakage, and safety steps pros never skip.
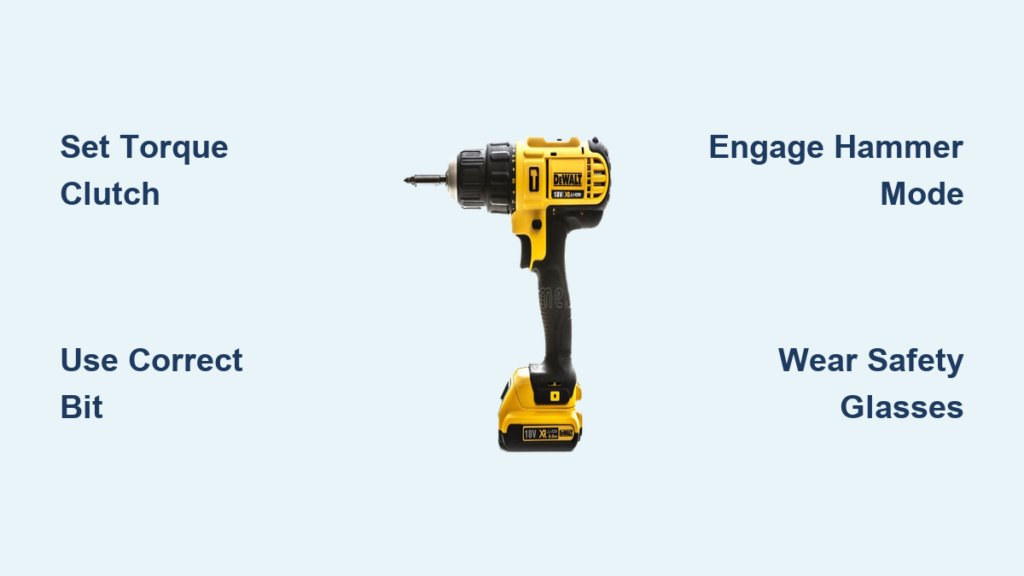
Stop guessing which dial controls what. Your DeWalt drill-driver’s power lies in five critical components working together: the variable-speed trigger (press harder for faster rotation), forward/reverse switch (clockwise for driving, counterclockwise for removal), torque clutch ring (that numbered dial preventing over-tightening), two-speed transmission (low for torque-heavy tasks), and keyless chuck (twist to open/close). Most beginners ignore the torque clutch until they snap a screw head—don’t be that person. Recognize these controls now to avoid project-killing mistakes from day one.
Identify Your DeWalt Drill-Driver’s Critical Controls in 60 Seconds
Why the Torque Clutch Saves Wood from Splitting
That numbered ring near the chuck isn’t decorative—it’s your secret weapon against stripped screws and splintered wood. Each number (typically 1-20) represents incremental torque levels. Set it too high when installing cabinet hinges, and you’ll tear through the wood fibers. Too low, and the clutch disengages before the screw seats. For standard #8 wood screws, start at setting 8. Test on scrap wood: if the drill clicks before the screw is flush, increase by 2 increments. If the screw head strips, drop back to lower settings. Never drill holes in this mode—switch to the drill icon setting first.
How to Switch Between Drilling and Driving Modes
Your DeWalt’s mode selector (usually a collar behind the chuck) has two positions: a drill bit symbol for drilling holes, and a clutch icon for driving screws. This is where 90% of beginners fail. Drilling with the clutch engaged causes dangerous bit wobble—always use the drill symbol setting. Conversely, driving screws in drill mode strips every fastener because there’s no torque cutoff. Twist the collar until you hear a distinct click into position. Verify by checking the indicator window: arrow should align with the correct symbol before powering on.
Choose the Right Drill Bit for Wood, Metal, and Concrete Projects

When to Use Brad Point vs. Twist Bits in Wood
Brad point bits (with sharp center spurs) prevent wandering on smooth wood surfaces—essential for cabinet installations where precision matters. Twist bits (standard spiral design) work for rough framing but tear out grain on finished surfaces. For plywood or MDF, start with a 1/16″ pilot hole using a brad point bit, then switch to your final size. Critical tip: Match bit diameter to screw shank size, not the threads. A #8 screw needs a 3/32″ pilot hole—not the larger thread diameter—to prevent splitting.
Why Masonry Bits Demand Hammer Mode for Concrete
Standard twist bits shatter in concrete. You need tungsten-carbide-tipped masonry bits with an arrow-shaped tip. But even with the right bit, you’ll burn it out without hammer mode. Locate the hammer icon setting on your DeWalt’s transmission switch (distinct from drill/driver modes). Engage hammer mode—it delivers rapid forward impacts while rotating. Start at 300 RPM with light pressure. If the bit smokes, you’re pressing too hard; let the hammer action do the work. Stop every 10 seconds to clear dust from the hole—overheating ruins bits fast.
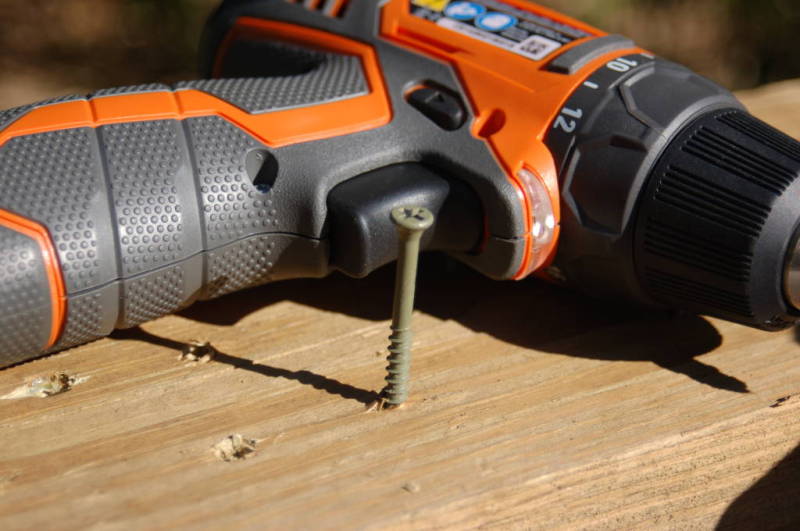
Drive Your First Screw Without Stripping: Step-by-Step Guide
How to Position Your Drill for Maximum Control
Grip the drill handle firmly with your dominant hand, placing your index finger near the trigger for speed control. Rest your non-dominant hand on the chuck housing—not the rotating part—to stabilize against kickback. Tilt the drill 5-10 degrees toward you when driving downward; this counteracts natural wrist drift that causes cam-out. Press straight into the screw head with steady, moderate force—never lean your body weight. If the drill jerks violently, your clutch is set too high or the bit isn’t fully seated.
Why Your Clutch Setting Prevents Stripped Screws
Beginners crank the clutch to max “for power,” guaranteeing stripped heads. For 1-1/4″ drywall screws into studs, set clutch to 12. For delicate trim work, drop to 4. Here’s the fail-safe test: drive a screw until the clutch clicks. If the screw sits 1/8″ proud, increase setting by 2. If the head is buried or stripped, decrease by 3. Always reset the clutch when changing screw sizes—this single step solves 80% of driving failures.
Set Perfect Speed and Torque for Drilling vs. Driving Screws
Low Gear Secrets for Large-Diameter Holes

Drilling 1/2″ holes in wood? Always use low-speed gear (typically setting 1). High speed causes tear-out and burns wood. Engage low gear by twisting the transmission collar to position 1. Start at 400 RPM—visible as the slowest rotation—and apply firm, consistent pressure. If the bit binds, back out slowly while rotating to clear chips. Warning: Forcing a binding bit breaks drill shafts. Stop, reverse to extract, then re-drill at half depth before finishing.
When to Disable the Clutch for Metal Drilling
Driving sheet metal screws? Keep the clutch engaged at setting 6. But drilling holes in metal requires zero torque control—switch to the drill symbol mode. Metal needs slow speeds to prevent heat buildup: 300 RPM for steel, 600 RPM for aluminum. Use cutting fluid on steel to extend bit life. If the drill chatters, your bit isn’t sharp enough—dull bits walk across metal surfaces. Test sharpness by trying to scratch glass; if it slides, replace the bit.
Drill Perfectly Straight Holes in Wood Every Time
How to Prevent Blowout on the Backside
Blowout—the ragged exit hole that ruins cabinet backs—happens when the bit bursts through unsupported wood. Drill 75% of the way from the front, then flip the workpiece. Position a scrap wood block behind the exit point and drill the remaining depth from the back. For through-holes, use a Forstner bit instead of spade bits—they cut cleaner edges. Pro move: Wrap masking tape around the bit at your target depth as a visual stop.
Why Center Punches Beat Pencil Marks for Accuracy
Pencil dots vanish under pressure, causing bits to skate across smooth surfaces. Instead, tap a center punch at your mark with a hammer to create a divot. This guides the bit’s tip during the critical first rotation. For angled holes (like pocket screws), clamp a speed square against your workpiece as a drill guide. Hold the drill flush against the square’s edge—any tilt creates an oval hole that wobbles fasteners.
Avoid Concrete Drilling Disasters: Hammer Mode Settings
How to Clear Dust Without Damaging Your Bit
Concrete drilling generates abrasive dust that overheats bits in seconds. Every 10 seconds of drilling, pull the bit halfway out while still rotating to eject dust. Never stop rotation while the bit is in the hole—this traps dust and increases heat. If using a DeWalt with built-in LED light, angle it to illuminate the hole depth. Stop drilling when you feel resistance decrease—this means you’ve hit the other side of the slab.
Prevent Common Injuries: Essential Safety Steps Before Every Use
Why Loose Clothing Causes Catastrophic Entanglement
That loose hoodie string? It’s a death trap near rotating chucks. Before powering on, secure long hair, remove dangling jewelry, and button shirt cuffs. Always wear ANSI-approved safety glasses—concrete chips can embed in corneas at 100+ mph. Critical check: Verify the battery is fully seated. A loose battery causes intermittent power that makes bits bind violently. Press the battery release button before insertion to ensure deep contact.
Extend Your DeWalt Drill-Driver’s Life: 3 Maintenance Must-Dos
How to Clean the Chuck After Masonry Jobs
Concrete dust grinds down chuck jaws in weeks. After masonry work, remove the battery and spray compressed air into the chuck’s teeth. Wipe with a microfiber cloth dampened with rubbing alcohol—never oil. Test chuck grip by trying to twist the bit with pliers; if it slips, the jaws need replacement. Store bits in a dedicated case with desiccant packs to prevent rust from humid air.
Mastering how to use a DeWalt drill driver starts with clutch discipline and bit selection—not brute force. Remember these three non-negotiables: always match the torque setting to your screw size, engage hammer mode for masonry, and wear eye protection even for “quick” tasks. Practice driving #8 screws into scrap 2x4s until the clutch clicks consistently at flush depth—that muscle memory prevents 90% of beginner errors. Your next project awaits: grab that DeWalt, set the clutch to 10, and drive your first perfect screw in under 60 seconds. For advanced techniques like pocket-hole joinery, check DeWalt’s official accessory guide for compatible driver bits and depth stops.


