
That snapped center drill buried in your aluminum workpiece? It happened because you drilled 0.5mm too deep into the tapered section. Center drills aren’t indestructible—they’re precision tools with a hair-thin pilot section that fails catastrophically when misused. Nearly 70% of center drill breakages occur during spotting operations, not lathe work, because machinists ignore the critical depth limit. This guide reveals exactly how to leverage a center drill’s true purpose—creating perfect 60° lathe centers—while safely adapting it for spotting holes without snapping the fragile web. You’ll learn the exact depth to stop at, why angle mismatches cause drill walking, and the material-specific tricks that prevent $50 tool recovery headaches.
Stop Breaking Center Drills: Spotting Holes Without Snapping the Web
Using a center drill to spot holes is common shop practice, but it’s also the #1 cause of snapped tools. The danger lies in geometry: your center drill’s 60° taper clashes with standard 118° or 135° twist drills. When you drill too deep, the twist drill’s outer cutting edges hit first instead of the center point. This creates chatter, forces the drill off-center, and multiplies stress on the center drill’s microscopic web until it shatters.
Why 60° vs 118° Angles Cause Drill Walking
Visualize a 118° drill tip trying to seat in a 60° dimple—the wide-angle drill straddles the shallow cone like a tripod on a narrow vase. The outer lips engage the workpiece before the center point, generating sideways force that walks the drill. This isn’t theoretical; it’s why your 3/8″ drill veers off-axis when starting holes in cast iron. The solution? Only engage the pilot section’s very tip—never the tapered flutes.
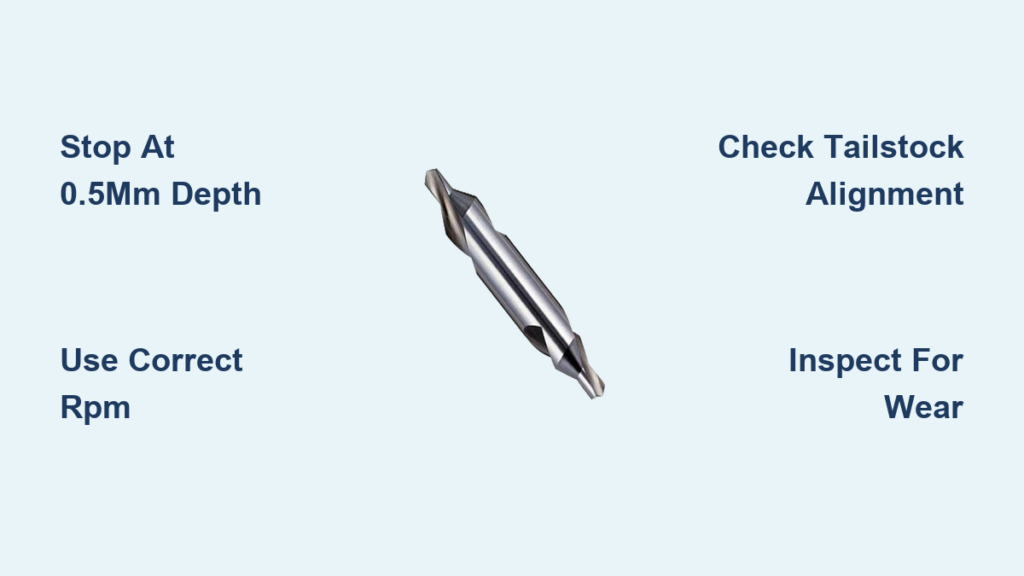
The 0.5mm Depth Rule That Saves Tools
Here’s the exact spotting technique that prevents breakage:
1. Set lathe RPM to 600-800 for steel (1,200 for aluminum)
2. Advance the center drill until the pilot web creates a 0.5mm-deep dimple
3. Stop the moment the tapered section’s flutes touch the workpiece—you’ll see metal shavings turn from continuous ribbons to fine powder
4. Withdraw immediately; any deeper risks web fracture
Pro Tip: For stainless steel, chill the workpiece in a freezer for 15 minutes first. The thermal contraction reduces work hardening that grabs the drill.
Creating Perfect Lathe Centers in 6 Steps
This is where center drills shine—their engineered purpose. Skipping any step guarantees an off-center workpiece that vibrates during turning.
Facing the Workpiece First (Non-Negotiable!)
Never skip this: An uneven surface makes the center drill walk. Face the workpiece end square to within 0.002″ TIR using a carbide insert. Apply light cuts (0.005″ depth) with cutting fluid—aluminum requires kerosene-based lube to prevent galling.
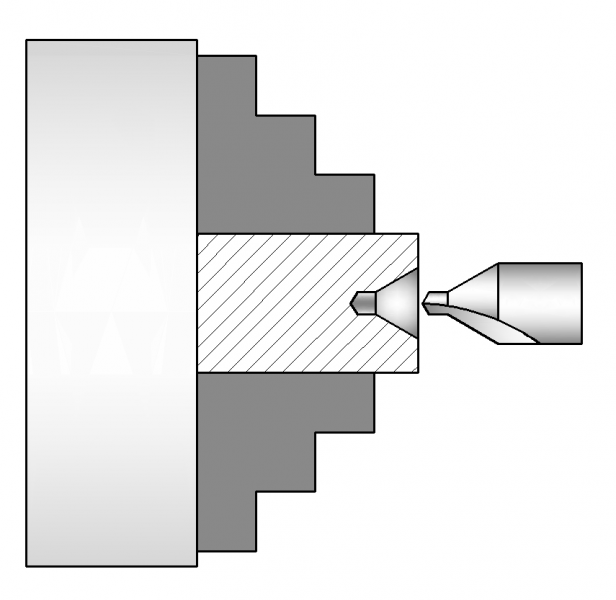
Correct Drilling Depth for True Rotation
- Mount center drill in tailstock collet (not a 3-jaw chuck—runout matters)
- Set RPM: 800 for 3mm drills, 600 for 4mm in steel
- Advance steadily until the 60° taper fully forms a sharp cone—stop when the pilot hole reaches 1.5x the drill diameter
- Critical check: The cone must contact the lathe center along its entire face, not just at the tip or rim
Warning: Drilling deeper than the pilot section causes chatter marks that make workpieces “chatter” during turning. If your finished shaft has spiral grooves, you drilled too deep.
4 Costly Center Drill Mistakes (and How to Avoid Them)

#1: Drilling Too Deep Into the Tapered Section
Why it breaks tools: The pilot web’s cross-section is 70% thinner than the tapered body. Forcing it through the fluted section multiplies torque until it snaps—like bending a paperclip. Fix: Use a depth gauge on the tailstock barrel. Set it to 1.2x the pilot diameter (e.g., 1.2mm for a #3 center drill).
#2: Ignoring Material Hardness Limits
High-speed steel (HSS) center drills shatter instantly on 304 stainless or Inconel. The rule: If your drill dulls in under 3 holes during regular drilling, don’t use an HSS center drill. Solution: For stainless steel:
– Use solid carbide center drills (costs 4x more but lasts 20x longer)
– Reduce RPM by 40% and feed at 0.002″ per revolution
– Flood with sulfurized cutting oil
#3: Misaligned Tailstock Causing Eccentric Centers
An off-center center hole makes workpieces rotate like a wobbly washing machine. Test alignment: Mount a dial indicator on the cross-slide, touch the tailstock center—runout must be <0.001″. Quick fix: Loosen tailstock clamps, tap with a soft mallet while indicator reads, then re-tighten.
#4: Dull Tools Generating Excessive Heat
A nicked cutting edge requires 30% more feed pressure, overheating the drill. Check for dullness: Examine under 10x magnification—the edge should reflect light like a mirror. If it looks fuzzy, it’s dull. Prevention: Clean chips after every use with a nylon brush; never wipe with rags (fibers embed in flutes).
When to Ditch Center Drills for Spotting Drills
For critical holes (bearing seats, hydraulic ports), center drills are the wrong tool. Spotting drills solve the angle mismatch with wider 90°-140° tips that match your twist drill’s geometry.
Carbide Alternatives for Stainless Steel
| Tool Type | Best For | Max RPM (1/4″ drill) | Cost vs Center Drill |
|---|---|---|---|
| HSS Center Drill | Mild steel, brass | 1,000 | $1.50 |
| Carbide Spot Drill | Stainless, Inconel | 2,500 | $12.00 |
| Indexable Spot Drill | Production runs | 3,000 | $25.00 (inserts $3) |
Use this flowchart:
1. Is the material stainless/hardened steel? → Use carbide spot drill
2. Is hole location critical (±0.001″)? → Use spot drill matching drill angle
3. Is it a one-off soft material part? → Center drill (0.5mm depth only)
Safety Checklist: Protecting Eyes and Workpieces

Why Cutting Fluid Prevents Work Hardening
Dry drilling stainless steel creates 1,200°F heat at the tip, instantly work-hardening the surface. The next cut meets material harder than the drill. Non-negotiable: Flood-cool with Houghton HOC 68 for steel or Trim E610 for aluminum.
The Tailstock Security Test You Must Do
Before every use:
1. Extend tailstock quill halfway
2. Try to rotate it by hand—zero movement allowed
3. If it turns, tighten the tailstock clamp bolt (often overlooked)
Critical: A loose tailstock shifts during drilling, causing catastrophic tool breakage. One shop reported a snapped center drill fragment embedding in a machinist’s safety glasses—always wear ANSI Z87.1-rated eyewear.
Tool Inspection Protocol
Examine under magnification for:
– Micro-cracks at the web-taper junction (reject immediately)
– Chip packing in flutes (clean with air blast at <30 PSI)
– Worn cutting edges (replace if edge width exceeds 0.005″)
Final Takeaways: Precision Without Breakage
A center drill’s only true purpose is creating 60° lathe centers—and it excels when used correctly. For spotting, treat it like a fragile instrument: never drill deeper than the pilot section’s length, match RPM to material, and inspect for wear after every use. When working with stainless steel or critical holes, invest in carbide spotting drills—their wider angles prevent walking and cost less than rework. Remember: that $2 center drill snapping off-center costs $200 in scrapped parts and downtime. Stick to the 0.5mm spotting depth rule, align your tailstock religiously, and you’ll transform this “problem tool” into your most reliable precision partner. For hardened materials, always choose carbide—your next drill bit (and safety glasses) will thank you.


