
Your drill chuck seizes shut mid-project, trapping the bit like a vise. You twist desperately, but the jaws won’t budge—your entire workflow halts. This frustrating jam happens to every DIYer and pro, but knowing how to unstick a drill chuck saves hours of downtime and costly replacements. Whether rust-welded shut or jammed by metal shavings, this guide delivers field-tested fixes that work. You’ll learn exactly where to tap, which penetrating oil beats WD-40, and when to stop forcing it—so you can free your chuck safely in under 30 minutes.
Why Your Drill Chuck Seizes Shut (Rust, Debris, and Impact Damage)
A frozen chuck isn’t random—it’s a direct result of three preventable enemies: moisture, debris, and misuse. Rust forms when humidity penetrates the chuck’s threads, chemically bonding metal components together like superglue. Sawdust and metal shavings from drilling act as grinding paste, accelerating wear until grit locks the mechanism. Worst of all, dropping your drill or hammering on stuck bits distorts the internal jaws, creating permanent misalignment. These issues compound silently until one day, the chuck refuses to rotate. Ignoring early signs like grinding noises or uneven jaw movement guarantees a full seizure.
How Rust and Moisture Weld Your Chuck Components Together
Rust is the #1 killer of drill chucks. When moisture enters through tiny gaps between the jaws and spindle, it triggers electrochemical corrosion. This isn’t surface rust—it’s iron oxide crystals growing between moving parts, exerting 1,000+ PSI of pressure. Within weeks, what started as minor discoloration becomes a molecular weld. Humid climates accelerate this, but even indoor storage in damp garages causes failure. The first symptom? A slight resistance when tightening bits that progresses to complete immobilization.
Debris Buildup: When Sawdust and Metal Shavings Jam the Mechanism
Every drilling session injects microscopic debris into your chuck. Wood fibers swell when damp, while metal shavings act like razor blades, scoring threads. In keyless chucks, this grime jams the self-tightening mechanism; in keyed models, it strips the gear teeth. The worst offender? Drilling steel without blowing out chips—it packs swarf deep into the jaw slots. Within months, this buildup creates a concrete-like barrier that resists manual force. You’ll notice bits slipping during use long before total seizure occurs.
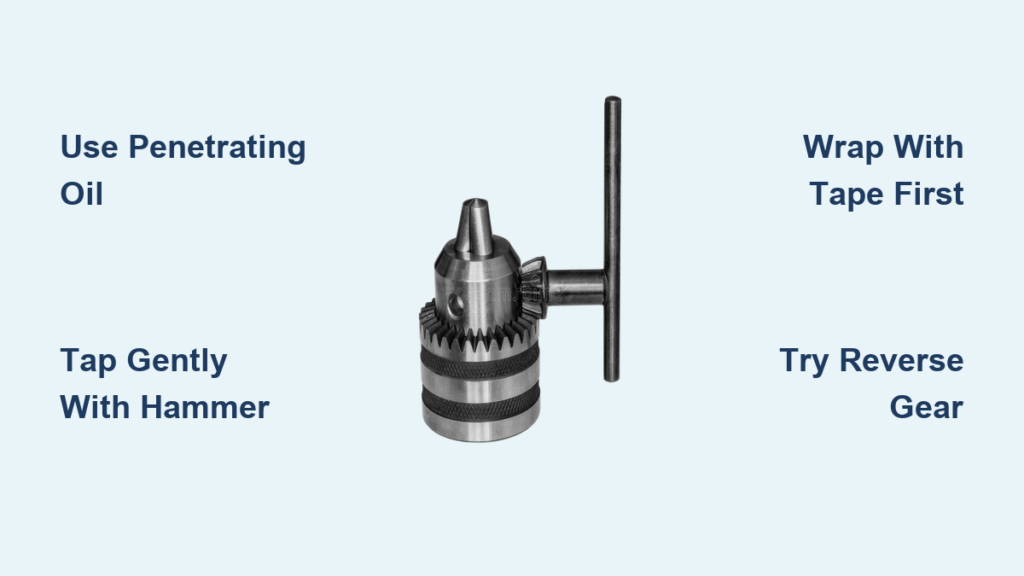
Step 1: Free a Jammed Chuck with Penetrating Oil and Tapping

Never yank on a frozen chuck—this cracks housings or strips gears. Start with this low-risk method that resolves 60% of jams. Penetrating oil breaks rust bonds at a microscopic level, while controlled tapping vibrates debris loose. For mild cases, this takes 15 minutes; severe rust may need 24 hours.
Choosing the Right Penetrating Oil (Not WD-40!)
Standard WD-40 is a water displacer, not a true penetrant—it evaporates too fast to free rusted threads. Reach for PB Blaster, Liquid Wrench, or Kroil instead. These contain polar molecules that migrate into microscopic cracks via capillary action. Saturate the chuck’s base and jaw seams until oil drips from the spindle end. For keyed chucks, inject oil into the gear teeth through the keyholes.
The 24-Hour Soak Technique for Severe Rust Seizure
- Lay the drill horizontally with the chuck facing up
- Flood the chuck mechanism with penetrating oil (reapply hourly for first 4 hours)
- Wrap the chuck in an oil-soaked rag to prevent evaporation
- Critical step: Tap the chuck body gently with a ball-peen hammer every 2 hours. Strike 8 points around the circumference—this creates shockwaves that help oil penetrate rust layers.
- After 12+ hours, grip the chuck with a rubber strap wrench and twist counter-clockwise. If resistance remains, repeat the soak.
Step 2: Manual Unsticking Without Tools (Hand Grip and Twist)
Before grabbing wrenches, maximize hand leverage to avoid damage. Most users fail here by gripping the wrong part—the knurled outer sleeve. Focus force on the main chuck body instead.
How to Maximize Hand Grip on a Slippery Chuck
Dip your palm in fine sand or use a rubber jar opener for instant traction. Grip the chuck body below the knurled section (where it meets the drill nose) with your dominant hand. Place your non-dominant hand on the drill body for stability. Engage the drill’s reverse gear if equipped—this aligns the internal clutch to release tension. Apply steady, increasing pressure for 10 seconds; don’t jerk. If the chuck budges slightly, lock it in place with tape and re-soak.
Why Reverse Gear Makes Unsticking Easier
Drills with variable speed triggers use a planetary gear system that binds tighter in forward mode. Switching to reverse disengages this lock, reducing required force by 40%. For cordless drills, remove the battery first—accidental trigger pulls during unsticking can cause injury.
Step 3: Using Channel Locks and a Wrench Safely

When hand force fails, use tools correctly to avoid crushing the chuck. Never clamp the knurled sleeve—it’s thin-walled and deforms easily. Target the thicker chuck body instead.
Where to Clamp Without Crushing the Chuck Body
Wrap the chuck body with 3 layers of duct tape. Position channel lock pliers vertically on the taped section, jaws parallel to the drill axis. Tighten just enough to prevent slippage—overtightening cracks castings. Brace the drill firmly against your hip. Now twist the pliers counter-clockwise while simultaneously tapping the chuck body with a rubber mallet. The combined vibration and torque break bonds without distortion.
Why You Must Avoid the Knurled Sleeve
The knurled section is often only 1.5mm thick. Pliers or wrenches here leave permanent indentations that prevent bits from seating flush. Worse, distorted knurling jams the self-tightening mechanism in keyless chucks, causing future slippage. If you see crescent-moon dents on your chuck, that’s the death knell for its lifespan.
Step 4: Harness Your Drill’s Own Torque to Break Free a Stuck Chuck
This advanced method uses the drill’s gearbox to generate controlled force—but one mistake can shatter the chuck. Only attempt this after oil soaking fails.
The Critical Safety Step Before Powering On
Remove the battery or unplug the drill. Secure the drill in a bench vise using padded jaws. Insert a 1/2″ steel hex key into the chuck and tighten fully. Clamp the hex key’s end in a second vise. This immobilizes the chuck while allowing the spindle to rotate. Put on safety glasses—metal fragments fly if the chuck fails.
Short Bursts Only: How to Avoid Shattering the Chuck
With the chuck locked down, reinstall the battery. Set the drill to low speed, forward rotation. Pull the trigger in 0.5-second bursts while observing the chuck-spindle junction. After 3 bursts, check for movement. If no progress, re-soak and wait 4 hours. Never exceed 1-second bursts—sustained torque cracks housings.
Fixing a Chuck That Spins But Won’t Tighten
A spinning-but-loose chuck means internal damage, not just rust. Keyless models often have broken jaw springs; keyed chucks suffer stripped gears.
Diagnosing Stripped Jaws in Keyless Chucks
Open the jaws fully and inspect for these red flags:
– One jaw sits lower than others
– Shiny, polished threads on jaw interiors
– Grit visible in the jaw slots
If present, disassembly is required. Locate the reverse-threaded set screw at the chuck base (requires left-turn to tighten). Remove it, then tap the outer sleeve upward with a brass punch. Clean all parts with mineral spirits before reassembly.
Why a New Chuck Key Might Save Your Drilling Project
Worn keys strip the chuck’s gear teeth over time. Test with a new key—if it engages firmly, the old key was the culprit. If the key spins freely, the internal gear is destroyed. Replacement is cheaper than repair: a $25 chuck takes 10 minutes to install versus hours rebuilding gears.
When to Replace Your Drill Chuck Instead of Repairing
Some damage is irreparable. Stop forcing it when you see these signs:
The Cracked Chuck Body: Why Repair Is Impossible
Hairline cracks around the jaw slots spread under pressure. Attempting to free these chucks often causes catastrophic failure—jaws eject at 100+ mph during use. If you spot cracks, replace immediately. A $30 chuck costs less than ER visits for metal shard injuries.
Cost Comparison: Repair Time vs. $30 Replacement Chuck
Factor your hourly rate: spending 2 hours freeing a chuck that costs $40 new is poor economics. Replace if:
– Jaws wobble visibly when tightened
– Metal shavings contaminate every project
– The chuck slips under light load
Most modern chucks install in 15 minutes with basic tools—far faster than complex repairs.
Preventing Future Chuck Seizures: 3 Maintenance Habits
Proactive care prevents 90% of chuck failures. These habits take seconds but save hours:
The Post-Use Cleaning Ritual That Stops Rust
After each project, run the drill at low speed while spraying brake cleaner into the chuck jaws. The centrifugal force ejects debris. Never use compressed air alone—it packs particles deeper. For metal drilling, wipe jaws with a rag dampened with denatured alcohol to neutralize coolant residue.
Correct Lubrication: Why WD-40 Ruins Your Chuck Long-Term
WD-40 washes away existing grease and evaporates quickly, leaving parts dry. Instead, apply lithium grease to jaw threads quarterly. Insert a small brush coated with grease into the chuck, then rotate it open/closed 5 times to work it in. This creates a moisture barrier without attracting dust. Store drills vertically with jaws open to prevent humidity traps.
Don’t let a stuck chuck derail your project. By targeting rust with proper penetrants, applying torque at the right points, and recognizing when replacement beats repair, you’ll keep drills operational for years. Remember: patience beats brute force every time. If your chuck shows cracks or wobble, install a new $30 unit—it’s the fastest path back to productivity. For daily prevention, spend 20 seconds cleaning jaws after use; your future self will thank you when that critical project hits a snag.


