
Your drill bit won’t budge. You’ve twisted the chuck until your knuckles turn white, and that stubborn bit remains welded to the chuck like it’s part of the tool. This common frustration stops DIY projects dead in their tracks and wastes precious time. Whether you’re installing shelves or building furniture, knowing how to unscrew drill bit effectively saves money on replacement tools and prevents dangerous improvised fixes. In this guide, you’ll discover field-tested techniques to free even severely seized bits—starting with the gentlest tap-and-release method and progressing to controlled heat applications. Most importantly, you’ll learn why bits jam in the first place and how to prevent this headache forever.
Why Your Drill Bit Won’t Budge: 4 Common Causes
Understanding what’s really locking your bit in place determines which removal method will work—and stops you from making it worse. Skip this step, and you risk snapping the bit or destroying the chuck.
Heat Fusion from Overdrilling
When drilling metal or hardwood at high speeds, friction generates intense heat that expands the chuck jaws and bit shank. As everything cools, the metals contract and fuse together through a process called galling. This “cold weld” feels like the bit is permanently bonded. You’ll see burn marks on the bit shank and discolored metal on the chuck jaws. Drilling without coolant or using excessive pressure accelerates this.
Corrosion and Debris Lock
Moisture exposure causes rust that acts like industrial glue between the bit and chuck. Sawdust, metal filings, or drywall dust packed into the chuck jaws creates a mechanical lock. This is common in tools stored in garages or workshops with humidity swings. If your chuck feels gritty when you try to loosen it, debris is the culprit. A bit forced in at an angle worsens this by jamming debris deeper into the jaws.
Hex Shank vs. Round Shank Mismatch
Forcing a standard round-shank drill bit into a 1/4-inch hex chuck (common on impact drivers) is a frequent mistake. The bit slides too far into the chuck until it jams against the internal ball bearing mechanism. You’ll notice the bit won’t seat properly—it either wobbles or feels stuck before full insertion. Never use round bits in hex-only chucks; this mismatch guarantees future jams.
Overtightening Damage
Cranking a keyless chuck with pliers or using a pipe wrench on a keyed chuck distorts the metal. The chuck jaws deform inward, creating microscopic ridges that grip the bit like a vise. If you see tool marks on the chuck collar or uneven jaw alignment, overtightening caused the seizure. This mistake is irreversible without professional repair.
Critical Safety Steps Before You Start
Skipping these steps risks serious injury. A drill activating mid-removal can hurl metal shards at 200+ mph.
Disconnect Power Sources Immediately
Unplug corded drills and remove batteries from cordless models. Verify power is off by pulling the trigger—never skip this. Residual charge in capacitors can still spin the chuck unexpectedly. Store batteries away from your work area to prevent accidental reinsertion.
Gear Up for Protection
Wear ANSI-rated safety glasses—metal fatigue can cause bits to snap violently. Use cut-resistant gloves when handling seized bits or using wrenches. Cover exposed skin; hot metal fragments cause severe burns during heat-based removals. Lay down a shop towel to catch small parts that might eject.
Secure Your Drill Properly
Clamp the drill body in a bench vise with soft jaws (use wood blocks or rubber pads). Position the chuck 1 inch above the vise jaws so you have full access. If no vise is available, wrap the drill body in a towel and clamp it vertically in a pipe vise. Never hold the drill by hand—slippage causes hand injuries from wrenches or snapping bits.
6 Proven Ways to Remove a Stuck Drill Bit (Start with #1)

Begin with the least aggressive method. Overly forceful techniques can damage your chuck beyond repair.
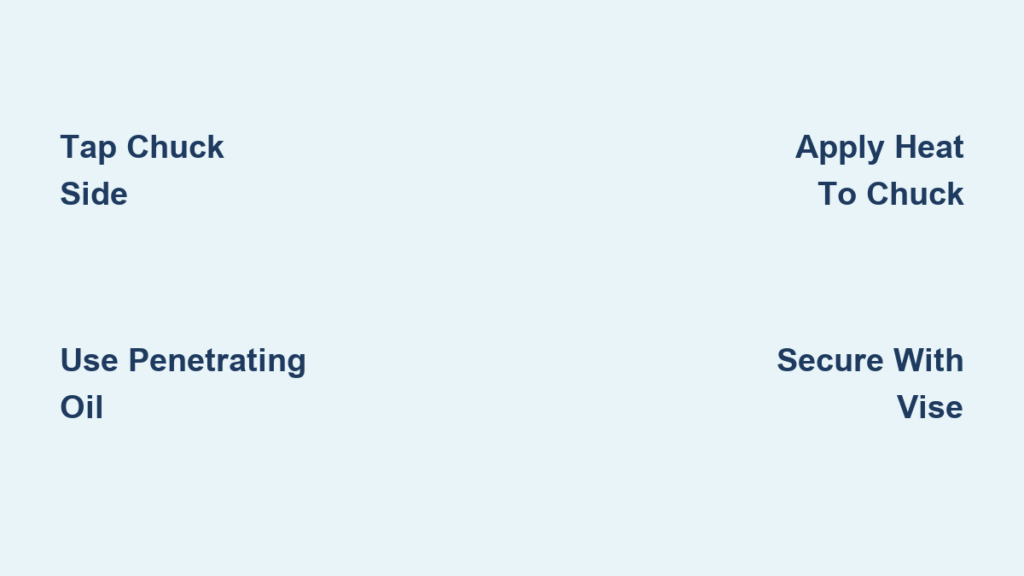
Tap-and-Release: The Gentle First Fix
Best for: Mildly stuck bits with no visible corrosion.
Time required: 2 minutes.
What to do: Secure the drill in your vise with the chuck facing up. Using a rubber mallet, firmly tap the side of the chuck collar (not the bit) in a circular motion. Deliver 3-4 sharp taps per side. The vibration breaks micro-welds without damaging components. After tapping, try loosening the chuck by hand. If it moves slightly, apply penetrating oil and repeat.
Pro tip: Wrap the chuck in a cloth first—this dampens vibration for delicate chucks while focusing energy on the seizure point.
Keyed Chuck Wrench Technique
Best for: Stubborn keyed chucks that won’t budge.
Tools needed: Adjustable wrench, penetrating oil.
Step-by-step:
1. Soak the chuck-bit joint with PB Blaster for 10 minutes
2. Clamp the drill body securely in your vise
3. Place the wrench on the flats of the chuck body (not the outer sleeve)
4. Apply steady counter-clockwise pressure while tapping the wrench handle with a mallet
Warning: If the chuck spins freely but the bit stays put, the internal mechanism is broken—stop immediately. Forcing it will strip gears.
Penetrating Oil Soak for Rusty Bits
Best for: Bits seized from moisture or debris.
Why it works: Oils like Liquid Wrench contain solvents that break down corrosion at a molecular level.
Procedure:
– Apply oil liberally to the seam where the bit enters the chuck
– Tap the chuck with a mallet to create micro-vibrations (helps oil penetrate)
– Wait 30 minutes minimum—do not rush this
– Reapply oil, then try the tap-and-release method
Critical note: Never use WD-40 as a penetrant—it lacks the necessary solvents. PB Blaster or Kano Kroil are 3x more effective for seized metals.
Heat-and-Quench Method for Severe Seizures
Best for: Bits fused by heat galling.
Safety first: Remove all plastic/rubber parts from the drill. Wear heat-resistant gloves.
How to execute:
1. Heat the chuck body only with a butane torch for 20 seconds (glowing dull red)
2. Immediately blast the bit shank with canned air held upside down (freezes metal)
3. The chuck expands while the bit contracts—breaking the bond
Why this works: Metal expands when heated and contracts when cooled. Targeting heat on the chuck and cold on the bit creates opposing forces.
Stop immediately if: You smell burning insulation—this indicates motor damage.
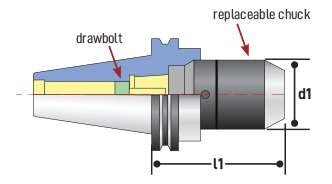
Hex Driver Bit Extraction (Blue Ridge Mini Drill Fix)

Specific solution for: 1/4-inch hex drivers with jammed round-shank bits.
Why standard methods fail: The bit slides past the retaining ball into the internal mechanism.
Steps:
1. Clamp the exposed bit shank in a vise using brass jaws
2. Hold the drill body firmly and rotate it counter-clockwise
3. Apply steady pressure—do not jerk
Visual cue: When the bit breaks loose, you’ll feel sudden resistance drop. Stop turning immediately to avoid damaging the chuck threads.
Drill-Out Method: Last Resort Destruction
Use only when: The bit is broken off flush with the chuck.
WARNING: This destroys both bit and chuck.
Procedure:
1. Center-punch the stuck bit’s core
2. Drill a 1/8″ pilot hole using a carbide bit
3. Gradually increase drill size until the bit shell collapses
Key insight: Drilling the center relieves radial pressure on the chuck jaws—allowing removal with dental picks. Never drill larger than the chuck’s internal diameter.
Tool-Specific Fixes That Prevent Damage
Generic methods can wreck specialized chucks. Match your approach to your tool type.
Keyless Chuck Rescue Without Destruction
Never use pliers on the knurled sleeve—this cracks the collar. Instead:
– Wrap a rubber strap wrench around the chuck
– Apply downward pressure while twisting counter-clockwise
– If stuck, use the “blip and hold” method: Pull the trigger in reverse for 1 second, then immediately try loosening
Keyed Chuck Troubleshooting
If the chuck key slips:
1. Tap the key fully into place with a mallet
2. Insert the key into all three holes simultaneously
3. Turn each hole 1/4 turn in sequence (not full rotations)
1/4″ Hex Driver Bit Jam Fix
For tools like DeWalt impact drivers:
– Insert a hex key into the bit’s flats for better grip
– Pull the chuck collar forward while twisting the bit
– If jammed internally, remove the chuck collar to access the retaining ball
Prevent Future Drill Bit Jams in 4 Steps
Fixing a seized bit takes 20 minutes—prevention takes 20 seconds. Implement these habits:
Clean Chucks After Every Project
Open the chuck fully and blast it with compressed air. Use a toothpick to dislodge packed debris in the jaws. Do this even after light-duty tasks—sawdust hardens into concrete-like residue.
Match Bits to Your Tool Type
- Hex chucks (impact drivers): Use only 1/4″ hex shank bits
- 3-jaw chucks (standard drills): Use round or hex bits
- Keyed chucks: Verify bit shank diameter matches chuck specs
Tighten Correctly—Not Excessively
For keyless chucks: Hand-tighten until snug, then give one firm quarter-turn. For keyed chucks: Tighten all three holes evenly with moderate force—never stomp on the key.
Apply Dry Lubricant Sparingly
Wipe bit shanks with a Teflon-based lubricant before insertion. Too much attracts debris. Reapply monthly for tools used in dusty environments.
A seized drill bit doesn’t mean buying new tools. By starting with the tap-and-release method and progressing carefully to heat applications, you’ll free even the most stubborn bits without damage. Remember: 90% of jams come from using round bits in hex chucks or overtightening—simple habit changes prevent future headaches. When that bit finally breaks loose, you’ll hear a distinct click as the jaws release. Keep your chuck clean, match bits to your tool, and you’ll never waste another project to a stuck bit. Your drill will thank you with years of smooth operation.


