
That frustrating vibration when your post hole auger struggles to bite into the earth? It’s screaming for attention. A dull blade transforms a 30-minute fencing job into an all-day wrestling match with stubborn soil. How to sharpen post hole auger blades properly isn’t just maintenance—it’s the difference between effortless digging and equipment that fights you at every rotation.
When blades lose their edge, you’ll notice increased resistance, uneven hole walls, and that telltale “chattering” as the auger skips across hard ground. Ignoring these signs wastes hours and strains your machinery. This guide delivers field-tested sharpening techniques used by professional fence installers and excavation crews. You’ll learn precise methods for different soil types—from sticky clay to shale—and discover why matching your bevel angle to ground conditions doubles blade life.
Required Tools for Sharpening Post Hole Auger Blades

Gathering the right equipment prevents rushed jobs that damage your blades. Never use random files or unsecured grinding—improper tools create uneven edges that cause vibration and premature wear. Your sharpening kit must include:
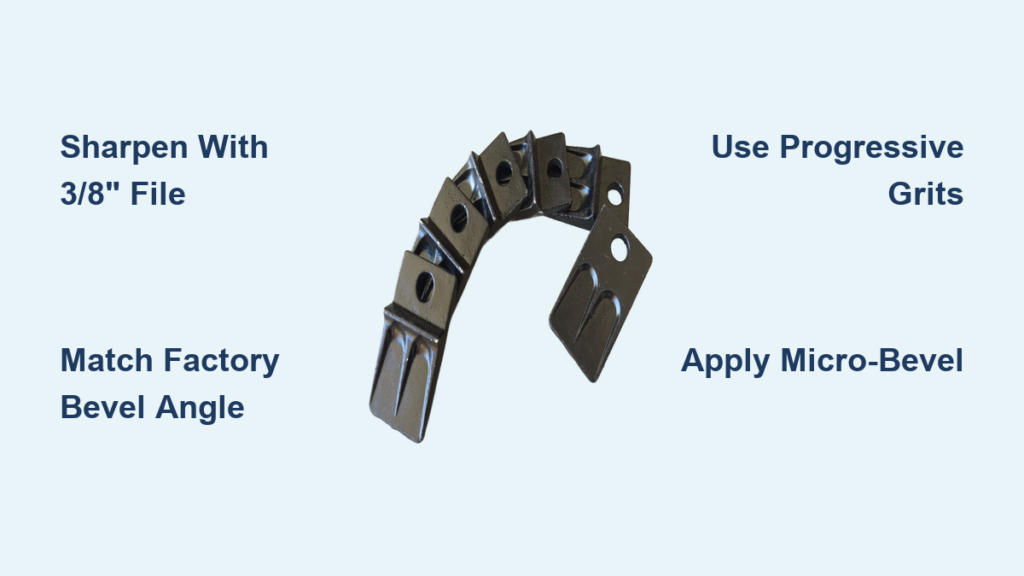
- 3/8″ round file for controlled manual sharpening (avoids overheating metal)
- Bench grinder with thin grinding wheel for aggressive reshaping (keep water bucket nearby for cooling)
- Sharpening stones in coarse (200 grit), medium (400 grit), and fine (800+ grit) configurations
- Angle finder and permanent marker to map factory bevels before filing
- Heavy-duty vise or C-clamp rated for metalwork (prevents dangerous slippage)
Critical safety gear includes cut-resistant gloves (metal filings embed in skin) and safety goggles with side shields (grinding sparks travel laterally). Skip the dust mask—use a respirator with P100 filters when grinding to avoid inhaling metal particles. For frequent sharpening, invest in a honing guide jig that locks your angle at 25°, 30°, or 35°—this eliminates guesswork when matching factory specifications.
Step-by-Step Sharpening Process for Auger Blades
Step 1: Secure and Inspect the Blade for Optimal Results
Never skip cleaning—dirt and rust hide critical damage. Scrub blades with a stiff wire brush and solvent to expose nicks and stress cracks. Mark the original bevel with a Sharpie®; this creates a visual guide showing where metal is removed during filing. Clamp the blade in your vise with wood blocks protecting cutting edges from marring. Check for bends or warps by rolling the auger on a flat surface—if it wobbles, professional straightening is needed before sharpening.
Step 2: Re-establish the Primary Bevel Without Damaging the Edge
Maintain factory angles religiously—most augers use 30°-45° bevels. Start with your coarsest stone or file. Using light, consistent pressure, move from heel to tip in smooth arcs matching the blade’s curve. Overheating ruins temper—dip in water every 10 seconds if using power tools. Stop when a uniform burr forms along the entire edge; this “wire edge” confirms you’ve reached the apex. For deep nicks, use a bench grinder with feather-light touches—grind only until the nick disappears, then switch to manual methods.
Step 3: Refine the Edge with Progressive Grits for Durability
Skipping grits guarantees rapid dulling. Move to medium-grit stones immediately after establishing the primary bevel. Use circular motions with minimal pressure to erase coarse scratches. Check progress by feeling for burr reduction—when it disappears on one side, flip and repeat. Finish with fine-grit stones using long, slow strokes to polish the edge. For clay soils, add honing compound on leather strops; this mirror finish prevents sticky adhesion. Critical tip: Always sharpen all blades identically—a 1/32″ imbalance causes violent vibration that damages your drill motor.
Step 4: Final Honing Techniques for a Razor-Sharp Finish
This step separates functional from exceptional edges. Hold a fine honing rod at 2° above your primary angle and draw the blade edge toward you in 5-stroke sets. Alternate sides after every set. Test sharpness by slicing newsprint—a properly honed blade cuts cleanly without tearing. For rocky soil work, add a 2° micro-bevel on your final strokes; this microscopic reinforcement prevents chipping on shale. Never skip deburring: Run a nylon brush along the edge to remove microscopic metal fragments that accelerate dulling.
Optimal Bevel Angles for Rocky, Clay, and Sandy Soils
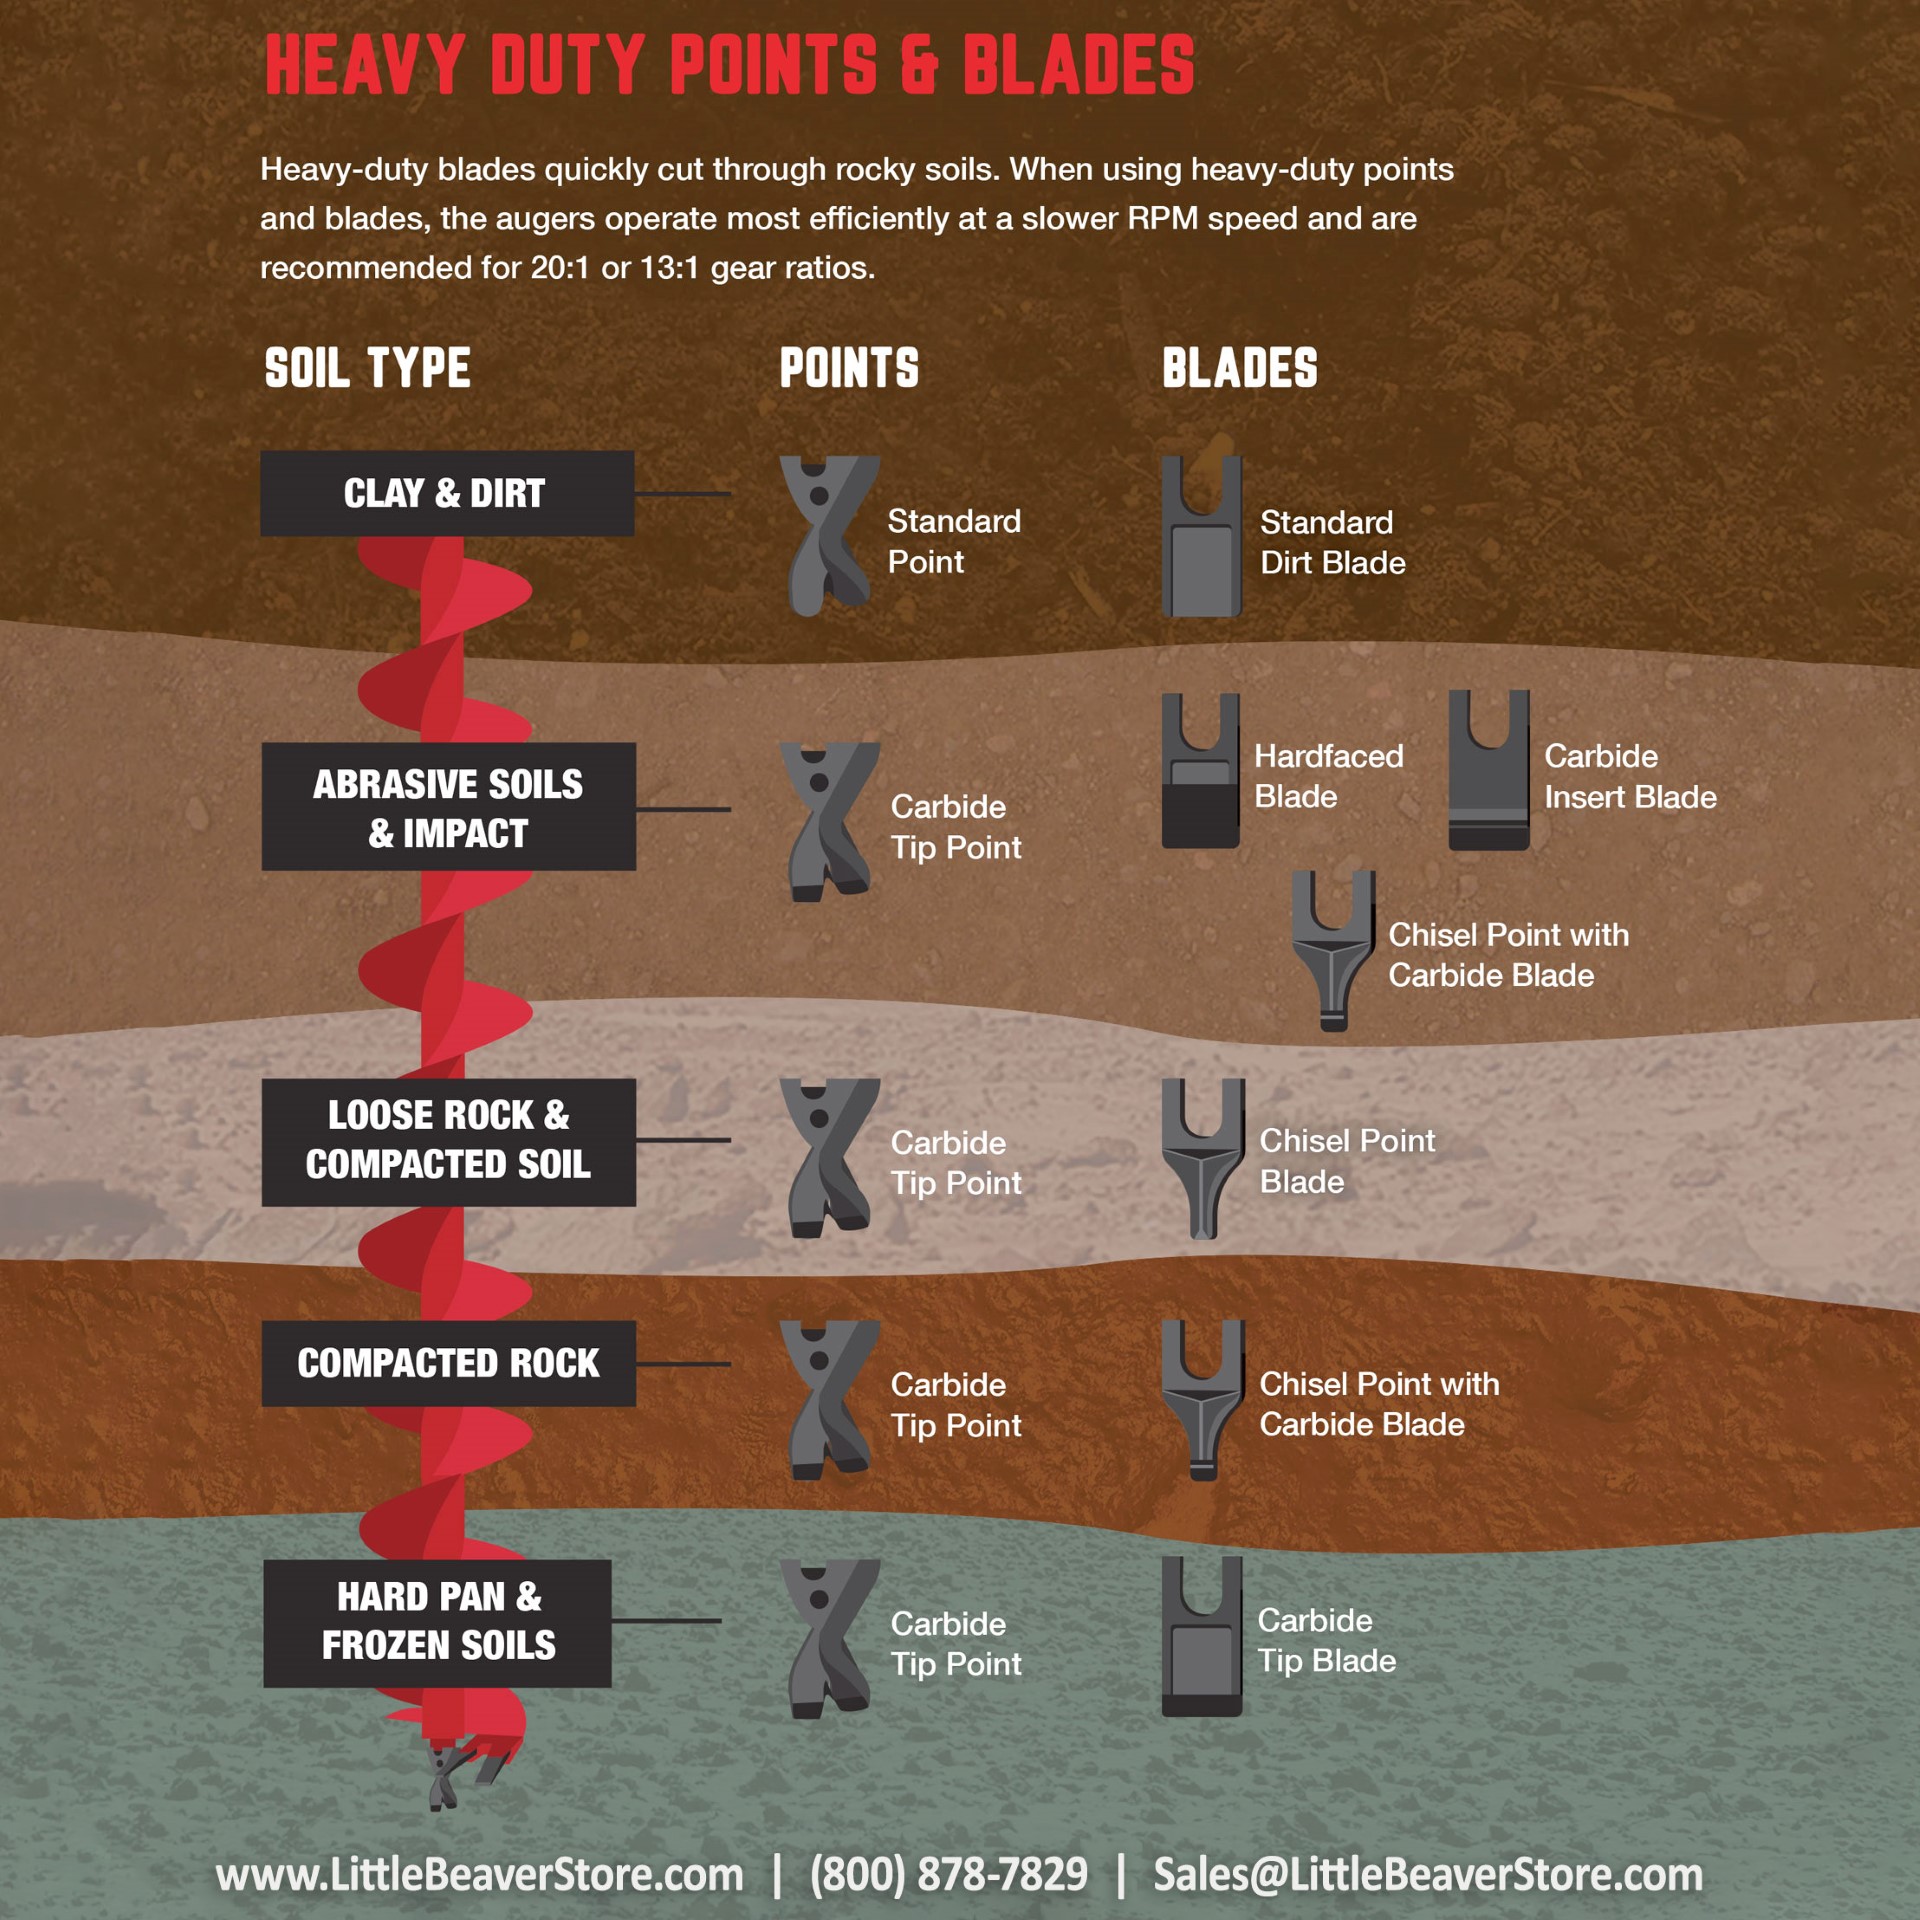
Best Angle Settings for Shale and Hard Ground Conditions
Hard ground demands brute-force geometry. Use a 25°-30° primary bevel with slight convexity (rounded edge profile). This thicker edge resists chipping when hitting shale layers. Grind relief behind the cutting edge—a 1/16″ flat section reduces friction in compacted soil. For frozen ground, carbide-tipped blades are non-negotiable; standard steel shatters on impact. If sharpening carbide, use diamond-coated stones only—regular abrasives won’t cut the tungsten matrix.
Ideal Edge Geometry for Clay and Sticky Soils
Clay requires surgical precision. Opt for a 20°-25° acute angle with mirror-polished finish. After sharpening, wipe blades with automotive wax—this creates a non-stick surface that sheds mud. Never use aggressive grinding on clay blades; the heat seals microscopic pores, making edges “gummy.” Instead, use ceramic sharpening rods with water-based honing oil to maintain a clean cutting surface. If blades still stick, apply graphite powder along the edge—it reduces adhesion without damaging soil structure.
Why Sandy Soil Requires a Different Sharpening Approach
Sand acts like liquid sandpaper on edges. Use a 35° bevel with micro-bevel—this slightly rounded profile resists abrasion. Avoid razor-thin edges; they wear down in minutes. After sharpening, heat blades to 400°F (blue tint appears) then quench in oil—this hardens the surface against silica grit. For professional results, apply plasma nitriding (available through equipment dealers); this creates a wear-resistant layer 0.002″ thick that triples blade life in sandy loam.
Proven Techniques for Long-Lasting Auger Blade Edges

Creating a Micro-Bevel for Extreme Durability
This pro technique adds 40% more edge life. After establishing your primary bevel (e.g., 30°), increase the angle by 2°-5° for final strokes. On fine stones, take only 2-3 light passes per side. This creates an invisible secondary bevel that handles impact while maintaining sharpness. Crucially: The micro-bevel must be smaller than the primary bevel—exceeding 1/16″ width defeats the purpose. Test with magnification loupe; the transition should be seamless.
Using the Sharpie® Test to Perfect Your Sharpening Angle
Eliminate guesswork with this field trick. Color the entire bevel with permanent marker. Take 3-5 sharpening strokes, then examine the edge. Missing ink shows where contact occurs—if only the tip or heel is stripped, your angle is wrong. Adjust until ink disappears evenly across the bevel. Repeat after each grit change. This method prevents over-sharpening, which thins edges and causes premature failure in rocky soil.
When to Seek Professional Sharpening Services
DIY has limits—call experts when:
– Deep gouges require welding (beyond 1/8″ depth)
– Blades show stress cracks near mounting holes
– Carbide tips are damaged (requires specialized brazing)
– Vibration persists after sharpening (indicates imbalance)
Professionals use laser scanners to measure edge geometry and cryogenic treatment (-300°F quenching) that realigns metal crystals for 2x edge retention. For under $50, this service often outperforms DIY on high-value equipment.
Daily Maintenance Habits to Extend Auger Blade Life
Immediate Post-Use Cleaning Steps to Prevent Rust
Rinse blades within 30 minutes of use—dried mud traps moisture against steel. Use high-pressure washer at 45° angle (never perpendicular) to avoid forcing debris into bearings. For clay, soak in vinegar-water solution (1:4 ratio) for 10 minutes before scrubbing. Dry completely with compressed air, then apply boiled linseed oil—this penetrates pores better than WD-40. Never store damp blades; rust pits create weak points that accelerate dulling.
Storage Solutions That Keep Blades Sharp Between Jobs
Hang augers vertically on wall hooks—never stack horizontally. Coat blades with cosmoline grease for long-term storage; it repels moisture without gumming up. For seasonal storage, insert wooden dowels through cutting edges to prevent contact with other metal. Critical oversight: Remove blades from the auger head—mounting stress causes microscopic warping during storage. Store in climate-controlled space below 60% humidity; silica gel packs in toolboxes absorb residual moisture.
Why Sharpened Auger Blades Make Digging Effortless
A properly sharpened auger cuts soil like a hot knife through butter—no straining, no uneven holes, no equipment damage. By matching your bevel angle to specific soil conditions and using progressive sharpening techniques, you transform frustrating jobs into smooth operations. Remember: regular maintenance prevents 90% of blade failures. Clean after every use, inspect for nicks weekly, and sharpen at the first sign of resistance. Your drill motor will run cooler, holes will be cleaner, and you’ll finish jobs in half the time. For rocky terrain, that micro-bevel could mean the difference between replacing blades monthly versus seasonally. Invest two hours in sharpening now to save dozens in labor later—your back (and your schedule) will thank you.


