
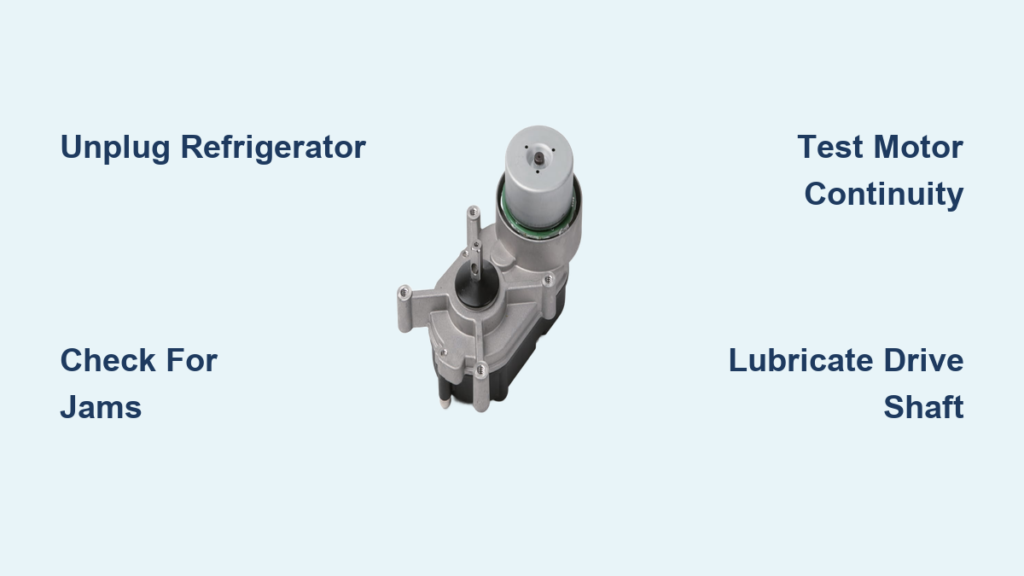
Your ice maker suddenly stops delivering ice right when you need it most—during a summer barbecue or holiday gathering. That frustrating humming sound without any ice dispensing, or complete silence from the dispenser, often points to a failed auger motor. This critical component powers the rotating screw that pushes ice from the bin to your glass, and when it dies, your kitchen workflow grinds to a halt. Learning how to replace ice maker auger motor components yourself saves hundreds in service calls and gets your appliance back online fast. In this guide, you’ll discover model-specific-free replacement steps, safety-critical precautions, and post-installation troubleshooting to restore ice flow within 45 minutes.
Before grabbing tools, confirm the auger motor is truly at fault. While a jammed ice chute or overfilled bin can mimic failure symptoms, a dying auger motor typically announces itself through distinct warning signs. Listen for a persistent humming noise with zero ice movement—a classic indicator of motor strain against a seized mechanism. You might also hear rapid clicking from the motor housing as it struggles to engage, or experience complete dispensing failure despite normal ice production in the bin. Crucially, rule out simple fixes first: empty the ice bin fully, check for chute obstructions, and verify your ice maker is actively cycling. Only proceed with motor replacement when these checks confirm the problem originates at the auger assembly.
Why Your Ice Maker’s Auger Motor Failed and How to Confirm It
Common Failure Triggers You Can Diagnose in 5 Minutes
Auger motors typically die due to three preventable causes: mineral buildup from hard water gumming up the mechanism, electrical surges damaging internal windings, or mechanical stress from ice jams. Start diagnostics by unplugging your refrigerator and removing the ice bin—never skip this safety step. Shine a flashlight into the dispenser cavity while manually rotating the auger screw. If it turns stiffly or won’t budge, mineral deposits or ice shards have likely seized the shaft. Next, plug the unit back in and initiate a test cycle: if you hear the motor whirring but see no auger movement, the drive coupling has probably stripped. For silent failures, use a multimeter on the motor terminals (set to ohms) to check for continuity—no reading means an internal break.
Critical Safety Checks Before Opening the Housing
Power disconnection isn’t optional—one accidental startup could crush fingers in the auger mechanism. Always:
1. Unplug the refrigerator at the wall outlet (don’t rely on control panel shutoffs)
2. Close the water supply valve behind your fridge to prevent leaks
3. Lay towels in the dispenser area to catch residual water
4. Wear insulated-handle tools to avoid electrical risks
Pro Tip: Snap smartphone photos of every wire connection before disconnecting anything. A single reversed wire can fry your control board during reassembly.
Exact Tools Needed for Auger Motor Replacement
Must-Have Equipment for a Smooth Repair
Gather these items before starting to avoid mid-repair delays:
– #2 Phillips screwdriver (most common for housing screws)
– ¼” and 5/16″ nut drivers (socket sets often slip on plastic mounts)
– Needle-nose pliers with wire cutter (for stubborn connectors)
– Food-grade lubricant (petroleum-based oils contaminate ice)
– Dielectric grease (for moisture-proof electrical connections)
– Magnetic parts tray (prevents screw loss in tight spaces)
Never improvise with tools—using pliers on plastic tabs cracks housings, while undersized screwdrivers strip heads. Your replacement motor must match your model exactly; universal motors often have incompatible mounting patterns. Check the old motor’s label for part numbers before purchasing.
Step-by-Step Auger Motor Replacement Process
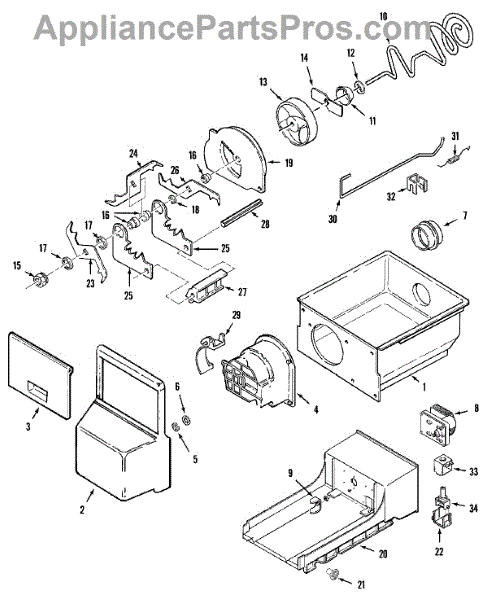
Accessing the Motor Housing Without Damage
Locate your ice maker’s service panel—usually behind the front grille for built-in models or under the dispenser cover for freestanding units. Remove visible screws with your Phillips driver, then gently pry clips with a plastic spudger (never metal). For under-counter units, detach the front panel by releasing bottom tabs first. Visual cue: If you see water pooling, place a container under the drip tray before proceeding.
Removing the Faulty Motor in 4 Critical Moves
1. Disconnect power wires by pressing the connector tab firmly while pulling straight out—never yank cables
2. Remove mounting screws (typically 2-4) with the correct nut driver size
3. Rock the motor gently side-to-side to free it from the auger shaft (forcing causes gear damage)
4. Lift the assembly straight up while watching for hidden wiring harnesses
Warning: Note the motor’s orientation—most have alignment tabs that only fit one way. Losing this detail means disassembling twice.
Installing Your New Motor Correctly the First Time

1. Apply a pea-sized dab of food-grade lubricant to the new motor’s drive shaft (excess attracts debris)
2. Align tabs with housing slots and lower straight down—do not twist
3. Hand-tighten mounting screws until snug, then give a quarter-turn more (overtightening cracks plastic)
4. Coat electrical contacts with dielectric grease before reconnecting
Pro Tip: Press connectors until you hear a distinct click. A loose connection causes intermittent failure that mimics motor defects.
Testing and Final Reassembly Checklist
Reinstall panels in reverse order of removal, ensuring no wires pinch behind covers. Restore power and water, then:
1. Run a manual test cycle via your fridge’s control panel
2. Verify smooth auger rotation (no grinding or stuttering)
3. Confirm ice dispenses within 30 seconds of activation
Critical check: Place your palm near the motor—if it vibrates excessively, remount with slight rotational adjustment.
Fixing Common Post-Replacement Issues
Motor Runs But Ice Won’t Dispense? Solve These Fast
- Check auger direction: If ice pushes backward, swap the motor’s wiring connectors
- Clear hidden jams: Shine light into the chute while dispensing—frozen chunks often lodge behind flappers
- Verify bin seating: The ice bin must click fully into place to engage the auger drive
No Motor Movement? Diagnose in Under 2 Minutes
- Test outlet voltage with a multimeter (should read 120V)
- Inspect for pinched wires along the dispenser track
- Ensure the ice bin’s microswitch activates when inserted (listen for a click)
Never ignore burning smells—immediately unplug and inspect for melted insulation.
Extending Your New Motor’s Lifespan
Prevent premature failure with these monthly habits:
– Clean mineral deposits using manufacturer-approved descaling solution every 3 months
– Listen for pitch changes—a higher whine indicates bearing wear needing lubrication
– Inspect the auger shaft during ice refills for ice buildup or hairline cracks
Critical maintenance: Replace the motor proactively every 5-7 years. Waiting for total failure risks water leaks from melted ice during extended downtime.
When to Stop and Call a Repair Technician
Immediately halt work and call a pro if you see:
– Burnt wiring with blackened insulation or melted connectors
– Refrigerant leaks (oily residue near coils with a sweet chemical smell)
– Control board error codes persisting after motor replacement
Never attempt repairs if you lack a multimeter for electrical testing—guessing with live components risks electrocution. For sealed refrigeration systems (common in commercial units), federal law requires licensed technicians due to EPA regulations.
Replacing your ice maker’s auger motor is one of the most cost-effective DIY appliance repairs, typically taking under 45 minutes with basic tools. By following these precise steps—especially the critical safety protocols and connection documentation—you’ll restore ice flow faster than waiting for service. Remember to apply food-grade lubricant during installation and always verify the dispenser’s test cycle before reassembling panels. For persistent issues after replacement, consult your model’s service manual for control board diagnostics. Now that you know how to replace ice maker auger motor assemblies confidently, you’ve eliminated one of summer’s most common kitchen emergencies. Keep this guide handy for your next maintenance cycle—your future self will thank you when the ice starts flowing again.


