
Nothing ruins an ice fishing trip faster than an auger that struggles to cut through the ice. When your ice auger blades become dull or damaged from hitting rocks or hard-packed ice, drilling holes becomes an exhausting chore instead of a quick setup task. Replacing your ice auger blades is one of the most impactful maintenance tasks you can perform to restore your auger’s cutting efficiency and ensure your safety on the ice. Whether you’re prepping for the upcoming season or troubleshooting poor performance mid-winter, knowing how to replace ice auger blades properly will save you time, energy, and frustration on the frozen lake. This guide delivers the precise steps you need to swap out worn blades and get back to fishing with confidence.
Why Your Ice Auger Blades Need Replacement Now
Ignoring worn ice auger blades creates more than just inconvenience—it compromises your entire ice fishing experience. Dull blades force you to apply excessive downward pressure, increasing strain on your back and arms while dramatically slowing your hole-drilling process. More critically, damaged blades can catch unexpectedly in the ice, causing dangerous kickback that might throw you off balance on slippery surfaces. You’ll know it’s time for replacement when you notice increased resistance while drilling, hear unusual grinding noises, or see visible nicks and chips along the cutting edge. Don’t wait until blades fail completely—proactive replacement prevents emergency situations when you’re miles from shore on a frozen lake.
Essential Safety Measures Before Handling Sharp Blades
Working with ice auger blades demands serious safety precautions—these cutting edges are designed to slice through solid ice, so they’ll easily cut through unprotected skin. Before you even touch your auger, implement these critical safety steps to prevent serious injury during your blade replacement project.
Secure Power Sources and Stabilize Your Auger
For electric and gas-powered augers, disconnecting power sources isn’t optional—it’s your primary defense against accidental activation. Remove the battery pack from electric models completely, storing it well away from your work area. On gas augers, physically disconnect the spark plug wire and secure it where it can’t accidentally reconnect. Never rely solely on turning off the ignition. Then, firmly secure your auger in a bench vise with protective jaw covers or use heavy-duty workbench clamps—never attempt blade replacement while holding the auger between your knees. This single precaution prevents countless accidents when working with sharp components under tension.
Protective Gear You Must Wear During Replacement
Cut-resistant gloves aren’t just recommended—they’re non-negotiable when handling ice auger blades. Standard work gloves won’t stop these razor-sharp edges, so invest in ANSI Level A5 or higher cut-resistant gloves specifically designed for blade handling. Safety glasses protect your eyes from metal shavings and accidental slips with wrenches. When removing stubborn bolts, consider wearing long sleeves to protect against unexpected blade movement. Remember: new replacement blades arrive incredibly sharp—treat them with the same respect as a professional chef treats kitchen knives. One careless moment during installation can cause serious lacerations that sideline your entire ice fishing season.
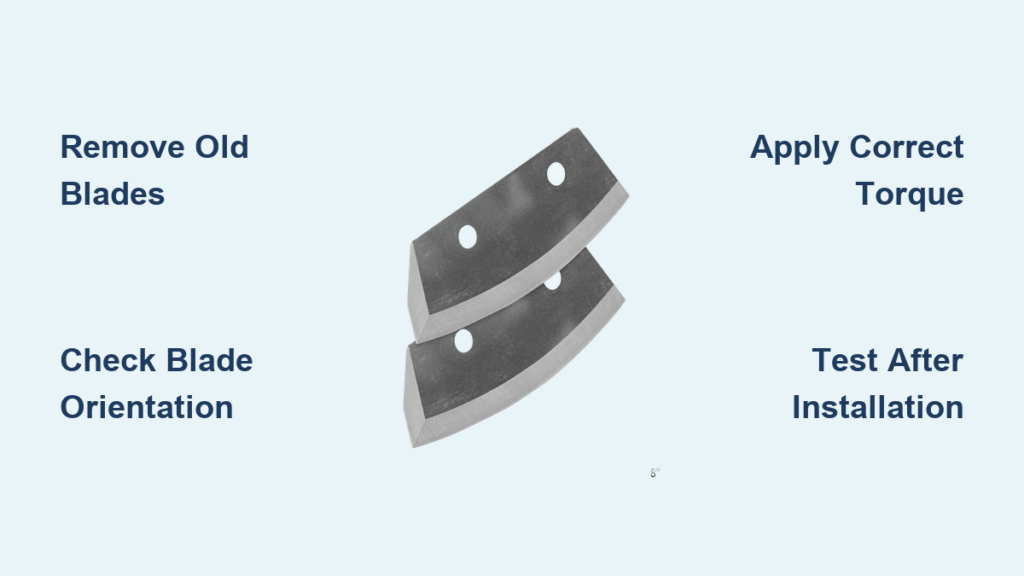
Step-by-Step Ice Auger Blade Replacement Process
Replacing your ice auger blades follows a logical sequence that becomes routine once you’ve completed it a few times. This detailed walkthrough covers every critical action you need to take, with specific warnings about common pitfalls that can damage your auger or cause injury.
How to Remove Old Blades Without Stripping Bolts
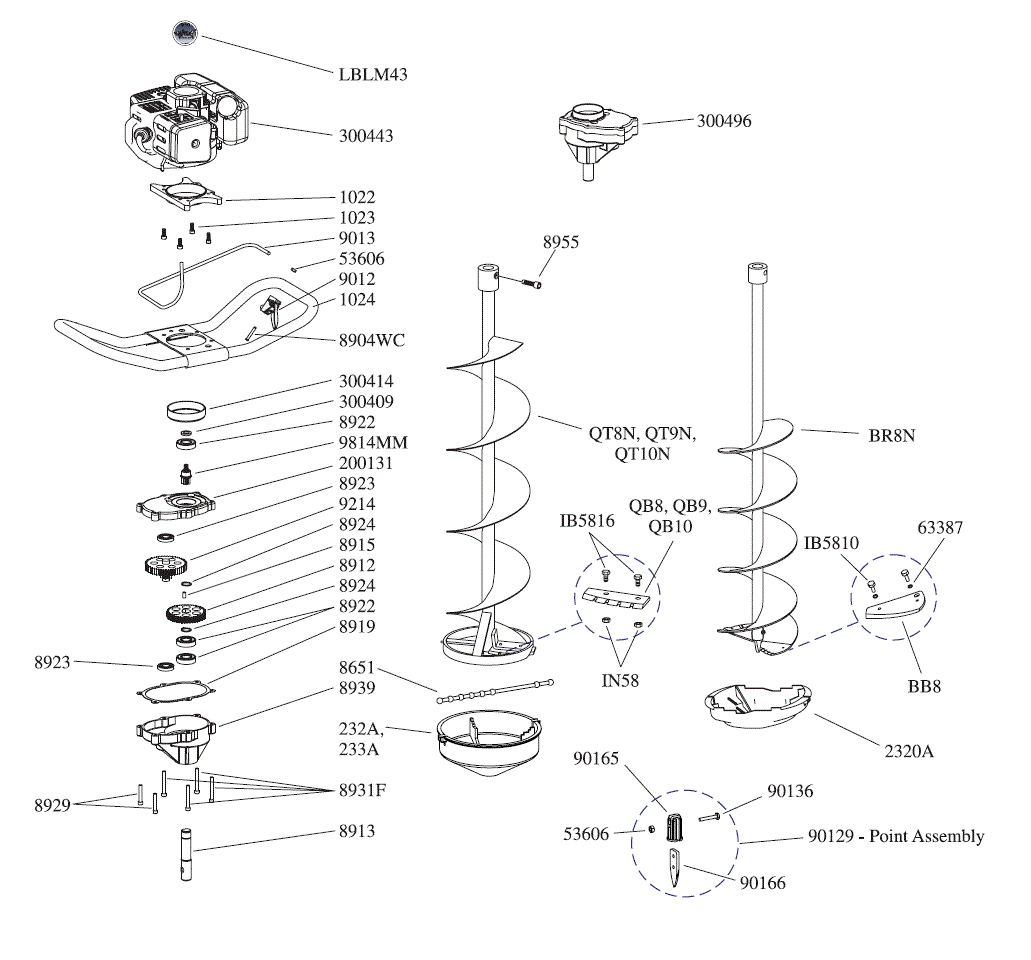
Begin by identifying the exact fasteners securing your blade assembly—most modern augers use Torx (star-shaped) or hex/Allen bolts, but older models may have standard hex nuts. Using the incorrect size tool is the #1 cause of stripped bolt heads that turn replacement into a major headache. Before applying force, clean debris from bolt heads with a small brush. Apply penetrating oil if bolts appear corroded, waiting 10 minutes before attempting removal. When loosening, apply steady pressure while pulling the tool toward you—this maintains better control than pushing away. If a bolt resists, don’t force it; apply more penetrating oil and try again later. Stripped bolts often require professional extraction that could cost more than the blades themselves.
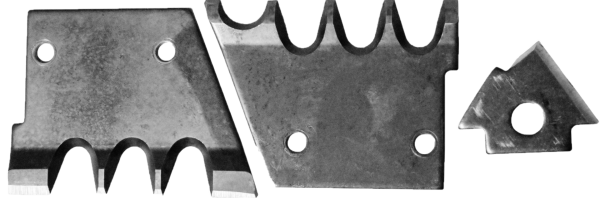
Proper Blade Orientation: Avoid This Costly Mistake

The direction your blades face determines whether your auger cuts efficiently or fights against the ice. Most blades feature an arrow indicating rotation direction or markings like “UP” on the non-cutting side. If your old blades are intact, snap a photo with your phone before removal showing their exact positioning. The cutting edge should always face the direction of rotation—forward for downward drilling. Installing blades backward creates dangerous kickback and poor cutting performance. For augers with primary and secondary blades, note that these often have different angles and must occupy specific positions. Consult your owner’s manual for model-specific orientation diagrams—this 30-second check prevents hours of frustration on the ice.
Correct Torque Application: Why Tightening Matters
The final critical step in how to replace ice auger blades properly involves precise bolt tightening. Under-tightened blades will loosen during operation, potentially causing catastrophic failure at high speeds. Over-tightened bolts strip threads in the soft aluminum housing, requiring expensive repairs. Follow a star pattern when tightening, applying gradual pressure in multiple passes like automotive wheel lug nuts. Most manufacturers specify 15-25 inch-pounds of torque—tighten until snug, then apply one-quarter additional turn with a small wrench. Never use power tools for final tightening. After installation, drill one test hole slowly, then immediately stop and recheck bolt tightness before continuing. This precaution prevents most in-field failures.
Troubleshooting Common Blade Replacement Issues
Even with careful installation, you might encounter problems that affect your auger’s performance. Knowing how to diagnose these issues saves wasted trips to the lake and prevents dangerous situations when you’re far from shore.
Why Your New Blades Won’t Cut Properly After Installation
If your freshly installed blades struggle to cut ice, first verify proper orientation—the most common installation error. Next, check for uneven bolt tension causing blade wobble. Spin the auger by hand (with power disconnected) and look for consistent clearance between blades and the auger housing. If blades contact the housing, loosen bolts slightly, realign, and retighten in the star pattern. Also inspect for manufacturing defects in new blades—some budget replacements have inconsistent bevel angles that create poor cutting geometry. Contact the manufacturer immediately if you suspect defective blades rather than blaming your installation technique.
When to Replace vs. Sharpen Your Ice Auger Blades
Not all blade problems require full replacement. Slightly dull blades from normal ice contact can often be restored with professional sharpening. However, blades with nicks deeper than 1/16 inch, bent tips, or visible cracks must be replaced immediately—sharpening won’t restore structural integrity. Consider sharpening only when wear is uniform across the entire blade edge. Factor in that professional sharpening typically costs 60-75% of new blade prices, making replacement more economical for severely damaged blades. Always replace both primary and secondary blades as a set—mixing sharpened and new blades creates imbalance that stresses your auger’s motor and transmission.
Season-Long Blade Maintenance Practices
Proper care extends beyond just knowing how to replace ice auger blades—it includes ongoing maintenance that maximizes blade life and ensures consistent performance throughout the season.
Immediate Post-Use Cleaning Routine
After every ice fishing trip, clean blades thoroughly with warm soapy water to remove ice residue and prevent corrosion. Never hose down electric augers near motor components. Dry completely with a clean towel, then apply a light coat of mineral oil or specialized blade protectant to all metal surfaces. Store blades in a dedicated case or wrap them in oiled cloth to prevent contact with other metal objects that could cause nicks. This simple routine prevents the pitting and rust that prematurely dull cutting edges and compromise blade integrity.
Off-Season Storage Techniques That Prevent Damage
At season’s end, perform a final deep clean before storage. Remove all blades and inspect for hidden damage you might have missed during the season. Apply a heavier coat of protective oil than your post-trip routine, focusing on the cutting edges. Store blades in a climate-controlled space away from humidity—garages and sheds often experience temperature swings that promote condensation. Never store blades loose in a tackle box where they can contact other equipment. Consider investing in blade guards specifically designed for your auger model—these plastic covers slip over cutting edges and prevent accidental damage during storage.
Replacing your ice auger blades properly transforms your ice fishing experience from a strenuous chore to smooth, efficient hole drilling. By following these precise steps for blade replacement and implementing the maintenance practices outlined, you’ll extend the life of both your blades and your entire auger system. Remember that safety isn’t just about protective gear—it’s about taking the time to do each step correctly, especially verifying blade orientation and proper torque. When you hit the ice with freshly installed blades, you’ll immediately notice the difference in cutting performance and reduced physical effort required. Before your next fishing trip, check your blades and replace them if needed—your future self standing on the ice will thank you when you’re drilling perfect holes with minimal effort. Always consult your specific auger’s manual for model variations, and never compromise on safety when working with these critical cutting components.


