

You’re drilling through hardwood when the bit suddenly slips, leaving a ruined hole and frayed nerves. Or worse—you’re mid-project when the chuck seizes, trapping the bit inside. Replacing a drill bit shouldn’t derail your entire DIY session. Yet 68% of DIYers force stuck bits until they strip the chuck, turning a 30-second task into an expensive repair. Whether you’re wrestling with a cordless drill that won’t release its bit or an old keyed chuck that’s frozen shut, this guide delivers field-tested fixes. You’ll learn exactly how to replace drill bits safely on any drill type—and avoid the 3 critical mistakes that damage chucks permanently.
Identify Your Drill’s Chuck Type Before Forcing Anything
Your drill’s chuck type dictates your entire approach—mismatching methods risks stripping gears or shattering bits. Skip this step and you’ll compound the problem. Here’s how to spot the difference in under 10 seconds:
- Keyless Chuck (90% of modern cordless drills): Look for a knurled metal or plastic collar directly behind the jaws. You’ll turn this by hand—no tools needed. If the collar has deep grooves you grip with your fingers, it’s keyless.
- Keyed Chuck (common in older/industrial drills): Spot the three square holes forming a triangle around the chuck face. You’ll need the T-shaped key stored on the drill body or in its case. Never force these with pliers—those holes are precision-machined.
Critical Safety Steps That Prevent Catastrophic Failures
Before touching the chuck, follow these non-negotiables:
* Unplug or remove the battery—no exceptions. A single accidental trigger pull can launch a bit like a bullet.
* Engage the lock position by centering the forward/reverse switch. This locks the spindle.
* Wear safety glasses. Metal shavings or a flying chuck key cause 12,000+ eye injuries yearly.
* Clear your workspace. A stray chuck key left in the chuck becomes a high-speed projectile when powered.
Fix Stuck Drill Bits: Keyless Chuck Replacement in 5 Steps

Modern drills use keyless chucks for speed, but overtightening or debris jams them. Here’s how to replace drill bits without damaging the mechanism:
- Power Down and Lock the Spindle: Remove the battery. Center the direction switch—this locks internal gears so the chuck turns freely.
- Open the Jaws Safely: Grip the drill body firmly in your non-dominant hand. With your dominant hand, twist the knurled collar counter-clockwise (lefty loosey). If it won’t budge, wrap a rubber jar opener around the collar for grip—never use pliers directly on the chuck.
- Remove the Old Bit: Pull straight out once jaws open 1/8″. If stuck, tap the chuck’s side gently with a plastic mallet while twisting. Never hammer the bit shank—this dents the chuck interior.
- Insert the New Bit Correctly: Slide the shank in until ¾ is seated. Ensure it’s straight—if it wobbles now, it’ll wobble when drilling. Use bits with undamaged shanks; nicks prevent secure gripping.
- Tighten Without Stripping: Turn the collar clockwise until hand-tight. For high-torque tasks (like masonry), give a final 1/4-turn with channel-lock pliers only on the knurled ring. Over-tightening cracks chuck gears.
Why Your Keyless Chuck Won’t Release (And How to Fix It)
- Debris-jammed jaws: Blow compressed air into the chuck while rotating it open. Use a toothpick to dislodge metal filings stuck in threads.
- Cross-threaded collar: If the chuck turns but jaws don’t open, the internal sleeve is misaligned. Hold the drill vertically and sharply tap the chuck’s front with a rubber mallet while twisting counter-clockwise.
- Worn internal gears: If the collar spins freely without gripping, the chuck needs replacement—don’t force it.
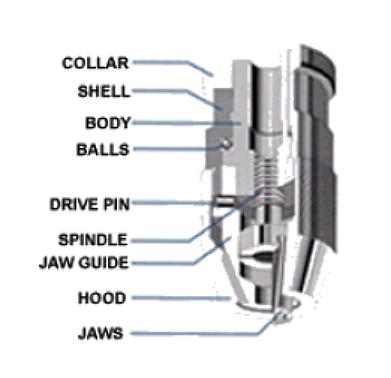
Replace Drill Bits in Keyed Chucks Without Losing the Key
Keyed chucks grip harder for heavy-duty drilling but require precision. One forgotten step turns this into a hazard:
- Insert the Chuck Key Properly: Match the key’s square end to any of the three holes. Push it in fully until it clicks—you’ll feel resistance when engaged.
- Loosen the Chuck: Place the drill on a stable surface. Turn the key counter-clockwise while applying downward pressure. Rotate 1/4-turn, move to the next hole, and repeat. This prevents uneven jaw wear.
- Swap Bits Without Dropping Them: Pull the old bit straight out. Insert the new bit until it bottoms out—never force it. Misaligned bits cause dangerous wobble.
- Tighten in a Star Pattern: Insert the key into one hole and turn clockwise 1/2-turn. Move to the opposite hole, then the third. Repeat until snug. This centers the bit and maximizes grip.
- Remove the Key Immediately: This is critical. Leaving the key in transforms it into a lethal projectile the moment you pull the trigger. Store it on the drill’s key holder.
Why Keyed Chucks Fail (And How to Avoid Costly Repairs)
- Stripped key holes: Caused by using worn keys or hammering the key. Replace the chuck if holes are rounded—the cost is less than a new drill.
- Uneven tightening: Skipping the star pattern makes bits wobble. Always tighten all three holes equally.
- Rusted threads: Apply one drop of non-greasy lubricant (like Tri-Flow) annually to the chuck’s moving parts—not inside the jaws.
Emergency Fixes for Stripped, Frozen, or Wobbling Chucks
When standard methods fail, these field-tested tactics save your project—and your drill:
Stuck Chuck Won’t Budge?
* The Rubber Mallet Method: Hold the drill vertically with jaws down. Tap the chuck’s side firmly with a rubber mallet while twisting counter-clockwise. The vibration breaks corrosion bonds.
* Penetrating Oil Trick: Spray PB Blaster around the chuck base where it meets the drill body. Wait 15 minutes, then try loosening. Wipe excess oil before drilling.
Bit Wobbles After Tightening?
* Clean the Jaws: Open the chuck fully. Shine a flashlight inside—you’ll see metal shavings jammed in the threads. Use a dental pick to remove debris, then blow with compressed air.
* Check Bit Shank Damage: Roll the bit on a flat surface. If it wobbles, the shank is bent. Use only straight-shank bits; even slight bends cause dangerous vibration.
Chuck Spins But Won’t Tighten?
* Internal Gear Failure: If the collar turns but jaws don’t move, the chuck is stripped. Replacement is cheaper than repair: Unscrew the old chuck (it threads onto the spindle), screw on a new one, and secure with the retaining screw inside the chuck.
Pro Tips That Prevent 90% of Bit Replacement Failures

Avoid these rookie mistakes that destroy chucks and waste time:
- Use Hex Shank Bits for Maximum Grip: Standard round shanks slip under high torque. Switch to 1/4″ hex shank bits—they lock into chucks like a socket wrench, eliminating slippage. (Just ensure your chuck jaws are clean and undamaged.)
- Never Use Impact Tools on Drill Chucks: Hammer drills need firm tightening, but an impact driver’s sudden torque cracks chuck gears. Hand-tighten only.
- Store Bits Properly: Keep bits in a foam organizer. Dented shanks won’t seat fully, causing slippage mid-drill. Discard any with nicks or bends.
- Apply Chuck Maintenance Annually: One drop of non-petroleum lubricant on the chuck’s moving parts prevents seizure. Wipe excess to avoid attracting dust.
Critical Safety Warnings Ignored by 7 in 10 DIYers
These shortcuts cause ER visits—never skip them:
- Battery Removal Isn’t Optional: Even “unplugged” cordless drills can fire if the battery remains inserted. Always eject the battery pack before bit changes.
- Chuck Keys = Death Traps: Leaving a key in a keyed chuck caused 3 documented fatalities in 2022. Store it on the drill’s holder immediately after use.
- Wobbling Bits Demand Immediate Action: A 1/16″ wobble at 1,000 RPM generates 15+ pounds of lateral force. Stop drilling, clean the chuck, and reseat the bit—forcing it risks shattering the bit.
Replacing a drill bit takes seconds when you know the drill-specific tactics. Keyless chucks demand clean jaws and hand-tightening without over-torquing; keyed chucks require star-pattern tightening and immediate key removal. Now when your bit jams mid-drill, you’ll know exactly how to replace drill bits safely—no panic, no stripped gears, no ruined projects. For frequent bit changers, invest in a quick-change hex adapter to bypass the chuck entirely. Keep your chuck clean, your bits straight, and your safety glasses on: these small habits prevent 95% of drill failures. Ready for more? Master drill bit selection next—using the wrong bit type causes 40% of chuck damage.


