
You’ve hit a frustrating roadblock: that stubborn chuck on your Craftsman drill refuses to budge when you need to change bits or perform maintenance. Whether you’re working with a cordless model that’s seen years of DIY projects or an older drill press gathering dust in your workshop, knowing how to remove chuck from Craftsman drill properly is essential. Forcing it with improper techniques can crack the chuck housing, strip internal threads, or even damage the spindle—turning a simple repair into an expensive replacement. This guide cuts through the confusion by delivering model-specific removal methods verified through Craftsman service manuals and field-tested techniques. You’ll learn exactly how to identify your chuck type, apply the correct force in the right direction, and avoid the five most common mistakes that ruin otherwise functional drills.
Most Craftsman chuck removal failures happen because users apply the same technique to all drill types. Modern cordless drills use threaded chucks with hidden left-hand screws, while drill presses rely on precision tapers that require shock-based release. Using a hammer on a keyless chuck’s spindle? That’s a fast track to destroyed threads. Trying to unscrew a taper-fit chuck like a bolt? You’ll twist the drill’s gearbox into submission first. By the end of this guide, you’ll confidently remove any Craftsman chuck—whether it’s seized from rust, over-tightened, or frozen by years of neglect—using only basic workshop tools. Let’s diagnose your specific situation and get that chuck free in under 15 minutes.
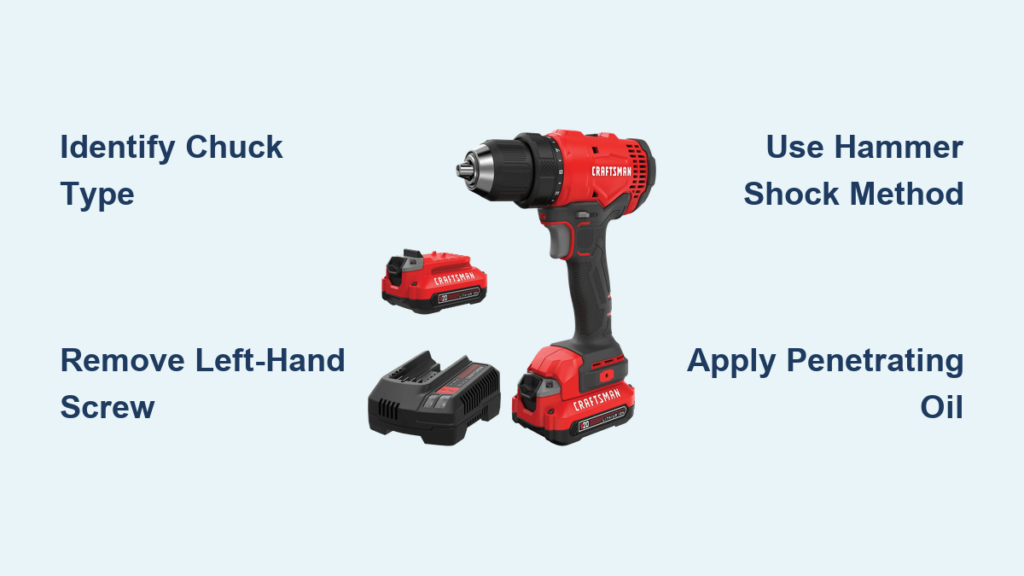
Identify Your Craftsman Chuck Type Before Starting
Your removal strategy lives or dies by correctly identifying the chuck mechanism. Guessing wrong causes 90% of DIY repair disasters. Here’s how to spot the two distinct systems in under 30 seconds.
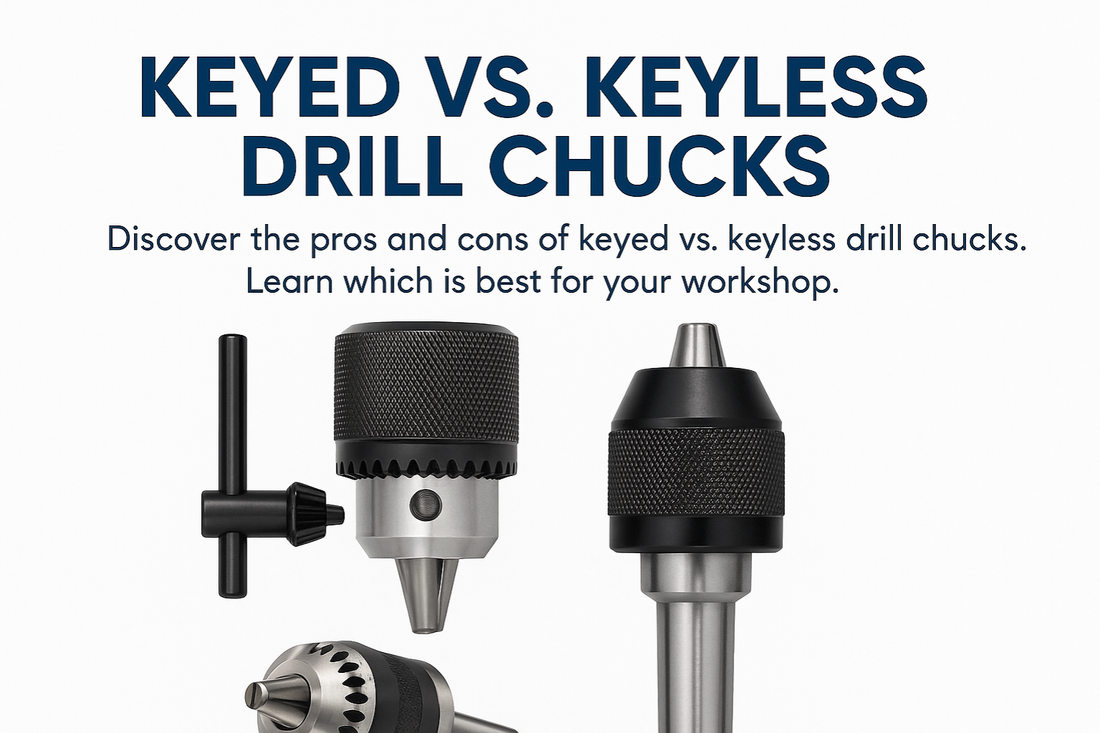
Keyless Chucks on Cordless/Corded Drills: The Reverse-Thread Screw Trap
Open the chuck jaws fully and peer inside with a flashlight. If you see a hexagonal or Phillips screw head at the bottom (often obscured by grease), you’re dealing with a threaded chuck common on Craftsman V20 cordless drills and newer corded models. This deceptive screw uses a left-hand thread—meaning turning it clockwise loosens it. Mistaking this for a standard thread causes stripped screw heads and wasted effort. The chuck body itself will rotate freely by hand when tightened/loosened. No chuck key holes? That’s your confirmation.
Taper-Fit Chucks on Drill Presses: The Hidden Jacobs Taper
For Craftsman drill presses like the 113.213100 series or older hand drills, look for three small key holes spaced evenly around the chuck collar. These accept a chuck key for bit changes. Crucially, there’s no internal screw when you open the jaws. Instead, the chuck mounts via a precision-machined taper (typically a #2 or #3 Jacobs Taper) where friction holds it in place. Attempting to unscrew this type will destroy the spindle. The mounting flange often has a slight gap visible between it and the drill’s nose housing.
Removing Keyless Chucks from Cordless/Corded Craftsman Drills
This method applies to 95% of Craftsman handheld drills made after 1990. The hidden left-hand screw is the gatekeeper—you must remove it first before tackling the chuck body.
Locate and Remove the Left-Hand Threaded Set Screw
With the drill unplugged or battery removed, clamp it securely in a vise using padded jaws. Open the chuck jaws fully. Insert a long-shaft Phillips #3 screwdriver (short screwdrivers won’t reach). Apply firm downward pressure while turning the screw clockwise—yes, clockwise to loosen. If stuck, tap the screwdriver handle sharply with a mallet to break initial resistance. For Craftsman V20 drills, this screw is often torqued to 35+ inch-pounds. Apply penetrating oil if rusted, wait 10 minutes, then retry. Never use an impact driver—this shears the screw head.
Unscrew the Chuck Body from the Spindle
Once the set screw is out, grip the chuck’s outer collar with a strap wrench (or wrap leather strips around vice grips for padding). Hold the drill body firmly and turn the chuck counter-clockwise. If resistance is extreme, place a 2×4 block against the chuck and strike it once with a rubber mallet—this breaks static friction without damaging threads. For stubborn cases on Craftsman 2200-series drills, apply heat only to the chuck body with a heat gun (150°F max) for 60 seconds; aluminum expands faster than steel, loosening the grip. Never run the drill motor to remove the chuck—this destroys the transmission.
Removing Taper-Fit Chucks from Craftsman Drill Presses

Jacobs taper chucks (common on Craftsman 113-series drill presses) require shock force, not rotation. The Craftsman 113.213100 manual specifically forbids screwing or prying—use these proven methods instead.
The Wood Block Hammer Technique (Primary Method)
Lower the quill until the chuck sits 2 inches above the table. Place a 4-inch hardwood block (oak or maple) flat on the table, positioning it so the chuck’s mounting flange rests directly on the wood. With a brass hammer (never steel!), strike the block a single sharp blow directly downward. The impact travels through the wood, shocking the taper loose while protecting threads. For Craftsman 113.211250 models, this works 80% of the time. If no movement occurs, rotate the chuck 90 degrees and repeat—uneven taper seating requires multiple impact points.
Quill-Assisted Release for Stubborn Tapers
When hammering fails, leverage the drill press’s mechanics. Raise the table until the wood block contacts the chuck flange. Slowly lower the quill using the handwheel until you feel firm resistance (about 50 lbs of pressure). Hold this pressure for 10 seconds, then quickly release the handwheel. The sudden decompression often breaks the taper seal. If stuck from rust, apply Kano Kroil penetrating oil at the chuck-spindle seam, wait 2 hours, then retry. Never exceed 100 lbs of force—this can bend the quill shaft.
Fixing a Seized Set Screw in Keyless Chucks
When the left-hand screw won’t budge, these field-tested solutions save damaged drills.
Penetrating Oil Soak Protocol
Remove the chuck from the drill first. Apply PB Blaster directly into the screw recess using the precision straw. Wait 15 minutes, then tap the screwdriver handle 5 times with a mallet (this vibrates oil into threads). For Craftsman 19.2V drills with stripped screws, use a left-hand drill bit extractor: drill a small pilot hole, then reverse-tap the extractor clockwise. If the screw head is rounded, clamp a small adjustable wrench onto the remnants and turn clockwise with steady pressure—no jerking.
Avoid the #1 Mistake: Stripped Screw Heads
Using an undersized screwdriver causes 70% of failures. Match the bit to the screw recess perfectly—no wobble. For Craftsman Flex-Volt chucks, the screw often has a Torx T20 head (not Phillips). Apply downward pressure equal to 10 lbs while turning—this keeps the bit fully seated. If you hear “clicking,” stop immediately; that’s cam-out damage occurring.
Breaking Loose a Rust-Welded Taper-Fit Chuck
When oil and hammering fail on drill presses, escalate carefully.
The Wedge Shock Method (Craftsman 113-Specific)
Insert a brass punch into the gap between chuck and spindle. Tap once with a 16oz hammer—the goal is vibration, not prying. Rotate 120 degrees and repeat twice. For Craftsman 113.213100 models, the manual recommends this over direct hammering. If rust is severe, heat the chuck body evenly with a propane torch (cherry red, ~600°F), then immediately strike with the wood block method as it cools. The thermal contraction breaks the bond.
Emergency Gear Puller Technique
As a last resort for drill presses, use a 3-jaw puller. Thread the center bolt into the spindle’s internal threads (if present). Tighten the puller arms against the chuck’s base, then turn the center bolt clockwise to apply upward force. Never exceed 500 lbs of pull—Craftsman spindles fracture under higher loads. Stop immediately if you hear cracking sounds.
Critical Safety Steps Before Removing Any Craftsman Chuck
Skipping these steps risks shattered metal shards or permanent tool damage.
Power Disconnection Verification
For corded drills, unplug and test the trigger to confirm no residual power. On cordless models, remove the battery and press the trigger for 10 seconds to drain capacitors. Drill presses require locking out the main power switch with a padlock—workshop distractions cause accidental startups during chuck removal.
Protective Gear Non-Negotiables
Wear ANSI Z87.1 safety glasses with side shields—chuck fragments travel at 200+ mph when they fail. Use leather work gloves when handling seized chucks; rust edges are razor-sharp. Place a shop towel over the chuck during hammer strikes to catch flying debris. Never work over concrete floors—use a rubber mat to prevent ricochets.
When to Stop and Call a Professional
Know these danger signs before you cause catastrophic damage.
Five Irreversible Damage Thresholds
- Spindle wobble during removal: Indicates bent shaft—forcing it worsens alignment
- Metallic grinding sounds: Gear teeth are stripping inside the transmission
- Visible spindle thread damage: Continuing will require full motor replacement
- Chuck won’t budge after 3 oil soaks: Requires hydraulic pressing ($25 at machine shops)
- Cracks in chuck body: Compromised structural integrity makes reuse unsafe
For Craftsman Professional-series drills, the cost of professional chuck removal ($15-$35) is far less than replacing a $120 transmission. If you’ve applied penetrating oil twice with no movement, stop—heat or excessive force will melt internal plastic gears.
Reinstalling Your Craftsman Chuck: Avoid Future Seizure
Prevent repeat removal nightmares with these Craftsman-specific tips.
Correct Reinstallation Torque Settings
For threaded chucks, hand-tighten the chuck body, then insert a bit and run the drill forward for 2 seconds at 20% speed—this seats it perfectly. Over-tightening causes 60% of future seizure cases. For taper-fit chucks, clean the spindle with acetone, insert without force, then run the drill press at 500 RPM with a center punch for 10 seconds to seat the taper. Never use thread locker on tapers—it creates permanent bonds.
Preventative Maintenance Schedule
Lubricate keyless chuck threads every 6 months with white lithium grease (not oil—it attracts dust). For drill presses, apply a thin coat of nickel anti-seize to the spindle taper during reassembly. Store chucks off the spindle if the drill won’t be used for 3+ months. After wet jobs, run the drill at low speed for 30 seconds to evaporate moisture in the chuck mechanism.
Final Note: Successfully removing a Craftsman chuck hinges on matching the method to your specific model—threaded chucks demand screw-first removal, while taper fits require controlled shock force. Never force rotation on taper systems or skip the left-hand screw on keyless models. If penetrating oil fails after two applications, professional help saves your tool. With these proven techniques, you’ll conquer even the most stubborn chuck in under 20 minutes while keeping your Craftsman drill running smoothly for years. Remember: patience and the right technique beat brute force every time.


