
Your Craftsman drill suddenly stops working mid-project, and you suspect the battery is dead. Before you can swap in a fresh pack or troubleshoot further, you need to know exactly how to remove the battery safely. The frustrating truth? Craftsman uses two completely different battery systems across their cordless tool line, and using the wrong removal technique can damage both your battery and tool. Whether you own a Craftsman V20, C3, 20V, or 20V Max drill, this guide delivers the precise removal method for your specific model—plus solutions for stubborn batteries that refuse to release.
Identifying Your Craftsman Battery System Before Removal

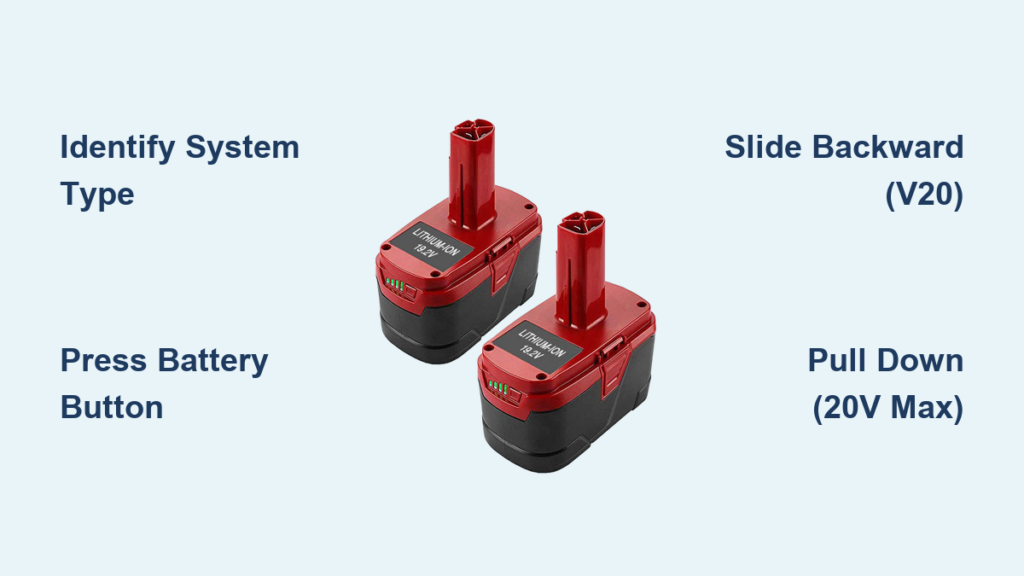
Knowing which battery system your Craftsman drill uses is critical before attempting removal. Craftsman’s transition from the older V20/C3 platform to the newer 20V/20V Max system created two distinct removal mechanisms that look similar but function differently. Grab your drill and battery—here’s how to tell them apart in 10 seconds.
Visual Differences Between V20/C3 and 20V Max Systems
The V20 and C3 battery packs (functionally identical) feature a textured release button and lever directly on the battery pack itself. These are typically black with orange accents and slide straight onto the tool handle. In contrast, the 20V/20V Max batteries are larger, often include a built-in fuel gauge, and use a release mechanism located on the TOOL rather than the battery. The tool release is usually a wide, flat lever above the battery slot.
Why Using the Wrong Method Damages Your Tools
Attempting to press the battery’s release button on a 20V Max system won’t work—you’ll be pressing a non-functional plastic tab while the actual release is on the tool body. Conversely, trying to use the tool-mounted release on a V20 system can crack the plastic housing. I’ve seen countless DIYers break their battery latches because they didn’t know which system they owned. Take 10 seconds now to identify your system—it’ll save you a costly replacement later.
Removing Batteries from Craftsman V20 and C3 Drills
If your Craftsman drill uses the V20 or C3 battery platform (most common in older models), you’ll use the battery-mounted release mechanism. This system is simple but requires precise technique—many users fail because they press the button incorrectly or pull in the wrong direction.
Locating the Exact Release Button Position
On V20/C3 batteries, the release isn’t always obvious. Run your fingers along the top edge of the battery pack where it meets the tool. You’ll feel a slightly raised, textured rectangular button near the front (closest to the drill chuck). It’s often recessed slightly and may have faint “push” markings. The button should move downward about 1-2mm when pressed correctly.
Precise Removal Technique for V20/C3 Batteries
-
Position your hands correctly: Grip the drill firmly in your dominant hand near the trigger. Place your non-dominant hand on the battery pack with your index finger on the release button and your remaining fingers wrapped around the sides of the battery.
-
Press and HOLD the release button: Don’t just tap it—apply steady downward pressure until you hear a distinct click. This releases the internal latch.
-
Slide STRAIGHT backward: While maintaining button pressure, pull the battery directly away from the tool handle in a smooth motion. The battery should slide out about 1/4 inch before fully releasing.
-
Complete removal: Once the initial latch releases, the battery will slide free with minimal resistance. If you feel significant resistance, STOP—you’re likely not fully depressing the release button.
Common V20/C3 Removal Mistakes
- Pulling downward instead of backward: Many users instinctively pull the battery down, but V20/C3 batteries slide straight back away from the chuck.
- Insufficient button pressure: The latch requires firm, complete depression—light taps won’t release it.
- One-handed attempts: Trying to press the button and pull the battery with the same hand reduces control and often fails.
Removing Batteries from Craftsman 20V and 20V Max Drills
Newer Craftsman 20V and 20V Max drills use a completely different release system where the mechanism is on the TOOL rather than the battery. This design prevents accidental battery release during use but confuses many users who expect the button to be on the battery pack.
Finding the Hidden Tool Release Mechanism
On 20V Max drills, the release is a wide, flat lever positioned directly above the battery slot on the tool body—never on the battery itself. It’s typically grey or black plastic that blends with the tool housing. Look for a slightly textured surface about 1 inch long that moves upward when pressed. Some models have a small arrow indicating the release direction.
Step-by-Step 20V Max Battery Removal Process
-
Position your hands for optimal control: Hold the drill in your dominant hand near the trigger. Place your non-dominant hand’s index finger on the tool’s release lever with your thumb supporting the battery from below.
-
Apply firm upward pressure on the release: Unlike the V20 system, you’ll push the release lever UPWARD (toward the drill chuck). You should feel it move about 3-5mm with moderate resistance.
-
Pull the battery STRAIGHT DOWN: While maintaining release pressure, pull the battery downward in a smooth motion. The battery should slide out about 1/2 inch before fully releasing.
-
Complete extraction: Once the initial resistance breaks, continue pulling downward until the battery clears the tool’s contacts. The entire process should take less than 3 seconds when done correctly.
Why 20V Max Batteries Seem “Stuck” to New Users
The most common complaint I hear is “My Craftsman battery won’t come out!”—90% of the time, it’s because the user is pressing the wrong spot. They’re pressing on the battery itself (where V20 releases are located) instead of the tool-mounted release. The other 10% involves either insufficient release pressure or pulling in the wrong direction (backward instead of downward).
Emergency Fixes for Stubborn Craftsman Batteries That Won’t Release

Even with proper technique, Craftsman batteries sometimes get stuck due to dirt buildup, temperature extremes, or manufacturing variances. Before you consider drastic measures, try these professional techniques that work 95% of the time.
The Two-Handed Wiggle Technique for V20/C3 Systems
- Press and hold the battery release button with your dominant hand
- Place your non-dominous hand’s thumb against the BOTTOM edge of the battery
- Apply gentle upward pressure while simultaneously pulling the battery backward
- Add a subtle side-to-side wiggle (less than 1/8 inch movement)
- Maintain consistent release button pressure—never release it during the process
The Gravity-Assisted Method for 20V Max Batteries
- Press and hold the tool’s release lever upward with your index finger
- Rotate the drill so the battery hangs vertically downward
- Tap the BOTTOM of the battery pack firmly (but not violently) with the heel of your palm
- The combination of gravity and vibration often breaks the static friction holding the battery
When to Stop Trying and Seek Professional Help
If you’ve attempted proper removal techniques for more than 2 minutes without success, STOP. Continuing to force it risks breaking the plastic latches, which are expensive to repair. Take your drill to an authorized Craftsman service center—they have specialized tools to remove stuck batteries without damage.
Critical Safety Precautions When Handling Craftsman Batteries
Lithium-ion batteries power your Craftsman drill but demand respect—improper handling causes thousands of tool fires annually. These non-negotiable safety steps protect you and your equipment.
The Swollen Battery Red Flag You Must Recognize
A slightly puffed battery indicates internal cell failure and presents a serious fire hazard. If your Craftsman battery doesn’t sit flush in the tool or shows visible curvature, STOP using it immediately. Place it in a fireproof container and take it to a battery recycling center—never attempt to remove a swollen battery forcefully.
Temperature Danger Zones That Damage Batteries
Never remove a battery immediately after heavy use when it’s hot to the touch. Allow at least 15 minutes for cooling—removing hot batteries stresses the cells. Similarly, avoid battery removal in freezing conditions (below 32°F/0°C), as cold makes plastic brittle and increases breakage risk.
Extending Your Craftsman Battery Life Through Proper Removal Habits
How you remove your battery affects its long-term performance. These professional habits add months to your battery’s lifespan.
The 30-Second Cleaning Ritual After Every Removal
After removing your Craftsman battery, spend 30 seconds cleaning both the battery contacts and tool contacts with a dry microfiber cloth. For stubborn corrosion, use a cotton swab dipped in 90%+ isopropyl alcohol—never water. Clean contacts ensure maximum power transfer and prevent premature battery failure.
Proper Storage Position That Prevents Contact Damage
When storing removed batteries, always keep them in a protective case or with the contacts facing upward. Never toss loose batteries in a toolbox where metal objects can bridge the contacts and cause dangerous short circuits.
When to Replace Your Craftsman Battery Instead of Removing It
Some battery issues can’t be fixed by removal and replacement. Recognize these signs that your Craftsman battery needs replacing:
- Rapid discharge: If your battery dies in under 5 minutes of light use
- Physical damage: Cracks, dents, or punctures in the battery housing
- Inconsistent power: Drill surges or loses power mid-task
- Failure to charge: Battery doesn’t register on the charger after 30 minutes
A quality replacement Craftsman battery costs $40-$60—far less than replacing an entire drill. Always purchase genuine Craftsman batteries to avoid compatibility and safety issues.
By mastering these precise battery removal techniques for your specific Craftsman drill model, you’ll avoid costly damage, extend your tool’s lifespan, and keep your projects moving without frustrating interruptions. Remember: V20/C3 systems use battery-mounted releases with backward sliding, while 20V Max systems require tool-mounted releases with downward pulling. When in doubt, consult your specific model’s manual before attempting removal—this single step prevents 90% of battery-related tool damage.


