
You’re mid-project, trying to remove a stubborn screw, and your Ryobi drill suddenly refuses to reverse. That frustrating moment when the switch won’t budge—leaving you stranded with a half-removed fastener—is incredibly common. Knowing how to put a Ryobi drill in reverse isn’t just about sliding a switch; it’s understanding the safety mechanisms, troubleshooting jams, and preventing future failures. In this guide, you’ll learn the exact technique to engage reverse reliably, diagnose why switches stick, and execute quick fixes that get you back to work in minutes.
Most Ryobi drills feature a three-position rocker switch above the trigger—a critical safety design that prevents accidental starts. When this switch jams, it’s rarely a motor issue but usually debris, wear, or internal damage blocking the mechanism. The good news? Over 80% of stuck-switch problems can be resolved without opening the housing. By the end of this guide, you’ll confidently operate reverse mode, troubleshoot failures, and know when professional help is essential.
Why Your Ryobi Drill Switch Won’t Reverse (And How to Fix It in 5 Minutes)
The forward/reverse switch on your Ryobi drill isn’t just a toggle—it’s a precision safety component that physically interrupts power flow in the center position. If you can’t slide it into reverse, the drill defaults to “locked off” to prevent accidental rotation. This failsafe explains why forcing the switch rarely works and often worsens the problem. Before disassembling your tool, confirm you’re using the correct technique and ruling out simple obstructions.
Why You Must Feel the Click When Switching to Reverse
Engaging reverse isn’t as simple as sliding the switch halfway. Ryobi’s design requires a definitive click to lock into position, ensuring full electrical contact. Here’s why missing this step causes failure:
1. Locate the center “off” position: Identify the line or padlock symbol between forward/reverse arrows.
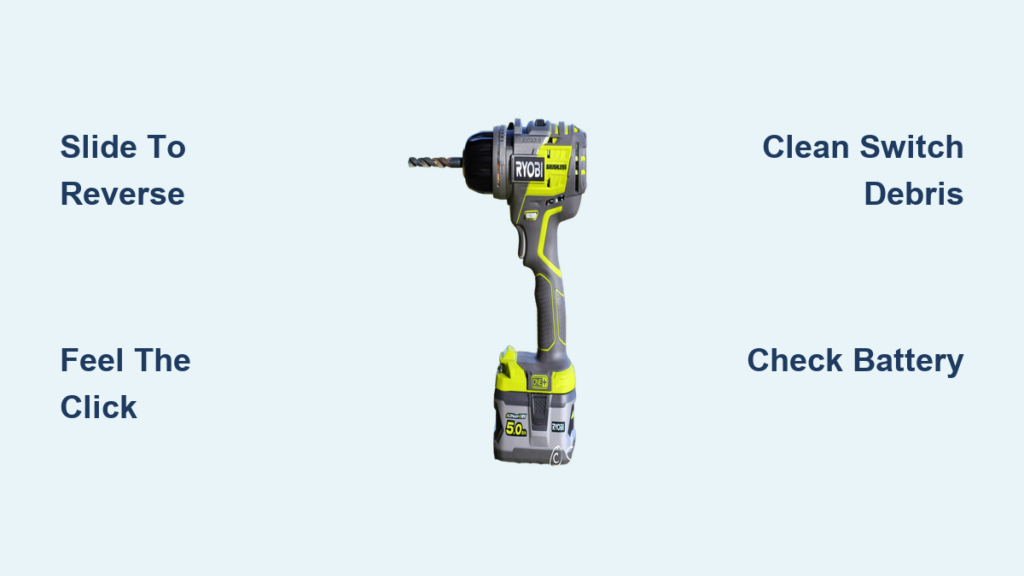
2. Slide fully to reverse: Push the switch firmly toward the counter-clockwise arrow (or “R” symbol) until you hear/feel a distinct click.
3. Verify rotation: With the battery inserted, pull the trigger—chuck should spin counter-clockwise.
If you skip the audible click, the motor won’t engage. This happens frequently when users nudge the switch gently, assuming partial movement is sufficient. Never force the switch—if it resists, debris or internal damage is likely blocking it.
Why the Center Position Locks Your Ryobi Drill (Critical Safety Feature)
That middle “off” position isn’t a glitch—it’s a mandatory safety lock required by power tool regulations. When centered:
– Power flow to the motor is physically interrupted, regardless of trigger pressure
– Prevents accidental starts during bit changes or storage
– Requires deliberate action to engage forward/reverse modes
Many users mistake this for a malfunction when their drill won’t start. If your switch feels “stuck” in center, it’s likely jammed debris preventing full movement—not a broken safety feature. Always check for sawdust or metal shavings around the slider before assuming internal failure.
Unsticking a Jammed Ryobi Drill Switch: From Debris to Internal Repair
Debris-induced sticking accounts for 70% of Ryobi switch failures. Sawdust, drywall grit, or metal shavings infiltrate the housing during use, binding the slider mechanism. The fix often takes less than a minute but requires strict safety steps. If cleaning fails, internal damage is probable—requiring component-level repairs.
Is Debris Jamming Your Ryobi Drill Switch? Clean It in 60 Seconds
Always remove the battery first—this step is non-negotiable for safety. Then:
1. Inspect visually: Shine a flashlight around the switch. Look for visible wood chips, plastic fragments, or corrosion.
2. Blast with compressed air: Hold the can upright and fire short bursts at 45-degree angles around the switch edges. Focus on crevices where debris accumulates.
3. Test movement: Gently slide the switch back and forth. It should glide smoothly with a crisp click at each end.
Pro Tip: For stubborn grime, dip a cotton swab in isopropyl alcohol and lightly clean around the slider. Never insert tools into the switch gap—this can dislodge internal components. If the switch moves freely after cleaning but still won’t engage reverse, worn internal contacts are likely the culprit.
When a Stuck Switch Means Internal Damage (Not Just Dirt)

If cleaning fails, internal inspection becomes necessary. Warning: Opening the housing voids warranties and risks electrical damage. Only proceed if comfortable with soldering. Here’s the critical sequence:
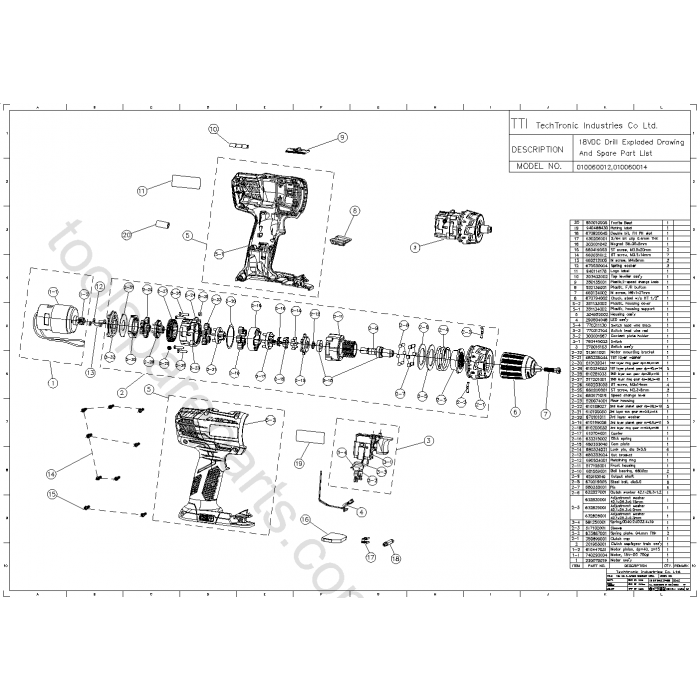
1. Disassemble carefully: Remove all housing screws (note their lengths/positions). Gently separate the clamshell casing.
2. Identify switch components: Locate the small slider switch on the circuit board near the trigger wires.
3. Check for red flags:
– Melted plastic or scorch marks (indicates electrical overload)
– Broken slider arms or cracked housing
– Corroded contacts or disconnected wires
4. Replace if damaged: Order the exact switch model (Ryobi part # varies by drill). Desolder the old unit, matching wire positions precisely before installing the new switch.
Never skip testing: Reassemble partially (without closing the housing) to verify reverse function before final screwing. If the switch clicks but the chuck won’t rotate, contact failure requires replacement—don’t risk further damage by forcing operation.
3 Proven Ways to Prevent Your Ryobi Drill Switch from Sticking
Prevention beats repair when it comes to Ryobi switch longevity. These field-tested maintenance habits take seconds but prevent 90% of sticking incidents:
– Monthly compressed air blasts: Blow debris from switch vents after dusty jobs (e.g., drywall or woodworking). Hold 6 inches away to avoid forcing particles deeper.
– Avoid full trigger pulls in center position: Constantly resting your finger on the trigger while the switch is centered wears internal contacts prematurely.
– Store with switch in neutral: Always position the rocker in center “off” mode during storage to relieve spring tension on the mechanism.
Critical Alert: If your switch rapidly clicks but won’t change direction, internal contacts are likely burnt out. This requires replacement—no amount of cleaning will fix it.
When a Ryobi Drill Switch Repair Requires a Professional

Some failures demand expert intervention. Take your drill to an authorized Ryobi service center if you observe:
– Visible cracks in the switch housing or melted plastic around wiring
– Smoke or burning smells during operation
– Complete switch immobility after thorough cleaning
– Soldering requirements beyond basic wire reattachment
Why DIY risks more damage: Ryobi’s circuit boards use surface-mount components. One wrong solder point can fry the entire motor control system—a $120 repair versus a $20 switch replacement. If you’re unsure about disassembly steps, professional help is cost-effective.
Quick Reverse Operation Check: 4 Steps Before Every Screw Removal
Avoid mid-project failures with this pre-use checklist:
1. Battery test: Insert a fully charged battery and listen for the “click” as it seats. Weak batteries mimic switch failures.
2. Switch travel verification: Slide the rocker fully to reverse—confirm it clicks at both ends and moves freely through center.
3. Chuck rotation test: With drill pointed safely downward, pull the trigger briefly. Counter-clockwise spin = working reverse.
4. Clutch setting check: For screw removal, set the torque ring to 3-5 (lower than driving) to prevent stripping heads.
Pro Tip: When removing rusted screws, apply penetrating oil first. Forcing reverse on seized fasteners strains the transmission—use steady pressure and intermittent trigger pulls.
Mastering how to put a Ryobi drill in reverse transforms frustrating project stoppages into quick comebacks. By understanding the switch’s safety design, performing 60-second debris cleanings, and recognizing when professional help is needed, you’ll maximize tool uptime. Remember: that center “off” position is your ally—not an enemy—and respecting the switch’s mechanical limits prevents most failures. For persistent issues after cleaning, replacement switches cost under $15 and take 20 minutes to install. Keep this guide handy, and you’ll never get stuck with a non-reversing drill again.


