
You’re holding a power drill, staring at a wall where a picture needs hanging, but that spinning bit feels intimidating. Whether you’re assembling furniture, mounting shelves, or tackling a weekend DIY project, knowing how to operate a drill properly transforms frustration into confidence. A single misstep—like a wandering bit or stripped screw—can ruin materials or cause injury. This guide cuts through the confusion with actionable steps to master drill operation safely and efficiently. You’ll learn precise techniques for wood, metal, and masonry, troubleshoot common failures in seconds, and avoid the top 3 mistakes that damage tools and projects.
Before you squeeze the trigger, understand that 70% of drill-related accidents stem from skipped safety steps. Your drill isn’t just a hole-puncher—it’s a precision instrument requiring material-specific settings and body mechanics. We’ll show you exactly how to select bits, control pressure, and interpret warning signs like smoking motors or “walking” bits. By the end, you’ll drill clean, splinter-free holes every time and extend your tool’s lifespan with pro-level maintenance.
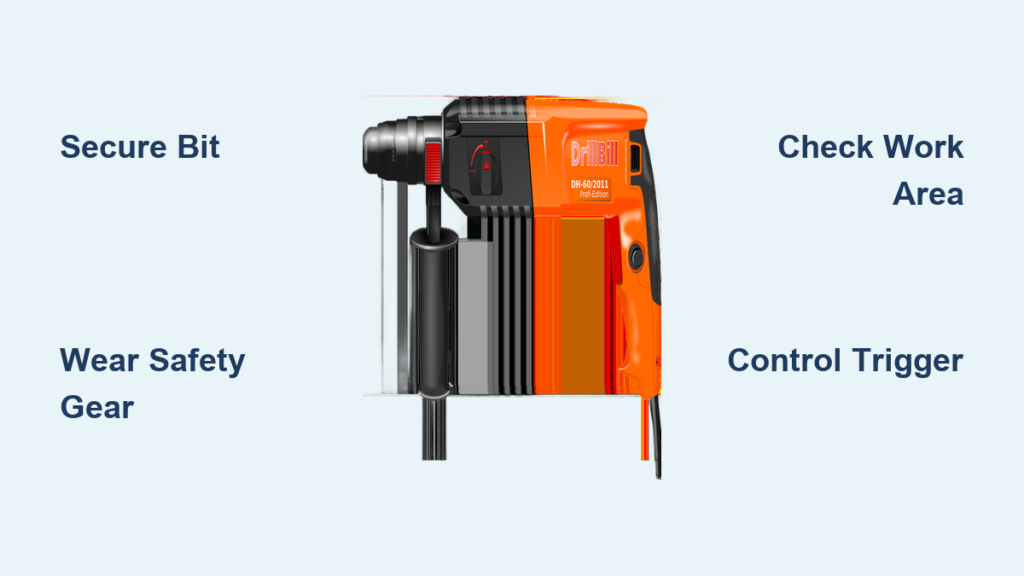
Secure Your Drill and Workspace Before Powering On
Lock the Correct Bit to Prevent Dangerous Slippage
Never assume your chuck is tight enough—loose bits cause erratic drilling and can eject at high speed. For wood projects, use brad-point bits; for metal, select high-speed steel (HSS) twist bits with a center punch starter dimple. Insert the bit shank fully into the chuck, grip the drill’s front housing firmly, and rotate the chuck sleeve clockwise until it’s hand-tight. If using a keyed chuck, tighten all three slots evenly and remove the key immediately—leaving it in risks severe injury when the drill spins. Test security by gently tugging the bit; if it moves, retighten.
Mandatory Safety Gear Checklist for Every Drilling Session
Skip eye protection just once, and flying debris could cause permanent damage. Always wear ANSI-approved safety glasses—not sunglasses or regular glasses—to shield against wood chips, metal shavings, or concrete dust. When drilling masonry, add a N95 dust mask and hearing protection for extended use. Remove rings, watches, and loose clothing that could snag the chuck, and tie back long hair. Crucially, never brace your workpiece with your hands—clamp it securely to a bench or use a vise. A spinning workpiece can wrench control from you in milliseconds.
Critical Pre-Drill Inspection: Avoid Hidden Hazards
Inspect your drill’s power source first: check corded models for frayed wires and plug into a GFCI outlet, or ensure cordless batteries are fully charged and undamaged. Next, scan the drilling path with a stud finder to detect live wires, pipes, or rebar—these lurk 12–16 inches from outlets in walls. For concrete, use a multi-sensor detector since standard stud finders miss metal. Finally, verify your drill’s trigger response: pull it slowly with no bit installed to confirm smooth speed control. If it jolts or sticks, stop and service the tool.
Perfect Your Drilling Technique for Flawless Results

Two-Handed Grip and Trigger Control for Precision
Stand with feet shoulder-width apart, dominant hand on the trigger handle, and non-dominant hand braced against the drill’s front collar. Position the bit directly over your center-punched mark, then tilt the drill slightly (about 45 degrees) to create a starter groove before straightening to 90 degrees. Squeeze the trigger gently at low speed to establish the hole—rushing causes “bit walk.” Apply steady, moderate pressure (like pushing a shopping cart), never leaning your body weight into it. For deep holes, use “peck drilling”: pull the bit out every 1/2 inch to clear chips, preventing overheating.
Material-Specific Drilling Protocols That Prevent Damage

Wood: Start with a brad-point bit to minimize splintering. Drill at medium speed, pulling the bit out every 2 inches to eject sawdust. For thick boards, place scrap wood behind the workpiece to eliminate exit tear-out.
Metal: Always use a center punch to create a starter dimple. Apply cutting oil liberally, drill at low speed (under 500 RPM), and back out frequently to clear metal shavings.
Masonry: Switch to hammer mode with an SDS carbide-tipped bit. Apply firm pressure but let the hammer action do 90% of the work—forcing it stalls the motor. Clear dust every 30 seconds with a bulb blower.
Tiles: Start at 45 degrees with a diamond-tipped bit, then gradually straighten as the groove forms. Keep the area wet with a spray bottle to cool the bit.
Screw Driving Without Stripping Heads or Splitting Wood
Set the directional switch to “forward,” select a screwdriver bit that fits snugly (no wobble), and adjust the clutch to a low setting (3–5 for small screws). Pre-drill pilot holes near wood edges to prevent splitting—use a bit 70% the screw’s core diameter. Begin driving slowly to seat the screw, then increase speed until the clutch disengages (a distinct “click” sound). For removal, switch to reverse and apply upward pressure to counteract downward force. Never use an impact driver for drilling—it shatters standard bits.
Fix Common Drill Failures in Under 60 Seconds
Stop Bit Wander with This Starter Hole Trick
When your bit skates across smooth surfaces (common on metal or tile), create a micro-guide hole: Press a center punch firmly into your mark, or tap a nail into wood with a hammer to make a 1/16-inch dimple. For stubborn materials, drill a pilot hole with a smaller bit (1/8 inch for a 1/4-inch final hole) before switching sizes. If bits still wander, switch to a brad-point design—the sharp center spur bites instantly.
Cool an Overheating Drill Before Permanent Damage Occurs
Smoking or burning smells mean immediate action: release the trigger and let the bit cool for 2 minutes. For metal, reapply cutting oil and reduce speed by 30%. In wood, clear packed chips from the flutes with a stiff brush. With masonry, pull the bit out every 15 seconds to expel dust. If overheating persists, the bit is likely dull—replace it. Continuing to drill risks melting motor windings.
Repair a Loose Chuck in 3 Simple Steps
If the chuck spins freely without gripping bits, unplug the drill and remove the bit. Tap the chuck gently on a wooden surface to dislodge debris, then clean the jaws with a dry toothbrush. Reinsert the bit and tighten fully. If it still slips, the chuck jaws are stripped—replace the entire chuck assembly (a 10-minute fix with online tutorials). Never operate with a compromised chuck.
Restore Power When the Drill Stalls Under Pressure
Cordless drills often stall due to low batteries—swap in a fresh one or recharge for 15 minutes. For corded models, check if other high-draw tools (like saws) share the circuit; move to a dedicated outlet. If the problem continues, inspect carbon brushes (replace if worn below 1/4 inch). Always match bit size to material hardness—a 1/2-inch bit in concrete requires more torque than your drill can deliver.
Advanced Techniques for Professional-Quality Finishes

Countersink Holes for Invisible Screw Heads
Use a combination countersink bit to drill two concentric holes: a narrow pilot hole for the screw shaft, followed by a wider conical recess for the head. Set the clutch to “2” to avoid over-driving. For wood, drill until the countersink’s stop collar touches the surface—this creates a perfectly flush finish without manual sanding.
Drill Perfect Angled Holes with a Guide Block
Clamp a scrap wood block against your workpiece at the desired angle (e.g., 45 degrees for picture frame miters). Drill through the block into the material—the block acts as a physical guide to maintain consistent angle. For precision, use a drill guide attachment with adjustable sleeves.
Eliminate Back-Side Splintering on Through-Holes
Place sacrificial plywood tightly against the drill’s exit point. As the bit penetrates, it cuts cleanly into the backing board instead of tearing out wood fibers. For laminate or veneer, apply masking tape over both sides of the hole location before drilling—it holds fibers in place.
Extend Your Drill’s Lifespan with 5-Minute Maintenance
After each use, remove the battery and tap the chuck downward to eject debris. Blow dust from vents using compressed air (never a cloth—fibers clog cooling ports). Monthly, apply one drop of light machine oil to the chuck’s moving parts—not inside the jaws. Store cordless drills with batteries at 40% charge in a dry case; fully drained batteries degrade 30% faster. Sharpen dull bits with a dedicated sharpener—dull bits force you to overwork the motor. Finally, replace worn carbon brushes annually; they cost $5 but prevent $50 motor repairs.
Final Note: Mastering how to operate a drill starts with respecting its power—never skip safety checks or force the tool. By using material-specific speeds, securing workpieces, and maintaining your drill, you’ll achieve cleaner holes and avoid 95% of common failures. For complex tasks like power tapping, stick to hand tools until you’ve logged 50+ successful drill projects. Keep this guide bookmarked for quick troubleshooting, and within weeks, you’ll tackle any drilling task with professional confidence.


