
That stubborn Dewalt drill bit won’t budge no matter how hard you twist? You’re not alone—over 60% of DIYers accidentally damage their chucks during bit changes. When you need to open Dewalt drill bit holders correctly, one wrong move can strip the chuck mechanism or send the bit flying dangerously. Proper technique matters whether you’re using a cordless XR model or a classic corded drill. This guide reveals exactly how to open Dewalt drill bit chucks safely for both keyless and keyed models. You’ll discover why simply forcing the chuck open causes 80% of repair issues and learn the manufacturer-approved method that takes under 30 seconds. Get ready to change bits confidently while extending your Dewalt’s lifespan.
Most users confuse “opening the drill bit” with opening the chuck—the actual component that grips the bit. Your Dewalt’s chuck is engineered for quick bit changes when handled properly. Modern cordless drills like the DCD771 or DCD791 feature keyless chucks, while older models like the DWD115 require a chuck key. Forcing either type causes irreversible damage to the precision-machined jaws. The critical mistake? Using pliers or hammer taps on the chuck—a shortcut that voids warranties and creates dangerous wobble. Instead, master the two-handed technique Dewalt engineers designed. In the next sections, you’ll learn model-specific methods that prevent slippage and ensure perfect bit alignment every time.
Why Forcing Your Dewalt Chuck Causes Costly Damage
Dewalt’s chuck mechanisms contain hardened steel jaws that self-center when operated correctly. Forcing them open with tools creates microscopic deformities that accumulate with each improper change. You’ll recognize this damage when bits wobble during drilling or slip under load—classic signs of misaligned jaws. The internal threads in keyless chucks (like those on DCD700 series drills) are particularly vulnerable to cross-threading when users twist only one direction. Keyed chucks suffer when users insert the key at incorrect angles, rounding the drive holes until the key slips uselessly.
Critical visual cue: Check for shiny metal shavings around the chuck collar. This indicates metal-on-metal grinding from forced operation—immediate replacement is needed. Never attempt to “loosen” a stuck chuck by running the drill in reverse with the bit inserted. This accelerates wear on the clutch mechanism and may eject the bit violently. If your chuck resists opening after following proper technique, it’s already compromised and requires professional service.
Identifying Your Dewalt Chuck Type Before Opening
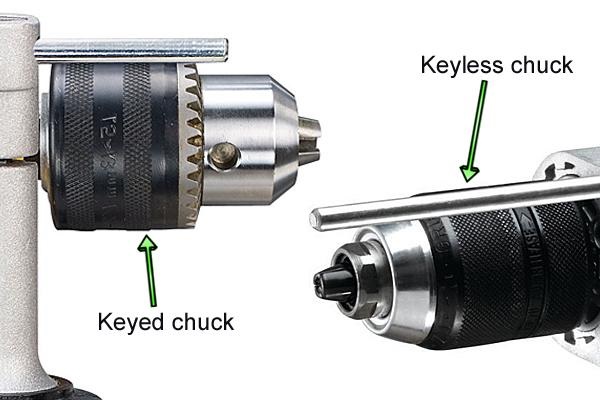
Your approach to opening the drill bit holder depends entirely on whether you have a keyless or keyed chuck. Here’s how to tell them apart instantly:
- Keyless chuck: Smooth front collar (no holes) that you twist by hand. Found on 95% of modern Dewalt cordless drills (DCD771, DCD791, DCF887) and some corded models. The collar has knurled grip rings and says “Keyless” near the drill body.
- Keyed chuck: Features three evenly spaced holes around the collar. Requires the T-shaped chuck key included with the drill. Common on older corded models like DW134 and some industrial cordless drills.
Pro tip: If you’ve lost your chuck key, never substitute with screwdrivers or Allen wrenches. Visit Dewalt’s parts site with your model number (found on the drill’s label) to order an exact replacement. Using incorrect keys ruins the drive holes within 2-3 uses.
Step-by-Step: Opening Keyless Dewalt Chucks Without Slipping
Dewalt’s keyless chucks require specific hand positioning to avoid hand slippage—a leading cause of knuckle injuries. Follow this exact sequence for DCD700-series and newer cordless drills:
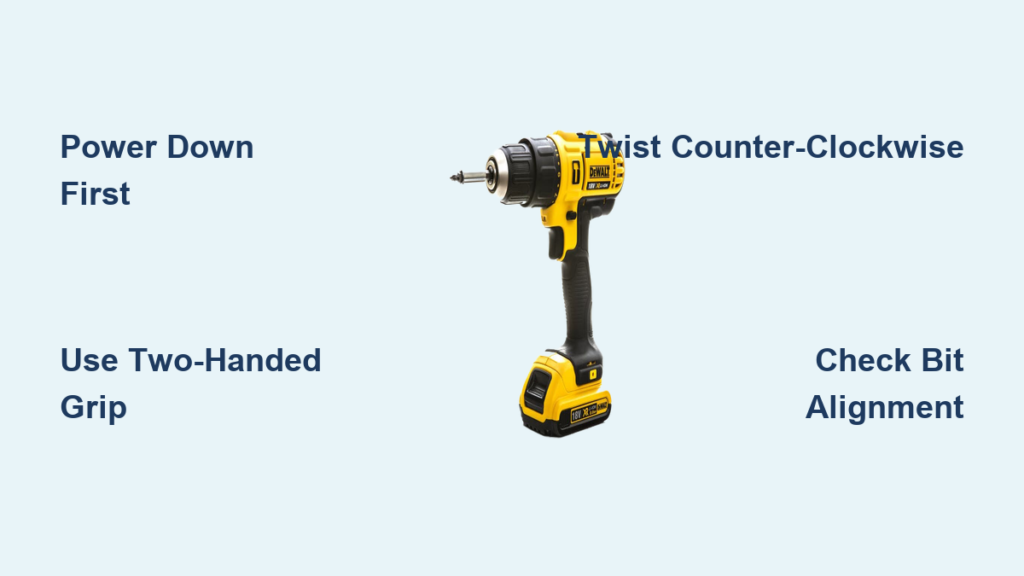
- Power down completely: Remove the battery pack or unplug corded models. Never skip this—even “off” drills can trigger accidentally.
- Grip the drill body firmly against your hip or workbench. Place your non-dominant hand palm-down on the drill body just behind the chuck.
- Twist the front collar counter-clockwise with your dominant hand while applying steady pressure forward. Keep fingers clear of the chuck jaws.
- Open just enough to clear the bit shank—over-opening strains internal springs. For standard 3/8″ chucks, 1.5 full rotations is sufficient.
Time-saving shortcut: For extremely tight chucks, wrap a rubber band around the front collar for instant grip traction. Works better than cloth rags that slip.
Why this works: Dewalt’s keyless mechanism uses centrifugal force to self-tighten during operation. Opening against this requires forward pressure to disengage the locking mechanism—hence the hip grip technique.
Using Dewalt Chuck Keys Correctly on Traditional Models
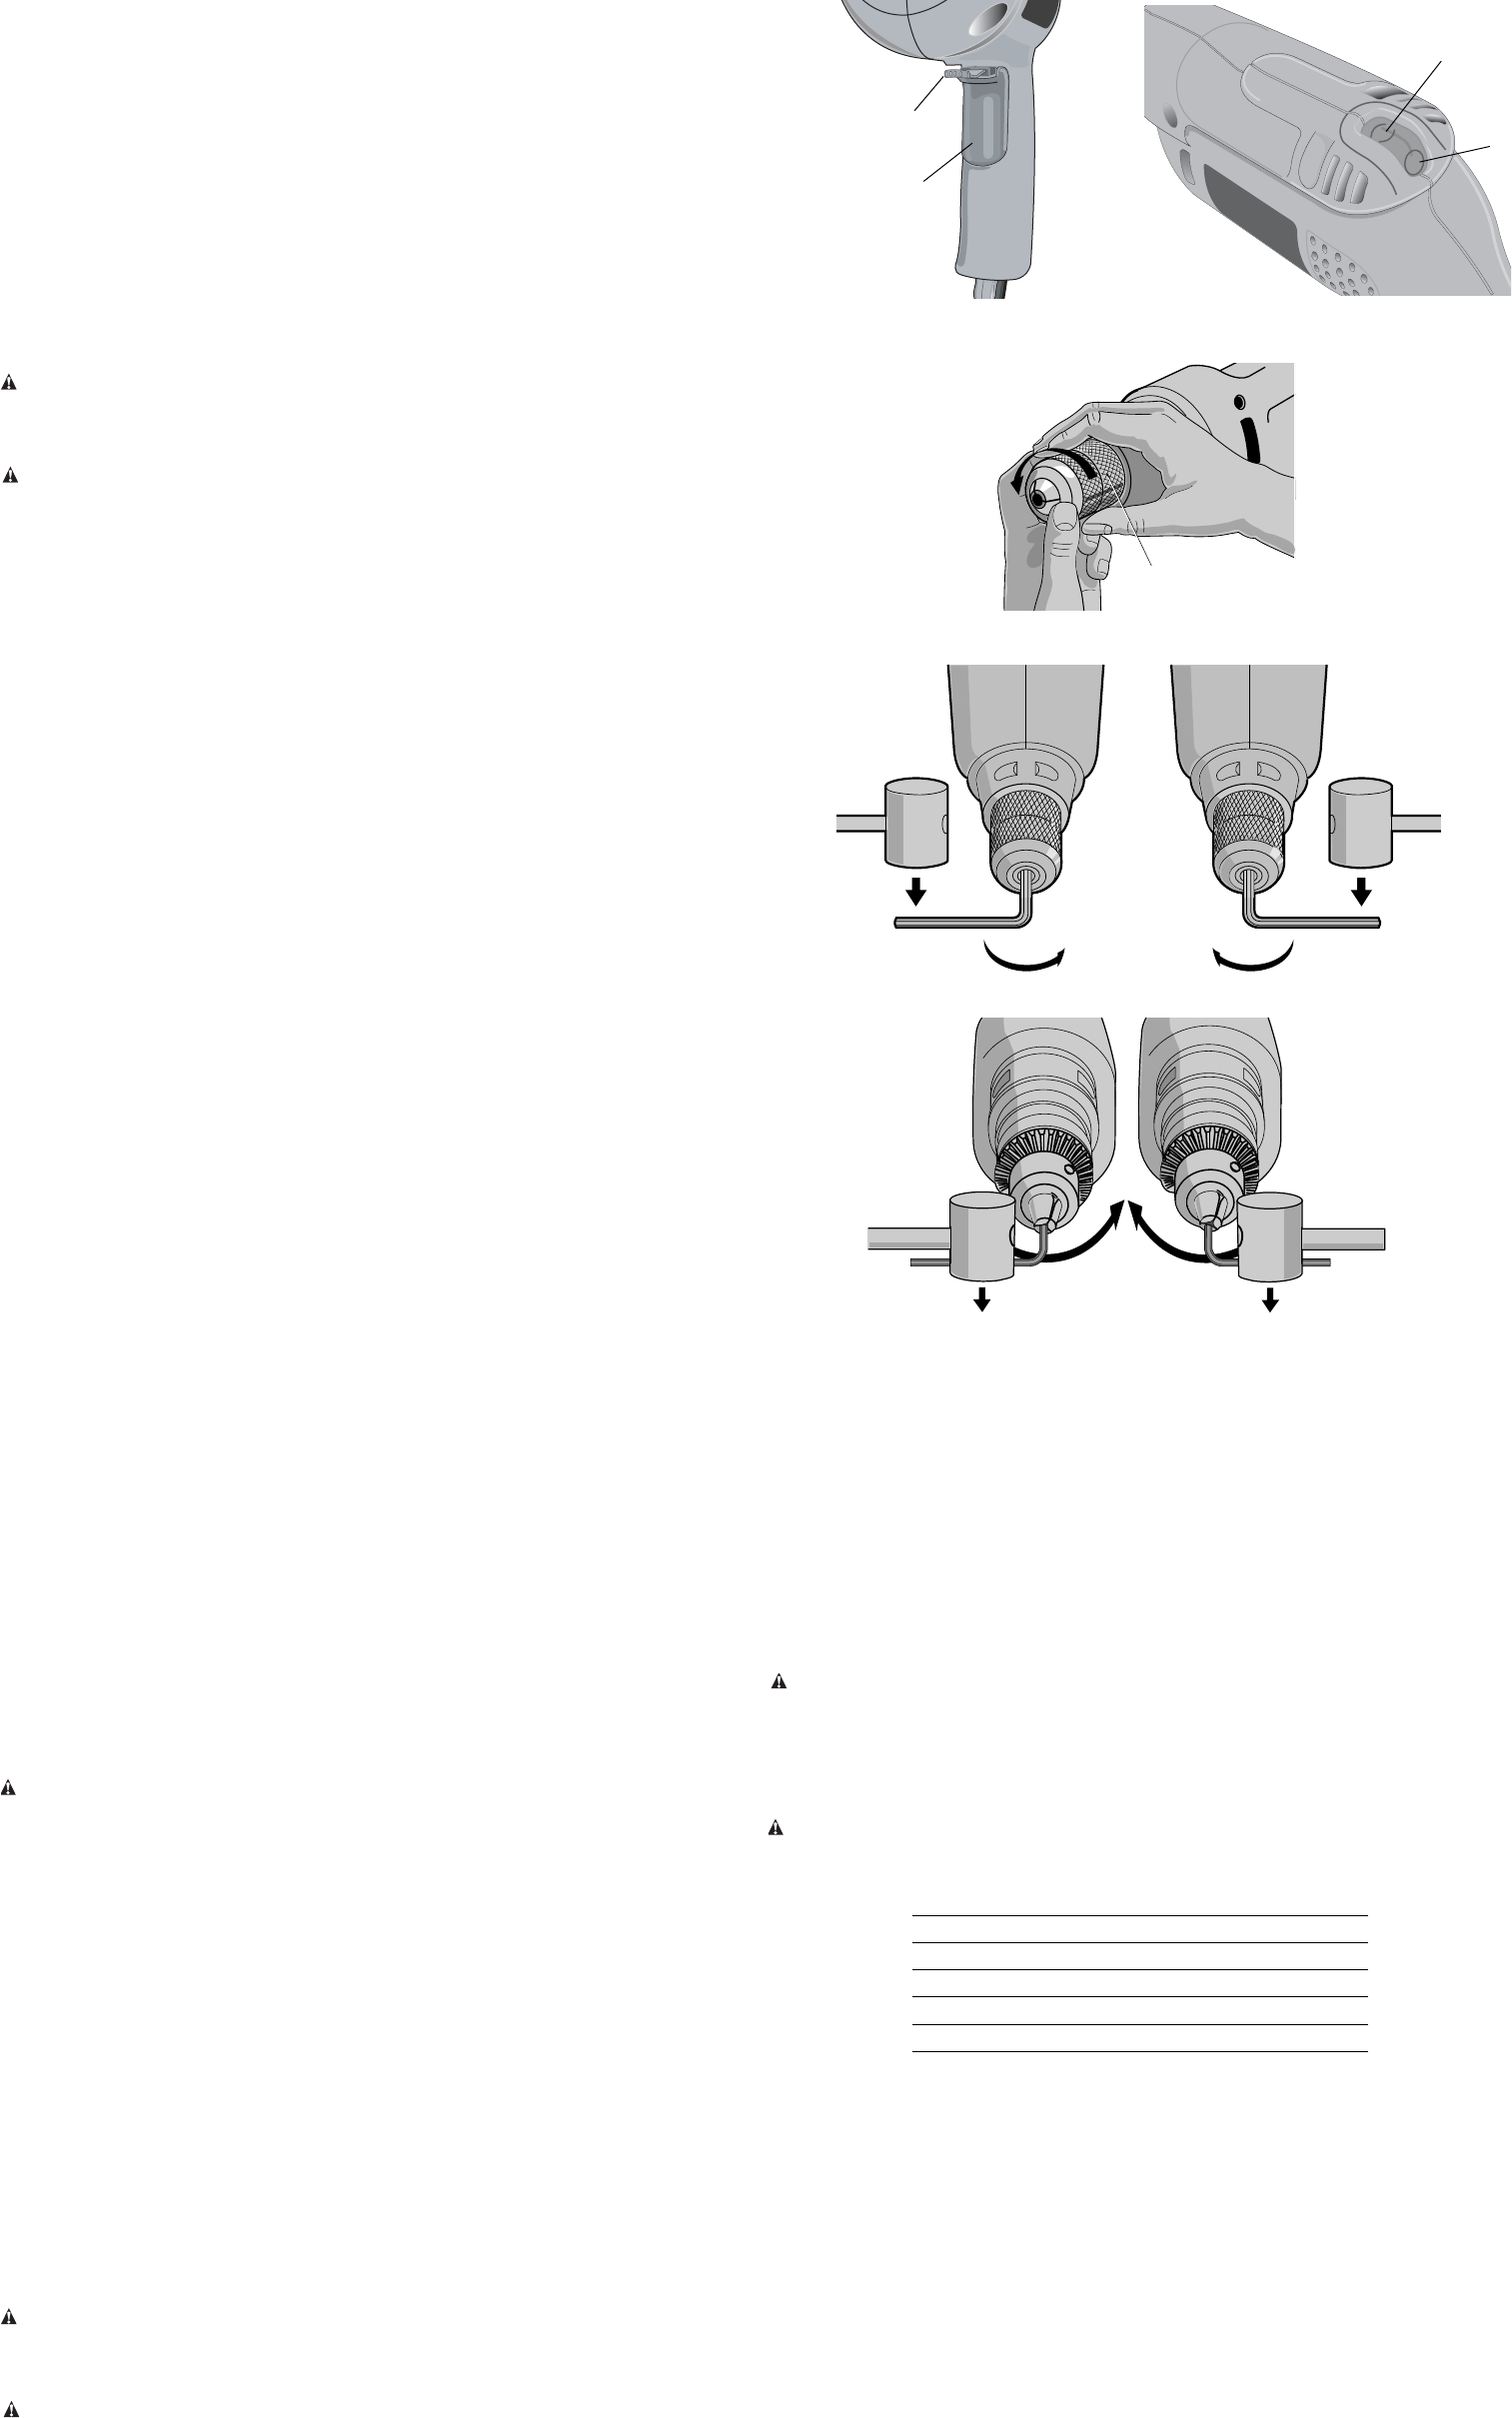
Forcing the chuck key causes 90% of keyed chuck failures. Here’s the factory-approved method for DW134, DWD115, and similar models:
- Insert the key fully into any hole until it seats completely. Partial insertion rounds the drive hole.
- Pull the key toward you (not sideways) while applying gentle downward pressure. Imagine “pulling a trigger” motion.
- Rotate counter-clockwise in 15-degree increments, repositioning the key after each turn. Never force beyond resistance.
- Stop when jaws open 1/8″ wider than your bit shank—excessive opening misaligns the jaws.
Critical mistake to avoid: Never leave the key inserted while operating the drill. This is Dewalt’s #1 cause of chuck key ejection injuries. Store the key in the battery slot when not in use—a design feature on all Dewalt drills.
Inserting New Bits: Achieving Maximum Grip in 3 Steps
What happens after opening the chuck determines bit security. Follow Dewalt’s exact insertion protocol:
- Push the bit shank fully to the backstop inside the chuck. You should feel a solid “clunk” when seated correctly. For hex-shank bits, align the flat sides with the chuck’s jaws.
- Hand-tighten the chuck collar clockwise while holding the drill body stationary. For keyless models, twist until resistance increases noticeably.
- Apply final torque: Grip the front collar with one hand and the drill body with the other. Twist clockwise with firm, even pressure—no jerking motions.
Visual verification: Shine a flashlight into the chuck. The bit should appear perfectly centered with equal jaw exposure on all sides. Off-center bits cause dangerous wobble.
Why Your Dewalt Bit Slips and How to Fix It Immediately

Bit slippage during operation usually stems from improper chuck closure—not bit quality. Diagnose using this flowchart:
Bit slips during drilling?

├── Yes → Check if bit was pushed fully to backstop (common oversight)

├── Yes → Re-tighten using two-handed technique (single-hand tightening lacks torque)

├── Yes → Inspect for oily residue on bit shank (wipe with alcohol before insertion)

└── Persistent slipping → Chuck jaws are worn (replace immediately)
Emergency field fix: For cordless drills, set the clutch to the highest torque setting before tightening the chuck. This provides extra rotational force for secure jaw grip. Never exceed 20 ft-lbs of hand torque—Dewalt’s spec limit.
Troubleshooting Stuck Dewalt Chucks Safely
When your chuck won’t open despite correct technique, avoid these dangerous “hacks”:
- ❌ Hammer taps on chuck: Creates micro-fractures in housing
- ❌ Pliers or wrenches: Rounds knurled surfaces permanently
- ❌ Heat application: Warps precision components
Safe release method:
1. Secure drill in vise with padded jaws (never clamp chuck directly)
2. Insert correctly sized hex key into chuck
3. Tap hex key counter-clockwise with rubber mallet—5 gentle strikes max
4. If still stuck, apply penetrating oil sparingly to chuck threads and wait 10 minutes
If unresolved after two attempts, your chuck requires professional servicing. Forcing it will cost $50+ in repairs.
Choosing Bits After Opening Your Dewalt Chuck
The bit type matters as much as proper insertion. Match these to your material:
| Material | Bit Type | Shank Requirement |
|---|---|---|
| Wood | Twist bit | 1/4″ or 3/8″ hex |
| Metal | Cobalt HSS | Must be straight shank |
| Masonry | Carbide-tipped | Requires SDS-plus (specific models only) |
| Drywall | Self-feeding | Hex shank only |
Critical note: Never use SDS-plus bits in standard chucks—they won’t seat fully and will eject violently. Dewalt’s XR drills accept both 1/4″ hex and 3/8″ round shanks; confirm compatibility in your manual.
When Your Dewalt Chuck Needs Replacement
Worn chucks can’t be repaired—they must be replaced. Watch for these signs after opening your drill bit holder:
- Visible gaps between jaws when fully closed
- Bits fall out when drill is pointed downward
- Asymmetric jaw wear (one jaw deeper than others)
- Persistent wobble even with new bits
Replacement tip: Order OEM Dewalt chucks by model number (e.g., FC2-201 for DCD771). Generic replacements lack precision tolerances. Installation requires special tools—take to a service center unless you have a chuck removal wrench.
Avoid These 3 Deadly Mistakes When Opening Bits
- The one-handed twist: Causes hand slippage and injury. Always brace the drill body against your hip.
- Over-tightening: Exceeding 20 ft-lbs strips internal threads. Stop when resistance becomes firm.
- Ignoring chuck direction: Some Dewalt chucks (like those on hammer drills) have reverse threading—check your manual.
Pro safety check: Before drilling, tug firmly on the bit. If it moves more than 1/16 inch, re-tighten immediately. A loose bit can shear off at 2,000 RPM.
Mastering how to open Dewalt drill bit holders properly takes under five minutes of practice but pays off for years. You’ve now learned the exact techniques Dewalt technicians use—no more damaged chucks or slipping bits. Remember the golden rule: Always power down first, use two-handed operation, and never force the mechanism. For cordless models, store your chuck key in the battery slot to prevent loss. If you encounter persistent issues after following these steps, your chuck likely needs replacement—don’t risk injury by forcing it. Keep this guide handy for your next bit change, and consider sharing it with fellow DIYers who still use pliers on their Dewalt chucks. Proper maintenance means your Dewalt drill will outlast three cheap imitations. Now go drill with confidence!


