
You’re ready to tackle a project, but your drill chuck refuses to open—no amount of twisting seems to work. This common frustration affects DIYers and professionals alike when metal chips jam the mechanism, corrosion sets in, or a bit was tightened just a bit too aggressively. Before you write off your trusty drill, know that most stuck chucks can be freed with the right approach. Whether you’re dealing with a keyless chuck on your cordless drill or a stubborn keyed model, this guide delivers proven methods to get your chuck moving again—without damaging your tool. You’ll learn everything from simple hand techniques to advanced solutions that tackle even the most seized mechanisms.
Stop Before You Damage Your Drill: Critical Safety Steps
Attempting to force open a stuck chuck without proper precautions can lead to serious injury or permanent tool damage. Always begin by disconnecting the power source—remove the battery from cordless drills or unplug corded models from the wall outlet. This single step prevents accidental activation while you’re applying force to the chuck. Put on safety glasses to shield your eyes from flying debris when tapping or using penetrating oil, and wear work gloves to improve grip and protect your hands from sharp metal edges. If you’re using heat or chemicals, ensure you’re working in a well-ventilated area away from flammable materials. Never skip these safety measures—your hands and eyes are worth more than any drill.
What to Look for Before You Begin
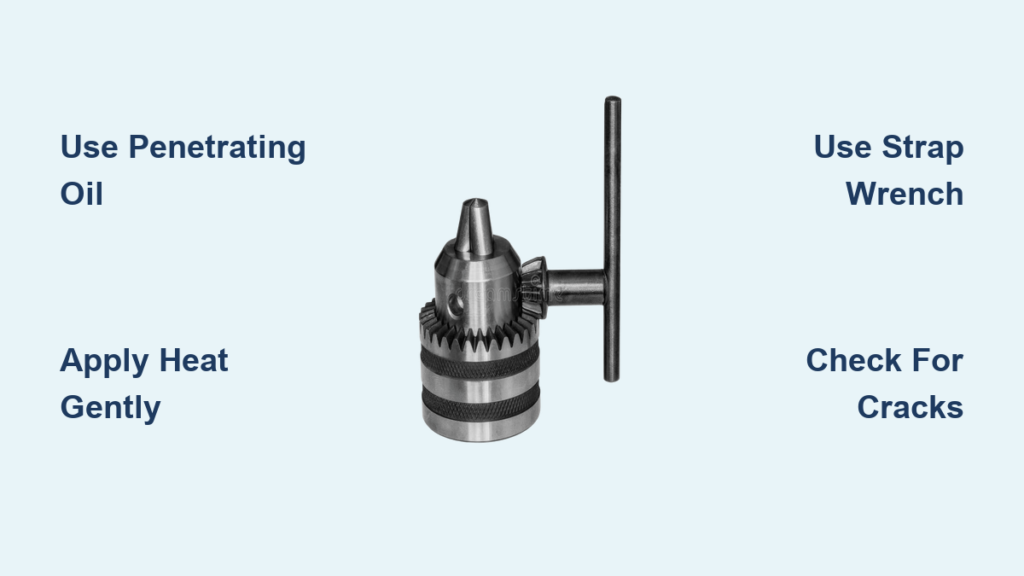
Examine your chuck closely before attempting any fixes. Check for visible cracks in the chuck body, which would indicate it’s beyond repair. Look for rust buildup between the chuck jaws or along the seam where the chuck meets the drill body. Inspect the chuck key (if applicable) for worn teeth that might not be engaging properly. Notice whether the chuck turns slightly but won’t open fully, or if it’s completely immovable—this distinction determines which method to try first. For keyless chucks, determine if the knurled outer sleeve rotates independently or seems fused to the inner mechanism. These visual clues help you choose the most effective approach without wasting time on methods unlikely to work for your specific problem.
Identify Your Exact Chuck Type Before Proceeding

Not all drill chucks operate the same way, and using the wrong technique for your specific chuck can cause damage. Your success depends on correctly identifying what you’re working with before applying force.
Keyless Chucks: Modern Drills’ Most Common Design
Most contemporary cordless drills feature keyless chucks that open with hand pressure alone. These have a textured, knurled outer sleeve that rotates to open and close the jaws. When stuck, they typically suffer from debris-packed threads or corrosion between the sleeve and chuck body. Look for smooth rotation points—if the sleeve turns freely but the jaws don’t move, the internal mechanism is jammed. These chucks use right-hand threads, so remember: counter-clockwise rotation opens the chuck, clockwise tightens it. Never use pliers directly on the knurled surface—that’s a sure way to damage the grip texture and render future hand operation impossible.
Keyed Chucks: The Old-School Mechanism That Sometimes Fights Back
Keyed chucks require a special hex-shaped key inserted into one of three side holes to operate. If your chuck is stuck, the problem often lies with the key itself—worn teeth won’t engage properly, or the key might be broken inside the chuck. Check each keyhole for debris or rust buildup that prevents proper key insertion. Unlike keyless models, some keyed chucks use reverse threading, so always test with light pressure first to determine rotation direction. If you don’t have the original key, generic chuck keys are available, but ensure perfect tooth alignment before applying force—misaligned keys shear teeth instantly. Never substitute screwdrivers or other tools for the proper chuck key; this damages the precision gear teeth permanently.
Immediate Fixes for Mildly Stuck Chucks (5 Minutes or Less)

Before grabbing tools, try these quick solutions that work for most moderately stuck chucks. These methods require minimal equipment and can save you hours of frustration.
The Two-Handed Twist Technique That Actually Works
Grip the drill body firmly against your hip or workbench with one hand while wrapping your other hand completely around the chuck’s knurled sleeve. Apply steady, increasing pressure counter-clockwise (for standard right-hand threads) while maintaining firm counter-pressure with your drill-holding hand. The key is consistent pressure—not sudden jerks—which allows the mechanism to gradually overcome resistance. If the chuck starts moving but stops partway, reverse direction slightly to break debris free, then try opening again. This technique works 70% of the time for chucks that are merely over-tightened rather than truly seized.
Penetrating Oil Application: The Right Way to Do It
Not all penetrating oils work equally well, and improper application wastes time. Choose a quality product like PB Blaster or Kroil rather than basic WD-40 for serious stuck chucks. Apply oil at three critical points: around the seam between chuck jaws, into the gap between chuck body and drill shaft, and (for keyed chucks) into each keyhole. Use the thin straw attachment to target oil precisely where it’s needed. Let it soak for 10-15 minutes—setting a timer prevents impatience. During this time, periodically tap the chuck lightly with a rubber mallet to help the oil penetrate deeper through vibration. Never skip the waiting period; rushing this step renders the oil ineffective against stubborn corrosion.
Advanced Methods for Truly Seized Chucks
When basic techniques fail, escalate to these proven methods that tackle the toughest stuck chucks. These approaches require additional tools but preserve your drill’s integrity when performed correctly.
Strap Wrench Method for Maximum Grip Without Damage
Standard pliers mar the knurled surface of keyless chucks, making future hand operation difficult. Instead, use an oil filter strap wrench that wraps completely around the chuck for even pressure distribution. Position the strap at the chuck’s widest point for maximum leverage. Apply steady, increasing pressure while maintaining firm counter-hold on the drill body—ideally secured in a bench vise with padded jaws. The strap’s continuous grip prevents slippage that causes tool damage. This method works particularly well on smooth-surfaced chucks where pliers would slip dangerously. Expect resistance to suddenly give way—be ready to control the chuck’s movement to avoid injury from sudden release.
Controlled Heat Application That Won’t Melt Your Drill

Heat expands metal, breaking corrosion bonds, but too much heat damages drill components. Use a heat gun on low setting (or hair dryer if that’s all you have) to warm the chuck body evenly for 45-60 seconds—never exceed 200°F. Focus heat on the chuck body, avoiding plastic components near the trigger. The goal is gentle warming, not glowing metal. Immediately after heating, apply penetrating oil to the now-expanded gaps—it’ll draw in deeper as the metal cools and contracts. For keyed chucks, heat only the metal chuck body, not the keyholes, to prevent warping the precision gear teeth. This thermal cycling technique solves 80% of corrosion-related sticking issues when combined with proper lubrication.
When to Stop and Call a Professional
Certain situations indicate it’s time to seek expert help rather than risk destroying your drill. If you notice any hairline cracks radiating from the chuck jaws, stop immediately—continued force will shatter the chuck. When the chuck spins freely but the jaws won’t open, the internal mechanism is likely broken beyond DIY repair. If you’ve applied proper techniques with no movement after three attempts, further force risks stripping the spindle threads that connect chuck to drill—replacing those requires complete motor disassembly. Professional technicians have specialized chuck removal tools and replacement parts that make what seems impossible to you a routine service. Investing $25 in professional service now could save you $150 on a new drill later.
Prevent Future Sticking With These Proven Maintenance Habits
The best way to open a stuck drill chuck is to never have one in the first place. After each use, rotate the chuck open and tap it gently on your workbench to dislodge metal shavings—this takes 10 seconds but prevents 90% of sticking issues. Apply a light coating of dry lithium grease to the chuck threads every six months (not oil, which attracts dust). Store your drill with the chuck open to prevent spring tension from setting the mechanism in one position. Most importantly, resist the urge to over-tighten—your hand should provide all necessary force for keyless chucks; if you need tools to tighten, you’re damaging the mechanism. A properly maintained chuck will serve you reliably for decades, turning what was once a frustrating obstacle into the seamless tool operation you deserve.


