
Tired of ragged holes ruining your handmade journals or scrapbooks? Standard hole punches tear delicate paper and struggle with thick cardstock or leather. You don’t need expensive equipment to create professional-looking binding holes—how to make a paper drill is simpler than you think. Using everyday items from your craft drawer or toolbox, you can build a precision tool in under 10 minutes. This guide cuts through the fluff to deliver four field-tested methods, including a lightning-fast 5-minute solution for urgent projects and pro techniques for flawless results on leather or 20+ sheet stacks. Stop wasting paper on failed punches—you’ll learn exactly which household items transform into reliable drills, how to sharpen bits for tear-free holes, and critical safety steps most tutorials ignore.
Why Your Thumb-Powered Hole Punch Fails (And What Works)
Standard hole punches crush fibers instead of cutting them, especially with thick materials or delicate paper. A properly made paper drill rotates a sharp point through the material, slicing cleanly like a surgeon’s scalpel. The secret? Downward pressure must stay under 200 grams—roughly the weight of a smartphone. Push harder, and you’ll tear paper fibers. This is why DIY drills outperform store-bought punches: you control the rotation speed and pressure. For immediate relief, try this emergency fix: Heat a large sewing needle with a lighter until warm (not red-hot), then pierce your paper. The heat seals fibers as it penetrates, preventing fraying. But for consistent results, build one of these three reliable tools.
Build a 5-Minute Emergency Paper Drill (No Glue Needed)
When you need holes now, skip complex assembly. This method uses items already on your desk.
Your 4-Essential Toolkit for Paper Drilling Success
– Bit: A thick upholstery needle (size 16 or larger)
– Shaft: A standard pencil (unsharpened end)
– Grip: A rubber band (width: 3-5mm)
– Backing: A thick magazine or phone book
Critical Assembly Steps
1. Prepare the Needle: Grip the needle’s eye with pliers. Tap the blunt end gently with a hammer on a hard surface until the point widens slightly (creates a “stop” to prevent slipping).
2. Insert Without Glue: Press the needle’s eye-end into the pencil’s unsharpened end. Twist firmly while pushing—friction alone holds it. Test by tugging; it shouldn’t slide out.
3. Add Non-Slip Grip: Wrap a rubber band twice around the pencil 2 inches below the needle. Stretch it tight to form ridges for finger traction.
How to Drill Without Tearing Paper
Place your paper on a phone book. Position the needle tip where you want the hole. Rest your index finger on the pencil’s top—this controls downward pressure better than palm-rolling. Rotate the pencil slowly (1 rotation per second) while applying feather-light pressure. You’ll feel the needle “bite” through in 2-3 rotations. Stop immediately when you feel resistance drop—that’s the exit point. Forcing it creates “feathering” (ragged edges).
Pro Tip: Dip the needle tip in mineral oil before drilling. This lubricates the cut, reducing heat buildup that causes paper to discolor or burn slightly. One drop lasts 10+ holes.
Upgrade to a Crank Drill for Thick Stacks (No Power Tools)
When binding photo albums or leather journals, hand-spinning fails. This crank design handles 30+ sheets effortlessly using physics, not muscle.
Materials That Actually Work
– Shaft: 12-inch wooden dowel (5/16″ diameter)
– Flywheel: 1.5-inch steel washer (found in hardware kits)
– Bit: 1/16″ metal drill bit (not masonry!)
– String: 36-inch waxed thread (sailmaker’s thread)
Assembly Mistakes to Avoid
1. Flywheel Placement: Drill a hole through the washer’s center. Slide it onto the dowel 4 inches from the bottom, not the middle. Too high = wobble; too low = no momentum. Secure with a dot of super glue only on the dowel (glue on metal causes slippage).
2. Bit Attachment: Drill a 1/16″ pilot hole 1/2 inch deep into the dowel’s bottom. Apply glue to the drill bit’s smooth shank only (never the fluted cutting area). Insert with pliers—overtightening cracks the dowel.
3. String Setup: Drill a 1/8″ hole through the dowel’s top. Thread string through, leaving a 4-inch tail. Tie a wooden bead to the tail—this becomes your pull handle.
Operating Like a Pro
Hold the dowel vertically with your non-dominant hand. Wrap the string twice clockwise just above the flywheel. Pull the bead handle straight down in one smooth motion—not at an angle. The flywheel’s weight spins the bit 8-10 times per pull. Critical: Let the drill stop completely between pulls. Rushing causes bit wobble and oval holes. For leather, add a drop of beeswax to the bit tip to prevent gumming.
Choosing the Right Drill Bit (The #1 Cause of Torn Holes)
Most DIY guides ignore bit geometry—this is why your holes tear. Paper requires a different point than wood or metal.
Needle vs. Nail: Which Cuts Cleaner?
- Sewing Needle: Best for thin paper (up to 10 sheets). Sharpening trick: Rub the point diagonally across 400-grit sandpaper at 20° angle (like sharpening a pencil). Creates a micro-bevel for slicing.
- Nail: Ideal for cardstock (12-30 sheets). File two flat sides along the last 1/4 inch (see diagram below). This creates “flutes” that eject paper dust instead of packing it into the hole.
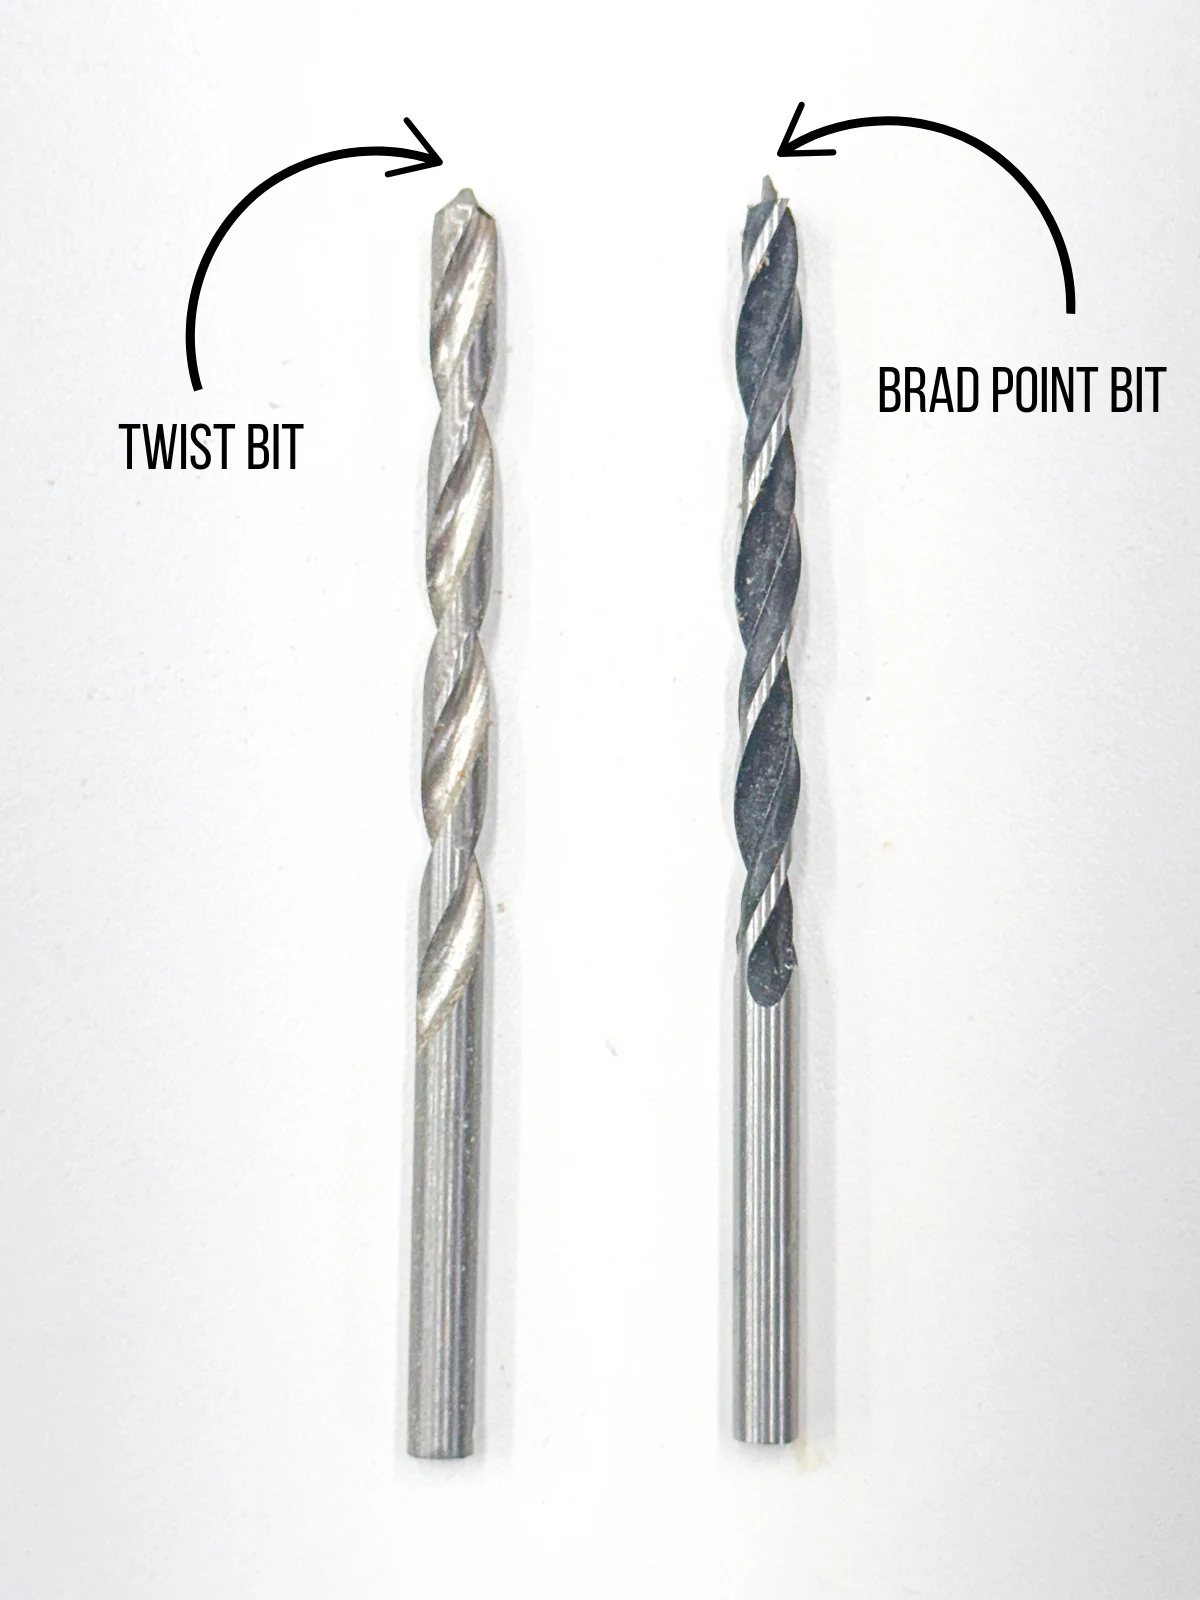
- Drill Bit: Only use 1-2mm twist bits. Never use masonry bits—they crush fibers. Grind the tip to a 60° angle (sharper than standard 118°) using a Dremel.
FLUTED NAIL BIT DIAGRAM:

  |       |  ← Flat filed sides (2mm wide)

  |  /\   |

  | /  \  |  ← Original conical point

  |/____\|
Why Oil Prevents Disaster
Paper dust clogs bits within 5 holes, generating heat that melts paper fibers. Apply this: One drop of sewing machine oil to the bit tip every 10 holes. Wipe excess with a toothpick—too much oil stains paper. For vegan crafters, use fractionated coconut oil (stays liquid).
Critical Safety Steps Before Drilling
Skipping these causes 90% of workshop injuries with DIY drills.
The Two-Hand Rule for Paper Drilling
Never hold paper with one hand while drilling. Your bit can slip and pierce skin. Instead:
1. Clamp paper to a cutting mat with two binder clips (one on each side).
2. Place a 1/2-inch thick sacrificial board beneath (cork or soft pine—never hardwood). Hard surfaces deflect bits.
3. Stabilize the top with a T-handle made from a wooden spoon: Drill a 1/4″ hole through the spoon’s handle end. Slide it over the drill shaft to apply downward pressure without hand rotation.
Urgent Warning: Wear safety glasses when sharpening bits. Metal filings can cause permanent eye damage—this isn’t optional. Grind bits outdoors or over a damp towel to catch sparks.
Fix These 3 Drilling Mistakes Immediately

“My Holes Are Ragged” → Bit Is Dull or Misaligned
- Symptom: Fibers pull out instead of cutting cleanly.
- Fix: Resharpen bit using the sandpaper method above. Check alignment: Place the drill vertically on a flat surface. If it wobbles, sand the dowel’s contact point until stable.
“Bit Won’t Pierce Thick Stacks” → Wrong Pressure Technique
- Symptom: Bit sticks after 5 sheets.
- Fix: Apply zero downward pressure for the first rotation. Let the sharp point self-start. After penetration, increase pressure gradually to the weight of a AA battery (23 grams).
“Holes Are Oval-Shaped” → Drilling at an Angle
- Symptom: Holes elongate toward one side.
- Fix: Use a drill guide block: Drill a 3/16″ hole through a 2x2x1-inch wood block. Place block over paper, insert drill through the hole. Forces perfect perpendicularity.
Next Steps: Build Your Drill Library
Start with the 5-minute pencil drill for quick fixes—master the feather-light pressure technique first. Once comfortable, build the crank drill for binding projects. For heavy leather work, add a drop of gum arabic solution (1 tsp gum arabic + 2 tsp water) to the hole before drilling—it lubricates without staining. Never use commercial lubricants; they leave oily residues that repel glue. If you drill over 50 holes weekly, invest in a $5 pin vise (a professional-grade handle for small bits) instead of DIY shafts—it’s the single upgrade that transforms hobbyist results into pro work. Your handmade journals deserve clean, precise holes that last decades—now you have the tools to deliver them.


