
You’re hunched under a kitchen sink, trying to secure a tiny screw with one hand while the other struggles to keep your drill steady. The screw drops into the dark abyss for the third time, and frustration mounts. This common workshop nightmare vanishes when you learn how to make a drill bit magnetic. A magnetized bit securely grips ferrous screws and metal shavings, transforming frustrating single-handed jobs into smooth one-person operations. Whether you’re installing cabinet hardware or retrieving dropped fasteners from engine compartments, this simple skill saves time and eliminates dropped-screw disasters—no special tools required for the safest method.
Most DIYers waste time wrestling with screws that won’t stay put, unaware that magnetizing a drill bit takes less than a minute with household items. The magic happens when you align microscopic magnetic domains in the steel bit, turning it into a temporary magnet. High-quality hardened steel bits (like those designed for metal drilling) hold magnetism best, while cheap soft-steel bits lose charge quickly. Forget expensive gadgets—your solution likely sits in a junk drawer right now. By the end of this guide, you’ll master three proven techniques, avoid dangerous pitfalls, and keep your bits magnetically charged for precision work.
Why Your Drill Bit Won’t Hold Screws Without Magnetization
Non-magnetic drill bits force you into awkward two-handed maneuvers that compromise control and safety. When drilling overhead or in tight spaces, gravity wins every time—sending screws tumbling into inaccessible areas. This isn’t just annoying; it risks damaging workpieces when you fumble to reposition. Magnetization solves this by creating invisible “grip” at the bit tip, allowing confident one-handed operation. Crucially, this only works on ferrous (iron-based) screws—not brass, aluminum, or certain stainless steel types. If your bit slips off screw heads despite careful positioning, lack of magnetism is likely the culprit. The good news? Restoring that magnetic pull takes seconds with the right approach.
The Stroking Technique: Magnetizing in Under 60 Seconds
This method leverages physics you already understand: aligning microscopic magnetic domains through directional force. Grab a strong neodymium magnet (salvaged from old hard drives or bought for $2 at hardware stores)—weak fridge magnets won’t cut it. Place your drill bit on a stable surface and stroke firmly from shank to tip 20-40 times using one magnet pole only. Never rub back-and-forth; unidirectional strokes build consistent polarity. For even magnetization, rotate the bit and stroke all sides. Test success by seeing if the tip lifts a paperclip. Cheap bits may require re-magnetizing after 5-10 uses, while quality cobalt bits maintain charge for weeks.
Pro Tip: Boost holding power 300% with the “magnet sandwich.” Clamp your bit between two neodymium magnets (N-pole to S-pole) for 15 seconds. This concentrates the magnetic field through the steel, creating stronger alignment than stroking alone. Ideal for stubborn jobs with #4 or smaller screws.
Why Neodymium Magnets Beat All Other Options

Ceramic or flexible fridge magnets fail at magnetizing drill bits because their magnetic fields are too weak to reorient steel’s domains. Neodymium (rare earth) magnets generate fields 5-10x stronger, making them the only practical DIY solution. You’ll recognize them by their metallic silver color and surprising weight—they’ll pinch skin if handled carelessly. Salvage them from dead hard drives (pry the circular magnet near the spindle motor) or buy disc magnets (1/2″ diameter, 1/8″ thick) online. Never use electromagnets from speakers—their weaker fields won’t penetrate hardened drill steel. A $3 neodymium magnet pays for itself after two dropped-screw saves.
Battery Method: Critical Risks That Make This Unsafe for Most Users
Connecting a drill bit to a 12V car battery via copper wire creates a powerful electromagnet—but it’s a fire hazard you shouldn’t risk. Wrapping 20 turns of wire around the bit shank and touching battery terminals generates instant magnetism, but also extreme heat. Within 2 seconds, the coil can exceed 300°F (149°C), melting insulation and causing severe burns. Worse, accidental short circuits may spark battery explosions. One user reported melted wires and scorched workbenches after a 3-second connection. This method belongs strictly to electrical professionals with safety gear—not weekend DIYers.
When This Method Might Be Justified (With Extreme Precautions)
Only attempt battery magnetization if you have multimeter experience and understand electrical safety. Wear insulated gloves and eye protection. Use 18-gauge wire with high-temperature insulation. Connect for exactly 1 second—no more—then immediately check bit temperature with a non-contact thermometer. If the bit is too hot to touch, you’ve exceeded safe limits. Never use this on lithium batteries (fire risk). For 99% of users, the permanent magnet method is safer and equally effective.
Commercial Magnetizers: The Pro’s Secret for Instant On-Demand Magnetization

Dedicated magnetizing tools solve the “re-magnetizing mid-job” frustration. These $10-$20 handheld devices feature a slot where you insert your bit and press a button—activating an internal electromagnet that charges the tool in 2 seconds. Top models like the Weller MHPT-1 offer three strength settings and integrated demagnetization. Unlike DIY methods, they deliver consistent polarity (N-pole at tip) for reliable screw retention. Keep one in your drill case for jobs requiring frequent bit changes. The investment pays off when magnetizing small Torx bits that neodymium magnets can’t grip effectively.
Why Magnetic Bit Holders Are Your Best On-Site Solution
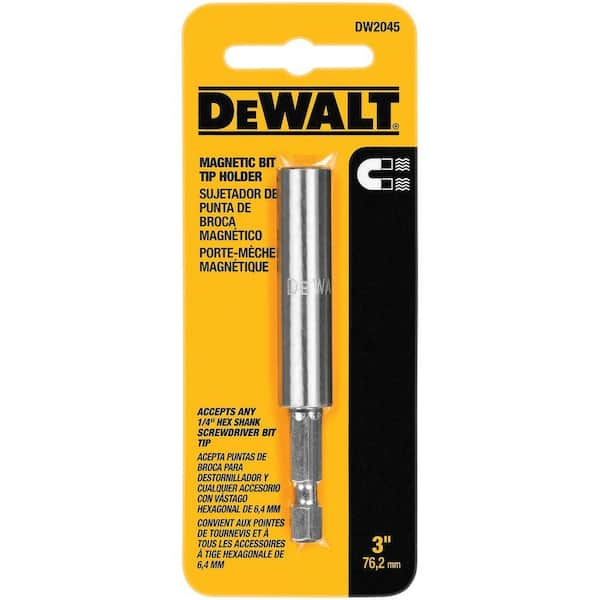
Skip magnetizing entirely by using magnetic bit holders—extensions with built-in neodymium magnets. These $5 sleeves slide between your drill and bit, conducting magnetism to the tip while holding the bit securely. The double benefit: no manual magnetization needed, and stronger screw retention than a magnetized bit alone. For overhead work, choose holders with rubber O-rings to prevent bit slippage. Brands like DeWalt’s FlexPoint feature replaceable magnets that maintain strength for years. When retrieving dropped screws from machinery, extend the holder to reach blind spots—its magnetized tip grabs shavings that would clog a standard bit.
Troubleshooting Weak Magnetization: 4 Fixes That Actually Work
Problem: Bit won’t hold even small screws
Solution: Your magnet is too weak. Replace ceramic magnets with N52-grade neodymium (check pull force ratings). Cheap bits with low iron content won’t magnetize—switch to cobalt or titanium-coated bits.
Problem: Magnetism fades after 2 screws
Solution: You’re stroking in both directions. Always stroke shank-to-tip using one magnet pole. Test polarity with a compass—consistent direction builds stronger fields.
Problem: Screw sticks but won’t release
Solution: Over-magnetization. Demagnetize by tapping the bit sharply on concrete 3 times. For precision electronics work, use minimal strokes (10-15).
Problem: Bit attracts metal shavings during drilling
Solution: Wipe the bit with a microfiber cloth between uses. For metalwork, demagnetize immediately after use to prevent shavings from scratching surfaces.
Demagnetizing: How to Safely Remove Magnetic Charge
Magnetism becomes problematic when drilling near electronics or working with stainless steel screws. To demagnetize:
1. Quick method: Drop the bit tip-first onto concrete 3 times (jolts disrupt domain alignment)
2. Precision method: Pass slowly through a commercial demagnetizer’s AC field while pulling away
3. Emergency fix: Heat the bit to 400°F (204°C) with a propane torch (not recommended for coated bits)
Never use the battery method for demagnetization—it risks reversing polarity without full neutralization. Test with a paperclip: a properly demagnetized bit won’t attract it at all.
Critical Safety Hazards You Must Avoid
Pacemaker risk: Neodymium magnets within 6 inches can disrupt medical implants. Anyone with pacemakers should never handle strong magnets. Store magnets in labeled containers away from work zones.
Electronics destruction: Keep magnets 12+ inches from phones, laptops, and credit cards. One contractor erased his truck’s ECU by storing a magnetized bit in the console.
Pinch injuries: Neodymium magnets snap together with 10+ lbs of force. Always wear safety glasses when handling—they’ve caused shattered fingers when trapping skin.
Fire hazard: Never place magnets on lithium-ion batteries. The conductive field can cause thermal runaway.
Maintenance: Keeping Your Magnetic Bits Performing Long-Term
Re-magnetize bits before critical jobs—don’t wait for failures. Store magnetized bits in dedicated foam slots away from steel tools to prevent accidental discharge. For bits used daily in metal drilling, wipe shavings with mineral spirits weekly to maintain magnetic permeability. Replace neodymium magnets annually; their strength decays 1% yearly. When bits lose magnetization despite proper technique, it’s time for new ones—hardened steel eventually develops “magnetic fatigue.”
Mastering how to make a drill bit magnetic transforms tedious hardware installations into efficient one-person tasks. The permanent magnet method delivers 95% of professional results with zero risk—making battery hacks unnecessary for most users. Keep a neodymium magnet taped inside your drill case for instant access, and pair it with a magnetic bit holder for stubborn overhead jobs. Remember: magnetization only works on iron-based screws, fades with cheap bits, and requires demagnetizing for electronics work. Implement these techniques, and you’ll never chase a dropped screw through floor joists again. For ongoing success, invest in quality cobalt drill bits and a dedicated magnetizer—your future self will thank you when that cabinet screw stays put on the first try.


