
A Ryobi drill chuck that refuses to grip bits, won’t open, or wobbles during operation can derail your entire project in seconds. When your trusted Ryobi drill suddenly fails to hold a bit securely or the chuck jams completely, you’re left standing there with tools in hand and work waiting to be done. This common frustration affects thousands of DIYers and professionals who rely on their Ryobi drills daily.
Knowing how to fix Ryobi drill chuck problems saves you money on replacement tools and keeps your projects moving forward. Whether you’re dealing with a seized chuck that won’t budge, a slipping mechanism that won’t hold bits, or dangerous wobble during operation, most issues have straightforward solutions you can handle in your workshop. This guide delivers the exact steps to diagnose and repair your problematic Ryobi chuck, complete with model-specific insights and professional techniques that actually work.
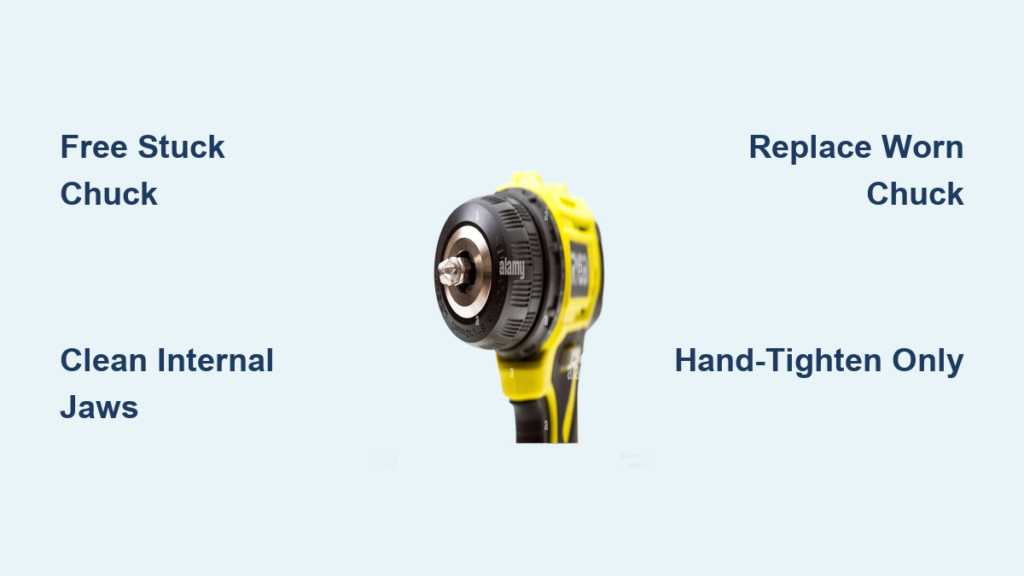
Why Your Ryobi Drill Chuck Stops Working Properly
Ryobi drill chucks typically fail due to three main culprits: internal debris buildup, worn jaw mechanisms, or improper installation. When sawdust, metal shavings, or old grease accumulates inside the chuck, it prevents the jaws from moving smoothly. Over-tightening with excessive force—especially using the drill’s motor to tighten instead of hand-tightening—is the #1 cause of premature chuck failure across all Ryobi models.
The chuck’s internal mechanism relies on precise thread engagement between the chuck body and the jaws. When these threads become worn or damaged from forcing the chuck beyond its mechanical limits, the chuck loses its ability to maintain consistent pressure on drill bits. Many users unknowingly accelerate this wear by using impact drivers with standard chucks not rated for high-torque applications, causing internal components to strip prematurely.
Essential Safety Steps Before Fixing Your Ryobi Chuck
Always disconnect power before starting chuck repairs—this is non-negotiable. For cordless Ryobi drills, remove the battery pack completely; for corded models, unplug from the wall outlet. One accidental trigger pull while you’re wrestling with a stuck chuck can cause serious hand injuries from rotating parts.
Wear ANSI-approved safety glasses throughout the repair process. Small metal fragments can dislodge during disassembly, and the spring-loaded components in some chucks can eject unexpectedly. Work on a clean, well-lit surface with all tools organized within reach—never attempt chuck repairs while the drill is balanced precariously on a workbench edge.
Tools Required for Ryobi Drill Chuck Repair
Gather these specific tools before starting your Ryobi chuck repair:
- 5mm and 1/4″ hex keys (Allen wrenches) – critical for removing the retaining screw
- Adjustable wrench or 13mm socket – for chuck body removal
- Bench vise with soft jaws – essential for secure chuck removal
- Penetrating oil (not WD-40 for long-term use) – PB Blaster works best
- Isopropyl alcohol and brass brush – for thorough cleaning
- Blue thread locker (Loctite 242) – for proper reinstallation
- Rubber mallet – for controlled impact during removal
- Replacement chuck (if needed) – confirm model compatibility first
How to Free a Stuck Ryobi Drill Chuck That Won’t Open
When your Ryobi chuck jams shut and won’t release bits, follow this proven method:
Apply Penetrating Oil Correctly
Pour 3-5 drops of penetrating oil where the chuck body meets the spindle. Let it soak for 20 minutes, then repeat. Do not use the drill motor to force the chuck open—this often damages internal gears. Instead, grip the chuck body with channel locks (protected by a leather strip) while holding the drill body firmly with your other hand.
The Vise Method for Stubborn Chucks
- Insert a 1/2″ hex key into the chuck and tighten fully
- Clamp the hex key securely in a bench vise with soft jaws
- Hold the drill body firmly and rotate counter-clockwise while applying downward pressure
- The chuck will begin unscrewing from the spindle—continue until fully removed
If the chuck remains stuck after multiple attempts, apply gentle heat with a hair dryer for 2 minutes (never use open flame) to expand the metal slightly before retrying the vise method.
Diagnosing and Fixing a Ryobi Chuck That Won’t Grip Bits

A chuck that won’t hold bits securely usually indicates worn internal jaws. First, remove the chuck completely and inspect the gripping teeth—if they’re smooth or rounded instead of sharp, replacement is necessary.
Deep Cleaning Procedure That Actually Works
- Soak the chuck in mineral spirits for 30 minutes
- Use a brass brush to scrub all internal surfaces (brass won’t scratch)
- Rinse thoroughly with isopropyl alcohol
- Air dry completely before reassembly
- Apply one tiny drop of light machine oil to the threads
Pro Tip: Test jaw functionality by inserting a small screwdriver into each jaw slot—properly functioning jaws should move smoothly with even resistance. Uneven movement indicates internal damage requiring replacement.
Step-by-Step: Removing a Ryobi Drill Chuck Safely

Critical Warning: The retaining screw inside Ryobi chucks uses reverse threading! To remove it, turn clockwise (opposite of normal screws).
- Open chuck jaws fully and locate the center screw
- Insert correct hex key and turn clockwise to loosen (may require significant force)
- Once screw is removed, insert 13mm hex key and tighten in chuck
- Clamp hex key in vise and rotate drill body counter-clockwise
- Continue unscrewing until chuck separates from spindle
If the chuck won’t budge after proper technique, it’s likely seized from corrosion—apply penetrating oil and let sit overnight before retrying.
Proper Installation of a Replacement Ryobi Drill Chuck
Installing a new chuck requires precision to avoid future problems:
- Clean spindle threads thoroughly with wire brush and degreaser
- Apply one small drop of blue thread locker to spindle threads
- Hand-tighten new chuck onto spindle until snug
- Use the vise method to tighten further: clamp hex key, rotate drill clockwise
- Install retaining screw—remember to turn counter-clockwise to tighten (reverse thread)
Never overtighten—this is the #1 cause of premature chuck failure. The chuck should be secure but still allow smooth jaw movement.
How to Diagnose and Fix a Wobbling Ryobi Drill Chuck
Wobble during operation creates dangerous inaccuracy and potential tool damage. First, eliminate variables:
- Test with multiple new, high-quality drill bits
- Remove chuck and roll on flat surface—if it wobbles, chuck is damaged
- With chuck removed, run drill at low speed to check spindle runout
If the spindle wobbles, internal damage has likely occurred from dropping the tool—this requires professional service. If only the chuck wobbles, replacement is the only reliable solution as internal bearings can’t be serviced.
Ryobi-Specific Chuck Issues Across Different Models
Ryobi 18V and 40V models share common chuck designs, but older HP and P models use non-standard threads. Home Depot exclusively sells genuine Ryobi replacement chucks—confirm your model number before ordering. Most newer Ryobi drills use 1/2″-20 spindle threads, while some compact models use 3/8″-24.
Keyless chucks on Ryobi drills are particularly prone to internal gear wear from users forcing them beyond their mechanical limits. If your keyless chuck slips when tightening, internal components are likely damaged beyond repair—replacement is more cost-effective than attempting internal repairs.
Preventing Future Ryobi Chuck Problems Through Maintenance
Extend your chuck’s lifespan significantly with these maintenance practices:
- Clean after heavy use: Blow debris from chuck jaws with compressed air
- Lubricate sparingly: One drop of light machine oil annually on jaw mechanisms
- Hand-tighten only: Never use drill motor to tighten chuck—this destroys internal threads
- Avoid side loads: Don’t use your drill as a pry bar or lever
Critical Reminder: Snug is sufficient—over-tightening by just 10-15% beyond hand-tight causes permanent damage to the chuck’s internal mechanism. If you need more torque, upgrade to a drill with higher power rather than forcing the chuck.
When to Attempt DIY Repair vs. Seek Professional Help
DIY chuck replacement makes sense if:
– Your drill is out of warranty (Ryobi’s standard is 3 years)
– You have proper tools, especially a bench vise
– The chuck shows clear signs of wear but spindle appears true
– Cost of new chuck is less than 30% of new drill price
Seek professional help when:
– Spindle shows visible wobble (indicates internal damage)
– Chuck is physically cracked or broken
– You’ve stripped the retaining screw head
– Drill is still under warranty (unauthorized repair may void coverage)
Ryobi customer service (1-800-525-2579) can verify warranty status before you disassemble your tool—never remove the chuck on a warrantied drill without authorization.
By following these precise steps, you’ll solve most Ryobi drill chuck problems in under 30 minutes with basic tools. Remember that prevention through proper usage and maintenance beats any repair—hand-tighten consistently, keep your chuck clean, and replace worn components before they cause operational failures. A properly maintained Ryobi chuck should last through multiple drill bodies, keeping your favorite tool in service for years to come.


