
You’ve found the perfect terracotta pot at a flea market or garden center, but there’s one problem—it lacks drainage holes. Before you give up on your pottery treasure, know that learning how to drill holes in terracotta pots is a completely achievable DIY project with the right technique. Many gardeners abandon beautiful pots because they fear cracking them during drilling, but with proper preparation and method, you can add drainage to nearly any pot safely. In this guide, you’ll discover the exact steps professional gardeners use to drill terracotta pots without damage, including critical safety precautions, tool selection secrets, and troubleshooting techniques for challenging situations.
Skipping proper drainage leads to root rot, fungal growth, and ultimately dead plants—wasting both your beautiful pot and your beloved greenery. The good news is that with the right approach, you can transform undrained pots into healthy plant homes in under 30 minutes. By the end of this guide, you’ll know precisely how to drill holes in terracotta pots safely, avoid the most common mistakes that cause cracks, and handle special cases like glazed ceramics or thick-walled planters.
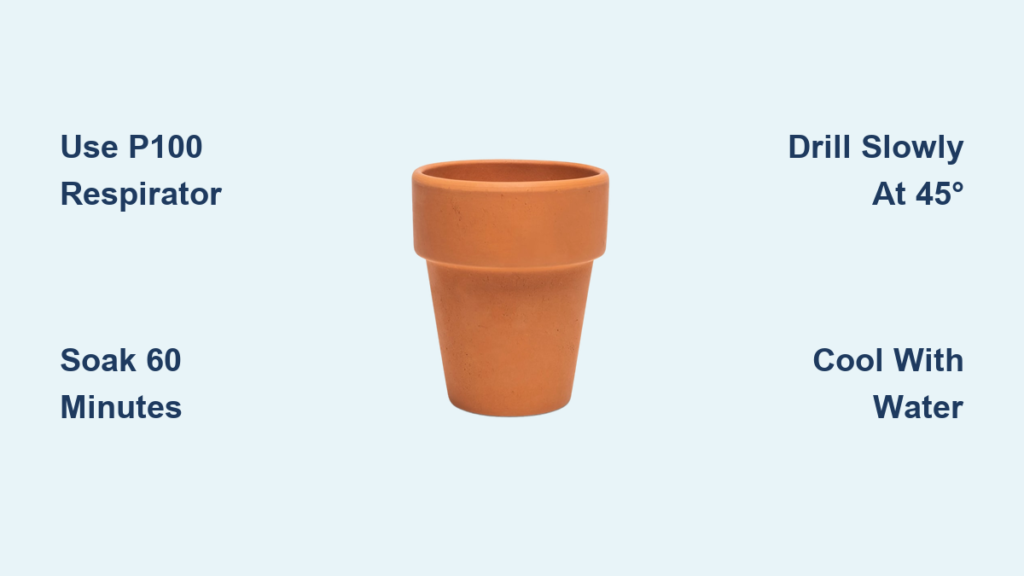
Critical Safety Gear: Why N95 Masks Aren’t Enough for Terracotta Drilling
Drilling terracotta creates dangerous silica dust that can cause permanent lung damage with just a few exposures. This isn’t ordinary dust—it’s microscopic particles that embed deep in your lungs, potentially leading to silicosis, a serious and irreversible condition. Standard dust masks won’t protect you; you need proper respiratory protection that filters these ultra-fine particles.
The Non-Negotiable Respirator: P100 Filters for Maximum Protection
Skip the basic N95 mask and use a NIOSH-approved P100 respirator with replaceable cartridges. These filters capture 99.97% of particles as small as 0.3 microns—essential for silica dust that’s often smaller than 1 micron. Fit testing is crucial; facial hair or improper seal renders even the best respirator useless. Pro tip: Perform a user seal check by covering the filters and inhaling sharply—your face should pull inward with no air leakage around the edges.
Eye Protection That Actually Works for Ceramic Dust
Safety glasses with side shields (ANSI Z87.1+ rated) are mandatory—regular eyeglasses won’t stop ceramic shards. Look for anti-fog coating since drilling generates heat and moisture. For complete protection, use a full-face respirator that combines eye and respiratory protection, especially when drilling overhead or on large planters. Never skip eye protection; ceramic fragments can cause permanent eye damage at drilling speeds.
Choosing the Right Drill Bit: Diamond vs. Carbide for Your Specific Pot
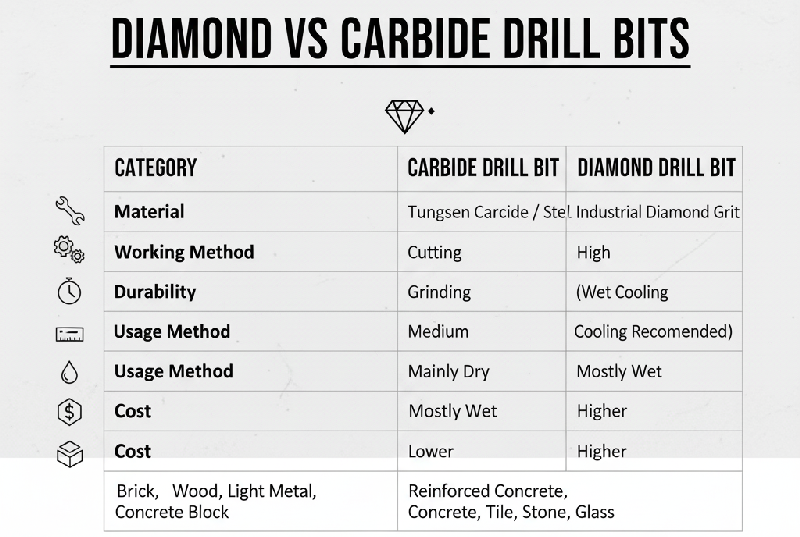
Using the wrong drill bit is the #1 reason terracotta pots crack during drilling. Standard metal drill bits will bounce off ceramic and shatter your pot, while proper bits slice through cleanly. Your bit choice depends entirely on your pot’s composition—using the wrong type guarantees failure.
Glazed Ceramic Pots: Why Diamond-Tipped Bits Are Non-Negotiable
For any glazed surface, diamond-tipped hole saws or core bits are mandatory. The glaze creates an extremely hard surface (8-9 on the Mohs scale) that dulls carbide bits instantly. Diamond bits grind rather than drill, creating minimal vibration. Use these at 100-300 RPM with continuous water cooling—never dry. For pots larger than 12″, step-drill with progressively larger bits starting at 1/8″ to prevent cracking.
Unglazed Terracotta: When Carbide Bits Get the Job Done Right
Standard unglazed terracotta responds well to carbide-tipped masonry bits at 500-800 RPM. Look for bits labeled “tile and masonry” with a spear-point tip. For holes larger than 3/8″, use the pilot hole method: start with 1/8″ bit, then 1/4″, finishing with your target size. Always keep the bit cool with water—carbide loses hardness when overheated, causing chatter and cracks.
Pre-Drilling Prep: The 60-Minute Soak That Prevents 90% of Cracks
Skipping proper preparation causes most drilling failures. Terracotta’s porous nature works in your favor when managed correctly—soaking transforms brittle clay into a crack-resistant material. This single step reduces your failure rate dramatically.
Why 60 Minutes Is the Magic Soak Time
Submerge your pot in water for exactly 60 minutes before drilling. Less time leaves the material too dry and brittle; longer soaks weaken structural integrity. During soaking, water fills microscopic pores, reducing dust by 70% and making the clay more flexible. Test moisture content by touching the pot—if it feels uniformly cool and damp throughout, it’s ready. For thick-walled pots over 3/8″, extend soak time to 90 minutes.
Three Foolproof Ways to Secure Wobbly Pots During Drilling
A shifting pot guarantees cracks. Try these stabilization methods:
– Sand-Filled Method: Fill pot with dry sand to 2″ below drilling point, then secure on non-slip mat
– Wood Backing Technique: Place scrap wood inside pot directly behind drilling area, clamped in place
– Wet Sponge Support: Position damp sponge against interior wall at drilling point for flexible backing
Step-by-Step: Drilling Your Terracotta Pot Without Cracks
Following this exact sequence prevents the vibration and heat that cause cracks. Rushing any step dramatically increases failure risk.
Starting Position: Why 45 Degrees Beats 90 Degrees for Initial Penetration
Begin drilling at a 45-degree angle to the pot’s surface, not straight on. This creates a stable groove that prevents bit walking. After 15 seconds of gentle drilling, gradually increase to 90 degrees over the next 10 seconds. Apply only 2-5 pounds of pressure—less than the weight of a can of soup. If you feel resistance, back off immediately; forcing causes instant cracks.
The Peck Drilling Technique: 2 Seconds On, 1 Second Off
Drill in short bursts: 2 seconds of drilling followed by 1 second of retraction to clear dust. Never drill continuously for more than 5 seconds. At the critical breakthrough moment (when bit exits the pot), reduce pressure by 50% and slow your speed. Listen for the sound change—when drilling becomes quieter, you’re 1mm from breakthrough. This technique prevents exit chipping on the interior wall.
Water Cooling Methods That Prevent Overheating and Cracking
Water isn’t optional—it’s your primary defense against heat-induced cracks. Dry drilling generates temperatures over 500°F that instantly crack terracotta.
Spray Bottle vs. Immersion: Which Works Best for Your Setup
For small pots (under 8″), use a spray bottle with fine mist setting, applying every 5 seconds. For larger pots, the immersion method works best: submerge pot in water with only 1″ above surface. The water level should cover the drilling point by 1/4″. For indoor projects, the sponge technique is ideal—press a damp sponge against the drilling point from the inside.
Common Mistakes That Crack 90% of Terracotta Pots
Even with proper tools, these errors cause most failures. Avoid them to dramatically increase your success rate.
Why Pressing Harder Causes More Damage
New drillers instinctively press harder when resistance increases, but this is the fastest way to crack terracotta. The material requires grinding, not drilling—let the bit’s abrasiveness do the work. If you feel increased resistance, reduce pressure and increase water flow. Proper technique requires only enough pressure to maintain contact between bit and pot.
The Speed Myth: Why High RPMs Shatter Terracotta
Contrary to metal drilling, high speeds destroy ceramic. Terracotta requires slow, deliberate grinding:
– Glazed pots: 100-300 RPM
– Unglazed pots: 500-800 RPM
– Large holes (>1″): 200-500 RPM
Higher speeds generate heat that causes microfractures. Use your drill’s lowest speed setting and resist the urge to speed up—patience prevents cracks.
Special Cases: Drilling Thick-Walled or Glazed Ceramic Pots
Standard techniques fail with challenging pots. These specialized methods handle difficult situations.
The Three-Step Method for Pots Over 3/8″ Thick
Thick walls require progressive drilling:
1. Center punch with 1/8″ bit (1mm depth)
2. Drill through with 1/8″ bit
3. Enlarge to final size with stepped bits
Drill from both sides for walls over 1/2″ thick—start from one side until halfway, then flip and complete from the opposite side to prevent exit chipping.
Glazed Surface Secrets: The Painter’s Tape Trick That Actually Works
Apply painter’s tape over your drilling point, then mark through the tape. The tape fibers grip the bit, preventing slippage on slick glazed surfaces. For extra security, create a small dimple in the tape with a center punch before drilling. Remove tape immediately after drilling to prevent adhesive residue.
Testing Your Newly Drilled Pot Before Planting
Never skip this critical verification step—undetected micro-cracks cause pots to fail days after planting.
The 24-Hour Water Test: Why You Shouldn’t Skip It
Fill your pot with water and let it sit for 24 hours. Check for:
– Water seepage through walls (indicates micro-cracks)
– Consistent drainage rate (should flow freely)
– No new cracks forming
If you detect micro-cracks, seal with food-safe silicone caulk and retest. Only plant after passing this test—rushing leads to ruined plants and broken pots.
After following these precise steps, your once-undrained pot becomes a healthy home for plants. Remember the critical triad for success: proper safety gear, correct bit selection, and water-cooled slow-speed drilling. For future projects, keep a dedicated diamond-tipped bit just for ceramics—using the same bit for multiple materials dulls it prematurely. If you encounter persistent cracking, try drilling on humid days when terracotta naturally contains more moisture. Most importantly, never force the process—when in doubt, stop, reassess, and restart with more water and less pressure. With practice, you’ll drill perfect holes in even the most delicate pots, transforming discarded treasures into thriving plant homes.


