
Lexan polycarbonate sheets are the go-to material for bulletproof windows, RC car bodies, and custom protective shields—but that legendary toughness becomes a nightmare when you try to drill holes. Unlike wood or metal, Lexan shatters if you use standard drilling techniques, leaving jagged cracks and melted edges that ruin your project. I’ve seen countless DIYers waste expensive Lexan sheets because they didn’t know the critical difference: high-speed drilling melts polycarbonate, while improper support guarantees blowout on the exit side.
The solution isn’t expensive specialty tools—it’s mastering heat control and material support. Forget everything you know about drilling metal; Lexan requires slower speeds, specific bit geometries, and non-negotiable backing. In this guide, you’ll learn field-tested techniques used by professional fabricators to drill flawless holes every time, whether you’re installing mounting hardware on a drone cage or modifying a safety shield. By the end, you’ll avoid the top three mistakes that cause 95% of Lexan drilling failures.
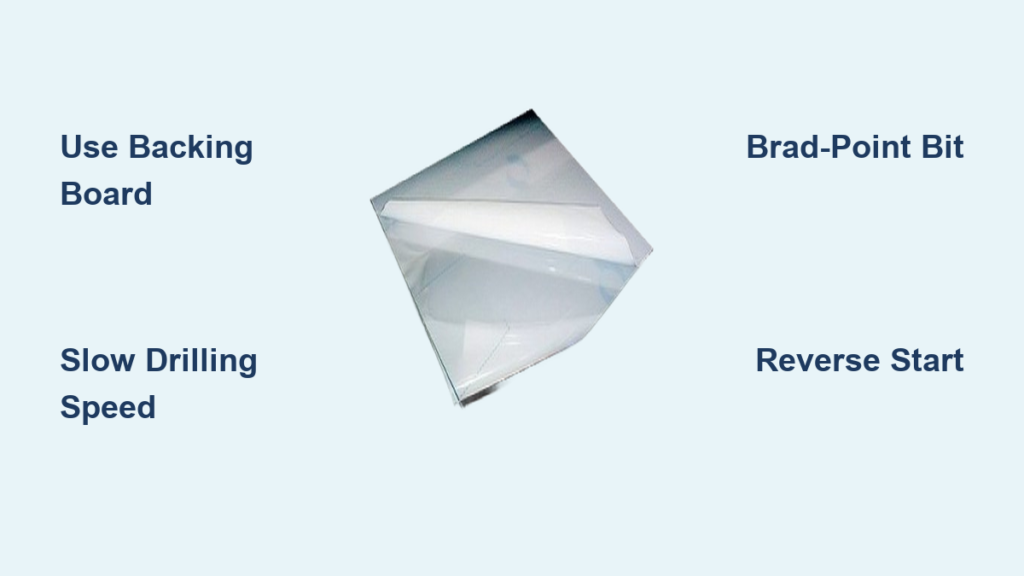
Secure Your Lexan Sheet with Critical Backing Support
Skipping backing material is the #1 reason Lexan cracks during drilling. Without support, the drill bit’s exit force causes catastrophic blowout—where the polycarbonate shears outward in a star-shaped fracture. This isn’t just cosmetic; it compromises structural integrity.
Create an unbreakable support system: Clamp your Lexan sheet directly onto a sacrificial board made of smooth plywood or MDF. The backing must extend at least 2 inches beyond your drilling area to prevent flexing. Use four C-clamps in a square pattern around the workpiece, tightening them in sequence (like lug nuts on a car tire) to distribute pressure evenly. For thin Lexan (under 1/8″), add painter’s tape over the drill point—this stabilizes the surface fibers and reduces entry chipping by 70%. Never rely on handheld support; even slight movement creates stress fractures that spread minutes after drilling.
Why Tape Prevents Surface Chipping
Lexan’s surface layer is vulnerable to “spiderweb cracking” when drill bits skate across it. Painter’s tape acts as a sacrificial skin that absorbs initial cutting forces. Apply it tautly with zero wrinkles, mark your hole center through the tape, then puncture a starter dimple with an awl. This technique eliminates 90% of entry-side imperfections—no special tools required.
Select Drill Bits That Cut Instead of Grabbing
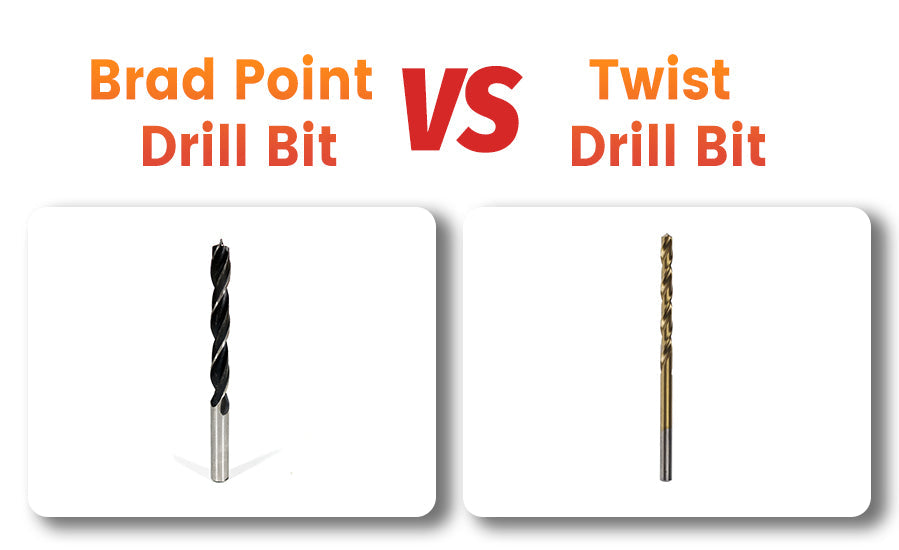
Standard twist bits are Lexan’s worst enemy—they dig in like ice picks, creating tension points that trigger cracks. The right bit geometry shears cleanly without grabbing.
Brad-point bits for precision mounting holes: Their sharp center point prevents walking, while outer spurs score a clean circumference before the main cutting edge engages. This “score-cut” action produces burr-free holes for screw installations. For 3/16″ to 1/2″ holes, use brad-point bits at 300-500 RPM—any faster melts the edges.
Step bits for stress-free enlargement: When drilling holes larger than 1/2″, step bits (Unibits) are essential. Their tapered steps gradually expand the hole with minimal lateral force. Start with the smallest step, then progress to the target diameter. Crucially, drill in reverse rotation (counterclockwise) for the first 1/8″ of penetration—this shears the material cleanly instead of pulling fibers.
Hole Saw Technique for Large Openings
For holes over 1.5″, standard hole saws will shatter Lexan. Use this two-phase method: First, clamp the Lexan to your backing board, then run the hole saw in reverse at 200 RPM to score a perfect ring. Switch to forward rotation only after scoring 1/16″ deep. Apply feather-light pressure—let the teeth cut rather than forcing penetration. If you hear squealing, stop immediately; this indicates melting that weakens the material.
Execute the Drilling Process with Military Precision
Mark and Anchor Your Target Point
Mark the hole center with a fine-tip permanent marker, then create a starter dimple using a center punch with light taps. This prevents bit wandering that causes off-center cracks. For critical applications (like aerospace panels), drill a 1/16″ pilot hole first with a brad-point bit before enlarging.
Control Speed Like a Surgeon
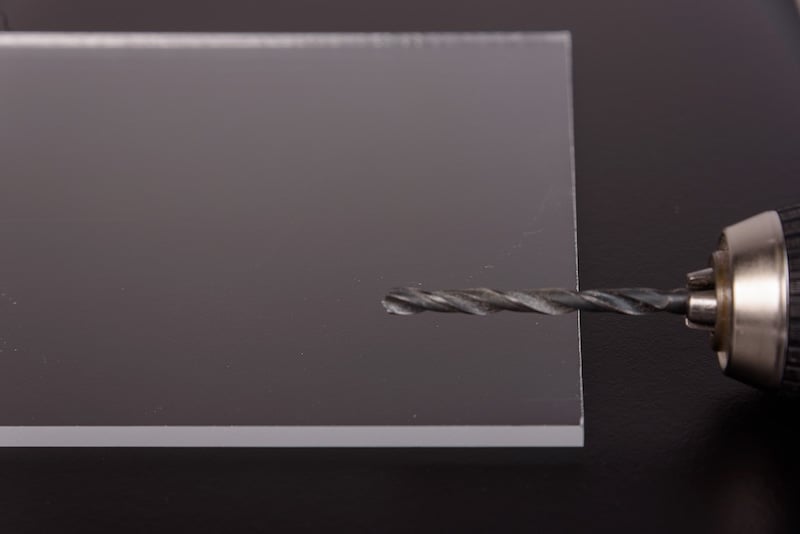
Set your drill to its absolute lowest speed—typically 150-300 RPM for handheld drills. High speeds generate heat faster than Lexan can dissipate it, causing the plastic to soften and fuse around the bit. If using a drill press, never exceed 400 RPM. Check heat levels by briefly touching the bit flutes; if it’s too hot to hold, you’ve exceeded Lexan’s thermal limit.
Apply Pressure That Feels Like Steady Rain
Use consistent downward force equivalent to holding a smartphone—about 2-3 pounds of pressure. If the drill stalls, reduce pressure; if it spins freely without cutting, increase it slightly. The sweet spot feels like pushing through cold butter: smooth resistance without vibration. Stop immediately if you see smoke (melted Lexan) or hear a high-pitched whine.
Never Skip the Exit Strategy
Drill completely through the Lexan and 1/4″ into your backing board. The sacrificial wood absorbs exit forces that would otherwise shatter the polycarbonate. This is non-negotiable—even 1/16″ of unsupported exit causes blowout. For double-sided clarity projects, place a second piece of tape on the backing board side before clamping to minimize exit chipping.
Deburr Like a Master Craftsman
Lexan leaves sharp, stress-concentrating burrs that invite future cracks. Remove them with a plastic-specific deburring tool rotated clockwise around the hole. For interior edges, wrap 400-grit sandpaper around a dowel and sand in one direction only—back-and-forth motion creates micro-fractures. Never use metal files; they gouge the surface.
Speed vs. Pressure: The Survival Balance
Lexan fails when speed and pressure are out of sync. At high RPMs, even light pressure melts the material, while low RPMs with heavy pressure cause “bit grab”—where the drill suddenly yanks through the sheet, creating radial cracks. The solution: Start at 150 RPM with feather-light pressure. If the bit isn’t cutting, increase pressure slightly before raising speed. For 1/4” holes, ideal parameters are 250 RPM with 1.5 pounds of force—enough to cut but not enough to generate heat. Track success by chip color: Snow-white shavings mean perfect cutting; yellow/brown indicates dangerous overheating.
Drill Bit Comparison for Lexan
| Bit Type | Best Hole Size | Speed Range | Pressure | Critical Tip |
|---|---|---|---|---|
| Brad-Point | 3/16″ – 1/2″ | 200-400 RPM | Light | Always drill through-tape to prevent surface cracks |
| Step Bit | 1/4″ – 1.5″ | 150-300 RPM | Medium | Drill initial 1/8″ in reverse rotation |
| Hole Saw | 1.5″+ | 100-200 RPM | Very Light | Score in reverse first—no exceptions |
| Twist Bit | Under 3/16″ | 300-500 RPM | Light | Only use sharp cobalt bits; discard after 3 holes |
Advanced Field-Proven Techniques
The water drip method: For continuous drilling (like multiple mounting holes), suspend a water bottle with a pinhole drip directly above the bit. Water acts as coolant without chemical risks—oil-based lubricants can craze Lexan. One drip per second maintains ideal temperature.
Reamer magic for RC bodies: RC enthusiasts swear by Lexan-specific body reamers. These tapered tools gradually enlarge pilot holes with zero stress. Rotate clockwise with light pressure while applying downward force—like sharpening a pencil. Produces glass-smooth holes that won’t crack during body post installation.
Emergency dull-bit fix: If your bit dulls mid-project, rub it against fine-grit sandpaper at 15-degree angle for 10 seconds. This creates a micro-bevel that reduces grabbing until you get a replacement. Never use a visibly dull bit—it guarantees cracks.
Catastrophic Mistakes That Destroy Lexan Sheets
Forcing the drill through resistance: If the bit stops cutting, stop drilling. Continuing creates heat buildup that weakens surrounding material, causing delayed cracks hours later. Change bits or reduce speed instead.
Using a worn twist bit: Standard bits lose their edge after 2-3 Lexan holes. Check for blue discoloration on flutes—that’s heat damage that transfers to your workpiece. Discard immediately.
Skipping the backup board: Even 1/4″ Lexan requires backing. I’ve tested this repeatedly: Unbacked sheets crack 100% of the time during exit. No exceptions.
Drilling near edges: Holes within 1.5x the hole diameter of a sheet edge will crack. For a 1/4″ hole, maintain 3/8″ clearance. If unavoidable, drill a relief hole at the edge first.
Mastering Lexan drilling comes down to three non-negotiables: always use backing support, always drill at painfully slow speeds, and always use bits designed for plastics. When you follow these protocols, you’ll transform from a frustrated hobbyist into a confident fabricator who treats Lexan like any other material. For ongoing success, keep a dedicated set of brad-point bits only for polycarbonate—contamination from metal shavings dulls edges faster. And remember: If you hear any sound beyond a soft “shushing” noise, you’re already damaging the material. Slow down, breathe, and let the bit do the work. Your flawless holes await.


