
Drilling holes in furniture separates DIY enthusiasts who get professional results from those who create expensive mistakes. One wrong angle or dull bit can splinter expensive hardwood or turn sleek IKEA furniture into a patchwork of tear-out. This guide reveals exactly how to drill clean, precise holes in any furniture material—whether you’re installing concealed hinges in cabinets, adding cable management to your desk, or mounting hardware on a vintage dresser. You’ll learn material-specific techniques that prevent blowout, the exact drill bits that deliver clean entry and exit holes, and professional tricks most beginners never discover.
Why Your Drill Bit Choice Makes or Breaks Furniture Holes
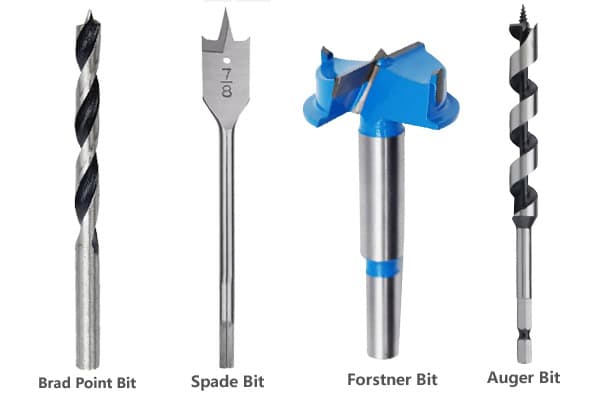
Selecting the wrong drill bit is the #1 reason furniture projects fail at the drilling stage. Brad point bits with their sharp center spur and cutting spurs slice cleanly through wood fibers instead of tearing them, making them essential for visible holes in hardwood furniture. Forstner bits create perfectly flat-bottomed holes required for Euro-hinges and shelf pins, while hole saws deliver clean large-diameter openings for cable grommets. Spade bits might seem tempting for speed, but they’ll splinter veneer and laminate surfaces—save them for hidden structural work only.
Critical bit selection mistakes to avoid:
– Using twist drill bits for large holes (they wander and tear out)
– Employing dull bits that burn wood instead of cutting cleanly
– Choosing the wrong bit type for your specific furniture material
– Skipping pilot holes for hardware installations
The 3-Step Setup That Prevents Furniture Damage Before You Drill
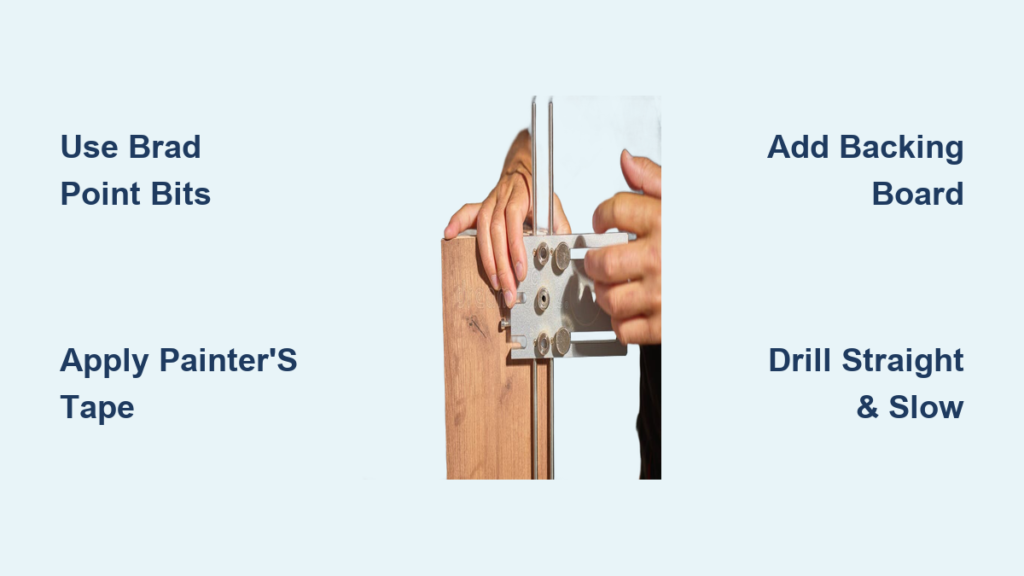
Skipping proper setup guarantees disaster when drilling into furniture. First, secure your piece with clamps—not your hands—to eliminate movement that causes off-center holes. Second, apply painter’s tape over your drilling area to stabilize veneer and laminate surfaces. Third, clamp a sacrificial backing board made of scrap wood to the exit side of your workpiece; this simple step prevents the dreaded blowout that ruins the back of your furniture.
Pro tip: For thin IKEA furniture (typically 3/4″ particle board), sandwich your piece between two sacrificial boards. This “backing sandwich” technique delivers clean holes on both sides, critical for visible areas like desk grommet holes.
How to Mark and Punch Perfect Hole Locations Every Time
Inaccurate hole placement ruins furniture symmetry and hardware function. Start by marking your hole center with a sharp pencil or marking knife, then create a small indentation with an awl or center punch. This precise starting point prevents drill bit “walking” that leads to misaligned holes. For critical hardware like concealed cabinet hinges, use a story stick or transfer punch to ensure identical spacing across multiple pieces.
For professional results:
1. Measure twice, mark once with a fine-point tool
2. Punch a visible indentation at your mark
3. Verify alignment with a square before drilling
4. For multiple identical holes, create a simple cardboard template
Speed Settings That Prevent Burning in Different Furniture Materials
:max_bytes(150000):strip_icc()/drill-press-chart-424bb9992cb84508936912ea46a0569f.jpg)
Drill speed isn’t one-size-fits-all—using the wrong RPM burns wood and melts laminates. Hardwoods like walnut require slower speeds (1500-2000 RPM) with steady pressure, while plywood tolerates faster speeds (2000-2500 RPM). Particle board and MDF need moderate feed rates at 1800-2200 RPM to prevent crumbling edges, and melamine demands slower entry (2500-3000 RPM) with carbide-tipped bits to avoid chipping.
Warning: If you smell burning or see smoke while drilling, stop immediately—you’re either going too fast or pressing too hard. Let the bit do the work; forcing it creates heat that damages both your furniture and the bit.
Drill Straight Technique: How to Avoid Oval, Off-Center Holes
An angled drill creates oval holes that won’t accept hardware properly. Hold your drill perfectly vertical using a bubble level attachment or by aligning it with a 90-degree square. Start drilling slowly at full 90 degrees—any initial wandering becomes permanent. If your drill lacks a level, rest its base against a straightedge clamped to your workpiece for perfect alignment.
Pro technique for flawless holes:
– Begin with light pressure until the bit establishes the hole
– Increase pressure gradually as the hole deepens
– Reduce speed and pressure as the bit exits to prevent blowout
– For critical holes, use a drill guide or homemade jig for perfect perpendicularity
The Backing Board Trick for Clean Exit Holes (No More Splintering!)
The moment your drill bit breaks through the back of furniture is when most damage occurs. This simple technique prevents exit-side splintering: clamp a sacrificial backing board tightly against the exit surface. As the bit emerges, it cuts into this scrap wood instead of tearing out your furniture’s finished surface. For veneered plywood, apply blue painter’s tape to both sides plus use a backing board—the triple protection method professional cabinetmakers use.
Time-saving variation: For through-holes in thick hardwood, drill to about two-thirds depth from one side, then flip the piece and finish drilling from the opposite side. This prevents blowout on either surface.
Material-Specific Drilling: Hardwood vs. IKEA Furniture vs. Veneer

Drilling Solid Hardwood Furniture
Hardwoods like oak or walnut require sharp brad point bits at 300-800 RPM. Clear chips frequently from the bit flutes to prevent burning, especially in deep holes. For through-holes, use backing boards on both sides or flip the workpiece at breakthrough. Waxing your bit with beeswax reduces friction for cleaner cuts in dense woods.
Drilling IKEA-Style Particle Board
Flat-pack furniture demands special handling due to its thin, fragile composition. Always use painter’s tape over drilling points and clamp a sacrificial board behind the workpiece. Start with a 1-2mm pilot hole before progressing to your final size. Drill at moderate speeds (1800-2200 RPM) with carbide-tipped bits—dull bits will crumble particle board edges.
Drilling Veneered and Laminated Surfaces
The thin surface layer on veneer and laminate makes tear-out likely. Apply masking tape over your mark, use sharp new bits, and drill from the finished side toward the backing. For melamine-coated boards, consider an upcut spiral bit designed specifically for laminates to minimize chipping.
How to Fix Common Drilling Mistakes Before They Ruin Your Project
When Your Hole Is Too Big
Don’t reach for wood filler immediately. For minor oversizing, wrap the hardware shank with masking tape to create a tighter fit. For larger gaps, insert thin wood splints coated with wood glue, let dry, then re-drill. In particle board, use a longer screw that reaches into solid material behind the damaged area.
Repairing Tear-Out on Visible Surfaces
For small splinters, apply wood glue to the damaged area, clamp, and sand smooth after drying. Larger damage may require cutting a plug with a Forstner bit, gluing it in place, then drilling a new hole. On laminates, use an iron-on edge banding patch that matches your furniture color.
Hardware-Specific Holes: Getting Shelf Pins, Hinges, and Knobs Right
Concealed Cabinet Hinges
Use a 35mm Forstner bit with a depth stop set to 13mm. Drill perfectly centered holes using a hinge boring jig—freehand drilling rarely achieves the precision required. Test on scrap first; even 1mm off-center creates alignment issues.
Shelf Pin Holes
Create professional adjustable shelves with 5mm holes drilled at exactly 32mm spacing. Use a dedicated shelf pin drilling jig or mark positions with a story stick. Drill to minimum 8mm depth for stability, and ensure all holes are perfectly perpendicular.
Knob and Handle Installations
For standard cabinet hardware, drill 6-10mm pilot holes for screws, or 10-12mm through-holes for bolt installations. Always pre-drill to prevent splitting, especially in hardwoods. Position holes precisely using the hardware template or by placing the hardware against the cabinet and marking screw locations with a pencil through the mounting holes.
Post-Drilling Cleanup: Making Your Holes Look Professionally Done
Blow out sawdust with compressed air or a shop vac attachment—loose particles prevent proper hardware seating. For visible holes, lightly chamfer edges with a countersink bit to prevent future splintering. Test fit all hardware before final assembly; holes should accept components with slight resistance but without forcing. On hardwood, a light coat of finish inside the hole protects against moisture damage.
Pro finish technique: For exposed holes like cable grommets, use a plug cutter with matching wood to create seamless repairs when hardware is removed later. This professional touch maintains furniture value and appearance through future modifications.
Drilling perfect holes in furniture isn’t about expensive tools—it’s about understanding material behavior and applying the right technique for each situation. By selecting appropriate bits, controlling speed and feed, and using backing boards strategically, you’ll transform from someone who makes holes to someone who creates precision openings that enhance your furniture’s function and appearance. Remember to always test on scrap first, especially with unfamiliar materials, and never skip the preparation steps that prevent costly mistakes. With these techniques, even complex drilling tasks become manageable, turning your furniture projects from DIY attempts into professional-looking results.


