
You’ve lined up your drill bit perfectly on that aluminium fixture—then WHIRRRR! The metal suddenly spins out of control, leaving jagged edges and a ruined project. If you’ve ever struggled with clogged drill bits, rough holes, or worse—dangerous “helicoptering” where thin aluminium gets violently ripped from your hands—you’re not alone. Drilling aluminium seems simple but demands specific techniques to prevent tear-out, burrs, and safety hazards. This guide reveals exactly how to drill clean, precise holes in aluminium every time, whether you’re modifying track lighting or building custom brackets. You’ll learn the only lubricants that work, why standard drill bits fail, and the critical clamping trick that stops metal from spinning away mid-drill.
Why Standard Drill Bits Fail on Thin Aluminium Sheet Metal
Aluminium’s soft, gummy nature creates unique problems most DIYers overlook. When you use a typical wood or steel drill bit, the aluminium welds itself to the flutes through heat buildup—a process called “galling.” This clogs the bit, generates dangerous heat, and causes the drill to grab the material violently. For thin sheets (like common 0.8mm/0.03″ track lighting fixtures), this grabbing can launch the workpiece like a frisbee. The result? Oversized, ragged holes and potential injury. Avoid these costly mistakes by understanding what makes aluminium different: its low melting point means friction heat softens the metal instantly, while its ductility causes long, stringy chips that jam standard bits. Recognizing these traits is the first step to flawless holes.
How Aluminium’s “Gumminess” Causes Drill Bit Clogging
When drilling aluminium without proper technique, you’ll notice three clear warning signs: smoke rising from the drill point, a high-pitched squealing sound, and chips disappearing into the flutes. This happens because the drill bit’s heat (exceeding aluminium’s 660°C melting point) literally welds the metal to the cutting edges. Standard HSS bits with black oxide coatings worsen this—they create microscopic friction points where aluminium sticks aggressively. Even titanium-coated bits fail here; their extra hardness increases heat transfer instead of reducing it. The solution? Bits with polished flutes that let chips slide cleanly away. Without this, you’re guaranteed torn edges and ruined projects.
The 3 Non-Negotiable Safety Steps Before Touching Your Drill
Skipping safety steps when drilling aluminium risks severe injury—especially with thin sheets. Metal chips fly at high speed, and unsecured workpieces can become dangerous projectiles. These aren’t optional precautions; they’re essential for avoiding emergency room visits.
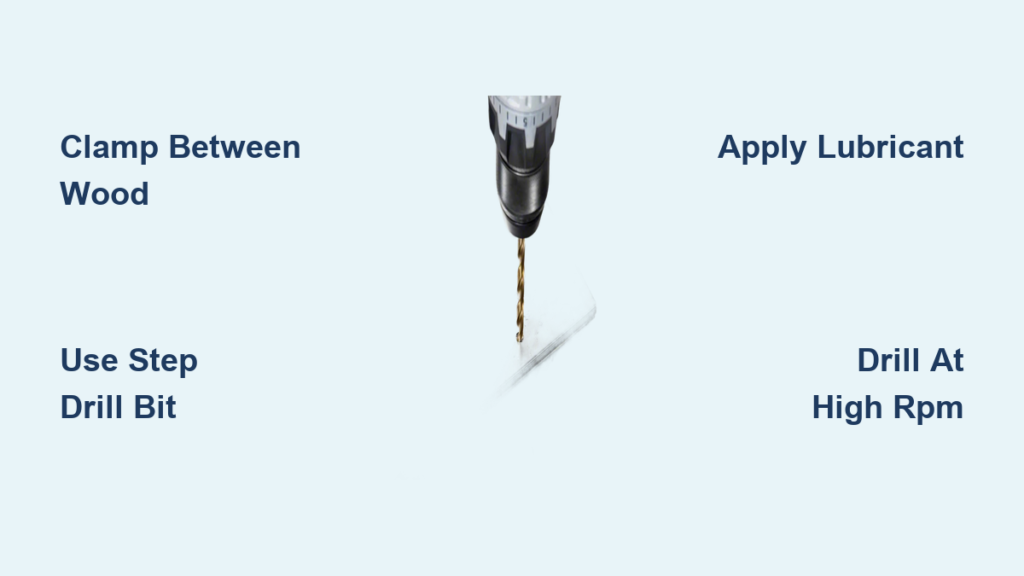
Why Clamping Between Wood Saves Your Fingers
NEVER hold thin aluminium by hand. When the drill bit catches the edge (a near-certainty without backing), it will spin the sheet violently—a hazard called “helicoptering.” To prevent this, clamp your aluminium between two sacrificial wood pieces (like scrap plywood) using a metal vise with soft jaws. The wood backing serves three critical purposes: it stops the metal from flexing, eliminates tear-out on the exit side, and absorbs the drill’s torque. For track lighting fixtures or brackets under 1mm thick, this step is non-negotiable. If you skip it, you’ll likely end up chasing a spinning metal disc across your workshop.
Essential Gear: What You Must Wear (Not Just Glasses)
Safety glasses alone won’t protect you. Aluminium generates razor-sharp burrs and hot, needle-like chips that can pierce skin. Wear cut-resistant gloves (like mechanics’ nitrile-coated gloves) to handle pieces post-drilling and long sleeves to shield arms. Crucially, secure loose clothing and tie back hair—especially when using a drill press. One strand caught in the chuck can cause catastrophic injury. These measures aren’t overkill; they’re standard practice in machine shops for good reason.
Step Drill Bit vs. HSS: Which Wins for Your Aluminium Project?

Not all drill bits work for aluminium. Using the wrong type guarantees frustration, but choosing correctly ensures clean holes with minimal burrs. Forget multi-purpose bits—aluminium demands specialized tools.
Why Cobalt Bits Outperform Standard HSS for Thick Aluminium
For extrusions or blocks over 3mm thick, polished cobalt (HSS-Co) bits are your best defense against heat buildup. Their cobalt alloy stays sharper 50% longer than standard HSS and resists the “built-up edge” that plagues aluminium drilling. Look for uncoated bits with a bright, mirror-like flute finish—the polish reduces friction so chips evacuate cleanly. Avoid black oxide or TiN-coated bits; their rougher surfaces increase heat retention. Pro tip: Grind cobalt bits to a 135° split point angle if possible—it prevents walking and reduces feed pressure by 30%.
When Step Drill Bits Are the Only Safe Choice for Thin Sheets
For 0.8mm sheet metal (like light fixtures), step drill bits are revolutionary. Their conical shape drills progressively larger holes without grabbing, eliminating helicoptering risks. Unlike twist drills, step bits shear cleanly through thin material, producing near-burr-free holes. A single step bit handles multiple hole sizes—critical when drilling M3 or #6-32 screw clearance holes. If you only drill thin aluminium occasionally, this $15 tool pays for itself in saved projects. Never use step bits on thick aluminium; they’ll overheat and shatter.
Kerosene or WD-40? Picking Your Cutting Fluid for Aluminium
Lubrication isn’t optional—it’s the secret to preventing galling and extending bit life. Skip this, and your drill bit will weld itself to the aluminium within seconds. The good news? Effective lubricants are cheap and accessible.
The DIY Cutting Fluid Mix That Outperforms Store-Bought
Forget expensive industrial fluids. A 50/50 mix of kerosene (K1 grade) and 3-in-1 oil cools better and lubricates more effectively than WD-40 for most projects. Here’s why: kerosene’s low viscosity penetrates micro-gaps between bit and metal, while the oil provides lasting lubrication. Apply it with a squeeze bottle directly to the drill point before starting, then reapply every 5 seconds during drilling. For one-off jobs, WD-40 works in a pinch—it’s better than nothing—but it evaporates too quickly for multiple holes. Never drill dry; even 10 seconds without lubricant can ruin your bit.
How to Apply Lubricant Without Making a Mess
Drip lubricant onto a cotton swab and dab it precisely at the drill point. This targets the cutting zone without splattering your workspace. For deep holes, use “peck drilling”: drill 2mm deep, retract to clear chips, re-lubricate, and repeat. This prevents chips from packing in the flutes and overheating the bit. If you see smoke or hear squealing, STOP immediately—reapply fluid and reduce feed pressure. Proper lubrication makes the difference between a smooth, whisper-quiet cut and a seized, smoking disaster.
Drill at 3000 RPM: The Speed Rule That Prevents Gummed-Up Bits
Speed mistakes cause 80% of aluminium drilling failures. Too slow, and the bit tears the metal; too fast, and heat welds chips to the flutes. Get this wrong, and no lubricant can save you.
Why High Speed + Slow Feed Prevents “Chip Welding”
Aluminium requires high RPM with moderate feed pressure—the opposite of steel drilling. For a 1/8″ bit, run your drill at 3000-5000 RPM while applying feather-light downward pressure. This creates thin, broken chips that evacuate easily instead of long, gummy strings. If you force the drill (common when bits dull), chips jam the flutes, causing instant overheating. The telltale sign? Smoke and a metallic “squeal.” Reduce feed pressure immediately—let the sharp bit cut naturally. For drill presses, start at 2500 RPM for 1/4″ holes and adjust based on chip formation.
How to Adjust Speed for Hand Drills vs. Drill Presses
Hand drills demand extra control. Set your variable-speed drill to its highest setting (typically 2000+ RPM), then squeeze the trigger gently—never full throttle. Drill presses simplify this; lock the speed at 3000 RPM for bits under 1/4″. Crucially, maintain consistent pressure. Hesitating mid-drill lets the bit cool unevenly, increasing grab risk. If using a cordless drill, ensure full battery charge—voltage drops cause RPM fluctuations that ruin hole quality.
Step-by-Step: Drilling a Perfect Hole in 0.8mm Aluminium Sheet
Follow this sequence for flawless holes in thin aluminium—no tear-out, no helicoptering, and minimal burrs. This method works for track lighting, brackets, or any sheet under 1mm thick.
How to Punch the Perfect Starting Dimple
First, mark your hole center with a fine-tip marker. Then place a deep, pronounced dimple using an automatic center punch—standard punches often create shallow marks that won’t stop bit walking. Tap firmly until the dimple is 0.5mm deep. This guides the drill bit precisely, eliminating the #1 cause of misaligned holes. For critical projects, drill a 1/16″ pilot hole here first; it anchors the final bit perfectly.
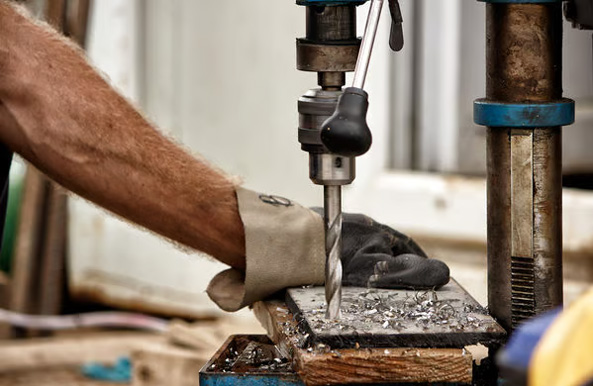
The Clamping Technique That Stops Metal from Spinning
Sandwich your aluminium between two 1/2″ plywood scraps using a metal vise. Align the hole location, then tighten until the stack feels solid—no flexing when pressed. Drill through all three layers. The bottom plywood catches the bit exit, preventing burrs and tear-out. For curved surfaces (like light fixtures), use soft jaw protectors in your vise to avoid marring. Never skip this; unbacked thin aluminium will spin violently.
Deburring Isn’t Optional: Fixing Sharp Edges Safely
Every drilled aluminium hole leaves a sharp, dangerous burr on the exit side—especially with twist drills. Ignoring this risks cuts and wire damage in electrical projects. Deburring takes 10 seconds but is mandatory.
Quick-Release Deburring Methods for Home Shops
Use a deburring tool (under $10) by hand: insert it into the hole and rotate clockwise 2-3 times. For a professional chamfer, run a 60° countersink bit at low speed. No tools? Press a larger drill bit (1/16″ bigger) into the hole by hand and twist gently. Always deburr both sides—the entrance side often has micro-burrs too. Run your finger along the edge (not across) to test; if it snags, repeat. This step transforms a jagged hazard into a safe, finished hole.
When to Call a Machine Shop Instead of Risking Injury
Some projects demand professional help. If you’re drilling aircraft-grade 7075 aluminium, creating precision holes for machinery, or lack a drill press for critical work, stop. Attempting complex jobs without proper tools risks ruined parts and injury. Local machine shops charge $5-$10 per hole and guarantee accuracy. Makerspaces often offer drill press access and mentorship—safer than improvising. For one-off fixture modifications, this small investment saves time and prevents costly errors.
Drilling aluminium holes cleanly requires respecting the metal’s quirks: its gumminess demands polished bits and lubrication, thin sheets need rigid backing, and speed control prevents disaster. Master these techniques—clamping between wood, using kerosene mix, and drilling at high RPM—and you’ll achieve professional results. Most importantly, never compromise on safety; that spinning aluminium disc can cause life-altering injuries. Keep this guide handy, apply the steps methodically, and you’ll transform frustrating failures into precision holes every time. For ongoing success, store drill bits in a dedicated case to maintain their sharp edges—your next aluminium project depends on it.


