
You’ve found the perfect wine bottle for a DIY lamp or beer bottle for a herb garden planter, but one problem stops you: drilling a clean hole without shattering the glass. Unlike wood or metal, glass demands specialized techniques to prevent catastrophic cracks. Most beginners make critical mistakes with speed, pressure, or cooling that turn their project into a pile of shards. This guide reveals the exact methods professional glassworkers use to drill flawless holes in bottles for lamps, planters, and hydroponic systems. You’ll learn why standard drill bits fail, the only two lubricants that work, and how to rescue a bottle when cracks start forming—all while keeping your hands safe from razor-sharp fragments.
Forget everything you know about drilling; glass requires counterintuitive patience. Push too hard, and your bottle explodes. Use the wrong bit, and you’ll create spiderweb cracks that ruin months of upcycling effort. But with the precise speed settings, cooling techniques, and safety protocols in this guide, you’ll transform ordinary bottles into stunning functional art. Whether you’re crafting a bottle lamp for your patio or a self-watering planter, these field-tested steps work for wine, beer, and spirits bottles of any thickness. Let’s turn that empty bottle into your next masterpiece—safely and successfully.
Why Glass Bottles Shatter During Drilling (And the 3 Fixes)
Glass isn’t just fragile—it’s unforgiving of common drilling mistakes that seem harmless with other materials. Most breakage happens because drill bits generate intense heat that makes glass expand uncontrollably, creating stress points that explode into star-shaped cracks. The three critical fixes aren’t obvious: first, never use standard twist bits—they skip across smooth glass, creating micro-fractures. Second, drilling dry is catastrophic; without constant cooling, temperatures exceed 400°F, weakening the glass structure. Third, excessive pressure is the #1 cause of blowout, where the bit punches through violently on the exit side.
How Bottle Curvature Causes Bit “Walking”
That elegant curve on wine bottles tricks beginners into applying uneven pressure. As the drill bit skids across the surface, it creates a starter hole that’s off-center or angled, guaranteeing cracks within seconds. Fix this by sanding a dime-sized flat spot with 220-grit paper where you’ll drill. For beer bottles with thinner walls, press modeling clay into a ring around your mark to create a reservoir that holds cooling fluid. Always start at a 45-degree angle for the first 10 seconds, then gradually straighten to 90 degrees—this prevents the bit from skating sideways.
The Temperature Threshold That Triggers Cracks
Glass begins weakening at 300°F, but most DIYers don’t realize their drill bit hits 500°F within 20 seconds of dry drilling. You’ll smell burning when it’s too late—the critical warning sign is visible smoke at the drill point. To stay safe, maintain glass temperature below 200°F using continuous coolant flow. If your bottle feels warm to the touch, stop immediately and cool it for 60 seconds. For thick spirits bottles (like whiskey), drill halfway through, flip the bottle, and complete the hole from the opposite side to prevent exit-side chipping.
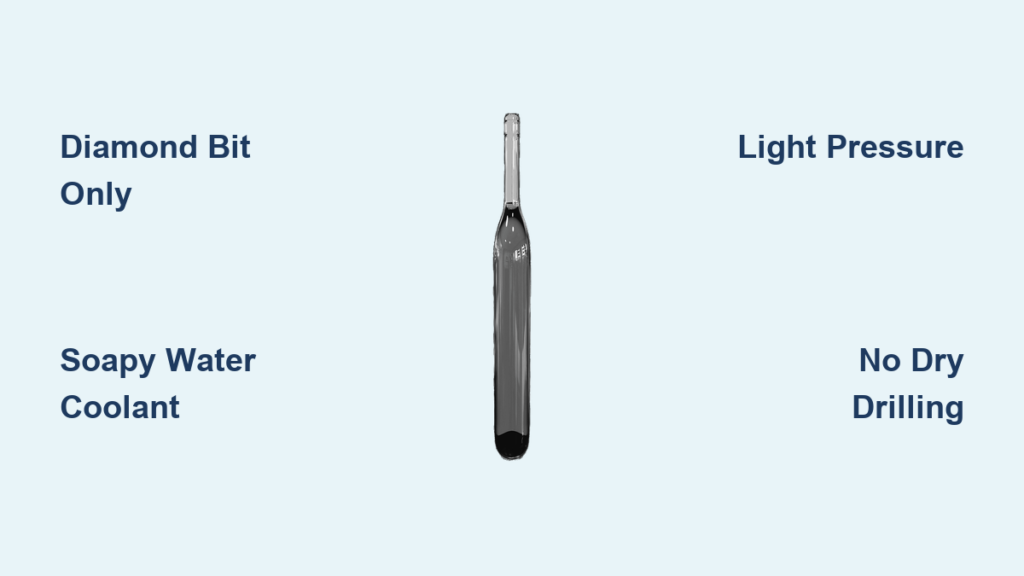
Diamond vs. Carbide Drill Bits: Which Saves Wine Bottles?

Choosing the wrong bit wastes hours and shatters bottles—yet 90% of beginners grab standard hardware store bits. Diamond-tipped bits are non-negotiable for wine bottles with their thick, uneven glass. The micro-diamond coating grinds rather than cuts, generating less heat and vibration. For thinner beer bottles, tungsten carbide spear-point bits work if you drill at ultra-low speeds (under 1,000 RPM). Never use spade-point bits—they create pressure spikes that crack glass instantly.
Why Bit Size Determines Your Project’s Success
Using a 1/2-inch bit for a lamp cord hole in a wine bottle? You’re inviting disaster. Start with a 1/8-inch pilot hole for any opening over 3/8 inches. Drill the small hole first, then switch to your final bit size. For drainage holes in planters (3–8mm), use a 1/16-inch bit to minimize stress. Spirits bottles with heavy bases require diamond hole saws—standard bits overheat and fail on glass thicker than 1/4 inch. Always match bit size to your bottle’s purpose: lamp cords need 1/4-inch holes, while herb garden wicks fit through 5mm holes.
The Bit Rotation Trick for Clean Exit Holes
Most cracks happen when the bit breaks through the inner wall. Flip your drill to reverse (counterclockwise) rotation during the final 10 seconds of drilling. This pulls glass fibers inward instead of pushing them outward, eliminating exit-side chipping. Test this on a spare bottle first—reverse rotation only works with diamond-coated bits, not carbide. If you’re using a Dremel, attach a flexible shaft extension to maintain perfect perpendicular alignment on curved surfaces.
Non-Negotiable Safety Gear for Glass Bottle Drilling

Skipping safety gear turns a simple project into an ER visit. Glass dust contains silica that causes irreversible lung damage after just one exposure, while flying shards can blind you in milliseconds. Your absolute minimum kit includes ANSI Z87.1+ safety goggles (regular glasses shatter on impact), Kevlar cut-resistant gloves, and an N95 respirator rated for fine particulates. Skip the respirator, and you’re inhaling microscopic glass that scars your lungs permanently.
Why Your Workspace Needs a HEPA Vacuum
Working outdoors seems safer, but wind blows glass dust into your eyes and lungs. Set up indoors with a HEPA vacuum nozzle taped 2 inches from the drill point to capture 99.9% of hazardous particles. Line your work surface with a rubber mat to prevent bottle slippage, and clamp the bottle in a padded vise—never hold it by hand. Place a fire extinguisher within arm’s reach; glass dust is highly flammable near drill sparks. For wine bottle lamps, add hearing protection—drilling generates 90+ decibels of nerve-damaging noise.
Step-by-Step: Drilling Through Glass Bottles Without Cracks
This method works for 95% of bottle projects when followed precisely. Drilling takes 3–8 minutes per hole—not seconds—so set realistic expectations. Rushing guarantees failure. For a standard 750ml wine bottle, you’ll need 2 minutes of patient grinding, not aggressive drilling. Always practice on a scrap bottle first; wine and beer glass have different thicknesses that require speed adjustments.
The Cooling Fluid That Prevents 90% of Cracks
Ditch the oil—use soapy water only. Mix 1 tablespoon of dish soap into 16oz of water in a spray bottle. Petroleum-based lubricants leave residues that weaken glass adhesion for lamp grommets or planter seals. Spray a steady stream directly on the drill point—never mist from the side. For hydroponic bottles needing multiple holes, build a clay dam around the drilling area and fill it with soapy water to maintain constant immersion. If coolant stops flowing, stop drilling immediately; 15 seconds of dry operation creates invisible stress fractures.
Pressure Control: The Finger Test Method
Apply pressure equal to holding a pencil—if you feel your knuckles whitening, you’re pushing too hard. Rest your drill hand on your hip for stability instead of bracing against the bottle. When the bit penetrates halfway, reduce pressure by 50% and increase coolant flow. As you near the exit side (visible when glass turns translucent), lighten pressure until it feels like touching the bottle with a feather. For thick bases, pause every 30 seconds to let heat dissipate—glass needs time to contract between drilling bursts.
Stop Immediately: What to Do When Glass Starts Cracking
If you see a hairline crack radiating from the hole, do not pull the drill bit out. Removing it releases tension that turns micro-cracks into full shatters. Immediately spray soapy water, then inject a drop of super glue into the crack using a toothpick—the glue seals the fracture and stabilizes the glass. For lamp projects, this repair holds if the crack is under 1/4 inch, but never use a cracked bottle for liquids. If the crack spreads past the hole, wrap the bottle in a towel and dispose of it safely—attempting to drill further risks explosive fragmentation.
Polishing Bottle Holes to a Smooth Edge for Lamp Cords

Rough edges snag lamp cords and slice fingers. Start smoothing with 400-grit wet/dry sandpaper while the hole is still damp. Sand in a circular motion from both sides, applying light pressure for 30 seconds. Progress to 1,000-grit paper for a satin finish, then 2,000-grit for lamp projects where cords rub against the hole. For planters, stop at 600-grit—smoothness matters less than drainage function. Never sand dry; constant water prevents new micro-fractures. Test smoothness by running a cotton ball through the hole—if fibers catch, keep sanding.
Drilling Multiple Holes in Bottles for Hydroponic Gardens
Hydroponic systems need 3–6 precisely spaced holes, but drilling sequentially overheats the glass. Drill all holes at 50% depth first, then complete each one to full penetration. Space holes at least 1 inch apart—closer spacing creates stress zones that crack between holes. For bottle planters, drill holes at a 15-degree downward angle so water drains efficiently. Always drill the largest hole (for wicks or pumps) first, then smaller aeration holes. After drilling, apply food-grade silicone around each hole’s inner edge to prevent root rot and seal micro-fractures.
Transforming bottles into functional art is deeply satisfying when done safely and correctly. Remember: diamond bits, soapy water cooling, and feather-light pressure are your holy trinity for success. Start with beer bottles (thinner glass) before tackling wine bottles, and always wear your respirator—even one drilling session creates dangerous silica dust. Within weeks, you’ll confidently drill holes for lamps, planters, and hydroponic systems that last for years. Now grab that empty bottle on your counter and create something extraordinary—your first flawless hole awaits.


