
Your nail drill bits clogged with stubborn acrylic residue aren’t just unsightly—they’re actively working against you. When debris builds up in the flutes, bits lose cutting efficiency, forcing you to apply excessive pressure that can cause client discomfort, nail damage, and uneven finishes. Worse, contaminated bits become breeding grounds for bacteria between clients. This isn’t just about tool maintenance; it’s about protecting your reputation and your clients’ safety. By mastering these proven cleaning techniques, you’ll extend your bits’ lifespan by months while delivering consistently smooth, professional results. Let’s transform your cleaning routine from a chore into your secret weapon for flawless manicures.
Critical Safety Steps Before Cleaning Nail Drill Bits
Never skip protective gear when handling solvents—acetone and isopropyl alcohol require serious precautions. Always wear nitrile gloves to prevent skin irritation and work in a well-ventilated space to avoid inhaling fumes. Position your workstation near an open window or use an exhaust fan, especially during acetone soaks. Crucially, unplug your drill unit or remove batteries before removing bits to eliminate accidental activation risks. When handling sharp bits, hold them by the shank (not the cutting head) to avoid nicks. Never submerge the drill motor housing in any liquid—this applies even when using ultrasonic cleaners. And remember: soaking bits in acetone longer than 15 minutes can degrade metal components, so set a timer religiously. These steps aren’t optional extras; they’re non-negotiable barriers between you and serious injury.
How to Clean Nail Drill Bits After Every Client in 60 Seconds
Skipping this immediate cleanup turns minor debris into permanent buildup that dulls bits prematurely. Master this lightning-fast routine to maintain peak performance between appointments.
The Essential Post-Service Wipe-Down
Unplug your drill immediately after finishing with a client. Using a dedicated stiff-bristled brush (never share brushes between clients!), vigorously scrub the bit’s flutes and shank over a lined trash can—you should see visible acrylic dust dislodging. Pay special attention to the bit’s base where it connects to the drill, as this high-contact zone harbors bacteria. Next, saturate a lint-free wipe with 70%+ isopropyl alcohol and thoroughly wipe the entire shank. For rubber-handled bits, quickly sanitize the grip area too. This isn’t just cleaning; it’s your first line of infection control. Pro tip: Keep a small dish of alcohol and brushes at each station for seamless transitions. Never blow on bits to remove dust—that aerosolizes contaminants into your workspace.
How to Deep Clean Nail Drill Bits Weekly for Maximum Performance
Weekly cleaning tackles hardened gel and acrylic that daily wipes miss. Do this every Sunday night to start the week with razor-sharp tools.
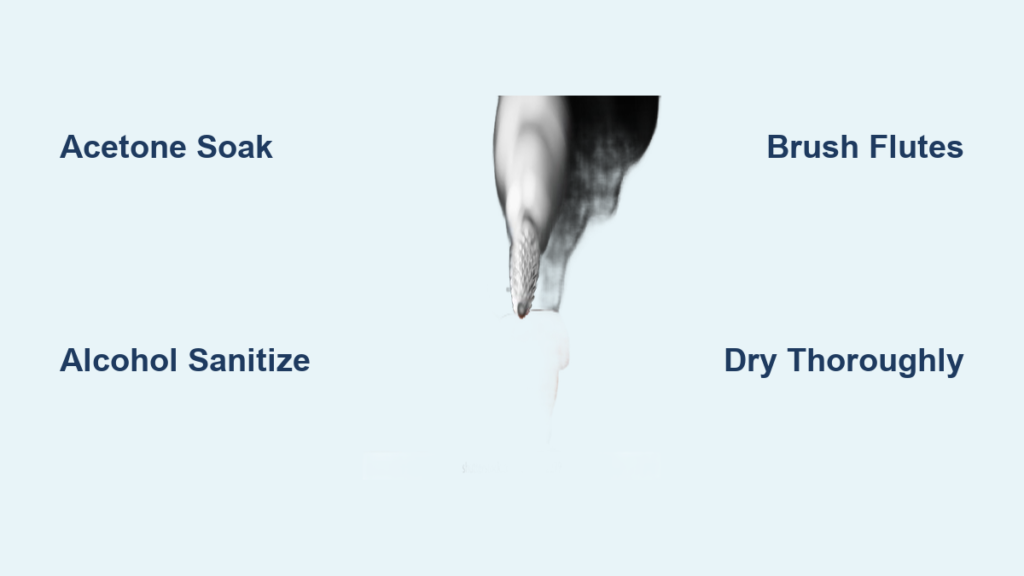
The Acetone Soak Method (Most Effective)
Fill a ceramic dish with pure acetone—not nail polish remover, which contains oils. Submerge only the metal portions of your bits for 5-10 minutes max (exceeding 15 minutes risks damage). As they soak, gently agitate with a soft toothbrush to loosen cured residue. Watch for the telltale “cloudy” acetone indicating dissolved buildup—this means it’s working. Never use metal scrubbers; they scratch cutting surfaces. Immediately after soaking, transfer bits to a fresh dish of 70%+ isopropyl alcohol for a 10-minute disinfecting bath. Rinse under warm running water until water runs clear, then pat completely dry with microfiber cloth—any moisture left causes rust overnight.
The Vinegar-Baking Soda Alternative for Sensitive Bits
For bits you can’t soak in acetone (like certain diamond-coated varieties), mix 2 cups warm water, ½ cup white vinegar, and 1 tablespoon baking soda. Soak bits for 30+ minutes to dissolve mineral deposits from hard gels. Unlike acetone, this solution won’t damage coatings but requires longer contact time. After soaking, lightly scrub flutes with a nylon brush under running water. This method won’t sanitize, so always follow with the 10-minute alcohol bath. Warning: Never combine vinegar and acetone—this creates toxic fumes.
Monthly Nail Drill Bit Restoration: Sharpening & Sterilization

This monthly ritual revives dull bits and eliminates deep-seated contaminants that weekly cleaning misses.
Ultrasonic Cleaning for Stubborn Residue
Fill your ultrasonic cleaner with warm water and one drop of dish soap—more creates excessive suds that reduce effectiveness. Run a full 5-10 minute cycle to dislodge microscopic debris from flutes. This isn’t a substitute for acetone; it’s for bits already pre-cleaned with solvents. Never submerge drill handles, and avoid using ultrasonic cleaners on ceramic bits unless manufacturer-approved. After cleaning, immediately move bits to the alcohol disinfection step—ultrasonic baths don’t sanitize.
Sharpening Dull Bits Like a Pro
Dull bits cause friction burns and excessive dust. Hold a fine-grit sharpening stone at the bit’s original bevel angle (usually 15-20 degrees). Using light, consistent strokes away from your body, hone each cutting edge 3-5 times. Test sharpness by lightly touching the bit to acrylic—sharp bits should “bite” immediately without sliding. Over-sharpening removes too much material, so stop when cutting improves. For diamond bits, use a specialized diamond hone; never sharpen carbide bits as they’ll shatter.
Smart Storage Solutions to Prevent Rust and Contamination

Where you store bits determines their longevity as much as cleaning does. After your monthly deep clean, store bits in an airtight container lined with silica gel packets—this absorbs moisture that causes rust. Never toss bits loosely into drawers where they knock against each other; use compartmentalized cases with soft foam inserts. Crucially, never store bits while damp—even microscopic moisture causes corrosion. Place a UV sanitizer in your storage cabinet for continuous disinfection, but limit exposure to 10 minutes daily since prolonged UV degrades metal. Pro tip: Label containers “CLEAN” and “TO CLEAN” to prevent accidental use of contaminated bits.
How to Clean Nail Drill Bits FAQ: Critical Questions Answered
Can I use an ultrasonic cleaner on all nail drill bits?
Yes for metal bits, but check manufacturer guidelines first—some diamond-coated bits can’t withstand ultrasonic vibrations. Always use only water with a single drop of dish soap, and never submerge the drill motor. For ceramic bits, verify compatibility to avoid cracking. Ultrasonic cleaning excels at removing resin from flutes but doesn’t replace chemical disinfection—always follow with your 10-minute alcohol soak.
How do I know when it’s time to replace versus sharpen a bit?
Sharpen bits when cutting slows but flutes remain intact. Replace immediately if you see chipping, visible wear on cutting edges, or excessive vibration during use. A simple test: file a small acrylic swatch—sharp bits produce fine dust; dull bits create large chunks and require heavy pressure. High-quality bits last 6-12 months with proper care, but ceramic/diamond bits need replacing when coatings wear thin. Never try to sharpen cracked bits—they’ll shatter during use.
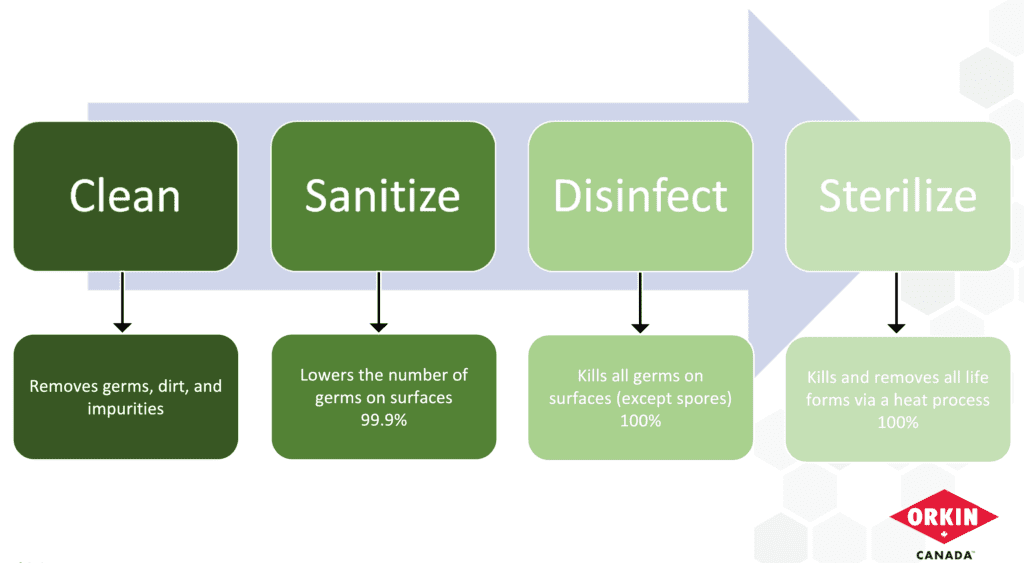
What’s the difference between sanitizing and sterilizing drill bits?
Sanitizing (with 70%+ isopropyl alcohol) reduces microbes to safe levels and is required between clients. Sterilizing (via autoclave) destroys all pathogens but isn’t practical for routine salon use and can corrode bits. For daily work, the 10-minute alcohol soak is your gold standard—never skip it. Change your disinfectant solution daily; cloudy or contaminated solution spreads bacteria. Remember: cleaning (removing debris) must always precede sanitizing—alcohol can’t penetrate acrylic buildup.
Why do my bits keep rusting even after drying?
Residual moisture in flutes is the silent killer—patting dry isn’t enough. After rinsing, place bits on a clean towel and use compressed air (or a straw) to blow through each flute. Store only when room-temperature dry; cold bits condense humidity. Switch to stainless steel bits if rust persists—they resist corrosion better than carbon steel. Never use oil-based protectants; they attract dust and contaminate next client’s nails.
Professional nail technicians know immaculate tools separate amateurs from experts. By implementing this precise cleaning system—60-second client turnovers, weekly acetone soaks, and monthly sharpening—you’ll eliminate the frustration of clogged bits and inconsistent results. Most importantly, you’re building client trust through visible hygiene practices that protect their nail health. Start tonight by restocking your acetone and alcohol supplies; tomorrow’s clients will feel the difference in every smooth, vibration-free pass of your drill. Your reputation for flawless manicures depends on what happens between appointments—not just during them.


