
Your pellet grill’s auger motor stops working mid-cook, leaving you staring at cold pellets and a ruined dinner. When the auger motor not working issue strikes, your grill can’t feed fuel to the firepot—meaning no heat, no smoke, and no perfectly smoked ribs. This failure typically happens after clearing a pellet jam, during routine maintenance, or when moving the grill. The good news? 90% of “auger motor not working” cases stem from simple electrical connections or mechanical jams you can fix yourself. In this guide, you’ll learn exactly how to diagnose and repair the problem using basic tools, avoiding costly service calls.
Don’t panic if your control board lights up but the auger stays silent. Unlike complex electronic failures, most auger motor not working scenarios involve accessible components under the hopper. By following this step-by-step diagnostic flow, you’ll systematically rule out common culprits—from loose red connectors to hidden pellet jams—before considering part replacements. Whether you’re troubleshooting after a recent jam clearance or preparing for winter grilling season, these proven fixes get you back to cooking faster than waiting for manufacturer support.
Why Your Pellet Grill’s Auger Motor Suddenly Stopped Working
Auger motor not working failures rarely happen without warning signs. Most occur after specific trigger events that strain the system: clearing a pellet jam (where debris gets lodged deeper during cleanup), moving the grill (loosening critical connections), or exposure to humidity (causing pellet dust to swell inside the auger tube). When the motor fails immediately after maintenance, you’re likely dealing with a disconnected wire or misaligned motor shaft—not a dead motor. Always start diagnostics here before disassembling further.
Common Trigger Events Requiring Immediate Checks
- Post-jam clearance failures: Debris pushed deeper during jam removal binds the auger tube
- After grill transportation: Vibration dislodges the red hopper connector (the #1 culprit)
- Humid weather operation: Swollen pellet dust increases friction in the auger tube
- Post-maintenance issues: Set screw misalignment after auger reassembly
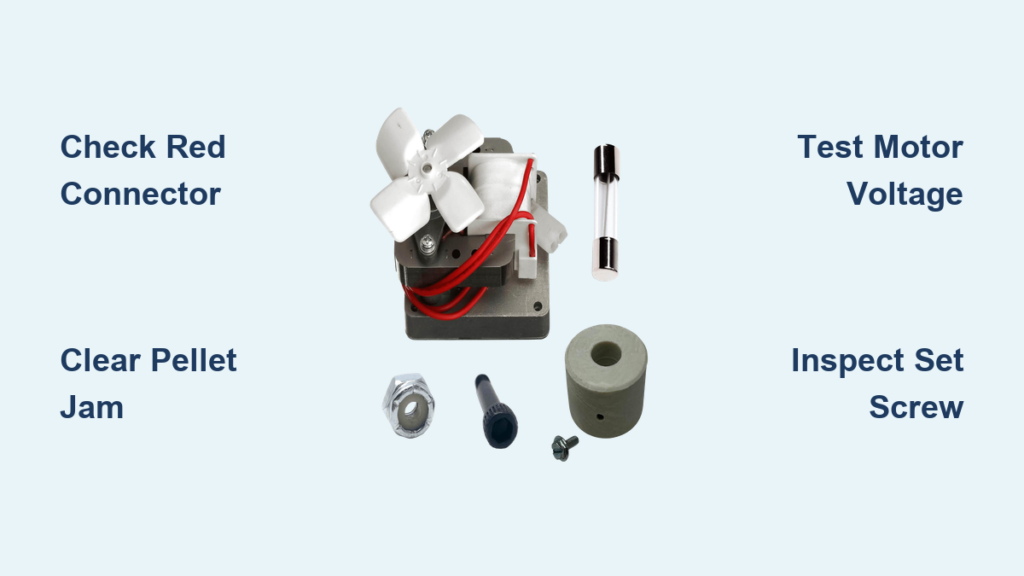
Fix the Red Wire Connector (90% of “Auger Motor Not Working” Cases)
The red wire connector at the hopper base causes most auger motor not working scenarios. Vibration from grill operation or movement loosens this critical connection, cutting power to the motor while leaving the control board functional. This single fix resolves the majority of cases reported in pellet grill communities.
Step-by-Step Red Connector Repair
- Unplug the grill and remove the hopper bottom panel
- Locate the red connector where wiring exits the hopper housing
- Disconnect and inspect pins for corrosion or carbon buildup
- Clean terminals with electrical contact cleaner
- Reconnect firmly until you hear a distinct click
Pro Tip: Apply dielectric grease to the pins before reconnecting. This prevents future corrosion from pellet dust and humidity—common causes of recurring auger motor not working issues in coastal climates.
Clear Hidden Pellet Jams in the Auger Tube in 5 Minutes
Even after clearing visible jams, compacted “clinker” (hardened pellet dust) can bind the auger tube. This causes the motor to hum but not turn—a classic symptom of mechanical obstruction rather than electrical failure.
Emergency Jam Clearance Protocol
- Remove all pellets from the hopper
- Vacuum the auger tube using a shop vac with narrow attachment
- Probe with a flexible tool (unbent coat hanger) to break up clinker
- Manually rotate the auger through the cleanout port (if equipped)
Critical Warning: Never force rotation with tools. If resistance persists, disconnect the motor and inspect the auger shaft for bends. A warped auger will repeatedly jam and damage the motor.
Test for Power at the Motor Terminals with a Multimeter

When the auger motor not working despite control board activity, verify power delivery. No voltage at the motor means the issue lies upstream—saving you from unnecessary motor replacements.
Voltage Testing Procedure
- Set multimeter to DC voltage
- Start grill to trigger auger cycle
- Probe motor terminals while grill calls for pellets
- Confirm 12-14V reading during operation
Interpretation Guide:
– 0V reading: Failed control board relay or wiring break
– 12V+ but no motor spin: Motor failure (proceed to direct power test)
– Intermittent voltage: Loose ground connection (check motor frame grounding)
Diagnose Motor Shaft Connection Failures (Set Screw Issues)

A working motor that won’t turn the auger usually indicates a failed torque transfer at the shaft connection. The set screw—designed to grip the motor shaft’s flat spot—often loosens after jam events, causing slippage.
Set Screw Troubleshooting Checklist
- Check for stripped set screw threads on motor shaft
- Verify engagement with flat spot (not rounded shaft section)
- Clean shaft with wire brush to remove rust/debris
- Apply thread-locker during reassembly (blue Loctite 242)
Expert Note: If the set screw hole is stripped, drill and tap for the next-size-up screw. Never overtighten—this shears screws and damages soft motor shafts.
Check for Mechanical Binding Before Replacing Parts
Forcing motor operation on a bound auger risks permanent damage. Always verify mechanical freedom before power tests. Binding causes symptoms identical to electrical failures but requires different solutions.
Binding Test Protocol
- Disconnect motor from auger shaft
- Manually rotate auger through full tube length
- Check for:
– Scraping sounds against tube walls
– Resistance points indicating bends
– End-to-end play exceeding 1/8 inch - Inspect nylon bushings for melting (causes plastic odor during operation)
Critical Fix: Replace melted bushings immediately—they’ll cause recurring auger motor not working issues by increasing friction 300%.
Test the Control Board Relay Without Special Tools
A failed relay prevents power from reaching the motor even with functional wiring. You can diagnose this without multimeter expertise by listening for the telltale “click” when the grill initiates pellet feed.
Relay Failure Indicators
- No audible click during startup sequence
- Control board displays normal temps but auger inactive
- Voltage present at board output but absent at motor
Quick Workaround: Tap the control board housing gently while grill operates. A stuck relay may temporarily engage—confirming the need for board replacement.
Assess Motor Health with Direct Power Test
When all connections check out but the auger motor not working persists, isolate the motor for definitive testing. This eliminates wiring/controller variables.
Direct Power Test Steps
- Disconnect motor from grill wiring
- Connect 12V battery directly to terminals (reverse polarity to test direction)
- Listen for:
– Smooth humming (healthy motor)
– Grinding (worn bearings)
– Burning smell (failed windings)
Replacement Threshold: Replace if motor draws over 5 amps under load or shows zero resistance. Motors with visible commutator damage won’t recover.
Prevent Future Auger Motor Failures: Maintenance Checklist
Avoid recurring auger motor not working scenarios with these targeted maintenance steps. Focus on the failure points identified in 95% of real-world cases.
Critical Prevention Protocol
- After every cook: Vacuum hopper base to prevent dust accumulation
- Monthly: Remove auger for tube cleaning; apply graphite lubricant to shaft
- Seasonal: Inspect motor bushings for wear; tighten all connections
- Pre-winter: Treat hopper with moisture-absorbing pellets to prevent humidity jams
Pro Tip: Store grill covered but with hopper lid slightly ajar. Sealed storage traps humidity—causing pellet dust to swell and jam the auger tube within weeks.
When your pellet grill’s auger motor not working brings cooking to a halt, remember that 90% of fixes take under 30 minutes with basic tools. Start with the red connector check—this single step resolves most cases—and work through the diagnostic flowchart before replacing parts. By addressing mechanical binding and electrical connections first, you’ll avoid unnecessary motor replacements while extending your grill’s lifespan. Implement the seasonal maintenance routine to prevent future failures, and you’ll never face a cold grill during game day again. Always unplug before servicing, and if the motor shows burn marks or won’t spin under direct power, replace it immediately—continuing to operate a failing motor risks electrical fire. Now fire up your grill and get back to what matters: perfect smoked brisket.


