
You’re ready for a weekend cookout, but your Traeger grill won’t heat up. The telltale sign? That frustrating silence where you should hear the steady whir of the auger moving pellets to the fire pot. When your Traeger grill auger not turning, it’s not just an annoyance—it’s a complete cooking shutdown. Without pellet delivery, your grill can’t generate heat, leaving you with cold metal and disappointed guests. This critical failure affects nearly 30% of pellet grill owners at some point, but here’s the good news: 80% of traeger grill auger not turning issues stem from fixable mechanical jams or simple electrical faults. In this guide, you’ll learn exactly how to diagnose and resolve the problem yourself—no technician needed—saving you hours of downtime and costly service calls.
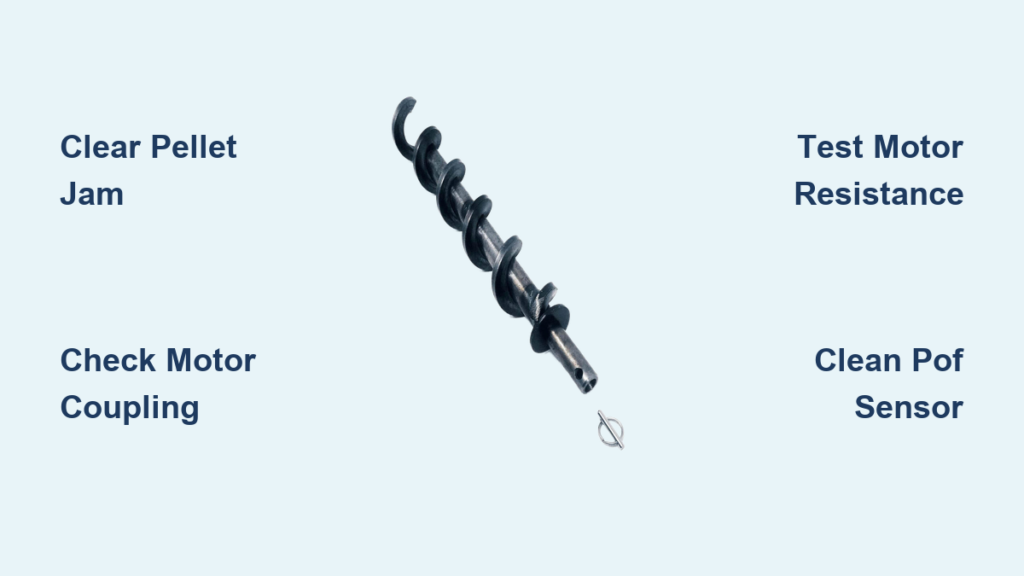
The auger is your Traeger’s lifeline: this corkscrew-shaped shaft transports pellets from the hopper to the fire pot. When it seizes, everything halts. But don’t panic—most traeger grill auger not turning scenarios fall into two buckets: physical obstructions blocking movement or electrical failures preventing power delivery. Whether you own a Pro Series, Ironwood, or Timberline model, the troubleshooting process is nearly identical. By following these steps, you’ll pinpoint whether you’re dealing with sawdust-packed debris, a sheared coupling, or a burnt-out motor. Let’s get your grill back in action before your ribs go cold.
Why Your Traeger Auger Suddenly Stops Turning
A non-turning auger isn’t random—it’s always caused by one of four specific failures. Physical jams top the list, occurring when compacted sawdust, warped pellets, or foreign objects (like stray bolts or rocks) wedge into the auger tube. This forces the motor to strain until it stalls, often burning out the coupling—a deliberate weak point designed to protect the motor. Motor failure follows closely, usually triggered by prolonged jamming that overheats the windings. You’ll hear a loud hum but see zero movement, signaling the motor’s internal gears have stripped.
Sheared motor couplings are the silent killer in many traeger grill auger not turning cases. This plastic or nylon connector between the motor and auger shaft sacrifices itself during jams. If the motor spins freely but the auger stays frozen, the coupling has likely snapped—a $15 fix. Finally, safety sensor failures can mimic mechanical issues. Your Traeger’s Proof of Fire (PoF) sensor monitors fire pot temperature; if it’s dirty or faulty, the grill assumes no fire exists and halts pellet delivery to prevent overflow. Similarly, an overheated thermal fuse cuts power to the entire auger circuit as a safety measure.
Critical Safety Steps Before Touching Your Grill
Unplug your Traeger immediately—never skip this. Even if the grill appears off, residual power could activate the auger unexpectedly. For plug-in models, yank the cord from the wall; for hardwired units, flip the circuit breaker. Next, let the grill cool for 2+ hours. Residual heat in the fire pot can exceed 500°F, risking severe burns during disassembly. While waiting, gather these tools: a 1/4″ hex key (for coupler access), Phillips screwdriver, shop vacuum with narrow nozzle attachment, multimeter, and safety glasses to shield eyes from ash and debris.
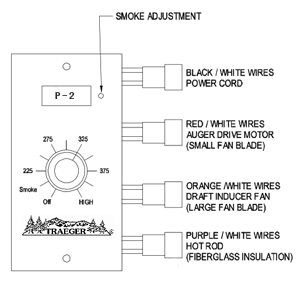
Never work on a plugged-in grill—electrocution risks are real with 24V DC motors. Also, avoid water-based cleaners near electrical components. Moisture causes corrosion in connectors, creating future failures. If you smell burnt plastic near the motor, unplug immediately and let components cool; this indicates serious overheating. Finally, photograph wire connections before disconnecting them. Traeger’s color-coded wiring (typically red/black) is easy to mix up during reassembly, causing short circuits.
Step-by-Step Diagnosis: Find the Exact Failure Point

Step 1: Clear Pellets and Check for Bridging
Empty the hopper completely—pellet bridging (where pellets arch over the auger inlet) mimics jam symptoms. Scoop out pellets by hand, then shine a flashlight into the hopper. If you see a hollow space above packed pellets, bridging is likely. Break it up with a long spoon before proceeding. Store removed pellets in an airtight container; damp pellets cause future jams.
Step 2: Manual Spin Test for Physical Jams
Locate the auger motor at the hopper’s rear. Insert a 1/4″ hex key into the coupler (the small square drive between motor and auger shaft). If it won’t budge, you have a jam. If it spins stiffly but freely, the problem is electrical. Critical detail: Rotate clockwise only—counter-clockwise can damage internal components. If jammed, skip to the clearing section below. If free-spinning, reconnect the coupler and move to Step 3.
Step 3: Power-On Motor Behavior Analysis
Plug in the grill, set it to 225°F, and start a cook cycle. Watch and listen closely:
– Humming/vibration with no movement = Mechanical jam overloading the motor
– Silence with no motor response = Electrical fault (motor, wiring, or board)
– Motor spins but auger doesn’t = Sheared coupling (the coupler is broken)
– Delayed start followed by stop = PoF sensor failure (grill thinks fire died)
Clearing a Stubborn Auger Jam in 5 Minutes
Disassemble Without Damaging Components
Remove the hopper’s side access panel (typically 4-6 screws). Don’t force stuck screws—use penetrating oil if needed. Disconnect the motor’s wiring harness by pressing the tab on the connector. Unscrew the motor’s mounting bolts (usually two 10mm), but leave the coupler attached to the auger shaft for easier reassembly.
Vacuum and Brush Debris Safely
With the motor detached, insert your shop vacuum’s narrow nozzle into the auger tube opening. Run it for 30 seconds to extract loose sawdust. Next, use a flexible drill brush (or a 12″ zip tie wrapped in microfiber cloth) to scrub the tube’s interior. Never use metal rods—they scratch the tube, creating future snag points. Pay special attention to the fire pot end where melted pellet clumps accumulate.
Reassemble with Precision
Reinsert the auger shaft until it clicks into the drive socket. Slide the motor back into position, aligning the coupler with the auger shaft. Hand-tighten set screws only—over-tightening strips threads. Before restoring power, spin the auger manually again to confirm smooth operation. If resistance remains, disassemble and re-clean; forcing it risks motor burnout.
Motor Testing and Replacement Protocol

Resistance Test: Confirm Motor Health
Unplug the grill. Set your multimeter to Ω (ohms). Touch probes to the motor’s two connector pins. 3-5 ohms = healthy motor. “OL” (open loop) = dead windings. 0 ohms = internal short. If readings fall outside 3-5Ω, replace the motor—Traeger part #TFB57BLA fits most Pro Series and Ironwood models ($45).
Live Voltage Test: Diagnose Power Delivery
With grill plugged in and in “Smoke” mode, back-probe the motor connector pins using multimeter set to 24V DC. 18-24V during feed cycles = board is functional. 0V = faulty control board. Critical warning: Keep fingers clear of moving parts! If voltage arrives but motor won’t run, replacement is mandatory.
Motor Swap Without Common Mistakes
After disconnecting power, note the motor’s orientation (arrow markings indicate rotation direction). Install the new motor with mounting bolts finger-tight first. Align the coupler perfectly—a 1mm misalignment causes premature wear. Test before final tightening: cycle the grill 3x to verify smooth feeding.
Control Board, Wiring, and Sensor Deep Dive
Verify Wiring Integrity and Board Signals
Trace wires from motor to control board. Look for chewed insulation (rodents love these) or corroded pins (common in coastal areas). Clean contacts with electrical contact cleaner. During a feed cycle, listen for a distinct click from the board—if absent, the relay is dead.
Proof of Fire Sensor Reset Procedure
Remove the fire pot and locate the PoF sensor (stainless steel probe near the burn pot). Wipe it with isopropyl alcohol to remove carbon buildup. Reboot the grill—if the auger still won’t run after 5 minutes, the sensor needs replacement (part #TFB58BLA).
Prevent Auger Failures Before They Happen
- Use only premium pellets: Avoid bargain bags—high sawdust content causes jams. Opt for Pit Boss or Traeger brand hardwood pellets with <1% fines.
- Vacuum after every cook: Remove ash from the fire pot using a shop vac on low setting. Ash infiltration into the auger tube is the #1 preventable cause.
- Perform shutdown cycles religiously: After cooking, run your grill at 225°F for 30 seconds to clear residual pellets from the auger tube.
- Store pellets properly: Keep unused pellets in vacuum-sealed containers with silica gel packs. Never leave pellets in the hopper over 48 hours in humidity above 60%.
When your traeger grill auger not turning crisis strikes, remember this: 9 out of 10 fixes take under 20 minutes and cost nothing. Start with the manual spin test—this single step diagnoses 70% of issues. If you clear a jam but the problem recurs within weeks, replace the motor coupling proactively; it’s designed to fail first to save your $200 motor. Most importantly, never ignore early warning signs like sluggish pellet feeding or unusual grinding noises. By following these protocols, you’ll transform from frustrated owner to confident grill technician, ensuring every cook starts exactly when you’re ready. Your Traeger’s auger isn’t magic—it’s mechanics. And mechanics can always be fixed.


