
That frustrating moment when your drill bit burns through wood or struggles to penetrate metal usually comes down to one critical factor: incorrect speed settings. Knowing how to adjust drill press speed properly transforms your results from amateur to professional while extending tool life and preventing dangerous situations. Whether you’re working with delicate plastics or hardened steel, selecting the right RPM ensures clean holes, minimal heat buildup, and safer operation. This guide delivers precise, actionable steps to master speed adjustments on both traditional belt-driven and modern variable-speed drill presses.
Your drill press’s speed directly impacts bit longevity, hole quality, and workshop safety. Running too fast causes burning in wood, work hardening in metals, and premature bit failure. Too slow and you’ll struggle with feed rates, creating excessive heat through friction. The good news? Learning how to adjust drill press speed correctly takes just minutes but pays off in every project you complete. Let’s dive into the specific systems and procedures that will make you confident in speed selection for any material.
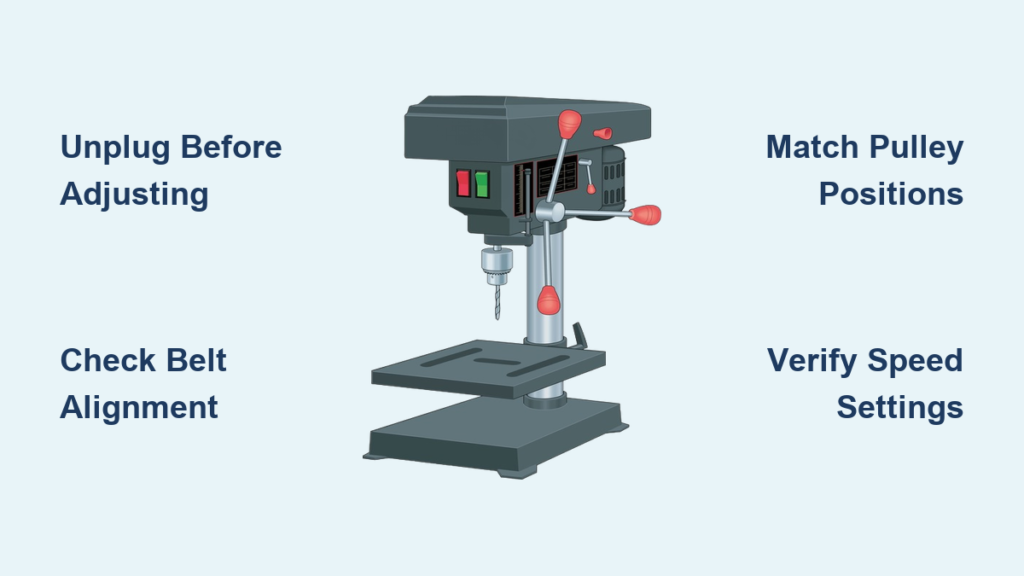
Belt-Driven Drill Press Speed Adjustment Procedures
Repositioning Belts on Step Pulleys Safely
Changing speeds on your belt-driven drill press requires careful attention to safety protocols before you touch a single pulley. Always unplug your machine completely before attempting any speed adjustments—this isn’t just recommended, it’s non-negotiable for your safety. Locate the tension release mechanism, typically a wing nut or lever on the motor mounting plate, and loosen it just enough to create slack in the V-belt.
When moving stubborn belts between pulley grooves, use a flathead screwdriver as a gentle guide rather than a pry bar to avoid damaging the belt edges. Rotate the pulley slowly while applying upward pressure on the belt section you’re moving. After repositioning, retension the belt to allow approximately ½ inch of deflection when pressed firmly with your thumb—this prevents both slippage and excessive bearing wear.
Critical alignment check: Before powering up, ensure both pulleys are perfectly parallel. Misaligned pulleys cause rapid belt wear and dangerous vibration. Stand directly in front of your drill press and verify the belt runs straight across both pulleys without angling to either side. A misaligned belt will quickly deteriorate and could snap during operation.
Matching Pulley Positions to Material Requirements
The secret to effective speed selection lies in understanding pulley ratios. When the belt runs on the smallest motor pulley paired with the largest spindle pulley, you achieve your slowest, most powerful setting—perfect for large bits in hardwoods or metal drilling. Conversely, the largest motor pulley to smallest spindle pulley delivers maximum RPM for small bits in soft materials.
For common woodworking tasks:
– 1/4″ brad point bits in softwood: Smallest motor pulley to middle spindle pulley
– 1″ Forstner bits in oak: Smallest motor pulley to largest spindle pulley
– 1/2″ twist drills in plywood: Middle motor pulley to middle spindle pulley
Metalworkers should memorize these critical pairings:
– 1/8″ HSS bits in aluminum: Largest motor pulley to smallest spindle pulley
– 1/4″ bits in mild steel: Middle motor pulley to largest spindle pulley
– 1/2″ bits in stainless steel: Smallest motor pulley to largest spindle pulley
Electronic Variable Speed Drill Press Control Techniques
Precise RPM Selection Without Belt Changes
Modern variable speed drill presses eliminate belt adjustments but require understanding their electronic controls. Power on your machine with no load applied, then gradually rotate the speed dial while watching the digital readout (if equipped). Most electronic systems allow real-time adjustments, but never change speeds under heavy load as this stresses the motor electronics.
Your machine likely includes a speed chart either on the column or in the manual—keep this visible near your workspace. When referencing this chart, match both your bit diameter and material type to find the recommended setting. For example, drilling 3/8″ holes in aluminum typically requires 1,200-1,800 RPM, while the same size hole in stainless steel needs only 200-300 RPM.
Pro tip: When starting with a new material, begin at one-third of the recommended speed and gradually increase while monitoring bit performance. This prevents costly mistakes with expensive materials or specialized bits. If your drill press lacks a digital readout, invest in an inexpensive laser tachometer to verify actual RPM—many electronic controls drift over time.
Material-Specific Speed Settings Guide
:max_bytes(150000):strip_icc()/drill-press-chart-424bb9992cb84508936912ea46a0569f.jpg)
Woodworking Speed Optimization
The right speed transforms your wood drilling results from ragged to professional. Softwoods like pine and poplar tolerate higher speeds—2,500-3,500 RPM for 1/4″ bits—while hardwoods like maple and walnut require slower speeds to prevent burning. For 1″ Forstner bits in oak, drop to 400-800 RPM and use multiple shallow passes rather than forcing the bit through in one go.
Specialty wood bits need customized speeds:
– Brad point bits: Run 20% faster than standard twist drills for cleaner holes
– Forstner bits: Reduce speed by 30-50% compared to twist drills of same diameter
– Hole saws: Limit to 300-500 RPM regardless of size to prevent binding
When working with laminates or veneers, back your workpiece with scrap material and reduce speed by 25% to prevent tear-out on the exit side. Plywood and MDF require 20-30% slower speeds than solid wood to avoid edge chipping.
Metal Drilling Speed Requirements
Metalworking demands strict adherence to speed guidelines to prevent work hardening and bit failure. Mild steel with high-speed steel (HSS) bits follows this progression:
– 1/8″ bits: 1,500-2,000 RPM
– 1/4″ bits: 800-1,200 RPM
– 1/2″ bits: 200-400 RPM
Aluminum allows much higher speeds due to its softness, but requires vigilance to prevent galling:
– 1/8″ bits: 2,500-3,500 RPM
– 1/4″ bits: 1,500-2,500 RPM
– 1/2″ bits: 1,000-1,500 RPM
Critical warning: Stainless steel requires dramatically slower speeds—30-50% of mild steel settings—because it work-hardens rapidly. Drilling at standard steel speeds creates friction that instantly hardens the material around the hole, making further penetration impossible and often breaking your bit.
Speed Adjustment Safety Protocols
Pre-Change Inspection Checklist
Before every speed adjustment, perform these critical safety checks:
– Verify power disconnection—physically check the plug is removed
– Inspect belt condition for cracks, glazing, or frayed edges
– Check pulley alignment by sighting across both pulleys
– Test tension—properly tensioned belts deflect ½-¾ inch under thumb pressure
Never attempt to adjust belts while the machine is running or plugged in—this accounts for most serious drill press injuries. If you encounter excessive resistance when moving belts, investigate the cause rather than forcing them. Often, a slightly misaligned pulley or binding motor mount creates unnecessary tension.
Recognizing Dangerous Speed Conditions
Your drill press communicates when speeds are inappropriate—learn these warning signs:
– Burning smell during wood drilling: Immediate speed reduction required
– Blue discoloration on metal bits: Speed too high or insufficient coolant
– Excessive vibration at specific RPMs: Indicates harmonic resonance
– Squealing belts: Signals improper tension or misalignment
If your bit binds or the motor strains significantly, stop immediately. Forcing the issue at incorrect speeds can cause catastrophic bit failure, sending shrapnel toward your face. Always start slower than you think necessary—you can increase speed, but you can’t undo a broken bit or damaged workpiece.
Troubleshooting Speed-Related Problems
Solving Common Drilling Issues
When your drill press isn’t performing as expected, these speed-related fixes often solve the problem:
Problem: Bits burning wood edges
– Cause: Speed too high for material density
– Solution: Reduce speed by 25-35% and test on scrap first
– Pro tip: Apply paste wax to bit flutes to reduce friction
Problem: Metal bits loading up with chips
– Cause: Speed too low for material type
– Solution: Increase speed 15-25% while maintaining steady feed pressure
– Critical: For steel, use cutting fluid at lower speeds
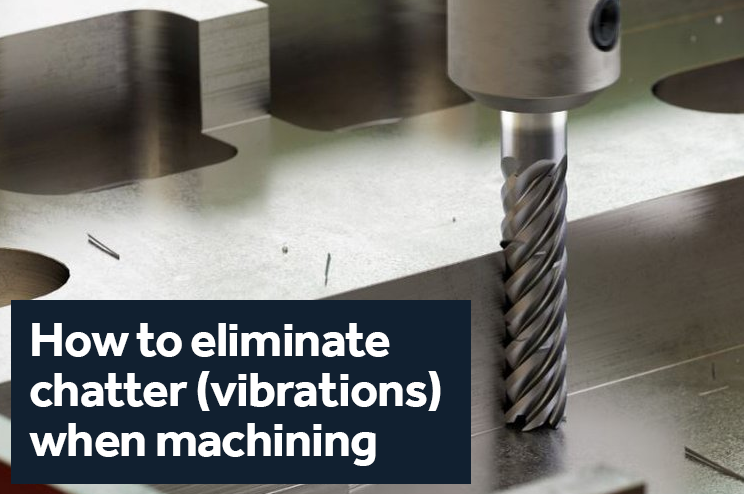
Problem: Excessive bit chatter or vibration
– Cause: Speed coinciding with natural frequency of setup
– Solution: Adjust speed by 100-200 RPM increments until vibration stops
– Warning: Persistent vibration damages bearings over time
Performance Optimization Techniques
Maximize your drill press results with these advanced speed techniques:
– Pilot hole strategy: Drill a small pilot hole at higher speed, then enlarge at proper speed
– Progressive drilling: For large holes, use incrementally larger bits at appropriate speeds
– Feed pressure adjustment: Softer materials require lighter pressure at higher speeds
– Coolant timing: Apply cutting fluid before reaching full drilling depth
When working with plastics like acrylic or polycarbonate, reduce speed by 20-30% from wood settings and back your workpiece with scrap material. These materials melt rather than cut when speeds are too high, creating dangerous binding situations.
Final Speed Adjustment Recommendations
Mastering how to adjust drill press speed separates novice users from professionals. Always begin new projects at the lower end of the recommended speed range—you can increase RPM if needed, but you can’t recover from a burned workpiece or broken bit. Keep a laminated speed chart taped to your drill press column with your most common material-bit combinations.
Pro maintenance tip: Schedule monthly belt inspections—replace V-belts annually even if they appear serviceable, as internal cord degradation isn’t visible. For electronic speed controls, clean speed dial contacts annually with electrical contact cleaner to prevent erratic operation.
Remember that proper speed selection is the foundation of precision drilling. When in doubt, slow down—most drilling errors come from excessive speed rather than insufficient RPM. Your drill bits, workpieces, and most importantly, your safety will thank you for taking these few extra moments to set the perfect speed before every operation.


