
That frustrating moment when your Hitachi drill suddenly dies mid-project—or you need to swap batteries for a long job—is all too familiar. Knowing how to remove battery from Hitachi drill properly isn’t just about convenience; it’s critical for avoiding damaged latches, electrical hazards, or even battery swelling. Whether you’re replacing an aging Ni-Cd pack or upgrading to lithium-ion, this guide delivers the exact steps to safely disconnect power from your Hitachi (now Metabo HPT) cordless drill. You’ll learn model-specific release techniques, avoid common removal mistakes, and handle batteries correctly after extraction—all based on official safety protocols.
Unlike generic tutorials, this guide addresses quirks across Hitachi’s legacy models—from older DS12DVF3 screwdrivers to modern Metabo HPT replacements. We’ve condensed manufacturer manuals and technician insights into a foolproof sequence you can complete in under 90 seconds. Most importantly, you’ll understand why each step matters for your safety and tool longevity. Let’s get that battery out the right way.
Essential Pre-Removal Safety Steps Before Touching Your Drill
Skipping these steps risks electric shock, battery damage, or accidental tool activation. Hitachi drills store residual power even when “off,” making preparation non-negotiable.
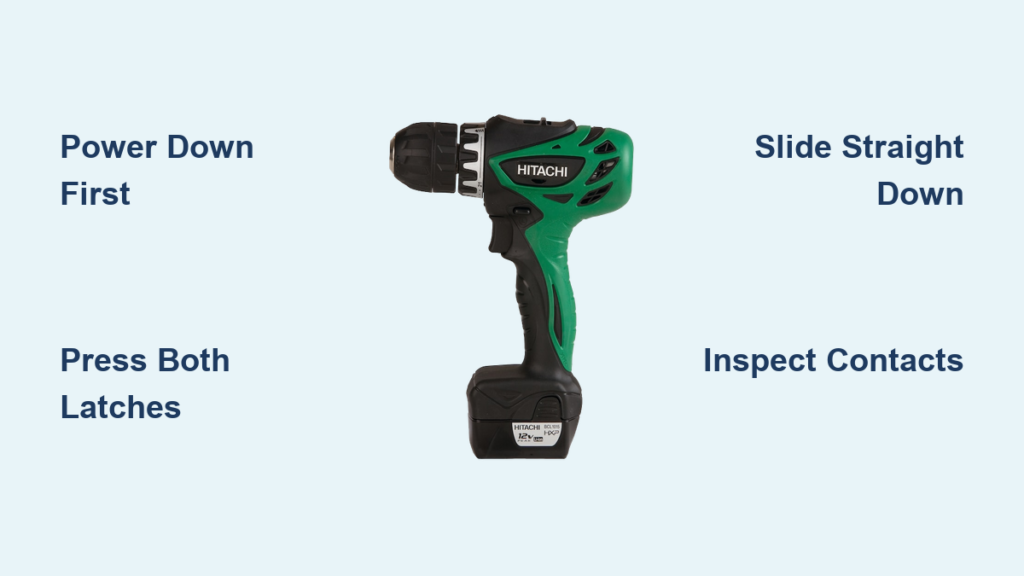
Power Down and Workspace Setup
Flip the drill’s mechanical switch to the “0” or “Off” position—never assume the trigger is sufficient. Remove belt clips, depth gauges, or chuck attachments blocking battery access. Work on a stable, non-conductive surface like a wooden workbench in daylight or bright LED lighting. Dim lighting causes misaligned latch pressing, the #1 reason batteries get stuck.
Mandatory Protective Gear and Battery Checks
Wear ANSI-rated safety glasses to shield eyes from spring-loaded latch debris or corroded contact particles. Heavy-duty work gloves improve grip during slide-off motions but avoid thick gloves that reduce latch sensitivity. Before touching latches, inspect the battery for swelling, leaks (sticky residue), or corrosion (white/green crust). If you see swelling, STOP—do not remove the battery. Place the drill in a fireproof container outdoors and contact Hitachi support immediately.
Finding Your Hitachi Drill’s Dual-Side Release Latches

All Hitachi/Metabo HPT drills use side-mounted latches—not top or bottom buttons. Your model’s latch style determines your technique.
Identifying Twin Tab vs. Twin Button Mechanisms
Rotate the drill so the battery base faces you. Older Ni-Cd models (pre-2010 like DS14DSE) feature spring-loaded plastic tabs protruding 2-3mm from the battery housing sides. Newer lithium-ion models (e.g., WH18DBL) use flush-mounted buttons requiring precise inward pressure. Both require simultaneous activation—pressing one side first jams the mechanism. The latch location never changes: always centered vertically on the left and right battery edges, within thumb-reach when gripping the handle.
Model-Specific Release Quirks to Watch For
- Compact screwdrivers (DS12DVF3): Latches sit above the battery grip ridge—press downward while sliding.
- 18V hammer drills (DS18DBL): Buttons recess deeper; use fingernail edges, not pads, for leverage.
- Legacy Ni-Cd packs: Tabs may feel stiff; apply steady pressure for 2 seconds before sliding.
Pro Tip: If latches won’t depress, wipe the housing with isopropyl alcohol—dirt buildup causes 70% of “stuck battery” issues.
Step-by-Step Hitachi Battery Removal Without Damaging Latches
Follow this sequence exactly—forcing the battery causes broken tabs requiring $40+ replacements.
Positioning for Optimal Leverage
Place the drill handle in your non-dominant hand with the chuck pointing left. Rest the battery base flat on your palm for upward support. Your dominant hand’s thumb and index finger must align perfectly with both latches. Misalignment causes uneven pressure, jamming the pack. For heavy drills (like WH18DBL), brace the tool against your hip for stability.
Depressing Latches: The Two-Second Rule
Apply firm, straight-inward pressure to both latches until you hear a distinct click. Key mistake: Angled pressure (common with gloves) bends tabs. Hold latches depressed for a full two seconds—this releases internal spring tension. If no click occurs, reposition fingers and retry. Never use screwdrivers or pliers; Hitachi’s plastic latches fracture easily.
Sliding the Battery Off Safely
While holding latches down, slide the battery straight downward (1-2 inches) in one smooth motion. Do not twist, wiggle, or pry. If resistance occurs:
1. Release latches
2. Wipe contacts with dry microfiber cloth
3. Re-press latches with 20% more pressure
Forcing past resistance cracks the battery housing. If stuck after 3 attempts, seek professional help—see section below.
Post-Removal Contact Inspection Protocol
Examine the drill’s metal contact pins and battery terminals for:
– Corrosion: White/green crust (clean with cotton swab + vinegar)
– Bent pins: Gently straighten with needle-nose pliers
– Burn marks: Indicates electrical fault; do not reuse battery
Never insert batteries with damaged contacts—this risks fire during reinstallation.
Replacing Your Hitachi Drill Battery: OEM vs. Upgraded Options

Using incompatible batteries voids warranties and risks catastrophic failure.
Direct OEM Replacement: The Foolproof Method
Match your drill’s model number (e.g., WH14DBL) to Hitachi’s current Metabo HPT battery line. Original packs like the 18V 5.0Ah (BL1850) have:
– Model-specific shrouds preventing incorrect insertion
– Thermal sensors that communicate with the drill’s circuitry
– 5-year warranty when purchased from authorized dealers
Critical step: Charge new batteries before first use—lithium packs degrade if installed at 0% capacity.
Lithium-Ion Upgrades: When It’s Safe (and When It’s Not)
Only attempt upgrades on discontinued Ni-Cd drills (e.g., DS14DSE) with no OEM battery availability. Never modify modern lithium drills. Safe upgrades require:
– 3S/4S 18650 packs matching original voltage (14.4V=3S, 18V=4S)
– Battery management system (BMS) rated for drill surge currents
– Professional soldering of nickel strips (no spot welders = fire risk)
⚠️ WARNING: DIY packs without BMS can overheat in <30 seconds during use. Recycle old Ni-Cd batteries properly—do not install lithium cells in Ni-Cd housings.
Correct Disposal and Recycling for Hitachi Drill Batteries
Improper disposal causes landfill fires and toxic leaks.
Handling Swollen or Damaged Batteries
Place puffy batteries in a sand-filled metal container outdoors. Contact your municipal hazardous waste facility—many Home Depots or Batteries Plus accept damaged packs. Never puncture, incinerate, or submerge in water.
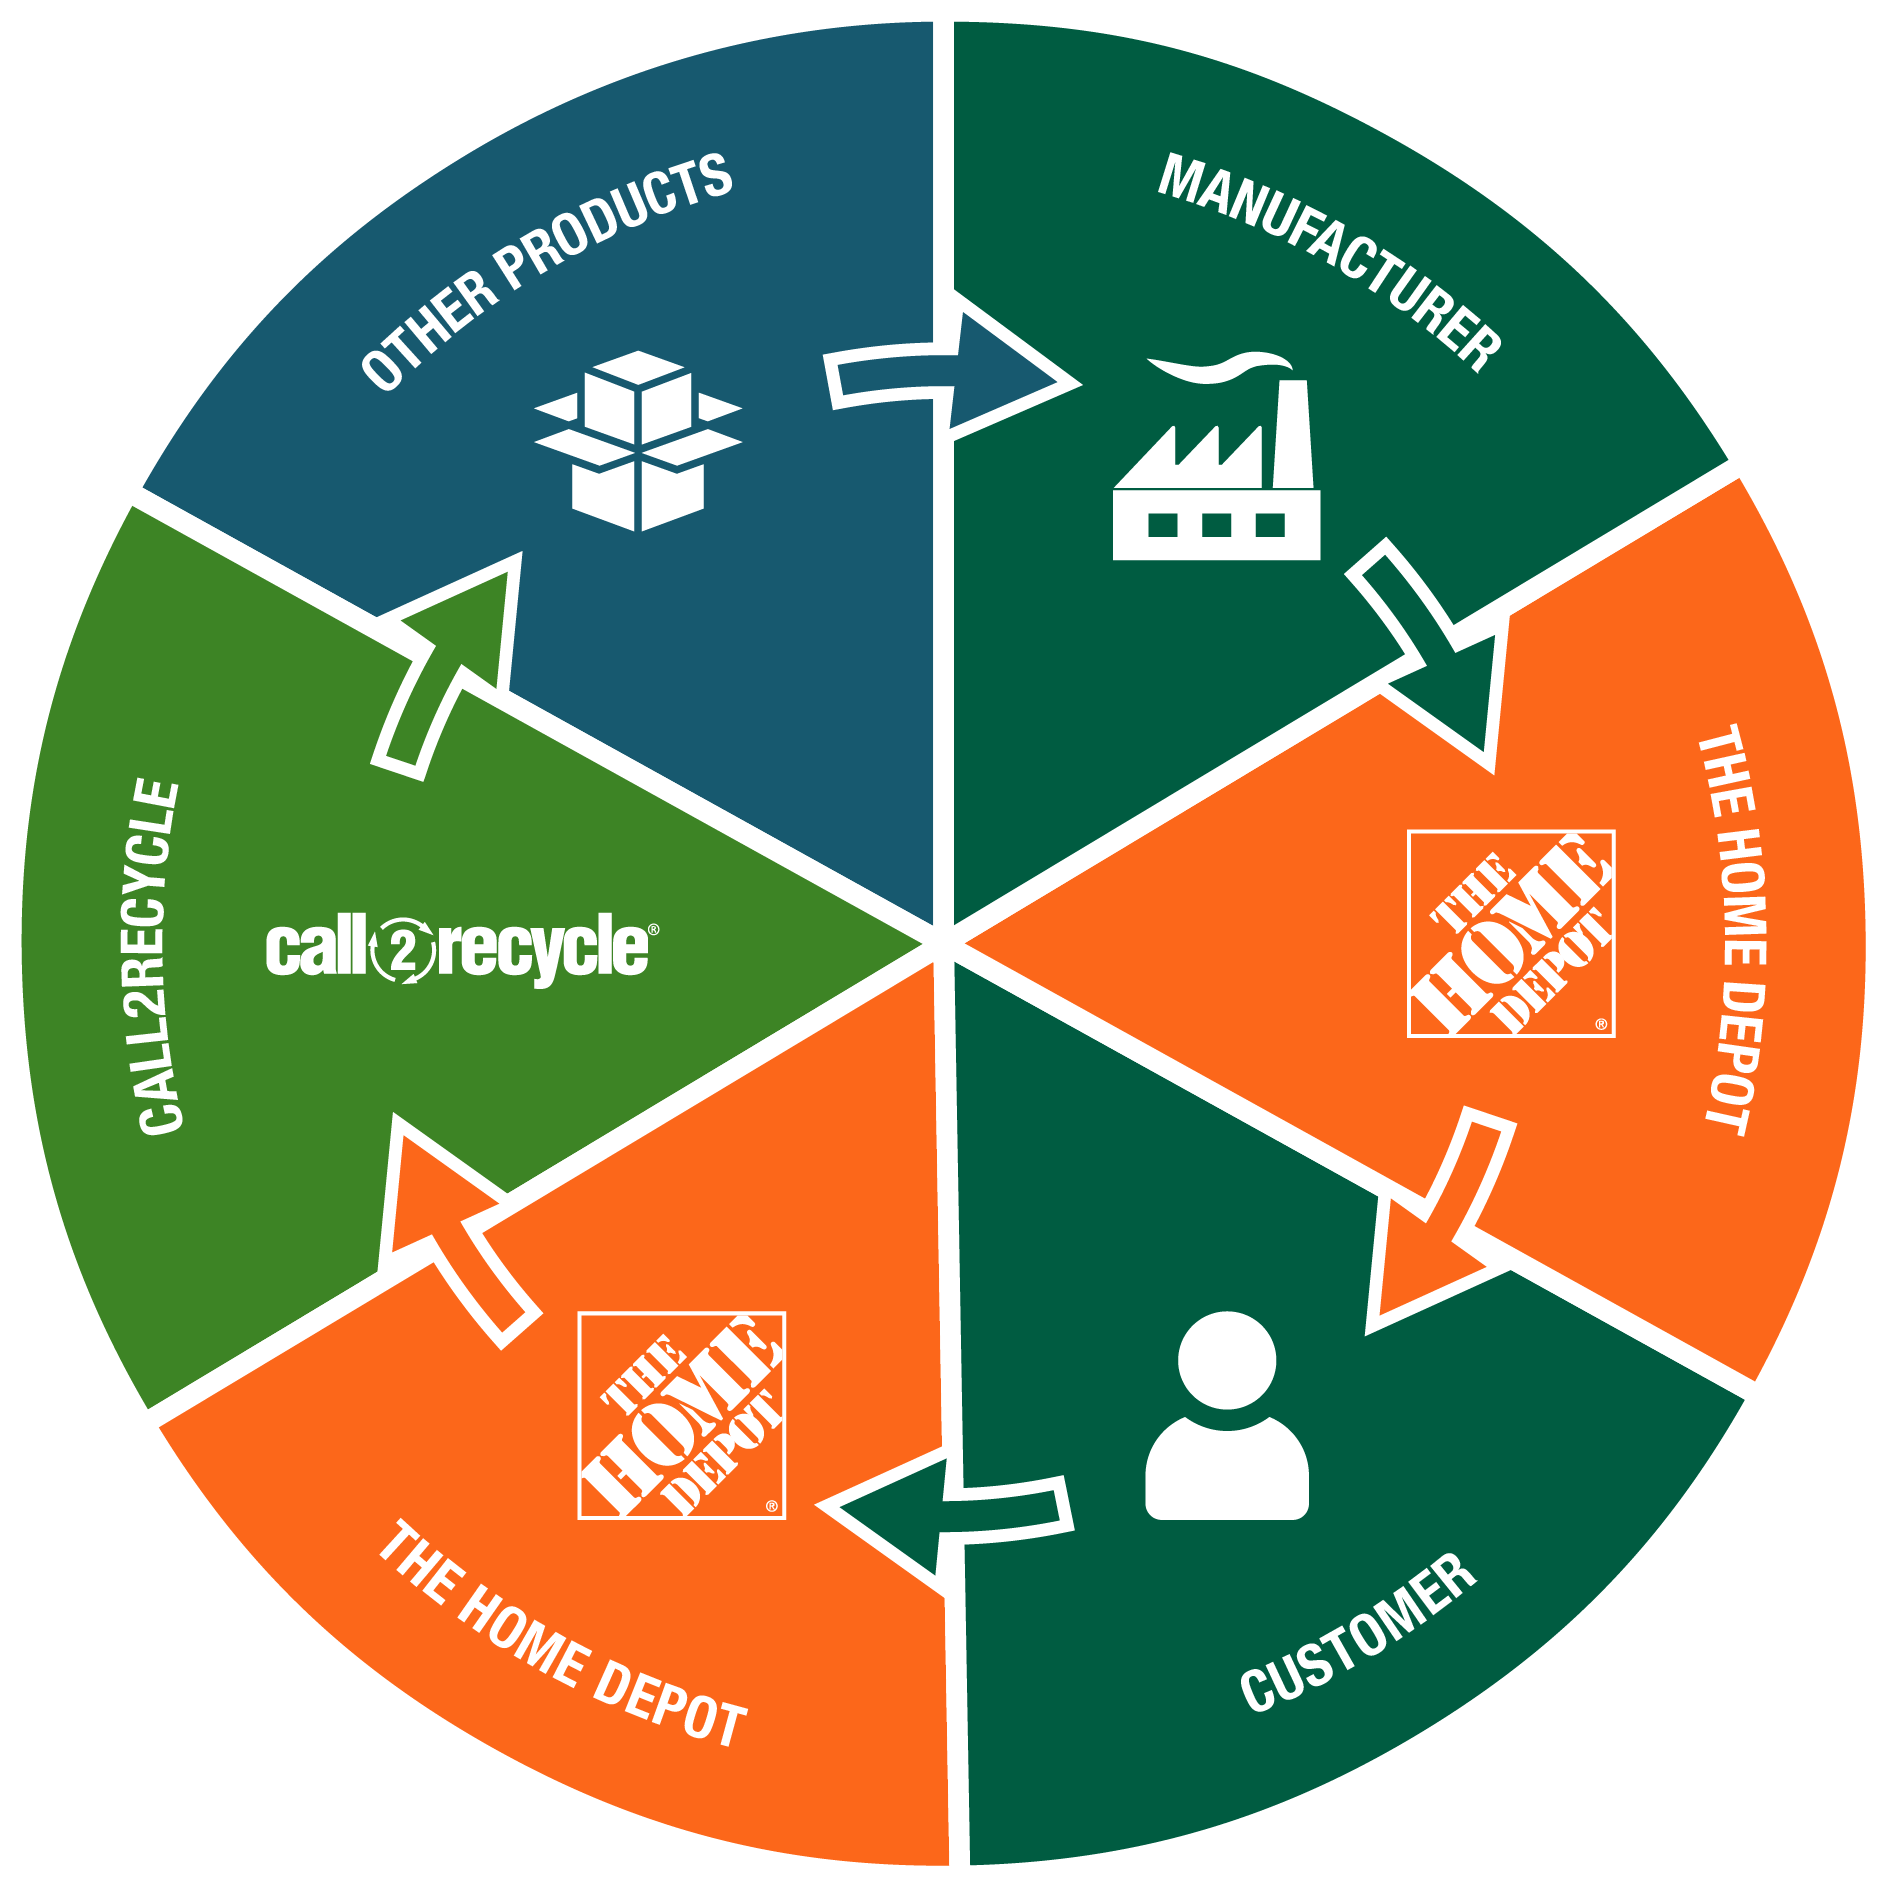
Recycling Functional but Dead Batteries
Use Call2Recycle’s locator tool to find drop-off points. Most Ace Hardware stores accept Hitachi batteries. Always tape terminals with electrical tape before transport to prevent short circuits. Ni-Cd packs contain cadmium—a neurotoxin requiring specialized recycling.
When to Stop and Call a Hitachi Repair Technician
Do not proceed if you encounter these red flags:
– 🔥 Battery swelling, heat, or chemical leaks (immediate fire hazard)
– 🔧 Latches broken or unresponsive after 3 removal attempts
– ⚡ Burnt smell from contacts or melted housing
– 🔄 Drill activates when pressing latches (indicates wiring fault)
Visit Metabo HPT’s service center locator—most offer free battery removal diagnostics. For discontinued models, technicians can often source legacy packs from Hitachi’s Japan warehouse.
Final Battery Removal Checklist for Hitachi Drills
- Drill powered OFF and workspace prepped ✅
- Safety glasses and gloves worn ✅
- Latches identified and cleaned ✅
- Simultaneous pressure applied for 2+ seconds ✅
- Battery slid straight downward (no twisting) ✅
- Contacts inspected before reinstallation ✅
By mastering how to remove battery from Hitachi drill correctly, you extend your tool’s lifespan and avoid dangerous shortcuts. Remember: OEM batteries cost less than drill repairs from forced removal. For legacy models with dead Ni-Cd packs, prioritize certified recycling over risky upgrades. Keep this guide handy for your next battery swap—you’ll have power restored in under two minutes, safely and confidently.
Pro Maintenance Tip: Clean battery contacts monthly with a pencil eraser to prevent 90% of “no power” issues. Store spare batteries at 40% charge in a cool, dry place—full charge accelerates degradation.


