
Your drill sputters to a stop mid-project, and the battery indicator shows nothing—no lights, no response, just a heavy paperweight. When how to recharge a dead drill battery becomes your urgent question, desperation might push you toward risky “revival” hacks circulating online. But lithium-ion drill batteries aren’t ordinary power sources; they contain volatile chemistry that can ignite violently if mishandled. While a deeply discharged battery might be recoverable through controlled methods, understanding the extreme dangers is non-negotiable. This guide details the precise steps to attempt revival—only if you accept the fire risks—and why replacement is often the only truly safe solution.
A “dead” drill battery typically enters deep discharge when its internal protection circuit cuts power to prevent cell damage. At voltages below 2V per cell, standard chargers ignore it entirely. The jump-start techniques here aim to nudge the battery above this threshold so the charger recognizes it again. However, forcing energy into compromised cells risks thermal runaway—a chain reaction where overheating cells vent flammable gas, potentially causing explosions. Never attempt these methods indoors, without safety gear, or if your battery shows physical damage. If you lack experience with electronics, stop reading now: recycling and replacing is your safest path.
Why Your Drill Battery Won’t Charge and When Revival Is Possible
Lithium-ion drill batteries fail to charge for specific technical reasons—not all are recoverable. The most common scenario is deep discharge below 1.5V per cell, triggering the battery management system (BMS) to lock out charging as a safety measure. If your battery shows zero voltage but has no swelling, dents, or leaks, revival might succeed. However, if the BMS has permanently blown its internal fuse (common after months of discharge), no jump-start will work. Crucially, batteries stored below 1V per cell for weeks are often irreversibly damaged and pose extreme fire hazards during revival attempts. Always inspect for swelling first—a puffed battery case means immediate retirement to a recycling facility.
When Should You Absolutely Not Attempt Revival?
- Swelling or deformation: Even slight puffiness indicates gas buildup from failed cells.
- Visible damage: Cracks, punctures, or electrolyte leaks make the battery a fire bomb.
- Zero voltage after long storage: If the battery sat unused for 6+ months, cell degradation is likely severe.
- Previous charging failures: If the battery sparked, smoked, or overheated before dying, internal damage exists.
Essential Safety Gear and Workspace Setup
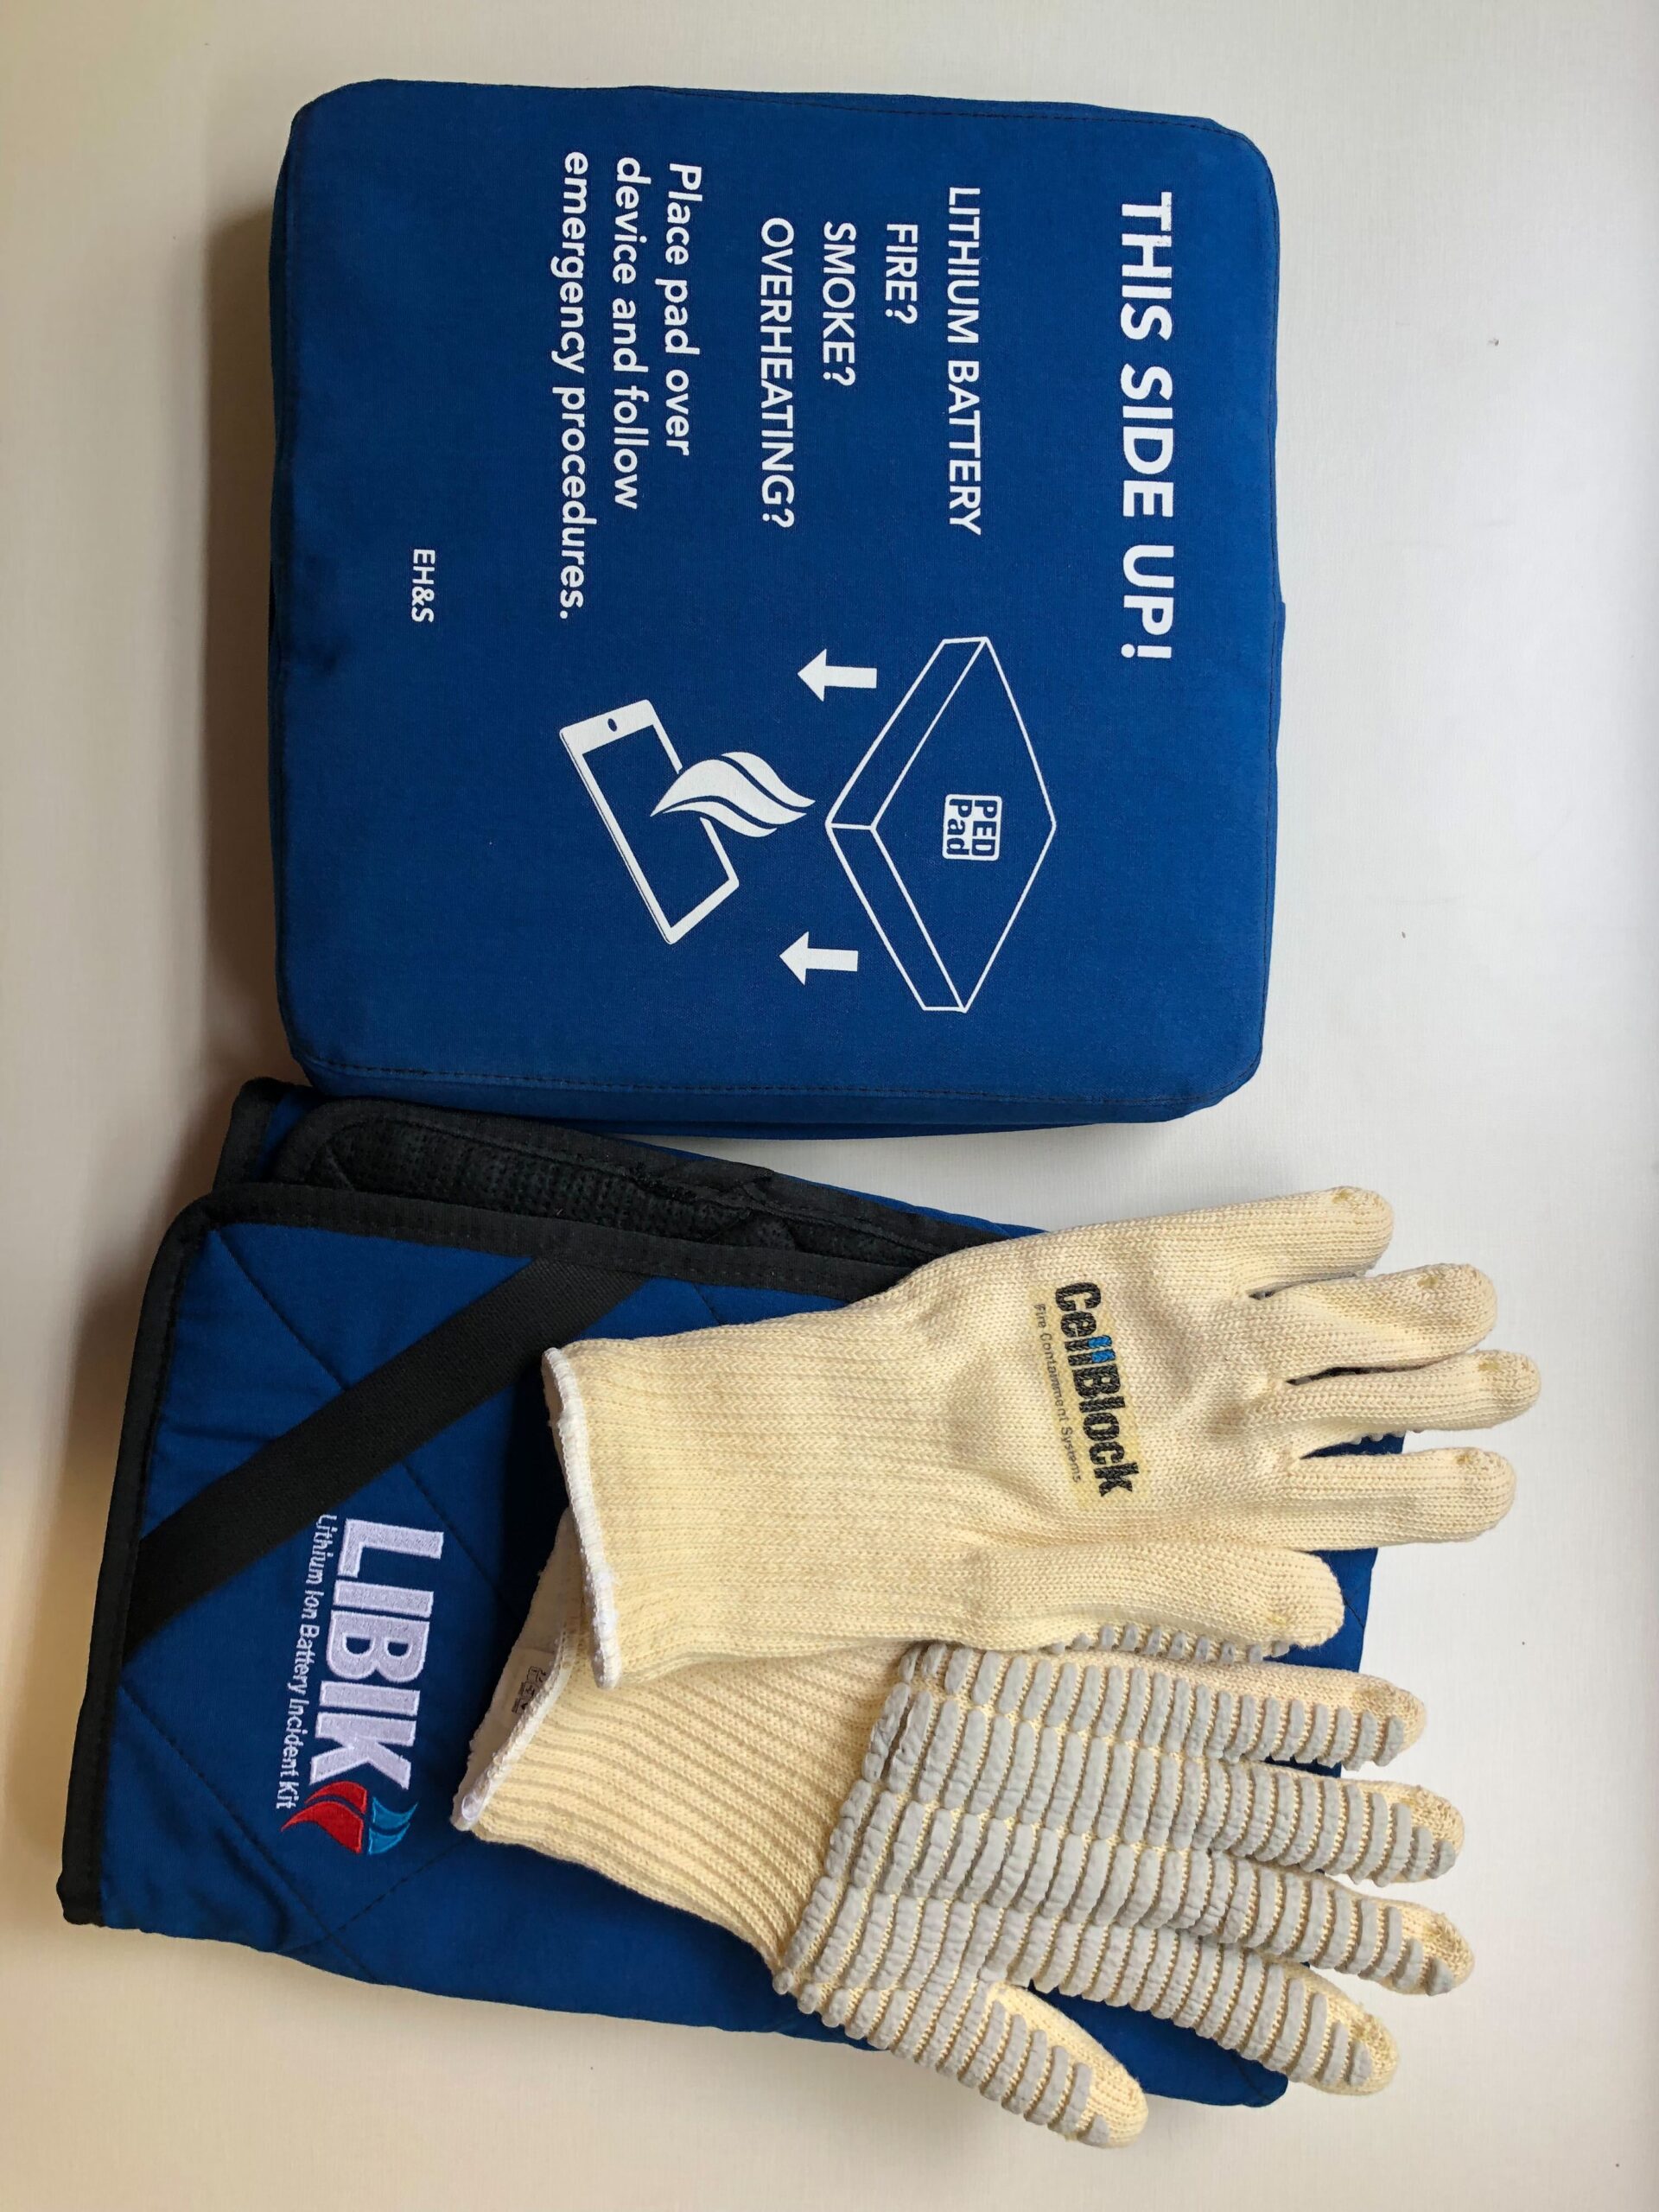
Skipping proper safety measures turns a revival attempt into Russian roulette. Lithium-ion fires burn at 1,500°F, resist water extinguishers, and release toxic fumes. Your workspace and gear must mitigate these risks.
Non-Negotiable Safety Protocol
- Personal Protective Equipment (PPE): Wear ANSI-rated safety glasses (not sunglasses), leather welding gloves, and flame-resistant clothing. Latex or cloth gloves offer zero protection against battery fires.
- Location: Work outdoors on concrete or dirt—never indoors, on wood, or near gasoline. Position yourself upwind to avoid toxic smoke.
- Fire Response Kit: Keep a Class D fire extinguisher (for metal fires) or 5+ gallons of dry sand within arm’s reach. A metal bucket filled with sand works as a last-resort containment vessel.
- Battery Isolation: Place the dead battery inside a non-flammable metal container (like an ammo can) during jumps. If fire erupts, slam the lid shut to smother flames.
Critical Checkpoint: If the battery exceeds 110°F (43°C) during any step, stop immediately. Heat accelerates thermal runaway—even after disconnecting.
Tools Required for Safe Revival Attempts

Using improper tools guarantees failure or disaster. Invest in these specific items:
For Jump-Starting (Basic Method)
- Donor battery: A fully charged pack of identical voltage (e.g., 20V Max for 20V Max). Mismatched voltages cause catastrophic surges.
- Jumper wires: 12-gauge insulated cables with heavy-duty alligator clips (rated for 30A+). Flimsy wires overheat and melt.
- Multimeter: To verify voltage before and after jumps. Never guess.
For DC Power Supply (Advanced Only)
- Adjustable bench supply: Must have independent voltage and current limiting (e.g., 0-30V, 0-5A range). Phone chargers or car batteries lack precision.
- Digital multimeter: For real-time voltage monitoring during trickle charging.
- Insulated pliers: To safely disconnect clips if arcing occurs.
Warning: Cheap no-name power supplies often lack true current limiting—this is a fire hazard. If you can’t afford proper equipment, skip revival.
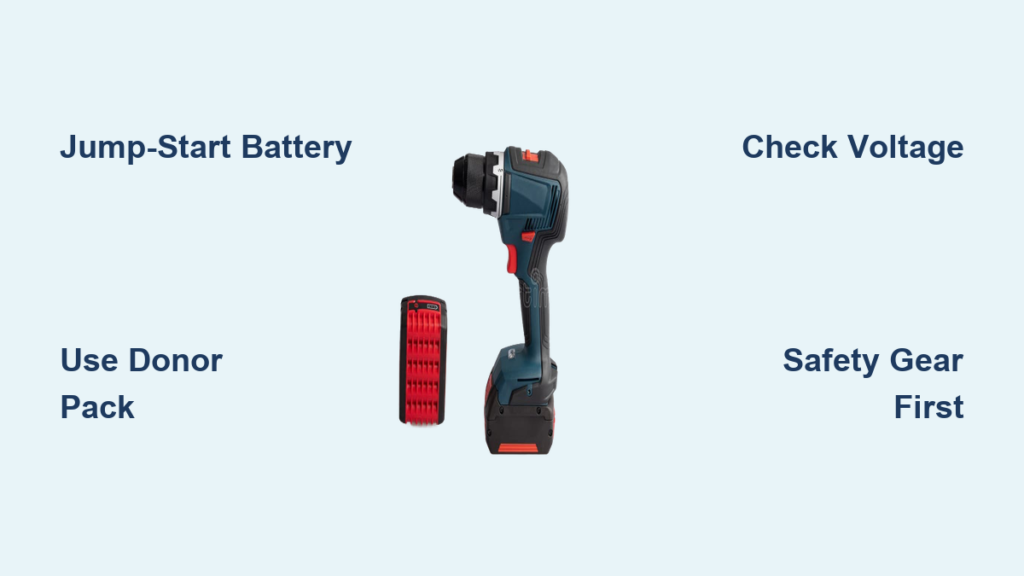
Step-by-Step: Reviving a Dead Drill Battery via Jump-Start
This method uses a healthy battery to bypass the dead pack’s locked BMS. Success hinges on precision timing and constant monitoring.
Connecting Batteries Safely
- Verify voltages: Measure both batteries with a multimeter. The donor must read ≥18V (for 20V systems); the dead battery should show 0-3V. If dead reads 0V, revival is unlikely.
- Clip in sequence: Attach jumper wires in this order—
– Red clip to donor battery’s + terminal
– Red clip to dead battery’s + terminal
– Black clip to donor battery’s – terminal
– Last: Black clip to dead battery’s – terminal (minimizes spark risk near battery) - Critical timing: Connect for exactly 3 seconds—use a phone timer. Longer durations cook the cells.
Charging Immediately After the Jump
- Disconnect instantly after 3 seconds and measure the dead battery’s voltage. If revived, it should read 8-12V.
- Place on OEM charger immediately—delays allow voltage to drop below the BMS unlock threshold.
- Watch for charger response: A blinking light means success; no light indicates permanent BMS failure.
- Stop if: Voltage doesn’t rise, battery warms >100°F, or you smell vinegar (sign of electrolyte breakdown).
Pro Tip: If the first jump fails, wait 10 minutes before retrying—never chain attempts. Heat buildup is cumulative.
Advanced Recovery: DC Power Supply Method (For Experts Only)
This controlled trickle charge bypasses unstable jump-starting but demands electronics expertise. Incorrect settings destroy batteries instantly.
Precise Setup to Avoid Catastrophe
- Configure the supply:
– Set voltage to the battery’s nominal rating (e.g., 18.0V for a “20V Max” pack).
– Crucially: Limit current to 0.2A (200mA). Higher currents overwhelm damaged cells. - Connect with polarity checks:
– Double-check red (+) to red (+), black (–) to black (–) before powering on.
– Use clips that can’t slip—loose connections cause arcing. - Monitor the critical first 5 minutes:
– Voltage should rise slowly from near-zero (e.g., 0.5V → 3V in 2 minutes).
– If voltage stalls or drops: Disconnect—cells are dead.
– If temperature exceeds 104°F (40°C): Stop immediately.
When to Transfer to the OEM Charger
- Once voltage reaches ~14V for an 18V pack, disconnect the supply.
- Do not fully charge via power supply—this risks overvoltage.
- Place on the manufacturer’s charger; it should now recognize the battery.
- Maximum trickle time: 45 minutes. Longer durations risk thermal runaway.
Emergency Response: When Revival Fails or Goes Wrong
Even careful attempts can trigger emergencies. Knowing how to react saves lives.
Immediate Actions for Critical Failures
- Swelling during jump-start:
1. Disconnect wires with insulated pliers.
2. Drop the battery into your sand-filled metal container.
3. Retreat 30+ feet and monitor for 1 hour—do not approach. - Smoke or hissing:
- Cover the battery with sand without touching it.
- Never use water—it reacts explosively with lithium.
- Call fire services immediately; specify “lithium battery fire.”
Why Some Batteries Can’t Be Saved
- Permanently blown BMS fuse: Common in Milwaukee or DeWalt packs after deep discharge. No voltage will reset it.
- Cell voltage imbalance: If one cell reads 0V while others show 3V, the pack is unrecoverable.
- Internal short circuits: Detected by rapid voltage drop after disconnection.
The Only Safe Long-Term Solution: When to Replace, Not Revive
Reviving a dead drill battery is a temporary gamble, not a fix. Even “successful” jumps often yield packs with 30-50% reduced capacity that fail unpredictably. A revived battery may work for light tasks but risks mid-project shutdowns or fires under load. Crucially, batteries revived after deep discharge degrade 3-5x faster due to irreversible cell damage.
Cost-Benefit Analysis: Revive vs. Replace
| Factor | Revived Battery | New Genuine Battery |
|---|---|---|
| Upfront Cost | $0 (if tools available) | $50-$150 |
| Lifespan | Weeks to 3 months | 2-3 years |
| Fire Risk | High (especially under load) | Near zero (OEM protected) |
| Project Safety | Unreliable—may die mid-task | Consistent power |
Final Recommendation: Unless you’re reviving a battery as a last-resort spare for low-risk tasks (like hanging pictures), replacement is the rational choice. Modern OEM batteries include advanced BMS safeguards that cheap jump-starts bypass. Recycle your dead pack responsibly at a Home Depot or Lowe’s drop-off bin—then invest in a new, warrantied battery. Your tools, workshop, and family are worth far more than a $100 gamble.
Remember: Knowing how to recharge a dead drill battery is less valuable than knowing when not to try. Prioritize safety over salvage—because no DIY hack is worth risking your home or health. When in doubt, recycle and replace.


