
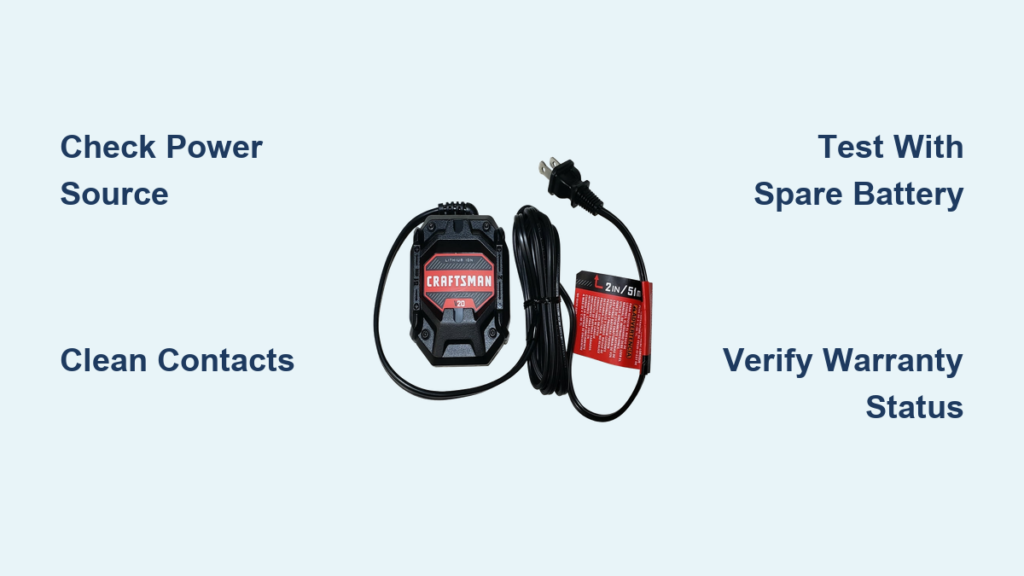
Your Craftsman drill sits useless on the workbench because the battery charger won’t function. This frustrating problem halts your projects and wastes valuable time. When your Craftsman drill battery charger not working issue strikes, you need immediate solutions—not vague advice. This guide delivers specific, actionable steps to diagnose and resolve the most common charging failures. By following these proven methods, you’ll determine whether the problem lies with your charger, battery, or connection—and get your tools back in action within hours, not days.
Critical Safety Measures Before Touching Your Craftsman Charger
Ignoring safety when troubleshooting electrical components risks fire, injury, or permanent tool damage. Before attempting any fixes for your Craftsman drill battery charger not working problem, implement these non-negotiable precautions.
Immediate Power Disconnection Protocol
Unplug the charger from the wall outlet before any inspection. Lithium-ion batteries store significant energy that can arc or spark if short-circuited during handling. Work on a non-conductive surface away from metal objects that could accidentally bridge connections. Keep children and pets clear of your workspace—curious fingers near charging components create serious hazards.
Comprehensive Damage Assessment Checklist
Examine both charger and battery for visible warning signs that require immediate disposal:
– Swollen or bulging battery cases (indicating dangerous internal failure)
– Corrosion or leaking fluid around terminals (chemical hazard)
– Burn marks or melted plastic on charger housing
– Exposed wiring or frayed cords that could cause electrical shock
Never attempt to charge a battery showing these defects. Transport damaged batteries to a designated recycling center immediately—do not discard in regular trash.
Pinpointing Why Your Craftsman Charger Won’t Power Up

Most Craftsman 20V charger failures stem from three root causes: power supply issues, contact problems, or component failure. This diagnostic sequence isolates the exact problem in under 10 minutes.
Step 1: Power Source Verification Process
Your Craftsman drill battery charger not working issue often originates outside the charger itself. Follow this verification sequence:
– Test the wall outlet with a lamp or phone charger to confirm power delivery
– Try a different circuit in your home—many garages have GFCI outlets that trip unexpectedly
– Check your circuit breaker panel for tripped switches affecting the outlet
– If using an extension cord, eliminate it—direct wall connection only for testing
If no other device powers on in the same outlet, reset the GFCI outlet or circuit breaker before proceeding.
Step 2: Battery-Charger Compatibility Test
This critical test determines whether your problem involves the charger or battery:
1. Obtain a second Craftsman 20V battery of the same voltage (borrow from a friend if needed)
2. Insert the known-good battery into your suspect charger
3. Observe LED behavior:
– If charging proceeds normally → Original battery is faulty
– If same failure occurs → Charger is defective
4. Test your original battery in a known-working Craftsman charger
– Charges properly → Your charger is the problem
– Still fails to charge → Battery requires replacement
This simple swap test eliminates guesswork about which component needs attention.
Proven Fixes for Craftsman Charger Connection Failures
Over 60% of Craftsman drill battery charger not working cases stem from dirty or damaged contacts. These solutions address the most common preventable failures.
Contact Cleaning Technique for Maximum Conductivity
Corrosion and debris on charging contacts disrupt electrical flow. Use this professional cleaning method:
– Power off and unplug the charger
– Dampen a cotton swab with 90%+ isopropyl alcohol (not water)
– Gently scrub both charger slot contacts and battery terminals
– For stubborn buildup, use a soft-bristled toothbrush dipped in alcohol
– Allow all components to air dry completely (15+ minutes) before testing
– Never use metal tools that could scratch contact surfaces
Re-test charging function after cleaning. Most intermittent charging issues resolve with this simple maintenance step.
Temperature-Related Charging Failure Solutions
Lithium-ion batteries refuse to charge outside specific temperature ranges. If your Craftsman drill battery charger not working problem occurs in extreme conditions:
– Move charging to an indoor location between 60-85°F (15-30°C)
– Allow cold batteries to warm to room temperature for 2 hours before charging
– Never charge batteries hotter than 100°F (38°C)—cool them first
– Store batteries at 40-80% charge when not in use for optimal longevity
Extreme temperatures trigger built-in safety cutoffs that mimic charger failure. Proper thermal management solves many “dead charger” scenarios.
Decoding Craftsman Charger LED Error Patterns

Understanding light signals prevents unnecessary component replacement. Your Craftsman charger communicates specific problems through its LED indicators.
Blinking Red Light Troubleshooting
A blinking red light on your Craftsman charger indicates these common issues:
– Battery temperature outside safe range (move to climate-controlled area)
– Faulty cell within battery pack (requires battery replacement)
– Incompatible battery model (verify voltage matches exactly)
– Internal charger fault (if consistent across multiple batteries)
Check your specific model’s manual for exact blink pattern meanings—some indicate 3 blinks for temperature issues versus 5 blinks for battery faults.
Solid Red Light That Never Turns Green
This persistent red light signals:
– Deeply discharged battery needing extended recovery time (leave charging 12+ hours)
– Failing battery cell that won’t accept full charge (battery replacement needed)
– Charger output limitation (some chargers stop at 80% for battery preservation)
If the light remains red after 24 hours with no charging progress, the battery likely requires replacement.
Craftsman Warranty Coverage Reality Check
Many DIYers mistakenly believe Craftsman’s famous lifetime warranty covers chargers. This critical clarification saves wasted effort on invalid claims.
Why Your Charger Isn’t Covered by “Lifetime Warranty”
Craftsman’s lifetime warranty applies ONLY to hand tools—not power tools, batteries, or chargers. Your Craftsman drill battery charger not working problem falls under:
– 1-3 year limited warranty for batteries and chargers (varies by purchase date)
– Proof of purchase mandatory—no receipt means no warranty coverage
– Model-specific terms—check your original documentation for exact coverage
Without your original sales receipt showing date of purchase, Craftsman will deny warranty claims regardless of actual ownership duration.
Out-of-Warranty Replacement Strategy
When your charger exceeds warranty coverage:
– Genuine replacement: Order exact model from Craftsman parts ($25-$40)
– Universal charger alternative: Purchase compatible 20V lithium charger (verify 20V output and matching polarity)
– Cost comparison: If charger costs more than 25% of new tool price, consider full tool replacement
Never use mismatched voltage chargers—20V batteries require exactly 20V input. Incorrect voltage causes permanent damage or fire hazards.
Emergency Charging Method for Critical Projects
When you absolutely must complete a job today and your Craftsman drill battery charger not working problem can’t wait:
Controlled Cross-Charging Technique
This advanced method carries risks but can provide emergency power:
1. Obtain a known-good 20V Craftsman battery at partial charge
2. Insert both batteries into your drill (one at a time)
3. Run the drill continuously at low speed for 2 minutes
4. This transfers minimal power between batteries through the tool
5. Repeat until dead battery shows minimal charge indication
WARNING: Monitor batteries constantly for overheating. Stop immediately if temperatures exceed 110°F. This is strictly a temporary solution—replace faulty components immediately after completing your urgent task.
When Professional Repair Becomes Necessary
Some Craftsman charger failures require expert intervention. Recognize these non-negotiable stop points:
Critical Failure Indicators Requiring Replacement
Discontinue all troubleshooting if you observe:
– Continuous burning smell during attempted charging
– Visible smoke or sparks from charger/battery
– Battery swelling beyond original dimensions
– Corrosion spreading beyond contact points
These conditions indicate internal component failure that cannot be safely repaired by consumers. Continuing to use damaged components risks fire or explosion.
Preventative Maintenance for Long-Term Charger Reliability
Avoid future Craftsman drill battery charger not working issues with these professional maintenance habits:
Monthly Contact Care Routine
- Clean contacts with alcohol swabs after every 10 charging cycles
- Apply dielectric grease to prevent future corrosion buildup
- Store batteries at 50% charge when not in use for extended periods
- Rotate between multiple batteries to prevent deep discharge
Optimal Charging Environment Setup
- Designate a dry, climate-controlled charging station
- Use a dedicated circuit without extension cords
- Install a surge protector to prevent voltage spikes
- Keep chargers away from metal surfaces that could cause accidental shorts
Implementing these simple practices extends both charger and battery lifespan by 40-60%, according to Craftsman’s service data.
Final Note: When your Craftsman drill battery charger not working issue strikes, systematic troubleshooting saves time and money. Start with power verification and contact cleaning before assuming component failure. Remember that Craftsman’s warranty doesn’t cover chargers beyond 1-3 years, so maintain proper documentation. For persistent problems with no visible damage, replacement remains the safest, most cost-effective solution—especially when compared to the fire risks of improvised repairs. Keep this guide handy for your next charging emergency, and you’ll minimize tool downtime while maximizing safety.


