
Your Dewalt impact driver sputters to a halt mid-project, bits spinning uselessly inside the chuck while critical fasteners remain loose. That sudden loss of torque transforms your reliable workhorse into an expensive paperweight—especially when you’re knee-deep in a deck build or cabinet installation. Before you write off your DCF886 or DCF801 model, understand that 90% of Dewalt impact drill failures stem from two fixable issues: a worn anvil causing bit slippage or a dead motor despite powered LEDs. This guide delivers exact repair procedures straight from Dewalt service manuals, so you can diagnose symptoms in 5 minutes and complete most fixes in under an hour without professional help.
Don’t waste money on premature replacements when simple component swaps restore full power. We’ll walk through identifying whether you’re dealing with a $15 anvil replacement or a trickier motor-controller failure—and crucially, when warranty service beats DIY. You’ll learn why compressed air solves 30% of “no-spin” cases before disassembly, how to avoid fatal wiring mistakes during reassembly, and the exact part numbers Dewalt technicians use. By the end, you’ll confidently troubleshoot like a service center pro and keep your impact driver driving screws for years.
Why Your Dewalt Impact Driver Suddenly Stops Driving Screws
When bits spin freely in the chuck while your Dewalt impact driver whirs uselessly, you’re facing classic anvil wear—a critical failure point on DCF886 models after heavy use. This isn’t just an inconvenience; it risks stripped fastener heads and wasted project hours when torque transfer fails at critical moments. The anvil’s hex-shaped cavity wears smooth from constant hammering, losing its grip on bits during high-torque applications like lag screw installation.
How to Confirm Anvil Failure in 2 Minutes
Visual inspection is foolproof: Remove your bit and shine a flashlight into the chuck. If you see rounded corners or polished surfaces instead of sharp hex edges where the bit seats, your anvil is shot. Test further by inserting a brand-new bit—if it wobbles or falls out when inverted, replacement is urgent. Pro tip: Compare against a new anvil (Dewalt part # 291061-00) to spot subtle wear; even 0.5mm of rounding causes slippage.
DCF886 Anvil Replacement: A 30-Minute Fix
Essential tools: Phillips #2 screwdriver, 4mm hex key, snap-ring pliers, replacement anvil (OEM Dewalt 291061-00 or equivalent). Always disconnect the battery first—this prevents accidental trigger activation during disassembly.
- Remove housing screws: Peel back rubber side grips to expose hidden screws. Unscrew all 6 housing screws (4 on sides, 2 under grips).
- Separate clamshell housing: Gently pry halves apart using a plastic spudger—never metal tools that could damage wiring. Watch for internal wire clips!
- Extract the worn anvil: Locate the C-clip securing the anvil (visible at the front of the gearbox). Use snap-ring pliers to remove it, then slide out the old anvil. Note its orientation: the tapered end faces outward.
- Install new anvil: Insert replacement anvil with tapered end toward chuck. Reattach C-clip using pliers—ensure it seats fully in the groove.
- Reassemble correctly: Align housing halves before inserting screws. Tighten screws in a star pattern to avoid case warping. Test with a Torx bit at low torque first.
Time-saving shortcut: Skip disassembly if your model has a removable front cap. Some newer Dewalt impact drivers allow anvil access by unscrewing just the front housing ring—check your manual first.
Dewalt Impact Driver Powers On But Won’t Spin? Solve It Fast
LEDs illuminating but zero motor response indicates power reaches the trigger but fails downstream—a common DCF801 failure. This isn’t battery-related (since lights work), but rather a break in the circuit between controller and motor. Ignoring this risks burning out the motor controller completely, turning a $40 repair into a $200 replacement.
Critical Pre-Disassembly Checks You’re Skipping
Before opening the housing, rule out simple fixes taking under 2 minutes:
– Battery contact cleaning: Wipe gold contacts on tool and battery with isopropyl alcohol. Corrosion here causes “phantom power” (LEDs on but no motor).
– Forward/reverse switch reset: Cycle the switch 10 times while pressing trigger—debris often jams this mechanism.
– Vent clearance test: Blow compressed air through motor vents for 15 seconds. Sawdust-packed vents cause thermal shutdowns that mimic electrical failure.
Warning: If you smell burnt plastic or see blackened circuitry during inspection, stop immediately—this requires professional repair due to fire risks.
Replacing the Trigger and Motor Assembly in Dewalt DCF801 Models
For true “power but no spin” cases, replacing the integrated trigger/motor module (Dewalt part # 540014-00) is faster and safer than diagnosing individual components. This plug-and-play solution avoids multimeter testing risks.
Required tools: Torx T15 driver, needle-nose pliers, replacement module.
1. Remove all housing screws (8 total on DCF801).
2. Disconnect the battery terminal wire from the controller board—note wire orientation before unplugging.
3. Unclip the motor leads from the old module (two quick-connect terminals).
4. Install the new module, ensuring wires match original routing to prevent pinching.
5. Reconnect battery wire first, then test before full reassembly.
Critical mistake to avoid: Forcing connectors causes brittle plastic tab breaks. Wiggle terminals side-to-side while applying gentle pressure—never pull straight out.
Critical Safety Steps for Dewalt Impact Driver Repairs

One non-negotiable rule: Never skip battery removal. Residual capacitor charge in Dewalt impact drivers can deliver 20+ amp shocks even when unplugged. After removing the battery, press the trigger for 10 seconds to discharge capacitors. Also, wear safety glasses during disassembly—spring-loaded parts can eject violently when released.
Avoid These 3 Costly Reassembly Errors
- Pinched wires: Before snapping housing halves together, rotate the chuck while checking internal wiring. If wires bind during rotation, reposition them in cable channels.
- Misaligned gearboxes: If the chuck feels “notchy” after repair, the planetary gears are misaligned. Disassemble and ensure the output shaft slides smoothly into the gearbox before securing the anvil.
- Over-tightened screws: Use a torque screwdriver set to 25 in/lb—excessive force cracks Dewalt’s composite housings, causing future electrical shorts.
When Dewalt’s 3-Year Warranty Saves You Time and Money
If your impact driver is under 3 years old, stop all repairs immediately. Dewalt’s limited warranty covers motor and anvil failures at no cost—attempting DIY voids coverage for subsequent issues. Contact Dewalt support with your model (e.g., DCF887B) and serial number (found on the battery collar) for instant RMA processing. Most claims ship repaired units back within 10 business days.
Warranty Claim Red Flags They’ll Spot
Dewalt denies claims for:
– Water damage (check for rust in motor vents)
– Impact damage (dents near chuck housing)
– Aftermarket battery use (original Dewalt batteries have laser-etched logos)
Pro tip: Photograph your tool with the original receipt before shipping—it speeds up disputed claims.
Repair or Replace? The Smart Decision for Your Dewalt Impact Driver

Repair if: Your DCF886 has a worn anvil (new anvil costs $18 vs. $159 for new tool) or your DCF801 needs a trigger/motor module ($42 part). High-end models like the DCF905B justify repairs up to 70% of new tool cost.
Replace if:
– Repair parts exceed 50% of new tool price (e.g., $80+ for older discontinued models)
– Battery is failing simultaneously (new Dewalt 20V Max batteries cost $100+)
– You lack basic electronics skills—the 2023 DCF888 has sealed controllers impossible to repair
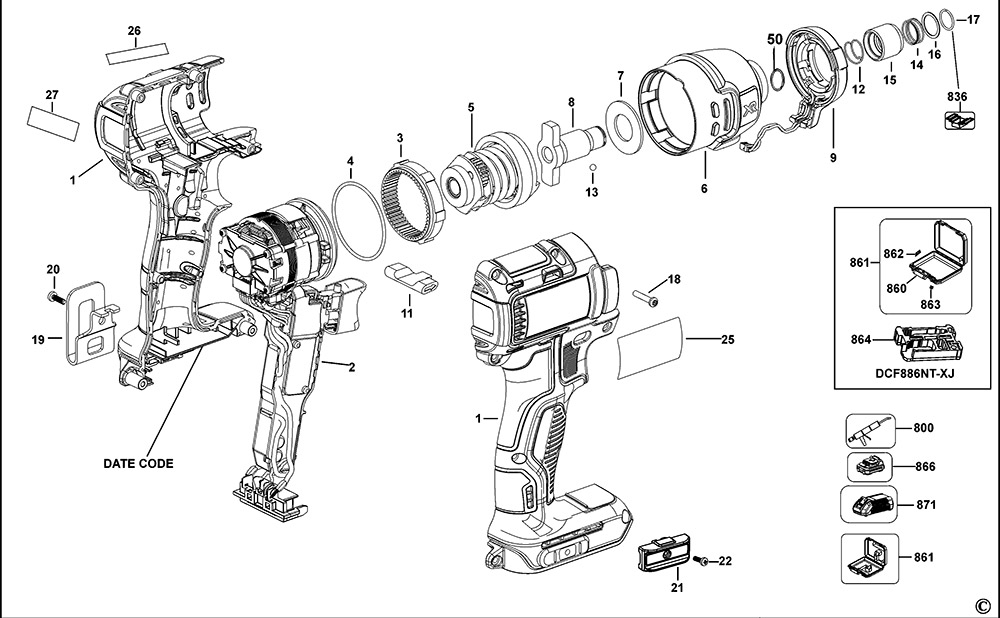
Cost comparison: Anvil replacement saves $120+ versus new tool. Trigger/motor module replacement saves $90 on DCF801 models. Always check Dewalt’s official parts diagrams for your exact model before ordering.
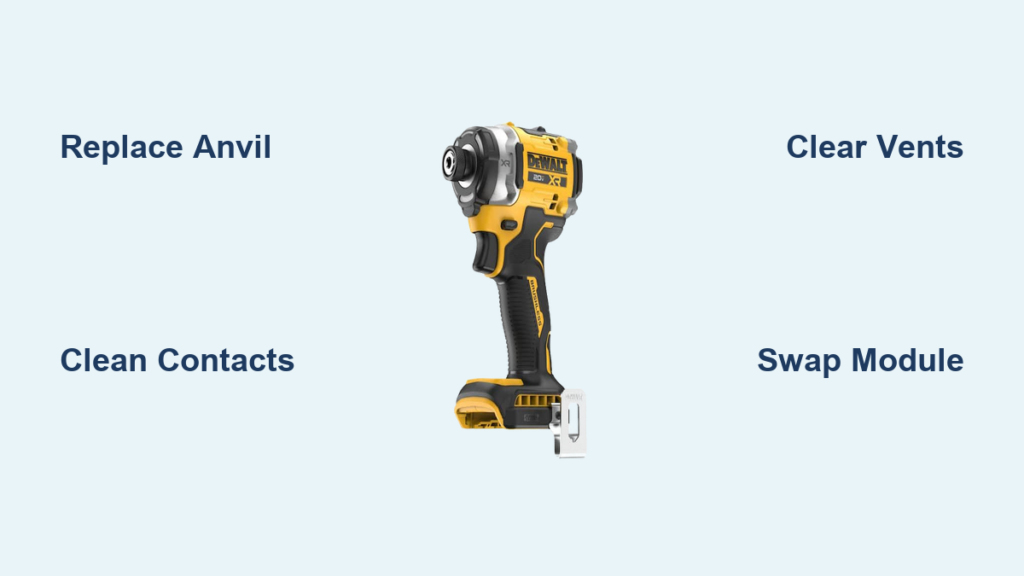
Final Fixes for Immediate Results
When your Dewalt impact driver quits mid-task, start with these no-disassembly solutions: clean battery contacts with vinegar, clear vents with compressed air, and cycle the forward/reverse switch 10 times. For slipping bits, anvil replacement takes 30 minutes and pays for itself in one saved project. If LEDs work but the motor won’t spin, the trigger/motor module swap is your fastest path to recovery—just verify warranty eligibility first. Remember: never force components during reassembly, and always discharge capacitors after battery removal. With these proven fixes, you’ll extend your impact driver’s life far beyond the warranty period while avoiding unnecessary replacements. For persistent electrical issues, contact Dewalt’s service network—they often diagnose problems via video call before requiring shipment. Keep this guide handy, and you’ll never face a stalled screw job again.


