
You just deleted an important file, formatted the wrong drive, or experienced a system crash—now your critical data is gone. Don’t panic. Disk Drill recovery software can retrieve your lost files if you act quickly and follow the right process. This guide shows exactly how to use Disk Drill recovery effectively across Windows and Mac systems, whether you’re dealing with accidental deletions, formatted drives, or corrupted partitions.
Data loss strikes when you least expect it, but Disk Drill’s powerful scanning algorithms give you the best chance to recover what matters. The key is knowing which scan method to use, where to save recovered files, and how to avoid common mistakes that could permanently destroy your data. By the end of this guide, you’ll be able to navigate Disk Drill’s interface confidently and maximize your recovery success rate.
Install Disk Drill Properly: Avoid Overwriting Lost Data
The first step in how to use Disk Drill recovery correctly starts before you even launch the software. Never install recovery software on the same drive you’re trying to recover from—this risks overwriting the very data you’re trying to save. Instead, download Disk Drill on a working computer and install it to your system drive (C: on Windows or Macintosh HD on macOS) before connecting the problem drive.
Critical installation checklist:
– Download only from the official Disk Drill website
– Run installer with administrator/root privileges
– Install to your primary system drive, not external media
– Verify system requirements: Windows 7+/macOS 10.9+, 2GB RAM minimum
Connecting your problem drive properly matters too. For external drives, use a direct USB connection rather than hubs. For internal drives, remove them from the affected computer and connect as a secondary drive. This prevents the operating system from writing new data to the problem drive while you work.
Launch Disk Drill and Select Your Target Drive
Once installed, launch Disk Drill and locate your problem drive in the main interface. Drives appear with their size, file system (NTFS, APFS, etc.), and health status. Never select your system drive unless you’re recovering files you recently deleted from it. Instead, identify the specific drive or partition that contains your lost data—this could be an external hard drive, USB stick, or internal partition.
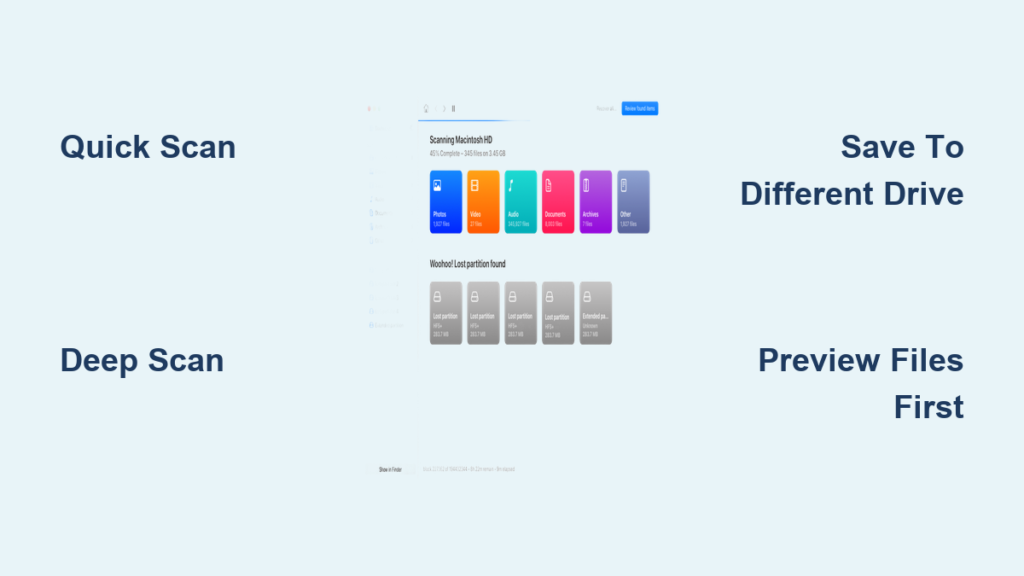
Run the Right Scan Type: Quick vs. Deep Scan Decoded

Knowing which scan to run is the most crucial step in how to use Disk Drill recovery effectively. Disk Drill offers two primary scan methods with dramatically different outcomes depending on your situation.
When to Use Quick Scan (Results in Minutes)
Choose Quick Scan when:
– You accidentally deleted files within the last 24-48 hours
– Files disappeared from the Recycle Bin or Trash
– You haven’t written new data to the drive since deletion
Quick Scan analyzes file system metadata to find recently deleted files while preserving original names and folder structures. For a 500GB drive, this typically completes in 5-15 minutes. Pro tip: If you see familiar folder structures during the scan, Quick Scan will likely recover your files completely.
When Deep Scan Is Necessary (4-10 Hours for 1TB)
Run Deep Scan when:
– You formatted the entire drive
– The partition table is corrupted or missing
– Quick Scan didn’t find your files
– The drive shows as “unallocated” in Disk Management
Deep Scan performs a sector-by-sector analysis of your entire drive, searching for file signatures rather than relying on file system structures. This method can recover files even when system information is gone, but recovered files may lack original names. For a 1TB drive, expect 4-10 hours—never interrupt this process as it builds results incrementally.
Preview Files Before Recovery: Don’t Waste Time
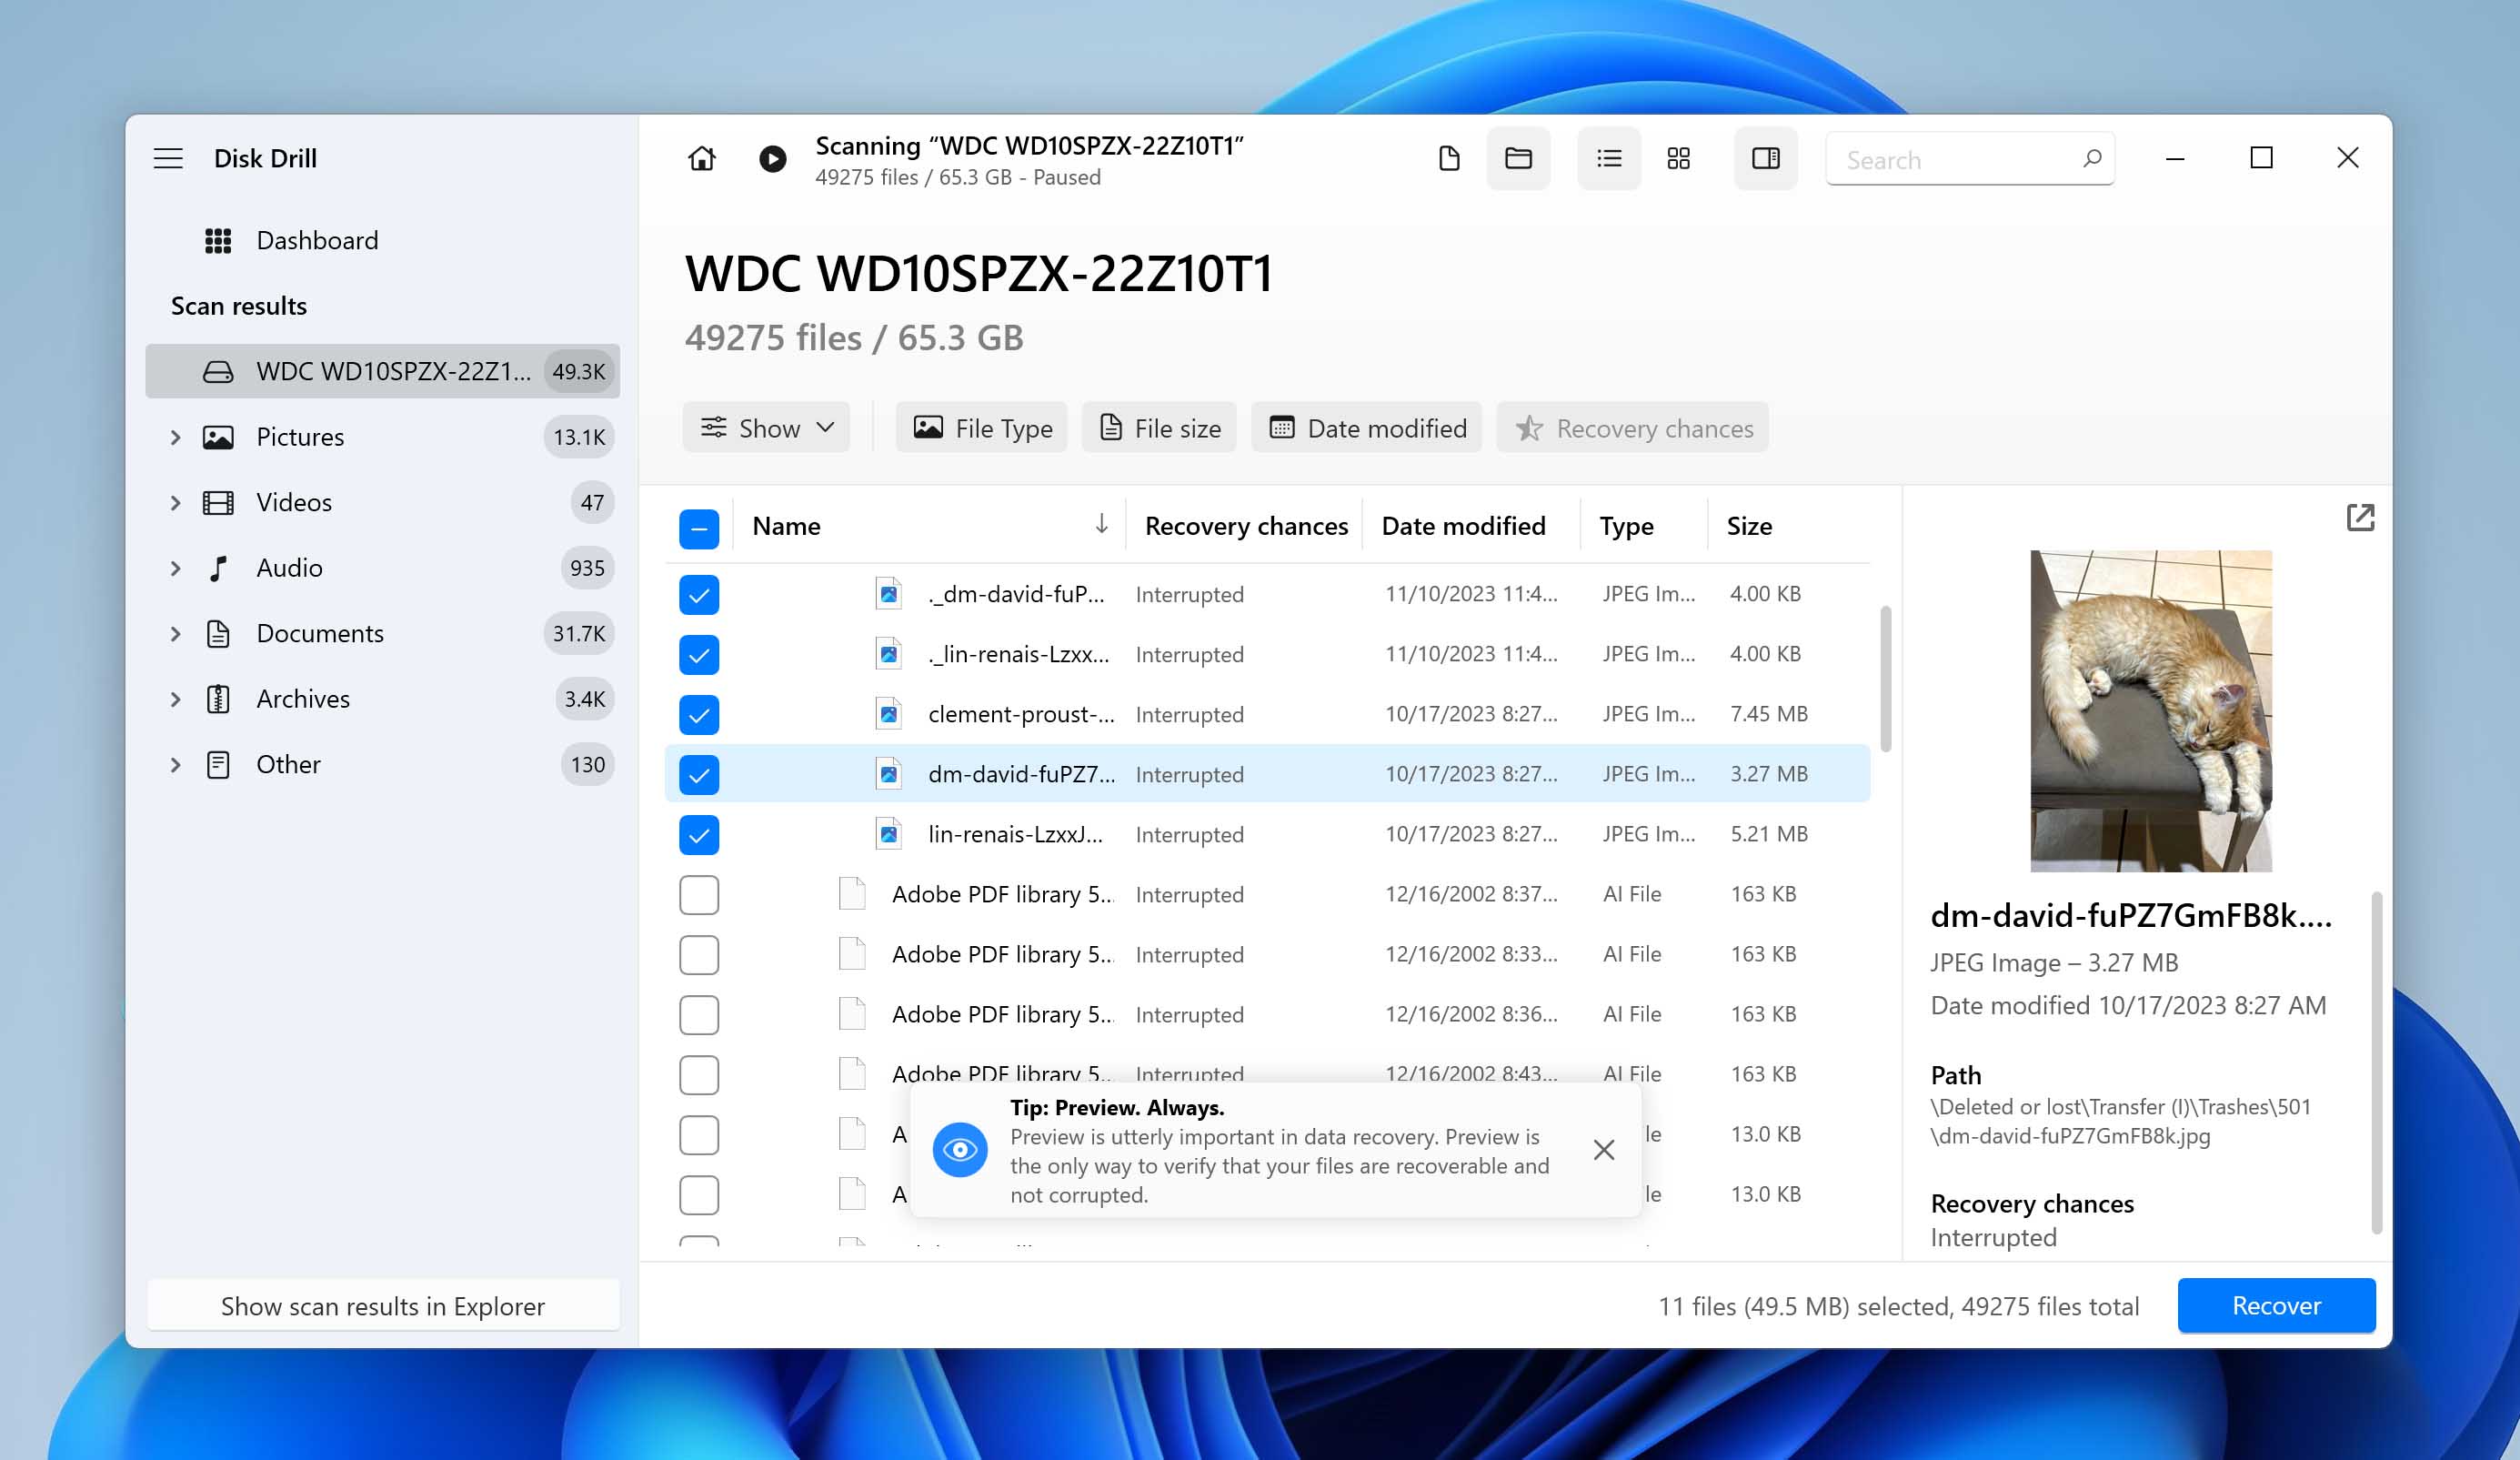
One of Disk Drill’s most valuable features is the ability to preview files before committing to recovery. This saves hours of recovering unusable files. Supported previews include:
- Image files: JPG, PNG, GIF, BMP with thumbnail view
- Documents: PDF, DOCX, XLSX with text extraction
- Media files: MP3, MP4 with partial playback
Critical preview limitation: Disk Drill can’t preview all file types. Database files, encrypted documents, and some application-specific formats won’t preview properly. If you don’t see a preview, the file might still be recoverable—check its size and extension for clues.
How to Verify File Integrity During Preview
When previewing images or documents, look for these quality indicators:
– Complete thumbnails without blocky artifacts
– Full text visible in document previews
– Correct file size matching original expectations
– Proper color representation in images
Files with partial previews often indicate overwriting—recover them immediately as they may degrade further.
Recover Files Safely: Avoid Critical Mistakes
The recovery process seems simple—select files and click “Recover”—but one wrong move can ruin your chances. This is why 90% of failed recoveries happen during the save process.
Why You Must Save to a Different Drive
Never save recovered files to the same drive you’re scanning. Each write operation risks overwriting recoverable data. Instead:
- Connect a second external drive with sufficient free space
- Select this drive as your recovery destination
- Create a dedicated folder named with date and purpose
- Click “Recover” and wait for completion
Warning: Saving to your system drive (C: or Macintosh HD) is acceptable only if you have ample free space and aren’t recovering system files.
How to Verify Recovered Files Are Complete
After recovery, immediately check:
– File sizes match original expectations
– Documents open without corruption errors
– Media files play through completely
– Critical files have correct content
If files appear corrupted, try recovering them again using a different scan method. Partially overwritten files sometimes recover better through alternative approaches.
Advanced Recovery: Formatted Drives and Lost Partitions
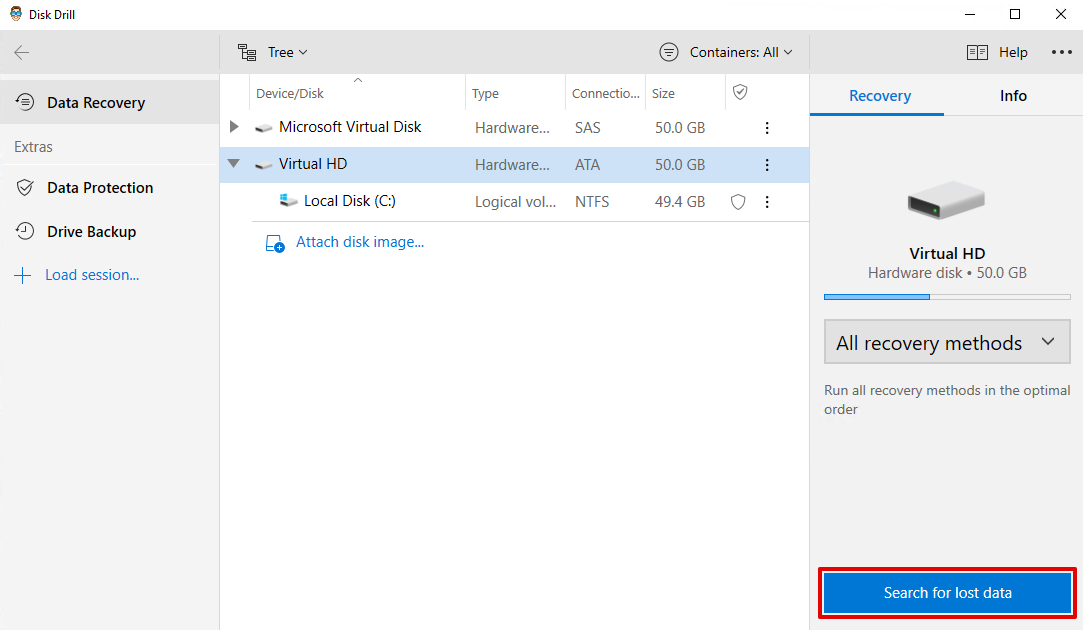
When facing serious data loss scenarios, Disk Drill’s specialized tools become essential for how to use Disk Drill recovery successfully.
Recovering After Accidental Formatting
If you formatted the wrong drive:
1. Run Deep Scan immediately (don’t reboot)
2. Look for the “Formatted” drive in results
3. Filter by file type using Disk Drill’s category system
4. Recover files to a different physical drive
Success factor: Quick formats (default in Windows) preserve more recoverable data than full formats. Disk Drill typically recovers 80-100% of files from quick-formatted drives if acted on quickly.
Partition Recovery When Drives Show as “Unallocated”
For missing partitions:
1. Select the “lost” physical drive in Disk Drill
2. Choose “Partition Recovery” from scan options
3. Wait for Disk Drill to rebuild partition structures
4. Scan the recovered partition as usual
This method works for NTFS, FAT32, HFS+, and EXT file systems. Pro tip: If multiple partitions existed, recover them one at a time to avoid confusion.
Disk Drill’s Recovery Vault: Prevent Future Data Loss
The best way to use Disk Drill recovery is to never need it. Enable these preventive features:
Set Up Guaranteed File Protection
On Windows systems:
1. Install Disk Drill with Recovery Vault enabled
2. It silently tracks file operations in the background
3. When you delete files, metadata is preserved for 30 days
4. Recovery becomes nearly instantaneous with original names
Critical note: Recovery Vault only works if installed before data loss occurs—it’s not retroactive.
Monitor Drive Health with S.M.A.R.T. Tools
Disk Drill’s built-in S.M.A.R.T. monitoring:
– Checks 10+ drive health parameters automatically
– Alerts you when failure probability exceeds 30%
– Gives you time to back up data before catastrophic failure
– Runs in the background with minimal system impact
Schedule weekly health checks to catch problems early—most drive failures show warning signs weeks in advance.
Troubleshooting Common Disk Drill Issues
“Scan Not Finding My Files” Solutions
If Disk Drill isn’t locating expected files:
– Try Deep Scan if you only ran Quick Scan
– Check the “Reconstructed” folder for fragmented files
– Filter results by specific file extension (e.g., .docx)
– Verify you’re scanning the correct physical drive
Important: Some file types (like databases) may not appear in standard views—search by extension.
Speeding Up Slow Scans on Large Drives
For faster scanning:
– Close memory-intensive applications
– Connect drives directly to motherboard ports
– Avoid scanning while performing other disk operations
– Save scan sessions to resume later without restarting
Scanning speed typically ranges from 2-4GB per minute depending on drive health and interface speed.
Final Note: Disk Drill recovery works best when you act immediately after data loss, use the appropriate scan method, and save files to a different physical drive. For physically damaged drives showing clicking sounds or failure to mount, stop using Disk Drill and seek professional recovery services—continued scanning could cause permanent damage. Always verify recovered files before considering your recovery complete, and implement regular backups to prevent future data loss emergencies.


