
Nothing frustrates DIYers and professionals more than a drill bit that wanders off course, overheats, or breaks mid-project. When you’re working with high-quality Makita power tools, using the wrong bit or improper technique wastes time, damages materials, and can even shorten your drill’s lifespan. Learning how to use Makita drill bits correctly transforms frustrating projects into smooth successes. This guide delivers exactly what you need to know to select, install, and operate Makita drill bits for clean holes in wood, metal, masonry, and more. You’ll discover professional techniques that prevent bit walking, reduce heat buildup, and extend bit life—saving you money and frustration on every project.
Choosing the Right Makita Drill Bit for Your Specific Material
Why Your Material Determines Bit Selection Every Time
Makita’s drill bit lineup isn’t one-size-fits-all—each type solves specific drilling challenges. Using a masonry bit on wood creates splintered edges, while a wood bit on concrete will shatter within seconds. Before you even touch your drill, identify your material to select the proper Makita bit:
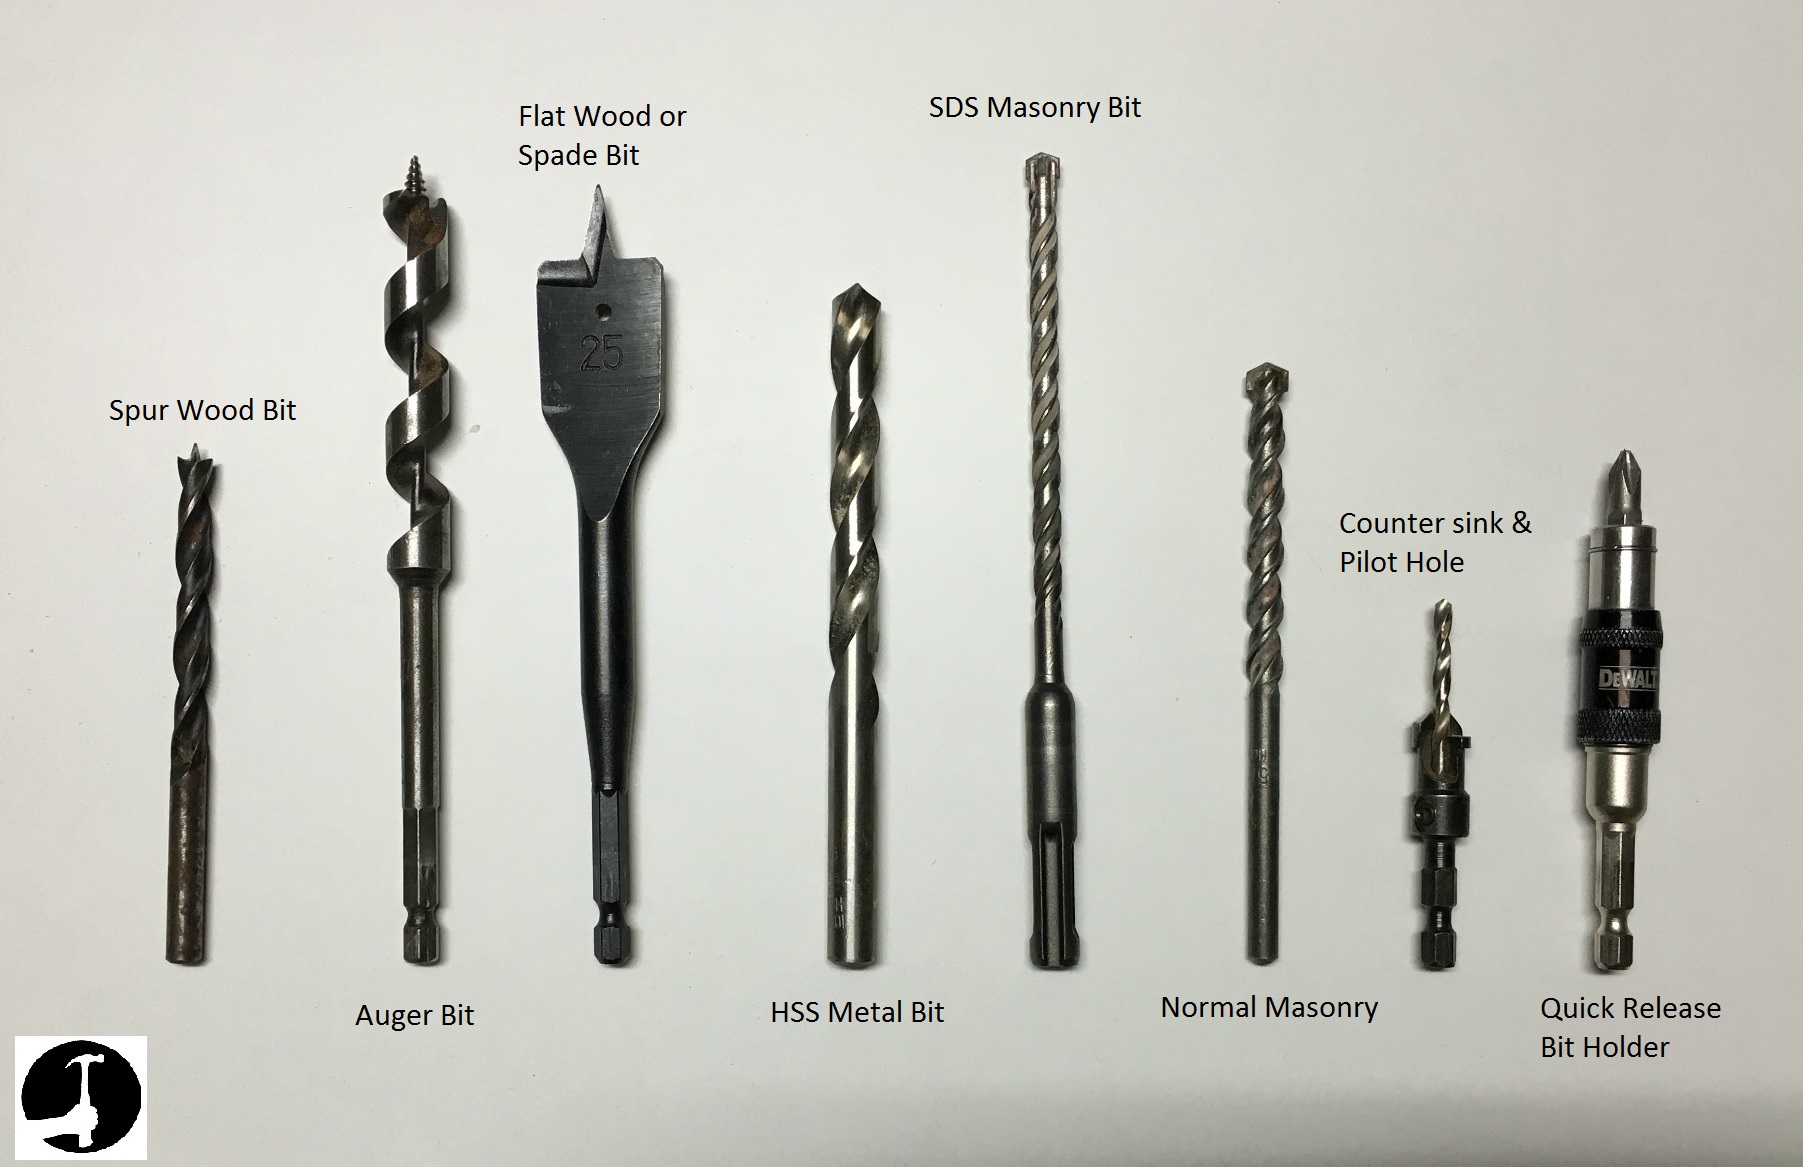
Twist drill bits (HSS) work best for general-purpose drilling in wood, plastic, and soft metals like aluminum. Their 118° or 135° split point prevents walking on smooth surfaces. For steel or stainless steel, upgrade to cobalt-tipped HSS bits which withstand higher temperatures without losing their edge.
Brad-point bits are non-negotiable for clean woodworking. The sharp center spur keeps the bit perfectly centered while the spurs score the wood fibers before the main cutting edge passes through—eliminating tear-out on both entry and exit sides. When you need perfectly round, splinter-free holes for dowels or hinges, these are the only Makita drill bits that deliver.
Carbide-tipped masonry bits handle concrete, brick, and stone when used with your Makita drill’s hammer function. The tungsten carbide tip withstands the pounding action that would destroy standard bits. Never attempt masonry drilling without this specialized tip—regular bits will dull instantly and potentially shatter.
Matching Bit Size to Your Project Requirements
Many beginners grab whatever bit is closest without considering hole diameter requirements. For pilot holes in softwood, use a bit 1/8 inch smaller than your screw diameter. Hardwoods require pilot holes just 1/16 inch smaller. When drilling clearance holes, match the bit size exactly to your screw’s shaft diameter (not the threads). For electrical work through studs, ¾-inch spade bits create perfect conduit passages without weakening structural members.
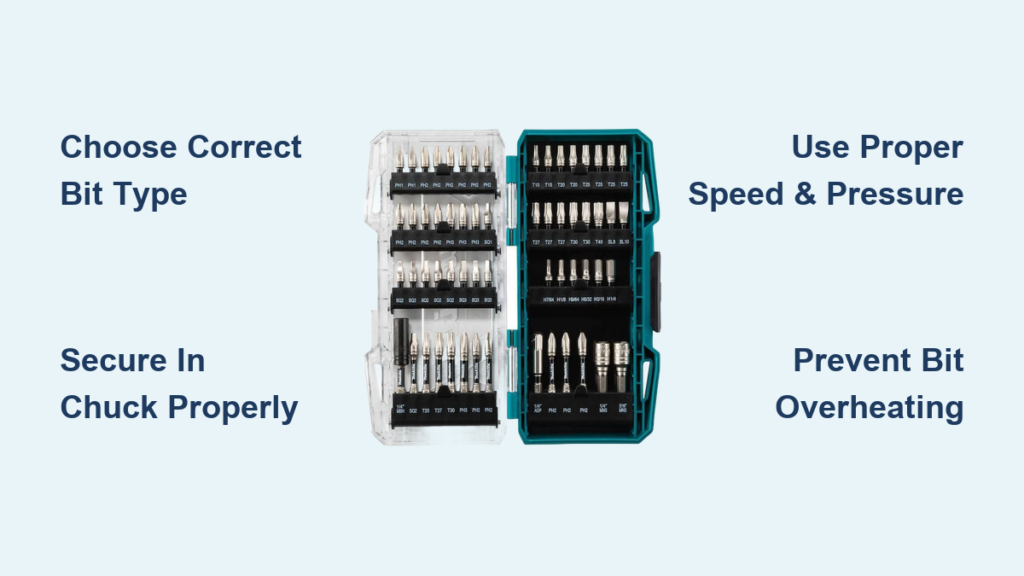
Installing and Securing Makita Drill Bits Properly
Step-by-Step Bit Installation Without Slippage
Loose bits cause wobbling, inaccurate holes, and dangerous kickback. Follow this exact sequence when installing any Makita drill bit:
- Set your drill to the lowest torque setting and rotate the chuck key clockwise to fully open the chuck
- Insert the bit shank at least ¾ of an inch into the chuck for maximum grip
- Tighten each chuck jaw evenly using the key—alternate between positions to prevent bit misalignment
- Give the bit a firm tug to verify it’s secure before powering on
Why Chuck Tightening Technique Matters More Than You Think
Most users tighten one jaw completely before moving to the next, causing bit wobble. The proper technique involves turning the chuck key one-quarter rotation at each jaw position, cycling through all three jaws 2-3 times until fully tight. This distributes pressure evenly around the bit shank. For hex-shank bits (common with Makita’s impact drivers), push firmly while tightening to ensure the chuck grips the flat surfaces properly.
Professional Drilling Techniques for Clean Holes Every Time
Preventing Bit Walking on Smooth Surfaces
Even with Makita’s precision bits, smooth materials like metal or finished wood cause bits to skate across the surface. Solve this with these field-tested methods:
- Create a precise starting point using a center punch—tap firmly with a hammer to make a small divot
- Apply masking tape over your drill location and mark through it with a pencil
- Start with a smaller pilot bit (1/16 inch) before stepping up to your final hole size
- For critical metalwork, use a spotting drill bit to create a perfect conical guide
Controlling Speed and Pressure for Different Materials
Your Makita drill’s variable speed trigger is useless if you don’t know how to use it properly. Here’s the exact technique professionals use:
For wood: Start at medium speed (around 800-1000 RPM) with light downward pressure. As the bit penetrates, gradually increase pressure while maintaining consistent speed. For large-diameter holes in hardwoods, slow to 500 RPM to prevent burning.
For metal: Begin at very low speed (300-500 RPM) with steady moderate pressure. Apply cutting fluid continuously—never drill dry. When the bit breaks through, reduce pressure dramatically to prevent grabbing and tear-out.
For masonry: Set your Makita drill to hammer mode and use firm, consistent pressure. Let the hammer action do 90% of the work—don’t push harder when progress slows. Periodically withdraw the bit to clear dust from the hole.
Troubleshooting Common Makita Drill Bit Problems

Why Your Bit Keeps Overheating and How to Fix It
Blue or black discoloration on your Makita drill bit signals critical overheating that has ruined the temper. This happens when:
- You’re drilling too fast for the material (metal requires slower speeds)
- Insufficient lubrication during metal drilling
- Not clearing chips from deep holes
- Using excessive pressure that creates friction
Immediate solution: Stop drilling, let the bit cool completely, then apply cutting fluid before continuing at half your previous speed. For future projects, drill in short bursts (10-15 seconds) followed by cooling periods.
Fixing Wandering Bits That Won’t Stay on Target
When your Makita bit consistently drifts off your marked location, you’re fighting physics—not a defective tool. The solution depends on your material:
On metal: Use a center punch to create an indentation deep enough to capture the bit’s tip. For stainless steel, a prick punch creates an even sharper starting point.
On wood: Switch to a brad-point bit which has a sharp center spur that anchors the bit precisely. For finished surfaces, drill through a sacrificial scrap piece of wood taped over your workpiece.
On tile or glass: Start with a diamond-tipped spear point bit at extremely low speed to create a guide hole before switching to your final bit size.
Essential Maintenance to Extend Makita Drill Bit Life
Cleaning and Storing Bits to Prevent Premature Dulling
Wood pitch and metal shavings accelerate bit wear if left uncleaned. After each use:
- Wipe bits with a cloth dampened with mineral spirits to remove resin and debris
- For stubborn pitch on wood bits, use a dedicated bit cleaner or a stiff nylon brush
- Apply a light coat of machine oil to HSS bits before storage to prevent rust
- Store in the original Makita case with foam inserts to protect cutting edges
Pro tip: Keep a dedicated container of cutting fluid near your workstation for metal projects—reusing the same fluid extends its effectiveness and keeps your bits cooler.
When to Sharpen Versus Replace Your Makita Drill Bits
Most users wait too long to sharpen or sharpen incorrectly, ruining bits. Replace HSS bits when:
- The cutting edges show visible rounding (check with 10x magnification)
- Chips appear along the cutting edge
- You need excessive pressure to make the bit cut
- The bit consistently overheats despite proper technique
For occasional users, replacement is often more cost-effective than sharpening. Professionals should invest in a quality drill bit sharpener that maintains the original 118° or 135° point angle.
Critical Safety Practices When Using Makita Drill Bits
Avoiding Catastrophic Bit Breakage During Operation
High-speed bit failure sends sharp metal fragments flying at dangerous velocities. Prevent this by:
- Never using damaged or bent bits (inspect before each use)
- Ensuring proper chuck tightness (recheck after first few uses of a new bit)
- Matching bit type to material—never force a wood bit through concrete
- Using reduced speed when drilling near the end of material to prevent blowout
Essential Personal Protection for Every Drilling Task
Many DIYers skip safety gear for “quick jobs” then regret it when a metal shaving hits their eye. Always wear:
- ANSI-approved safety glasses with side shields (regular glasses don’t protect adequately)
- A dust mask when drilling masonry (concrete dust contains carcinogenic crystalline silica)
- Hearing protection for extended drilling sessions (Makita drills exceed 85dB)
- Gloves only when clearing debris—never while operating the drill (risk of entanglement)
Maximizing Performance with Makita-Specific Features
Leveraging Your Drill’s Built-In Advantages
Makita drills offer features specifically designed to optimize bit performance:
- Use the torque control ring to prevent stripping bits in delicate materials
- Engage the hammer function only for masonry—using it on wood damages bits
- Take advantage of brushless motor models’ consistent power under load
- Match lithium-ion battery capacity to your bit size (larger bits need higher amp-hour batteries)
Pro tip: When drilling deep holes, use the “pulse drilling” technique—short bursts of power followed by brief pauses to clear chips. This prevents heat buildup and bit binding.
Conclusion: Transform Your Drilling Results Today
Mastering how to use Makita drill bits properly separates amateurs from professionals. By selecting the exact bit for your material, installing it correctly, and applying the right speed and pressure techniques, you’ll achieve cleaner holes, extend bit life, and complete projects faster. Remember the critical triad of successful drilling: the right bit, the right speed, and the right pressure. Start your next project by double-checking these three elements before spinning the first revolution. Keep your Makita bits clean, sharp, and properly stored, and they’ll deliver professional results for hundreds of holes. The next time you pick up your Makita drill, you won’t just be making holes—you’ll be creating precision openings with confidence and control.


