
You’re elbow-deep in a tight cabinet installation when your drill bit falls short—again. That frustrating moment when your standard drill bit simply can’t reach deep enough into the recessed area you’re working on is all too common for DIYers and professionals alike. Knowing how to extend a drill bit properly transforms your toolkit from limited to limitless, giving you access to confined spaces and deep cavities that would otherwise require disassembly or specialized tools. This guide reveals the exact techniques professionals use to extend their drilling capabilities safely and effectively, whether you’re installing cabinetry, running electrical wiring, or fabricating metal components. You’ll discover which extension method works best for your specific project and avoid the dangerous mistakes that can damage your tools or compromise safety.
When Your Drill Bit Falls Short: 5 Immediate Solutions for Extra Reach
That sinking feeling when your drill bit stops short of your target depth happens to everyone. Standard bits simply can’t handle deep pocket holes, recessed electrical boxes, or tight cabinet installations without help. The good news is you have five practical solutions depending on your specific challenge.
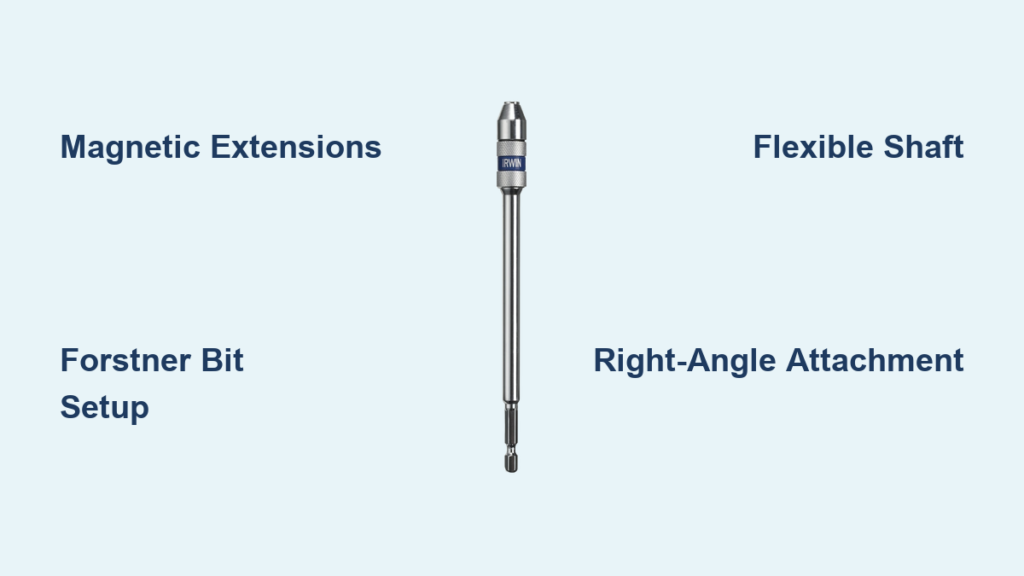
Magnetic quick-change extensions work best for rapid screwdriving tasks where precision isn’t critical. These 1/4-inch hex shank tools feature a magnetic bit holder that snaps into place in seconds—perfect for decking, cabinetry assembly, or subfloor installation. Forstner and spade bit extensions solve deep woodworking needs, adding 4-18 inches of reach while maintaining stability for clean, precise holes in cabinetry or furniture making.
When you need to navigate around obstacles, flexible drill bit extensions with their coiled shafts allow you to bend around corners—essential for electricians running wires through finished walls. Right-angle attachments give you 90-degree access for drilling in corners or against walls where your standard drill simply won’t fit. For the deepest, most precise holes in metal, aircraft extension drills (single, extra-long bits) outperform standard bits with extensions every time.
Magnetic Extensions: How to Extend a Drill Bit in 30 Seconds Flat
Magnetic quick-change extensions are your fastest solution when you need to extend a drill bit for screwdriving tasks. These impact-rated tools (like DEWALT DWA6HLDFT or Diablo DXT1010) feature a 1/4-inch hex shank that fits any standard drill chuck and a magnetic bit holder at the business end.
Secure your bit properly by pressing it firmly into the magnetic holder until you feel it click into place. The rare-earth magnet should hold your bit securely even during overhead work—if it doesn’t, the magnet may be worn or contaminated with metal shavings. Tighten the quick-release collar to lock the bit in position, preventing accidental ejection during high-torque applications.
Never use magnetic extensions for precision drilling tasks—metal shavings will cling to the magnet and clog your bit’s flutes, causing overheating and premature wear. These extensions work best for high-volume screwdriving where speed matters more than absolute precision, such as installing deck boards or assembling cabinets.
Forstner Bit Extension Setup: Drilling Perfect 2-Inch Deep Holes in Wood
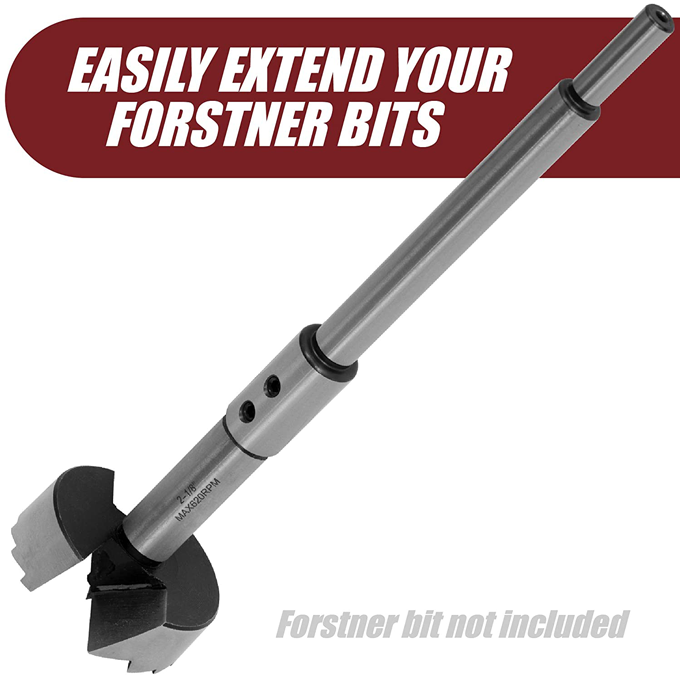
For deep, clean holes in woodworking projects, nothing beats a proper Forstner bit extension. These rigid extensions (like Fulton’s 6″ & 10″ set or Bosch EX Series) accept standard 3/8-inch round or hexagonal shanks and lock your bit securely with a set screw.
Follow these steps for perfect results:
1. Insert your Forstner bit into the extension’s chuck, ensuring it’s fully seated
2. Tighten the set screw firmly against the flat on your bit’s shank using the correct hex key
3. Insert the extension’s shank fully into your drill chuck and tighten completely
4. Start drilling at low speed (400-600 RPM) with steady pressure
Prevent wobble by checking that both your bit and extension are fully seated in their respective chucks. If you notice excessive vibration, stop immediately and recheck all connections—wobble in an extension quickly translates to an oval, inaccurate hole. For holes deeper than the bit’s length, use the “peck drilling” technique: drill 1/4-inch deep, retract to clear chips, then repeat.
Flexible Shaft Technique: How to Run Wires Through Finished Walls
The Klein Tools 53722 flexible extension (or similar 54-inch models) is your secret weapon for running wires through finished walls without destructive demolition. This coiled-shaft extension bends around obstacles while maintaining power transmission from your drill.
Master wire running with this technique:
– Insert a standard 1/4-inch hex drill bit into the flexible extension’s chuck
– Attach the extension’s hex shank to your drill, ensuring it’s fully seated
– Start drilling at LOW speed (200-400 RPM)—high speeds cause dangerous whip
– Gently guide the flexible shaft through the cavity, using your free hand to control bending
– Periodically reverse direction to clear debris from the hole
Avoid the #1 mistake—forcing the bit through obstacles. Let the drill do the work while you gently guide the flexible shaft. If you meet resistance, back out and try a different angle rather than applying excessive pressure, which can kink the shaft or damage your drill.
Right-Angle Attachment Mastery: Drilling in Corners Your Drill Can’t Reach

The DEWALT DWAARA120 right-angle attachment solves the “can’t fit my drill in this corner” problem by redirecting power 90 degrees. Unlike standard extensions, this tool changes your drill’s orientation rather than just adding length.
Set up for success:
1. Attach the right-angle tool to your drill using the included adapter
2. Insert your bit directly into the right-angle tool’s chuck (no separate extension needed)
3. Position yourself so the main body of your drill rests in an open area while the right-angle head accesses the tight space
4. Start at low speed with firm, steady pressure—never force the bit
This method provides superior control compared to long rigid extensions when working in corners, behind appliances, or against walls. The reduced leverage actually gives you better torque control than an extended bit, making it ideal for precision work in tight spots.
Deep Hole Drilling: Why Aircraft Extension Drills Beat Standard Bits + Extensions
For metalworking projects requiring deep, straight holes (like roll cages or frame fabrication), standard bits with extensions often wander or break. Aircraft extension drills (like Greycore’s 1/8″ x 12″ sets) solve this problem—they’re single, hardened bits engineered specifically for deep hole drilling.
Why they outperform extensions:
– No weak point at the extension connection that can cause deflection
– Precision-ground flutes designed for chip evacuation in deep holes
– Hardened construction resists bending under pressure
– Consistent diameter maintains hole straightness
Use the peck drilling technique for clean metal holes: drill 1-2 bit diameters deep, retract completely to clear chips, then repeat. Apply cutting fluid liberally and maintain consistent pressure—never force the bit. For holes deeper than 6 inches, consider specialized deep hole drilling equipment rather than standard drills.
Impact Driver Danger Zone: Which Extensions Will Survive the Torque
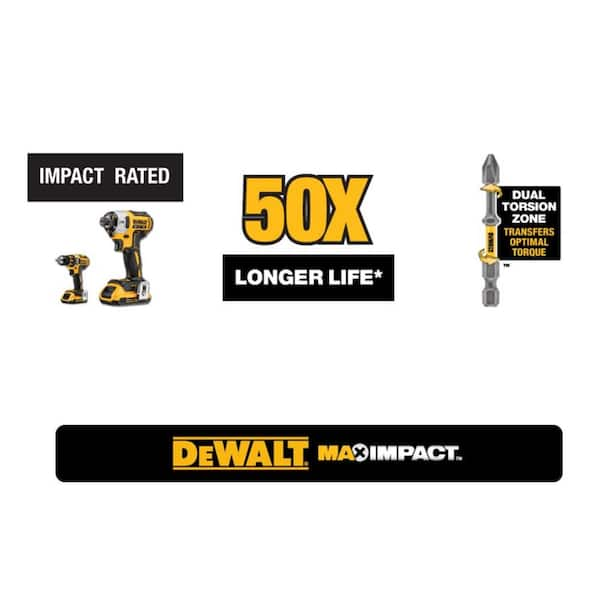
Using the wrong extension with your impact driver is a fast track to broken tools. Only use extensions specifically labeled “impact-rated” (like DEWALT’s DWA series or Diablo’s “Impact Strong” models) with impact drivers—the concussive force will destroy standard extensions.
Check for these impact-ready features:
– Reinforced internal construction
– Hex shank designed to withstand hammering action
– Magnetic holders with extra-strong retention
– Manufacturer’s explicit “impact-rated” labeling
Never use flexible extensions or Forstner bit extensions with impact drivers—they’ll fail catastrophically under the hammering action. For high-torque applications, the brief extra time to switch to a standard drill pays off in tool longevity and safety.
Safety First: The 5-Point Checklist Before Extending Your Drill Bit
Extending your drill bit creates unique safety hazards you must address before starting:
- Inspect for damage: Check for cracks, worn chuck mechanisms, or weakened magnetic strength
- Secure your workpiece: Clamping becomes critical with extensions—the leverage can spin unsecured materials
- Verify bit retention: Ensure your bit is fully seated and locked in both the extension and main chuck
- Start slow: Always begin at low speed to establish the hole before increasing RPM
- Wear eye protection: Extensions can deflect chips back toward you with surprising force
Skipping any of these steps risks tool failure, inaccurate holes, or personal injury. The extra 30 seconds spent on this checklist prevents hours of rework or worse.
Project-Specific Extension Guide: Wood, Metal, and Electrical Applications
Choose your extension method based on your specific material and application:
Woodworking projects (cabinetry, furniture):
– Forstner/spade bit extensions for deep, clean holes
– Magnetic extensions for high-volume screwdriving
– Right-angle attachments for corner installations
Metal fabrication:
– Aircraft extension drills for deep holes (never standard bits + extensions)
– Low speeds (200-400 RPM) with cutting fluid
– Center punch marks essential to prevent bit walking
Electrical work:
– Flexible extensions for wire running through walls
– Short rigid extensions for working in electrical boxes
– Right-angle attachments for tight spaces behind appliances
The right extension turns impossible tasks into routine work. Match your tool to the job, follow safety protocols, and you’ll extend not just your drill bit—but your capabilities as a craftsman. Keep your extensions clean, inspect them regularly, and replace any that show signs of wear to maintain precision and safety in every project.


