
That sinking feeling when your drill bit slips off a smooth metal surface or snaps mid-project isn’t just frustrating—it’s usually preventable. Most DIYers blame their Black+Decker drill bits for poor performance, but 90% of issues stem from incorrect installation, mismatched materials, or improper technique. This guide cuts through the confusion with actionable steps to maximize your Black+Decker drill bits’ performance. You’ll learn exactly how to install bits securely in both keyless and keyed chucks, select the right bit for wood, metal, or masonry, and avoid the top 5 mistakes that destroy bits and ruin projects. By the end, you’ll drill cleaner holes faster while extending your bits’ lifespan by up to 50%.
Why Your Black+Decker Drill Bit Won’t Stay Put
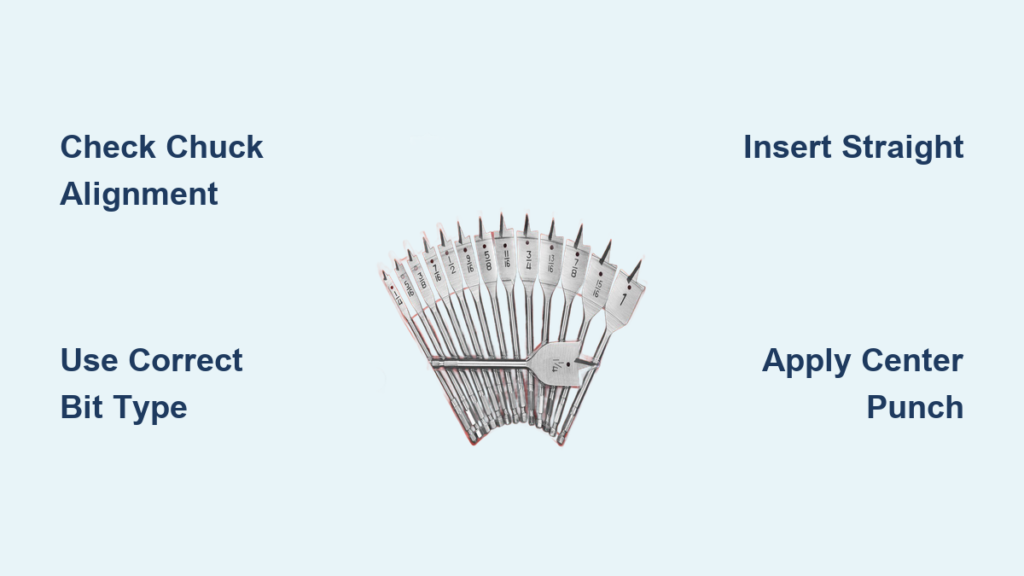
A wobbling or slipping bit almost always traces back to chuck issues—not bit quality. The chuck’s three internal jaws must clamp perfectly around the bit’s smooth shank to prevent rotation during drilling. Keyless chucks (common on newer cordless models) rely on hand-tightening force, while keyed chucks require precise alignment with the T-shaped key. If jaws are worn, dirty, or unevenly tightened, they can’t grip the shank securely. Inspect the chuck teeth for metal shavings or rust—these create gaps where the bit shifts under pressure. Always wipe the shank with a clean cloth before insertion; oil or debris reduces gripping power by 70%. For stubborn slippage, test jaw alignment by inserting a hex key into the chuck—any visible wobble means the chuck mechanism needs servicing.
How to Check Your Chuck’s Jaw Alignment
- Remove the battery and fully open the chuck
- Shine a flashlight into the chuck cavity
- Rotate the chuck sleeve slowly while observing the three jaws
- Note if jaws move in perfect unison (they should close simultaneously)
- If one jaw lags, apply two drops of penetrating oil to the chuck threads and work it through rotation
Identify Your Black+Decker Drill’s Chuck Type Instantly
Confusing keyless and keyed chucks causes 60% of installation errors. Keyless chucks feature a textured rubber or plastic sleeve you twist by hand—no tools needed. They typically click audibly when fully tightened. Keyed chucks have three small hexagonal holes around the chuck body and require the included T-shaped key. To confirm your type:
– Keyless: Look for ridges on the chuck sleeve; turning it clockwise tightens the jaws
– Keyed: Check for stamped numbers (like “1.5-10mm”) near the holes; the key fits flush into these sockets
Never force a key into a keyless chuck—this strips internal gears. If you’ve lost your chuck key, measure the hole size with calipers; Black+Decker uses standard 1/4″ or 5/16″ keys. For SDS chucks (used with hammer drills), bits slide in with a quarter-turn lock—no tightening needed.
Choosing the Right Black+Decker Bit for Wood, Metal, or Masonry
Using a wood bit on concrete guarantees tip breakage. Match these Black+Decker-specific bits to your material:
For hardwoods and plywood:
– Spade bits (with center point) prevent splintering
– Auger bits clear chips faster for deep holes
– Critical tip: Use 1,500+ RPM with light pressure to avoid burning
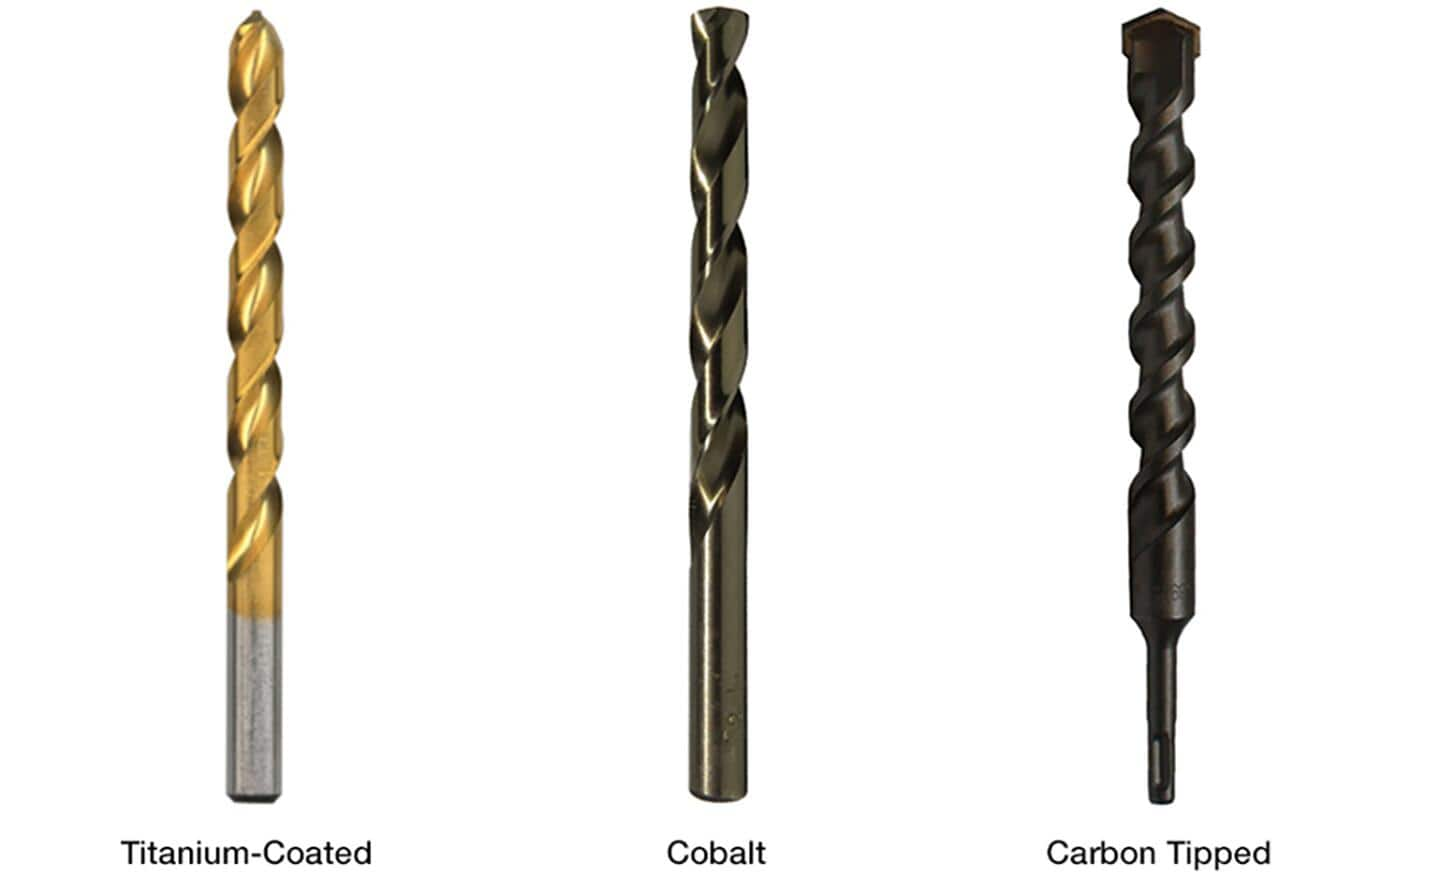
For metals (steel, aluminum):
– Titanium-coated HSS bits (gold-colored) resist heat buildup
– Cobalt bits for stainless steel or cast iron
– Must-do: Create a starter dimple with a center punch first
For brick, concrete, or stone:
– Carbide-tipped masonry bits (look for “Extreme2” labeling)
– Only use in hammer-drill mode—standard rotation shatters tips
– Warning: Never use titanium bits on masonry—they overheat instantly
Multi-material titanium sets work for occasional DIY tasks but sacrifice precision. For professional results, keep separate bit sets for each material.
How to Insert a Drill Bit in a Keyless Chuck Without Slipping
Forcing bits into keyless chucks causes 80% of premature failures. Follow this exact sequence:
- Power down: Remove the battery from cordless drills
- Open fully: Hold the drill body and rotate the chuck sleeve counterclockwise until jaws stop moving
- Insert straight: Push the bit shank fully into the chuck until it bottoms out (you’ll feel resistance)
- Hand-tighten: Rotate the sleeve clockwise while applying firm downward pressure on the bit
- Final lock: Squeeze the trigger while holding the chuck to engage the ratcheting mechanism (listen for 3 distinct clicks)
Pro mistake: Never use pliers to overtighten—this cracks the chuck’s internal gears. Test grip by trying to twist the bit with gloved hands; zero movement means secure installation.
Tightening a Black+Decker Keyed Chuck for Maximum Grip
Keyed chucks require precise technique to avoid damaging the mechanism:
- Insert the chuck key fully into any keyhole until it seats
- Turn counterclockwise to open jaws (opposite of intuition)
- Insert the bit shank until it hits the chuck’s internal shoulder
- Insert key and turn clockwise with steady pressure—never impact force
- Tighten all three holes equally: Rotate key 1/4 turn per hole in sequence
Critical check: After tightening, try to rotate the bit with pliers—if it moves, the key isn’t fully engaged in the keyhole. For stubborn chucks, tap the key’s end gently with a rubber mallet while turning to break corrosion.
Preventing Drill Bit “Walking” on Metal and Other Surfaces
Smooth surfaces cause bits to skitter dangerously off-target. The fix takes 10 seconds:
- Mark your hole center with a permanent marker
- Place a center punch tip precisely on the mark
- Strike once firmly with a hammer to create a 1/16″ deep dimple
- Set drill to lowest speed (250-300 RPM for metal)
- Rest the drill bit tip in the dimple before starting
Pro tip: On polished metal, apply masking tape over the mark first—this gives the bit instant grip. For curved surfaces (like pipes), clamp a wooden block with a pilot hole against the curve.
Optimal Speed Settings for Black+Decker Bits by Material Type

Speed mismatches destroy bits faster than any other error. Match these RPM ranges:
| Material | Bit Type | Speed Range | Pressure Level |
|---|---|---|---|
| Hardwood | Spade bit | 1,500-2,500 RPM | Light (1-2 lbs) |
| Softwood | Twist bit | 2,000-3,000 RPM | Medium |
| Steel | Titanium HSS | 300-600 RPM | Firm (5-7 lbs) |
| Aluminum | Cobalt bit | 800-1,200 RPM | Medium |
| Concrete | Carbide masonry | 400-900 RPM | Heavy (10+ lbs) |
Warning: Overheating (smell of burning) means RPM is too high or pressure too low. Stop immediately and let the bit cool. For metals, apply cutting fluid every 15 seconds during deep holes.
Critical Safety Steps Before Using Any Black+Decker Drill Bit
Skipping these steps risks eye injuries or kickback:
- Always wear ANSI-approved safety glasses—metal shavings travel at 100+ mph
- Clamp workpieces securely; handheld materials spin violently when bits bind
- Verify drill mode: “Hammer” setting only for masonry—using it on wood strips screw heads
- Check bit integrity: Discard any bit with chipped flutes or bent shanks
- Confirm depth stop: Set it 1/8″ shallower than material thickness to prevent bit jamming
Emergency prep: Keep your free hand clear of the drill’s rotation path. If the bit binds, release the trigger immediately—never try to “muscle through.”
Cleaning Clogged Flutes to Extend Bit Life
Clogged flutes cause overheating and poor chip ejection. Clean after every 3 holes:
- Power down and remove the bit
- Brush debris from flutes using a stiff nylon brush (wire brushes damage coatings)
- For stubborn metal shavings, use a pointed pick tool along the flute groove
- Wipe the shank with mineral spirits to remove oil buildup
- Store bits in a foam organizer—never loose in a toolbox where tips collide
Pro note: Never use compressed air—this forces debris deeper into flutes. For titanium-coated bits, avoid abrasive cleaners that strip the protective layer.
Fixing a Drill Bit Stuck in Your Black+Decker Chuck
A seized bit often results from overtightening or rust. Try this sequence:
- Apply penetrating oil around the shank/chuck interface
- Tap the chuck’s side (not the bit!) with a brass hammer 3-4 times
- Insert chuck key and turn counterclockwise with steady pressure
- If stuck, clamp the bit in a vise and rotate the drill body counterclockwise
Never use heat—this warps the chuck. If all fails, drill a small hole through the bit shank and use a screw extractor.
Replacing Dull Black+Decker Drill Bits: When and How
Dull bits require 3x more force and generate dangerous heat. Replace immediately if:
– Flutes show visible flattening (check with magnifying glass)
– Smoke appears within 5 seconds of drilling
– Holes have ragged edges or oversized diameters
– Bit takes >30 seconds to drill a 1/4″ hole in softwood
Cost saver: HSS bits can be sharpened 2-3 times using a drill bit sharpener, but cobalt and carbide-tipped bits must be replaced—sharpening destroys their heat treatment.
Mastering these techniques transforms frustrating drilling sessions into precision work. Remember: Your Black+Decker drill bits perform best when matched to the material, installed with chuck-specific techniques, and maintained with consistent cleaning. Never skip the center punch step for metal—it’s the single biggest factor in clean hole starts. Store bits vertically in a dedicated organizer to protect cutting edges, and always match RPM to material hardness. For stubborn projects, switch to a new sharp bit halfway through—it maintains cutting efficiency and prevents motor strain. Ready to tackle your next project? Grab your center punch and a titanium-coated bit—you’ll feel the difference from the first hole.


