
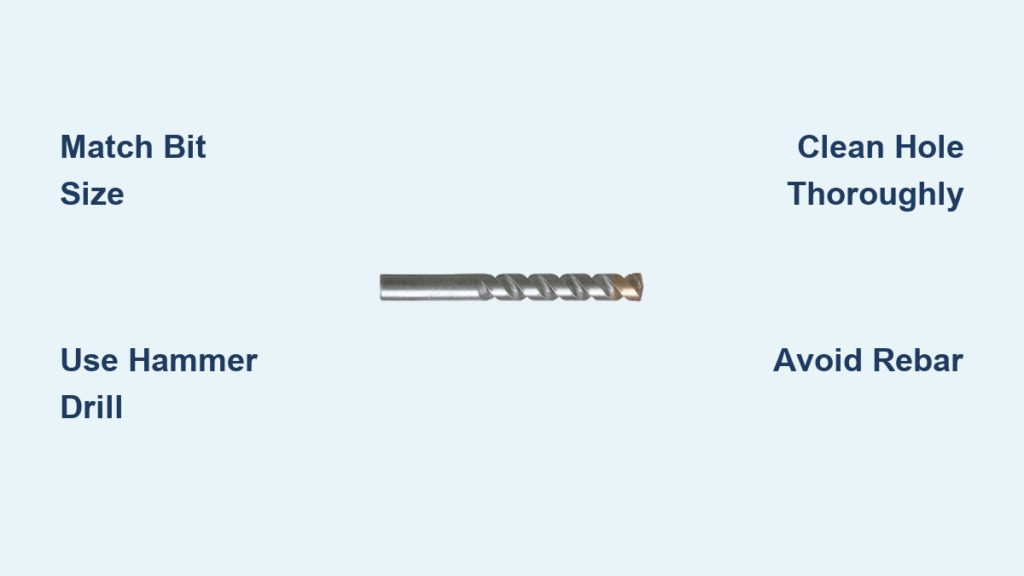
That frustrating moment when your shelf bracket pulls away from the garage wall or your deck ledger board shifts after installation usually traces back to one critical error: improperly drilled pilot holes for your Tapcon screws. Tapcon® screws deliver exceptional holding power in concrete, brick, and block—but only when paired with the correct drill bit and technique. Unlike standard masonry bits, Tapcon drill bits create precisely sized holes that allow the screw’s patented thread design to cut into masonry for maximum grip. Skipping proper hole preparation turns even the toughest concrete fastener into a spinning disappointment. This guide reveals exactly how to use Tapcon drill bits to achieve permanent, vibration-resistant installations that withstand heavy loads and harsh weather.
You’ll discover why matching bit size to screw diameter is non-negotiable, how to prevent the #1 cause of Tapcon failure (dust-filled holes), and professional techniques for drilling clean holes every time. Whether mounting a 200-pound TV bracket on a basement wall or securing structural components for a deck, these methods transform concrete fastening from a gamble into a guaranteed success. Let’s eliminate guesswork and install Tapcon screws that hold for decades.
Why Your Standard Masonry Bit Won’t Work for Tapcons
Using the wrong drill bit sabotages Tapcon performance before you even drive the screw. Standard masonry bits create oversized holes that prevent Tapcon’s high-low threads from properly engaging the concrete, while undersized holes risk cracking masonry or snapping screws. Tapcon-specific bits solve this with engineered tolerances that match the screw’s thread profile.
Critical Differences in Tapcon Drill Bit Design
Tapcon bits feature a carbide tip rated for 3x longer life in abrasive concrete compared to standard bits. More importantly, their diameters are calibrated to the screw’s shank—not the head. For example:
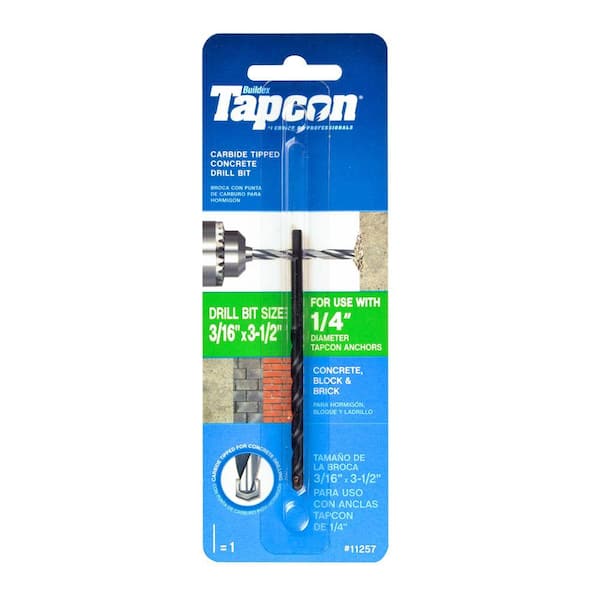
– 3/16″ Tapcon screws require a 5/32″ drill bit
– 1/4″ screws demand a 3/16″ bit
– 3/8″ screws need a 5/16″ bit
The packaging always specifies the exact bit size. Using a 1/4″ standard bit for a 1/4″ Tapcon creates a hole 1/32″ too large, reducing holding power by 40%. Always verify the bit diameter stamped on the shank against your screw size—never assume based on packaging labels alone.
Consequences of Bit Size Mismatch
An oversized hole leaves insufficient concrete for the threads to grip, causing the screw to spin uselessly during installation. Undersized holes create excessive friction that can:
– Crack brittle concrete blocks
– Strip screw threads
– Overheat and shatter the drill bit
– Cause screw breakage under load
One contractor we spoke with lost a $400 ledger board installation because he used a 1/4″ bit for 1/4″ Tapcons. The screws pulled out when securing joists, requiring complete rework. Always match the bit to the screw shank diameter as specified by Tapcon’s engineering.
Hammer Drill Setup for Flawless Hole Drilling

Your drill’s performance determines whether you’ll drill clean holes or fight a smoking, stuck bit. Standard drills lack the percussive force needed for efficient concrete penetration, making hammer drills or rotary hammers mandatory for Tapcon installations.
Essential Drill Settings and Accessories
Set your hammer drill to hammer-only mode (no rotation) for initial bit placement to prevent “walking” on smooth surfaces. Once the bit bites 1/4″ deep, switch to hammer-rotation mode. Use a depth stop collar locked at:
– Screw length + 1/4″ for dust clearance
– Never deeper than the screw length
For example, a 2-1/2″ Tapcon requires a 2-3/4″ drilling depth. Exceeding this depth wastes holding power—the screw needs undisturbed concrete at the hole’s base to anchor properly. Measure twice: slide the collar onto the bit before insertion so it contacts the drill chuck at your target depth.
Dust Management Techniques for Indoor Projects
Silica dust from concrete drilling causes permanent lung damage with repeated exposure. For indoor work:
1. Attach a HEPA-filtered dust extractor directly to the drill chuck
2. Use a shop vac with a crevice tool held against the hole
3. Drill in short bursts (5-10 seconds) to minimize airborne particles
Outdoor projects still require safety glasses and an N95 mask. Never blow holes out with compressed air near your face—use a canister with a straw attachment directed away from your body.
Drilling Tapcon Holes: The 5-Step Proven Method
Skipping any step in this sequence causes 90% of Tapcon installation failures. Follow this exact process for vibration-proof fastening.
Step 1: Prevent Bit “Walking” with Precision Marking
Concrete’s smooth surface makes bits slide off target locations. Solve this by:
– Making a light pencil mark at your drilling point
– Tapping a center punch into the mark to create a 1/16″ starter dimple
– For multiple holes, create a cardboard template with pre-drilled guide holes
Hold the drill perpendicular to the surface using a speed square as a visual guide. Even 5° of angle creates an oval hole that compromises thread engagement.
Step 2: Execute the Drilling Process Without Binding
Insert the correctly sized carbide bit and:
1. Start in hammer-only mode for 1/4″ depth
2. Switch to hammer-rotation mode
3. Apply firm, consistent pressure (no forcing)
4. Withdraw the bit every 1″ to clear dust
5. Stop immediately when the depth collar contacts the surface
Forcing the bit overheats the carbide tip, causing glazing that reduces cutting efficiency. If the bit binds, reverse rotation while maintaining light pressure to free it—never yank the drill.
Step 3: Eliminate Dust with Military-Grade Hole Cleaning
This is where most DIYers fail. Dust left in the hole acts as a lubricant, preventing thread engagement. Use this two-stage cleaning:
1. Blast the hole with compressed air for 5 full seconds
2. Insert a wire brush attachment and rotate 3 times
3. Final blowout to remove dislodged particles
Test hole cleanliness by inserting a toothpick—it should meet firm resistance at the bottom. If it slides deeper than the screw length, re-clean thoroughly.
Step 4: Drive Screws at Optimal Speed and Depth
Use a drill/driver with adjustable clutch set to:
– Low speed (450-600 RPM)
– Medium torque setting
Drive screws until the head is flush with your mounting surface. Countersunk heads should sit 1/16″ below the surface. Overtightening strips concrete threads—stop when you feel significant resistance increase. For structural applications, torque to 15-20 ft-lbs using a calibrated wrench.
Avoiding Costly Tapcon Installation Disasters

Even experienced contractors make these preventable errors that turn $2 fasteners into $200 rework jobs.
The Rebar Danger Zone Every Driller Must Know
Reinforcing steel (rebar) lurks just below concrete surfaces. Hitting it with a Tapcon bit:
– Instantly chips the carbide tip
– Creates dangerous sparks
– Leaves an irregular hole that won’t accept screws
Prevent this by:
– Scanning the area with a stud finder set to “deep scan” mode
– Tapping the surface—hollow sounds indicate no rebar
– Drilling a 1/4″ test hole first in questionable areas
One electrician we interviewed destroyed three Tapcon bits in one afternoon by drilling into rebar—adding $75 in bit replacements to his job.
When Hammer Drills Aren’t Enough: Rotary Hammer Solutions
For hardened concrete or frequent drilling:
– Use a rotary hammer in “chisel mode” without rotation for initial penetration
– Switch to “drill mode” after the first 1/2″ depth
– Rent a 1-1/8″ SDS-plus rotary hammer for projects over 20 holes
Standard hammer drills overheat after 10-15 holes in dense concrete. Rotary hammers deliver 3x the impact energy with less user fatigue.
Extending Tapcon Bit Life Through Proper Care
Carbide bits cost $15-$40 each—protect your investment with these maintenance protocols.
Immediate Post-Use Cleaning Routine
After drilling:
1. Wipe the bit shank with a dry cloth
2. Use a brass wire brush to remove concrete residue from flutes
3. Soak the tip in mineral spirits for 5 minutes if hardened slurry remains
4. Dry completely before storage
Never clean bits with water—concrete residue becomes cement-like when wet. Store bits vertically in foam organizers to prevent tip damage from contact with other tools.
Recognizing When to Replace (Not Resharpen)
Carbide can’t be sharpened with standard tools. Replace bits when:
– Flutes show visible wear (smooth instead of sharp edges)
– Drilling produces excessive smoke
– Penetration rate drops 50% from new performance
– Tips develop hairline cracks
Attempting to resharpen carbide often causes micro-fractures that lead to sudden tip failure during drilling. Keep one new bit on hand for critical jobs.
Mastering Tapcon drill bit usage transforms concrete fastening from a frustrating chore into a reliable process. Remember the non-negotiables: match bit size precisely to the screw shank, always use hammer-drill action, and never skip the two-stage hole cleaning process. For structural applications like deck ledger boards, verify local building codes—some jurisdictions require minimum 3″ embedment depths. When done correctly, a properly installed Tapcon screw in solid concrete achieves 300+ pounds of pull-out strength. Keep this guide handy for your next project, and consider exploring our companion article on “Choosing Tapcon Screw Lengths for Every Application” to complete your concrete fastening expertise. Your next installation will stay put—guaranteed.


