
Forstner bits deliver professional results that standard drill bits can’t match—clean, flat-bottomed holes perfect for cabinet hinges, inlays, and precision woodworking projects. Yet too many woodworkers struggle with burning, wandering bits, and tear-out because they’re using these specialized tools incorrectly. The secret isn’t just having the right bit—it’s knowing exactly how to operate it for your specific material and application. In this guide, you’ll learn the exact speed settings, feed rates, and techniques that transform frustrating attempts into flawless holes, whether you’re working with delicate cherry wood or stubborn oak.
Essential Pre-Drill Setup for Forstner Bits
Your Forstner bit’s performance starts long before you pull the trigger. A properly prepared setup prevents the most common frustrations woodworkers experience with these bits. Always begin by securing your workpiece with a hand-screw clamp or drill press vise—never hold it by hand. The aggressive cutting action of Forstner bits can cause sudden kickback if the material shifts, creating dangerous situations and ruined projects.
Mark your hole center precisely using a center punch to create a small indentation. This dimple gives the bit’s central spur a secure starting point, eliminating the “walking” that plagues beginners. For handheld drilling, this step is non-negotiable—you’ll struggle to control the bit without this guide point. When working with plywood or MDF, place painter’s tape over your drilling area to minimize surface tear-out.
Apply lubrication appropriate for your material before starting. For hardwoods, rub paraffin wax along the bit’s cutting edges; for metals, use a few drops of cutting oil. This simple step reduces heat buildup by up to 30% and extends bit life significantly. Always verify your bit is sharp—a dull Forstner bit will burn wood and produce ragged holes regardless of your technique.
Speed and Feed Rate Guidelines by Material
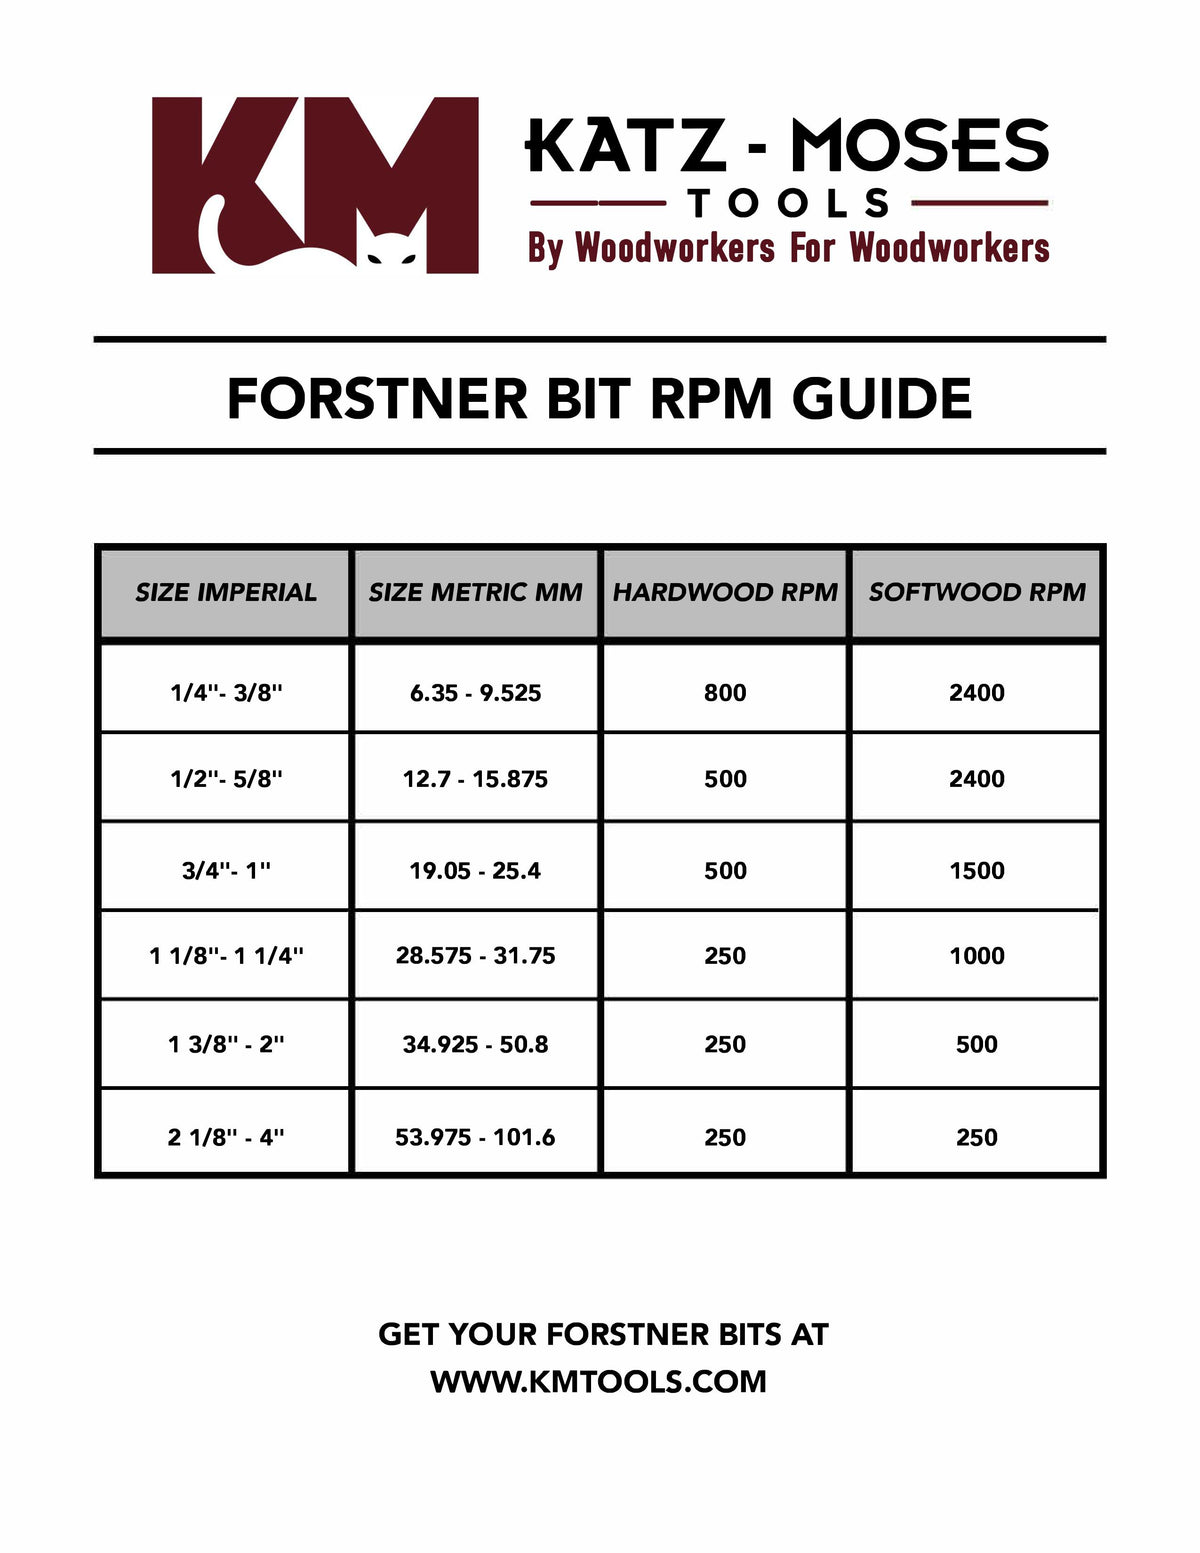
Wood Drilling Speed Chart
| Bit Diameter | Softwoods (Pine, Cedar) | Hardwoods (Oak, Maple) | Plywood/MDF |
|---|---|---|---|
| Up to 1/2″ | 1500-2000 RPM | 1200-1500 RPM | 1000-1400 RPM |
| 1/2″ to 1″ | 1000-1500 RPM | 800-1200 RPM | 1000-1400 RPM |
| 1″ to 2″ | 600-1000 RPM | 600-1000 RPM | 800-1200 RPM |
| Over 2″ | 300-600 RPM | 300-600 RPM | 600-1000 RPM |
Drilling Hard Maple with a 1-3/4″ Bit
When working with dense hardwoods like maple, start at the lower end of the recommended range (around 600 RPM for a 1-3/4″ bit). If you notice burning or smoke, immediately reduce speed by 25%—maple’s density requires slower operation than softer woods. Maintain steady, moderate pressure; forcing the bit creates excessive heat that damages both your workpiece and the tool. For deep holes exceeding 1″, implement peck drilling: advance 1/4″, then retract fully to clear chips before continuing.
Aluminum Drilling Technique
For soft metals like aluminum, use 200-400 RPM with a cutting fluid applied continuously. The lubricant prevents chip welding—a common issue where aluminum shavings fuse to the bit’s cutting edges. Apply firm, consistent pressure but watch for heat buildup; if the metal starts to discolor around the hole, stop immediately and allow cooling. Unlike wood, you want short, broken chips in metal—long continuous shavings indicate your feed rate is too slow.
Step-by-Step Drilling Technique
Creating the Pilot Dimple
Skip this step and you’ll battle bit wandering all day. After marking your center point, use a center punch to create a 1/16″ deep dimple. For extra security on smooth surfaces, drill a shallow pilot hole with a 1/8″ brad-point bit first. This gives the Forstner bit’s central spur something substantial to grab onto during initial penetration. When working with end grain or irregular surfaces, this pilot dimple becomes absolutely critical for accuracy.
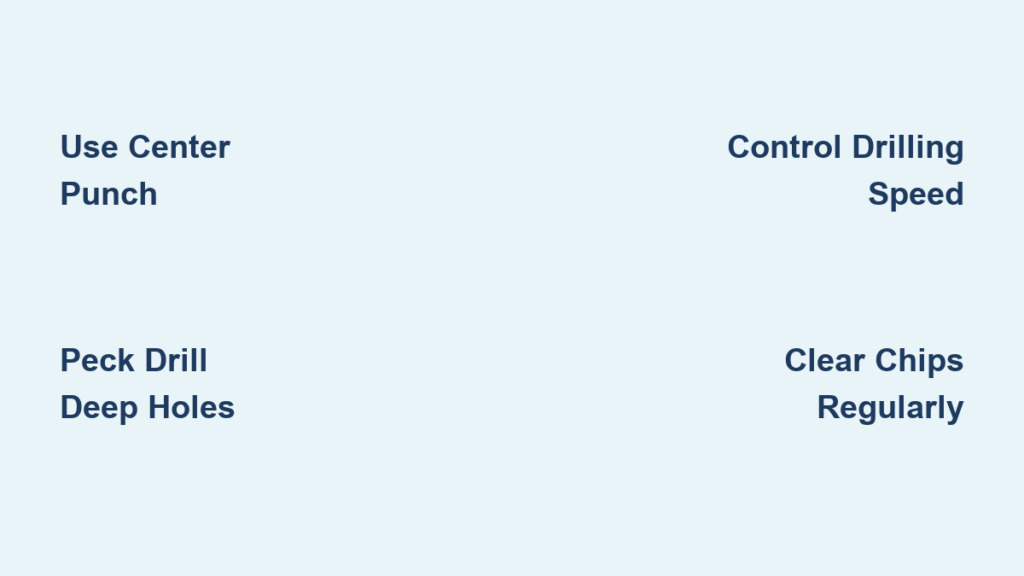
Peck-Drilling for Deep Holes
For holes deeper than 1″, peck drilling isn’t optional—it’s essential for success. Drill only 1/4 to 1/2 inch deep, then fully retract the bit to clear chips from both the hole and the bit’s flutes. This prevents chip packing that causes overheating and binding. In dense materials like maple or MDF, you’ll need to peck more frequently—sometimes after just 1/4″ of penetration. Listen for changes in motor sound; a rising pitch indicates chip buildup requiring immediate retraction.
Managing Heat and Chip Clearing
When drilling deep or large-diameter holes, heat becomes your biggest enemy. The telltale sign is smoke rising from your workpiece—this means you’re burning the wood and rapidly dulling your bit. Instead of drilling continuously, establish a rhythm: 5 seconds drilling, 3 seconds clearing. For holes over 2″ deep, use compressed air to blow chips from the hole between pecks. In metals, watch for discoloration around the hole edge—this indicates dangerous heat levels requiring immediate speed reduction.
Advanced Techniques and Applications
Creating Perfect Hinge Mortises
For cabinet hinge installations, set your drill press depth stop to match the hinge plate thickness plus 1/32″ for sanding. Drill overlapping holes spaced 3/4″ apart, then clean up the corners with a sharp chisel. Use 800-1200 RPM for hardwood doors—going too fast creates tear-out that ruins the mortise edges. Always drill with the door panel face down against the drill press table to prevent exit tear-out.
Flawless Through-Holes Without Tear-Out
When drilling all the way through material, place a sacrificial backer board underneath your workpiece. As the bit approaches the exit side (about 1/8″ from breaking through), reduce pressure by 50% and slow your feed rate. For clean exits in plywood, use a backing board made of the same material—this prevents the classic “blowout” that ruins the back surface. When working with acrylic or other plastics, add a second backer board on top as well to prevent surface chipping.
Common Problems and Solutions

Burning or Smoking Wood
Why it happens: Your bit is either dull or spinning too fast for the material. Large Forstner bits (over 1-1/2″) in hardwoods require significantly slower speeds than beginners realize.
Fix it now: Immediately stop drilling and reduce speed by 25-30%. For a 2″ bit in oak, drop from 400 RPM to 300 RPM. If burning persists, check bit sharpness—dull cutters generate excessive heat regardless of speed. Apply paraffin wax to the cutting edges before resuming.
Bit Wanders on Start
Why it happens: The central spur lacks purchase on smooth surfaces, causing the bit to skate across your workpiece.
Fix it now: Create a deeper pilot dimple with your center punch. For particularly slippery surfaces like finished wood, drill a 1/8″ pilot hole first. Position your drill perpendicular to the work surface—any angle greater than 2° increases wandering risk. Apply firm, steady pressure during initial penetration; hesitating gives the bit time to wander.
Maintenance and Safety Essentials
Sharpen your bit correctly: The outer rim is the primary cutting edge—use a fine diamond file at the original bevel angle (typically 45°). Never file the center spur, as this disrupts the bit’s tracking ability. Professional sharpening every 10-15 hours of use maintains optimal performance.
Safety non-negotiables: Always wear safety glasses—Forstner bits eject wood chips at high velocity. Secure long hair and remove loose clothing that could catch in the bit. Most critically, never hold your workpiece by hand; the aggressive cutting action can spin even small pieces violently. Use clamps or a vise for every drilling operation.
Storage protocol: After use, clean pitch and resin with a dedicated bit cleaner or 50/50 Simple Green solution. Dry thoroughly and coat high-carbon steel bits with light machine oil to prevent rust. Store bits in a dedicated rack—not loose in your toolbox where they can chip against other tools.
Mastering Forstner bits transforms your woodworking capabilities, allowing professional results on hinge installations, inlays, and custom joinery. Remember the golden rule: slower is better with larger bits. Start at the lower end of recommended speeds, prioritize chip clearance through peck drilling, and always use sharp bits. When you encounter problems, adjust only one variable at a time—speed first, then feed rate—to identify the true cause. With these techniques, you’ll consistently drill clean, flat-bottomed holes that elevate your projects from amateur to artisan quality. For your next project, test these methods on scrap material first to dial in perfect settings before working on your actual piece—this simple habit saves more projects than any other single technique.


