
Achieving a perfectly flush screw head transforms your DIY project from sloppy to professional in seconds. The countersink drill bit is your secret weapon for creating that smooth, seamless finish where screw heads disappear into the material. When you’re working with wood, metal, or plastic, this specialized tool creates the precise conical recess needed for flat-head screws to sit perfectly flush or slightly below the surface. Without proper countersinking, your screw heads will protrude awkwardly, ruining the clean look you’re after and potentially interfering with the function of your project.
Whether you’re building a custom cabinet, assembling metal brackets, or installing trim, learning how to use a countersink drill bit properly separates amateurs from craftspeople. The good news? Mastering this essential technique takes just minutes to learn but delivers professional results immediately. In this guide, you’ll discover exactly how to select the right bit, match it to your screw type, and execute perfect countersinks every time—regardless of your material or skill level.
Selecting Your Countersink Bit for Specific Materials
Choosing the right countersink drill bit isn’t one-size-fits-all—it depends entirely on what you’re working with and the finish you want. Grabbing the wrong bit leads to tear-out, chatter marks, or misaligned screw heads that ruin your project’s appearance.
Multi-Flute Countersinks: Your Go-To for Clean Woodwork
When you’re working with hardwoods or need a smooth finish on plywood, reach for a 3-6 fluted countersink. These bits deliver chatter-free cutting action because multiple cutting edges distribute the workload evenly. As you drill, the flutes efficiently evacuate wood chips, preventing clogging that causes burning and rough finishes. For standard flat-head wood screws (which typically have 82° heads), this is your most versatile option that works across most woodworking applications from furniture assembly to cabinetry.
Single-Flute Countersinks: The Deburring Specialist
If you’re working with softwoods, plastics, or need to clean up drilled holes, the single-flute countersink is your precision tool. Its deep flute design clears chips effortlessly as you work, reducing heat buildup that can melt plastics or burn softwoods. You’ll find this bit indispensable for deburring metal edges after drilling—simply run it around the hole perimeter to remove sharp burrs while creating a subtle chamfer. When you need a clean, smooth recess without aggressive material removal, this is your precision instrument.
Combination Drill-Countersinks: Double Your Efficiency
For production work or when you’re drilling multiple identical holes, combination drill-countersinks save you time and guarantee perfect alignment. These clever bits drill the pilot hole and create the countersink recess in one continuous motion—no switching bits or risking misalignment between operations. As you drill, the pilot section creates the perfect-sized hole for the screw shank while the countersink portion forms the matching recess. When you’re assembling multiple cabinet doors or installing dozens of metal brackets, this time-saving tool pays for itself in precision and speed.
Match Countersink Angle to Screw Head for Perfect Seating

Using the wrong angle is the #1 reason screws won’t sit flush—no matter how carefully you drill. Your countersink angle must match your screw head angle exactly, or you’ll end up with gaps, proud heads, or stripped screws.
- 82° Countersinks: Reach for this standard angle when working with common flat-head wood screws in North America. It’s the perfect match for most general-purpose screws you’ll encounter in hardware stores.
- 90° Countersinks: Grab this when working with metric fasteners or specific industrial applications. Never assume—always check your screw specifications before drilling.
- Specialty Angles (60°, 100°, 120°): These solve specific problems like aircraft rivet installation or specialized hardware. If your project involves unusual fasteners, verify the exact angle required.
Pro Tip: Place your screw on a flat surface and measure the angle between the screw head’s sides with a protractor. This simple check prevents mismatched angles that ruin your finish.
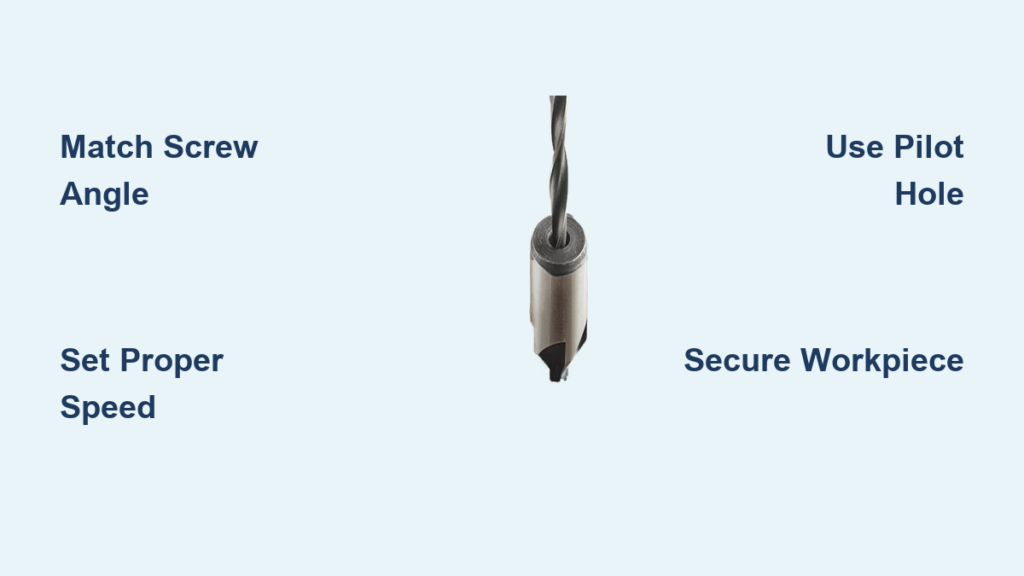
Execute Perfect Countersinks in 5 Critical Steps
Follow this exact sequence to create flawless screw recesses every time, whether you’re working with delicate veneers or tough metal plates.
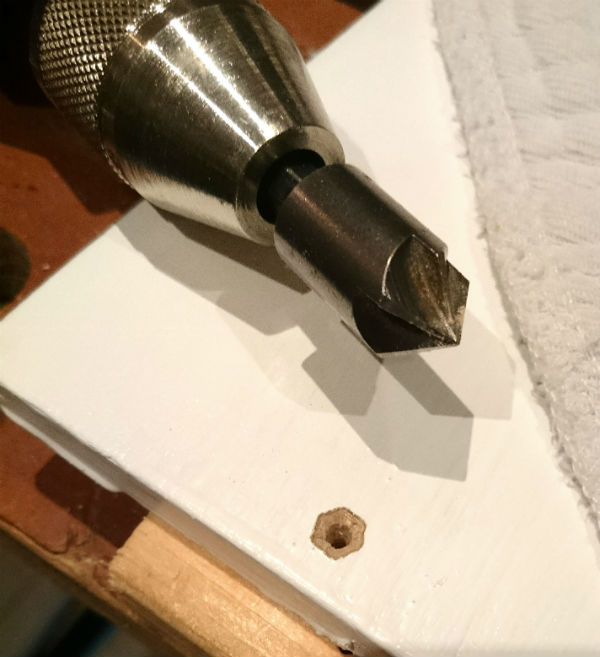
Prepare for Precision Before Drilling
Secure your workpiece with clamps before touching your drill—movement during countersinking creates wobbly, off-center holes that look unprofessional. Mark your hole location precisely with a pencil or awl, then drill your pilot hole first using a bit slightly smaller than the screw’s root diameter. For hardwoods or near board edges, this prevents splitting. Finally, set your depth by testing on scrap material—your goal is for the screw head to sit flush or just below the surface.
Drill Countersinks Like a Professional
- Start with a center punch (for metal) or pilot dimple (for wood) to prevent bit wandering
- Set appropriate speed: 1500-2500 RPM for wood, 500-1000 RPM for metal with cutting fluid
- Apply steady downward pressure while maintaining a 90-degree angle to the surface
- Drill in short bursts for deep holes, clearing chips after each pass to prevent clogging
- Test fit your screw frequently—stop when the head sits perfectly flush with the material
Warning: Forcing the bit or using excessive speed causes chatter marks and poor finishes. Let the cutting edges do the work—your job is just to guide the drill straight down.
Fix Common Countersinking Problems Before They Ruin Your Project
Even experienced craftsmen encounter issues like off-center holes or rough finishes. Knowing how to troubleshoot saves materials and time.
Eliminate Chatter Marks with Speed Adjustments
When you see spiral lines or a rough finish in your countersink, your drill speed is almost certainly wrong. For wood, increase your speed—countersinking requires higher RPMs than drilling pilot holes. For metal, slow down and apply cutting fluid to prevent heat buildup. Always ensure your workpiece is clamped securely; vibration from movement creates chatter that ruins your finish.
Correct Off-Center Countersinks Immediately
An off-center recess looks sloppy and weakens your connection. Prevent this by starting with a center punch mark and using light pressure until the bit establishes its path. If you’re using a hand drill, brace your wrist against the workpiece for stability. For critical applications, switch to a drill press—its fixed column guarantees perfect perpendicularity every time.
Prevent Chip Clogging in Dense Materials
When working with hardwoods or metals, chips can weld to your bit, causing overheating and poor finishes. Use a pecking motion: drill for 2-3 seconds, withdraw to clear chips, then continue. For deep countersinks, blow out the hole with compressed air between passes. Single-flute bits excel here—their deep flute design clears chips more effectively than multi-flute options.
Material-Specific Countersinking Techniques That Work
Woodworking Secrets for Invisible Fasteners
When working with plywood or MDF, use a sharp multi-flute bit at high speed to prevent tear-out on the surface veneer. For hardwoods like oak or maple, reduce feed rate slightly to avoid burning while maintaining high RPMs. After countersinking, fill the recess with a matching wood plug or colored filler for completely hidden fasteners—this professional touch makes your joints appear seamless.
Metalworking Essentials for Clean Results
Always use cutting fluid when countersinking metals—this simple step prevents bit binding and extends tool life significantly. For aluminum, use higher speeds with light pressure; for stainless steel, go slower with firm, consistent pressure. After countersinking, run a deburring bit through the hole to remove any remaining burrs that could interfere with screw installation.
Maintain Your Countersink Bits for Professional Results
Sharpen dull bits immediately—a worn cutting edge requires more force, increasing slip risk and producing poor finishes. For high-speed steel bits, use a fine file at the correct angle; carbide-tipped bits typically need professional sharpening. Store bits in individual slots to protect cutting edges from damage. Most importantly, always wear safety glasses—flying wood chips or metal fragments can cause serious eye injuries during countersinking.
Mastering how to use a countersink drill bit transforms your projects with professional finishes that impress. By selecting the right bit for your material, matching the angle precisely to your screws, and following these proven techniques, you’ll achieve perfectly flush screw heads every time. Remember to adjust speeds for different materials, secure your workpiece properly, and maintain your bits for consistent results. The next time you’re assembling furniture or metal components, take those extra few seconds to countersink properly—it’s the small detail that separates DIY projects from professional craftsmanship.


