
That stubborn broken bolt buried deep in your engine block or stuck in a critical piece of machinery can bring any project to a screeching halt. When standard extraction methods fail, knowing how to use a left handed drill bit becomes your secret weapon against seized fasteners. These specialized bits work with the physics of extraction rather than against it, using counter-clockwise rotation to actually back out broken screws and bolts instead of driving them deeper. Unlike conventional bits that spin clockwise to drill new holes, left-handed drill bits engage reverse torque to remove damaged fasteners—making them indispensable for mechanics, fabricators, and serious DIYers facing stripped or broken hardware.
Mastering this technique saves both time and money, preventing costly part replacements or professional extraction services. Whether you’re working on automotive repairs, machinery maintenance, or home projects, understanding precisely how to use a left handed drill bit transforms what seems like a catastrophic failure into a manageable repair. This guide delivers the exact steps, tools, and insider techniques you need to successfully extract broken fasteners using left-handed drill bits—without damaging surrounding materials or creating additional problems.
Why Your Standard Drill Bits Fail on Broken Fasteners
The Physics Behind Left-Handed Bit Success
When conventional right-handed drill bits encounter a broken fastener, they simply drive it deeper into the material. Standard bits rotate clockwise, which tightens rather than loosens fasteners. Left-handed drill bits solve this problem by reversing the rotational direction—when your drill spins in reverse (counter-clockwise), these specialized bits actually turn in the direction that loosens fasteners. This counter-intuitive design creates a mechanical advantage, allowing the bit to bite into the broken fastener and gradually back it out as you drill.
The spiral flute design works in perfect harmony with extraction physics. As the left-handed bit cuts into the fastener, the counter-clockwise rotation applies torque in the direction that unscrews the bolt or screw. In many cases, the broken fastener will literally spin itself out of the hole as you drill—a moment every mechanic lives for. This process works best when the fastener hasn’t seized completely from corrosion or extreme heat, making it the ideal first approach before resorting to more aggressive extraction methods.
When Left-Handed Bits Outperform Screw Extractors
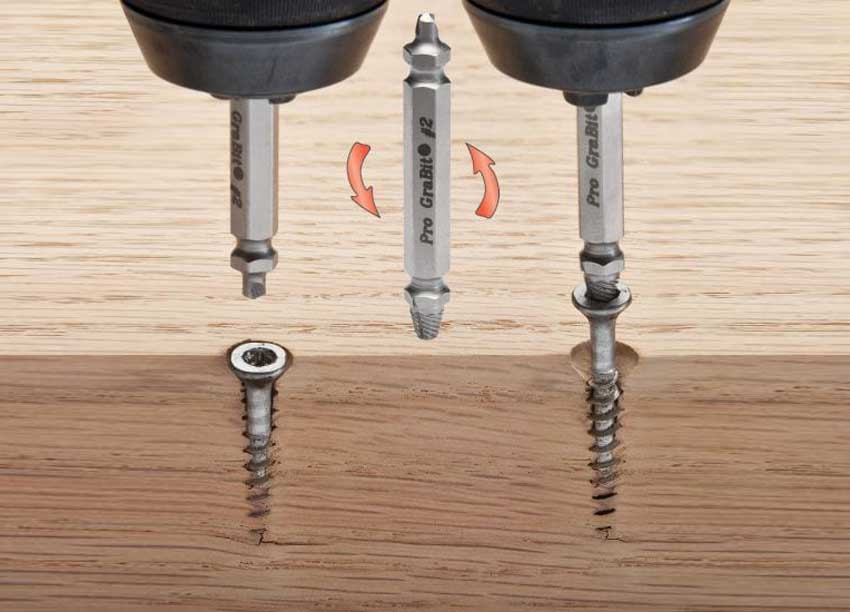
Many beginners reach for screw extractors as their first solution for broken fasteners, but this often creates more problems than it solves. Screw extractors require drilling a precise pilot hole first, and they’re notorious for breaking off inside the fastener—creating an even harder removal challenge. Left-handed drill bits combine the drilling and extraction processes into one seamless operation, significantly reducing failure points.
Consider this scenario: You’re working on an exhaust manifold with a broken bolt. Using a left-handed bit in reverse, you begin drilling and suddenly feel the resistance change—the bolt starts turning freely and backs itself out. This clean extraction preserves the surrounding threads and avoids the nightmare of a broken extractor embedded in your workpiece. Left-handed bits excel when the broken fastener has some remaining material to grip, hasn’t completely seized, and when you maintain proper drilling technique with adequate lubrication.
Essential Tools for Successful Left-Handed Bit Operation
Critical Safety Equipment You Can’t Skip
Before you even touch your drill, proper safety preparation determines whether your extraction attempt succeeds or creates additional hazards. Flying metal shavings from drilling operations can cause serious eye injuries—always wear ANSI Z87.1-rated safety glasses with side shields. Heavy-duty mechanic’s gloves protect your hands from sharp edges and prevent accidental slips onto the rotating bit. Work in a well-lit area with adequate ventilation, especially when using cutting fluids that produce fumes.
Secure your workpiece absolutely. A vise with soft jaws protects delicate surfaces while preventing dangerous movement during drilling. Never attempt extraction while holding the workpiece in your hand—this invites serious injury if the drill binds and kicks back. For larger projects like automotive work, chock the wheels and engage the parking brake to prevent unexpected movement. These safety measures seem obvious but are often overlooked in frustration when dealing with stubborn fasteners.
Must-Have Tools Beyond the Left-Handed Bit
Your left-handed drill bit is just one component of a successful extraction system. A high-quality center punch creates the essential starting point that prevents bit wander—a common reason for failed extractions. Invest in a hardened steel punch with a fine tip for precision work on small fasteners. For the pilot hole step, a dedicated center drill (not just a standard drill bit) provides the perfect conical starting point that guides your left-handed bit precisely.
Lubrication makes or breaks extraction attempts on metal fasteners. Tap Magic specifically formulated for metal cutting outperforms generic oils by reducing friction and heat while clearing chips effectively. Keep a small squeeze bottle handy for controlled application. A variable speed drill with a 1/2-inch chuck delivers the torque control needed—corded models often provide more consistent power for tough extractions than cordless drills that may bog down. Finally, keep a quality tap and die set nearby to clean threads after successful extraction.
Step-by-Step Extraction Process That Actually Works
Creating the Perfect Starting Point for Your Bit
The difference between success and failure often comes down to this critical preparation step. First, thoroughly clean the broken fastener area with a wire brush and degreaser to reveal the exact center point. Apply penetrating oil if corrosion is present and allow it to soak for at least 15 minutes. Position your center punch precisely at the geometric center of the broken fastener—this takes careful visual alignment, especially on rounded-off bolts.
Strike the punch firmly with a ball-peen hammer to create a deep, clean indentation. Don’t be shy—this mark must withstand initial drilling forces without slipping. For stubborn cases, rotate the punch slightly between strikes to deepen the indentation without spreading the metal. This precise starting point guides your pilot drill and subsequent left-handed bit exactly where it needs to go, preventing the “walking” that ruins most extraction attempts.
Executing the Drill-and-Extract Sequence Perfectly
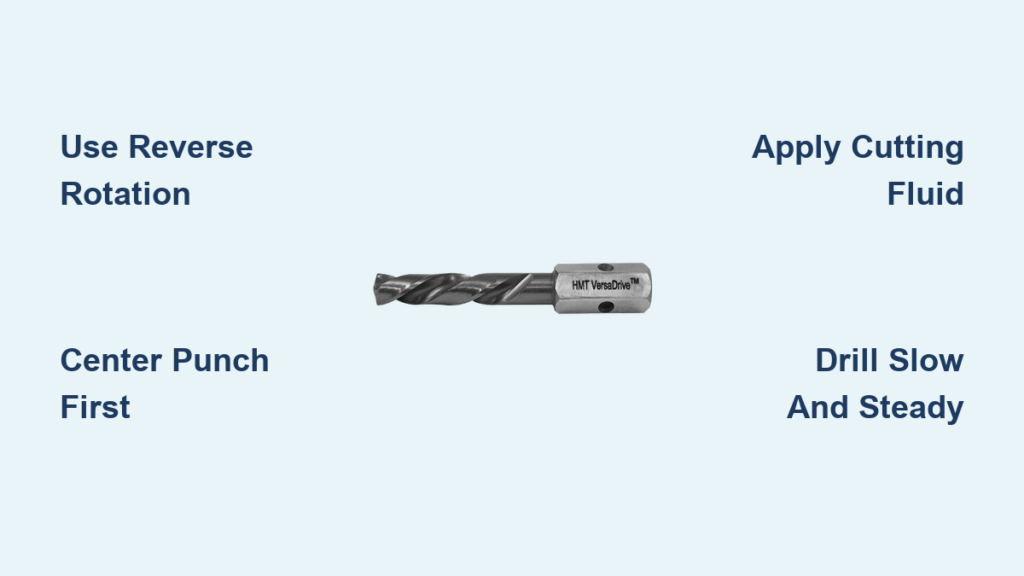
Now comes the moment of truth. Insert your left-handed drill bit into the chuck, ensuring it’s seated straight and tight. This critical detail gets overlooked—any bit wobble guarantees failure. Set your drill to reverse (counter-clockwise) and adjust to medium speed (800-1000 RPM). Apply cutting fluid generously to the starting point, then position the bit tip squarely in your center punch mark.
Apply firm, steady downward pressure while starting the drill—this initial contact determines everything. Maintain perfect perpendicular alignment; even slight angles cause bit walking or breakage. As the bit begins cutting, watch for metal shavings rather than dust, indicating proper cutting action. The magic happens when you feel the resistance suddenly decrease—the broken fastener has engaged with the bit’s rotation and is backing itself out. At this moment, reduce pressure and let the fastener unscrew itself completely.
Troubleshooting Stubborn Fastener Extraction
Fixing Bit Wander Before It Ruins Your Project
When your bit starts skating across the fastener surface instead of biting in, you’ve got a serious problem developing. This almost always stems from an inadequate starting point. Stop immediately—continuing will only create a larger, off-center hole that makes proper extraction impossible. Re-center your workpiece and deliver several sharp hammer blows with the center punch to deepen the indentation.
For extremely smooth surfaces, create a small cross-hatch pattern with a center punch before making your final center mark. This provides additional “grip” for the drill bit to catch. If you’ve already created an off-center hole, consider using a step drill bit to carefully enlarge the hole while bringing it back toward center before proceeding with your left-handed bit.
Handling Overheating and Bit Breakage
Smoke rising from your drilling operation signals immediate trouble—your bit is overheating and losing its temper. Stop drilling instantly and allow the bit to cool completely before continuing. Apply additional cutting fluid and reduce your drill speed by 25-30%. If the bit has already dulled from overheating, replace it with a fresh one—continuing with a dull bit requires excessive force that leads to breakage.
Bit breakage usually occurs from side pressure rather than downward force. If your bit snaps, don’t panic—evaluate why it happened. Was your drill perfectly perpendicular? Did you apply sideways pressure when the bit caught? Did you use adequate lubrication? Learn from the breakage and approach the next attempt with more patience and precision. Remember that left-handed bits work best when you let them cut at their own pace with consistent pressure.
Proven Techniques From Professional Mechanics
The Progressive Drilling Method for Maximum Success
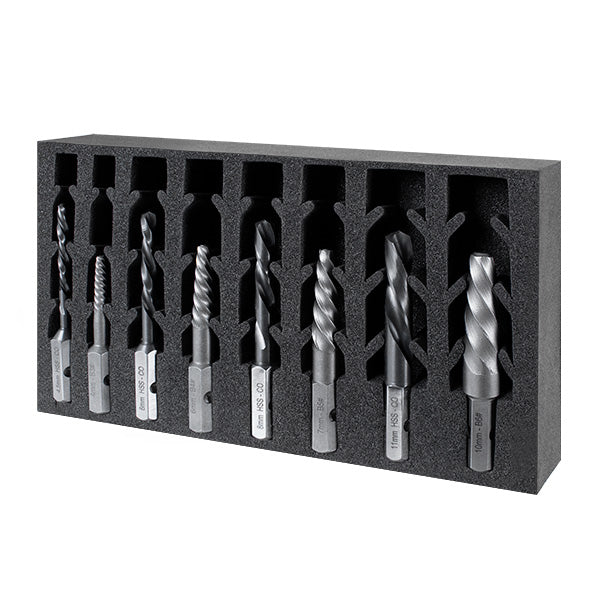
Seasoned mechanics rarely reach for their largest left-handed bit first. Instead, they employ progressive drilling—starting with a bit approximately one-third the diameter of the broken fastener. This smaller bit creates a precise guide hole that subsequent larger bits follow perfectly. As you drill with progressively larger left-handed bits, the extraction force increases until the fastener releases.
This method works particularly well on severely corroded fasteners where full extraction might require multiple bit sizes. Each larger bit engages more material on the broken fastener, increasing the torque applied to back it out. If the fastener begins to turn with a smaller bit, stop immediately—you’ve succeeded without needing larger bits that could damage surrounding threads.
Temperature Control Secrets for Hardened Steel
When working with hardened steel fasteners common in automotive applications, thermal management becomes critical. Instead of drilling continuously, use a “drill-pause-cool” cycle: 15 seconds of drilling followed by 10 seconds of cooling with cutting fluid. This prevents heat buildup that can ruin both your bit and the fastener’s temper. For extremely tough jobs, pre-chill your left-handed bit in the freezer for 10 minutes before starting—this thermal shock resistance helps it withstand drilling heat longer.
Apply cutting fluid continuously during operation, not just at the beginning. The best technique involves dripping fluid directly at the drill point rather than spraying it from a distance. This targeted application ensures maximum cooling where it’s needed most—the cutting interface between bit and fastener.
When to Walk Away and Call a Professional
Even with perfect technique using left-handed drill bits, some situations require professional intervention. If you’ve broken multiple bits or extractors in the same fastener, you’ve likely created an extraction nightmare that needs specialized equipment. Critical components like engine blocks, transmission cases, or structural elements demand precision that home workshops often can’t provide. Professionals use techniques like EDM (Electrical Discharge Machining) that remove broken fasteners without applying mechanical stress to surrounding materials.
Consider the cost-benefit analysis carefully. That $200 machine shop fee might seem steep until you consider the value of the component you’re working on and the risk of causing additional damage through continued DIY attempts. Knowing when to stop demonstrates true mechanical wisdom—preserving both your sanity and your project’s integrity. For non-critical applications, however, mastering how to use a left handed drill bit successfully solves 90% of broken fastener problems you’ll encounter in everyday projects.


