
Your ceramic tile backsplash looks perfect—until you try drilling a hole for a towel rack and it shatters like dropped china. Standard drill bits simply can’t handle the brittle hardness of glazed ceramics, porcelain, or glass, often causing catastrophic cracks that ruin hours of work. This happens because conventional bits generate excessive heat and vibration that ceramic surfaces can’t withstand. But when you know how to use ceramic drill bit properly—with the right technique, tools, and patience—you’ll create clean, professional holes every time. In this guide, you’ll master the precise methods professionals use to drill through the toughest surfaces without a single chip.
Ceramic drill bits aren’t magic wands; they’re specialized tools requiring specific handling. Unlike masonry bits that grind through brick, ceramic bits feature ultra-hard tungsten carbide or diamond-coated tips designed to score rather than pound. Forcing them like regular bits guarantees disaster. The critical difference lies in speed control, cooling, and pressure application—elements most DIYers overlook. By the end of this guide, you’ll understand exactly why ceramic drilling fails 90% of the time and how to avoid those pitfalls. Most importantly, you’ll gain confidence to tackle any ceramic, porcelain, or glass project with precision.
Why Standard Drill Bits Shatter Ceramic Surfaces
Conventional twist bits fail on ceramics because their fluted design creates uneven pressure points that initiate micro-cracks. As the bit spins, heat builds rapidly in the brittle material—glass reaches 500°F within seconds—causing thermal shock. Worse, the hammer function on impact drivers literally vibrates tiles apart. Ceramic drill bits solve this with a spear-point or diamond-coated tip that gradually scores the surface without shock. The key is maintaining temperatures below 250°F where ceramic remains stable. This isn’t about brute force; it’s surgical precision where speed kills.
Recognizing Ceramic Material Types
Not all “ceramic” surfaces behave the same. Glazed tiles have a glass-like coating over clay—drill through the glaze first with diamond tips. Unglazed porcelain is denser and requires constant water cooling. Glass demands backer boards to prevent blowout. Always test your technique on scrap pieces first; a 6-inch tile fragment reveals how your specific material responds.
Essential Safety Gear: Non-Negotiable Protection
Ceramic dust contains silica particles small enough to embed in your lungs permanently. Skipping protection risks silicosis—a painful, incurable condition. This isn’t standard workshop safety; it’s respiratory emergency prevention.
Must-Wear Equipment Checklist
- Safety glasses with side shields: Ceramic shards ricochet at high speed
- NIOSH-approved N95 respirator: Standard dust masks don’t block silica
- Neoprene work gloves: Protect against sharp edges when bits break through
- Hearing protection: Constant low-speed drilling still reaches 85+ decibels
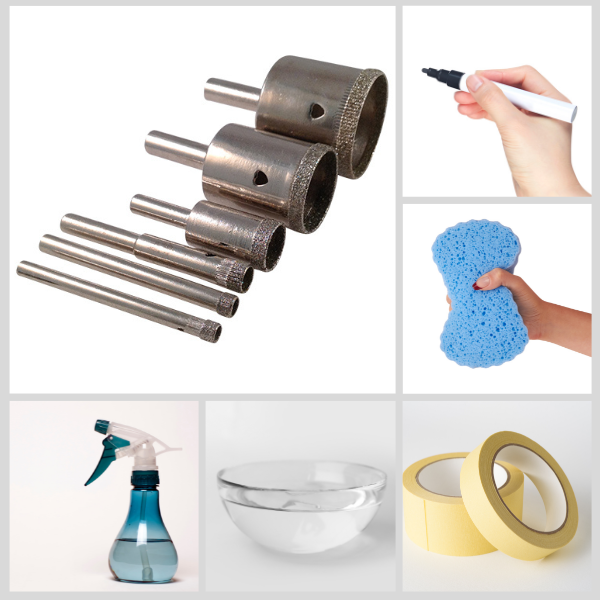
Required Tools Beyond the Drill Bit

Your drill’s settings matter more than its horsepower. A cordless model with variable speed (0-500 RPM) and clutch control is ideal—hammer mode must be physically disabled. Cheap drills often lack the torque stability needed for consistent pressure.
Critical Accessories You Can’t Skip
- Carbide-tipped spear-point bits for tiles (diamond-coated for glass/porcelain)
- Painter’s tape or masking tape: Creates non-slip drilling surface
- Water delivery system: Spray bottle with fine mist setting or sponge drip setup
- Clamp with rubber jaw pads: Secures work without cracking edges
- Depth gauge: Prevents drilling through wall-mounted tiles
Marking and Securing Ceramic for Zero Slippage
The drill bit will “walk” off smooth ceramic surfaces within milliseconds if not anchored. This single mistake causes 70% of failed projects.
Tape-and-Mark Technique for Perfect Hole Placement
- Clean the surface with rubbing alcohol to remove oils
- Apply 1-inch square of low-tack painter’s tape over target spot
- Mark an “X” with grease pencil (not marker—ink smears)
- Place bit tip precisely on the intersection and apply light pressure
- Clamp workpiece with rubber pads to prevent vibration
Pro Tip: For vertical surfaces, use a suction-cup clamp to avoid wall damage.
Continuous Lubrication: Your Secret Weapon Against Overheating
Dry drilling dulls bits in under 30 seconds and cracks tiles. Water serves three critical functions: cooling the bit, lubricating the cut, and suppressing hazardous dust.
Water Application Methods by Material
| Material | Water Technique | Frequency |
|---|---|---|
| Glazed Tile | Spray bottle mist | Every 5-7 seconds |
| Porcelain | Sponge drip system | Constant flow |
| Glass | Submerge backer board in water bath | Continuous immersion |
Warning: Never use oil-based lubricants—they degrade ceramic bonds.
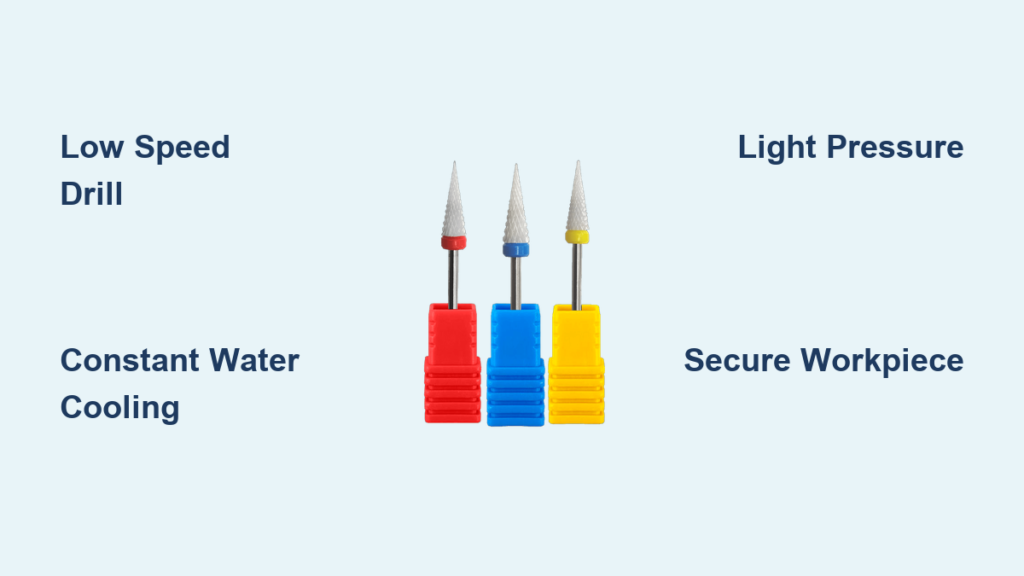
Low-Speed, High-Torque Drilling: The Perfect Pressure Technique
Start at 150-200 RPM—slower than you’d use for wood. Apply constant light pressure equivalent to pressing a pen to paper. If the bit smokes or squeals, you’re going too fast. The drill should feel smooth, not vibrate.
Pressure Control Troubleshooting
- Bit skips: Increase pressure slightly while reducing speed
- Hole walls rough: Decrease pressure and increase water flow
- Bit stalls: Clean flutes with stiff brush; never force rotation
Expert Note: Let the bit’s hardness do the work—your hands only guide direction.
Breaking Through Without Chipping the Backside
The moment the bit exits the material is when most chips occur. Reduce pressure by 50% and slow rotation as you near breakthrough. For wall tiles, place a scrap wood backer behind the drill point.
Backside Protection Methods
- Glass: Drill against submerged plywood block
- Tiles: Use sacrificial MDF board clamped behind work
- Porcelain: Apply extra water flow during final 2mm of drilling
Porcelain Tile Drilling: Diamond Tips and Drill Press Necessity
Porcelain’s density (1,000+ PSI) demands diamond-coated bits and mechanical stability. Hand-drilling often fails due to human tremor.
Porcelain-Specific Protocol
- Use diamond core bits for holes >1/4 inch
- Secure work in drill press with depth stop set 1mm below tile thickness
- Maintain 100 RPM with continuous water flood
- Withdraw bit every 15 seconds to clear debris
Why it works: Drill presses eliminate angular errors that crack porcelain.
Glass Drilling: Preventing Blowout with Backer Boards
Glass requires the most delicate approach. Start at 80 RPM with a diamond bit, using a backer board submerged in water.
Step-by-Step Glass Drilling
- Place glass on water-soaked sponge over plywood
- Begin drilling at 45-degree angle for 20 seconds
- Gradually tilt to 90 degrees while maintaining water flow
- Stop drilling when bit tip appears on backside
- Flip glass and complete hole from opposite side
Critical: Never drill completely through in one pass—this guarantees blowout.
Ceramic Tile Drilling: The 45-Degree Angle Starter Method

Glazed tiles need an initial scoring groove to prevent bit slippage. This technique creates a self-centering guide.
Angle-Drilling Sequence
- Position bit at 45-degree angle to tile surface
- Drill shallow groove in circular motion for 15 seconds
- Slowly rotate drill upright to 90 degrees while maintaining rotation
- Continue drilling with steady water application
Visual cue: Stop when you see the white clay body beneath the glaze.
Avoid These 4 Costly Ceramic Drilling Mistakes
Forcing the Bit Causes Instant Bit Failure
Pushing harder when drilling slows actually overheats the tip. Carbide loses hardness above 350°F—within 10 seconds of dry drilling. If progress stops, withdraw the bit, cool it, and clear debris before continuing.
Hammer Mode Activation Shatters Surfaces
Even “low” hammer settings deliver micro-impacts ceramic can’t absorb. Verify your drill shows NO hammer icon before starting. Test on scrap tile first—any vibration means immediate stop.
Skipping Water Cooling Creates Thermal Shock
A single dry pass through porcelain generates enough heat to create hairline cracks invisible until grouting. These expand weeks later when moisture penetrates. Water isn’t optional—it’s structural insurance.
Using Worn Bits Guarantees Rough Edges
Dull ceramic bits grab instead of score, tearing the material. Replace bits when:
– Drilling time doubles for same depth
– Hole edges show visible chipping
– Bit tip appears rounded under magnification
Extend Bit Life: Cleaning and Storing Ceramic Drill Bits
Carbide tips chip easily if stored loose in toolboxes. After each use:
- Soak bits in warm water for 5 minutes to loosen residue
- Brush flutes with stiff nylon brush (never metal)
- Air-dry completely before storage
- Place in foam organizer with individual slots
Pro Tip: Store bits vertically in a dedicated container—never toss them in drawers where tips contact metal.
Final Note: Mastering ceramic drilling comes down to three non-negotiables: relentless cooling, glacial speed, and feather-light pressure. Your first successful hole through porcelain tile will feel miraculous—but with these techniques, it becomes repeatable. Remember that every shattered tile stems from impatience, not inadequate tools. When you respect ceramic’s brittleness with disciplined technique, you’ll drill flawless holes that last decades. For your next project, start with a scrap piece to dial in your pressure and water flow—you’ll gain confidence that transfers directly to visible surfaces. The difference between amateur cracks and professional results lies entirely in how you use ceramic drill bit.


