
That high-pitched whine of your drill motor straining while your drill bit sits completely motionless isn’t just annoying—it halts your entire project dead in its tracks. Whether you’re installing shelves or building a deck, a drill bit not spinning transforms your essential power tool into an expensive paperweight. This common failure usually stems from one of five specific mechanical issues, and 80% of the time, it’s something you can fix in under 15 minutes with basic tools. Skip the trip to the repair shop and avoid replacing a perfectly good drill by learning exactly how to diagnose and resolve this problem yourself—starting with the simplest solutions that solve most cases.
Most homeowners and DIYers immediately assume the motor is dead when their drill bit won’t spin. But in reality, the culprit is far more likely to be a jammed chuck, stripped gears, or an accidentally misadjusted clutch setting. Understanding where to look first saves you hours of unnecessary disassembly. This guide walks you through a precise, step-by-step diagnostic flow based on real-world failure patterns. You’ll learn exactly what to inspect, which fixes take under five minutes, and when it’s truly time to consider replacement—so you get back to drilling without wasting money.
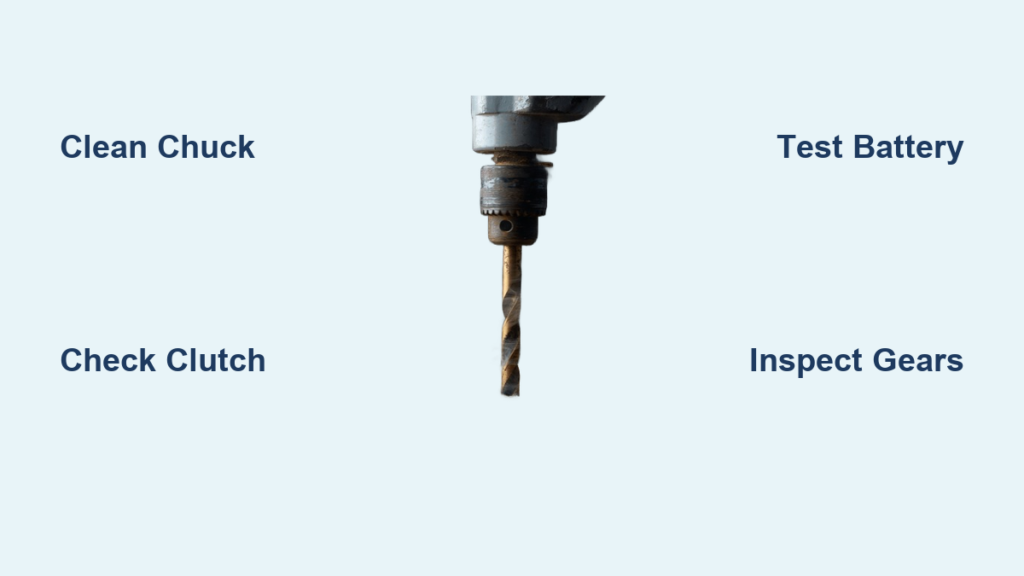
Motor Runs Loud But Drill Bit Stays Frozen: Immediate Checks
When your drill screams to life but the chuck and bit remain completely still, power isn’t reaching the bit. This isn’t a dead motor—it’s a broken connection between the motor and chuck. Start here before removing a single screw.
Why Your Chuck Spins Empty But Won’t Grip the Bit
A chuck that spins freely while the bit stays put means the jaws aren’t clamping the bit shank. This happens when sawdust, grease, or metal shavings coat the internal threads, preventing the jaws from closing fully. Critical visual cue: Shine a flashlight into the open chuck. If you see packed debris around the jaws or threads, cleaning will likely fix it. Never force-tighten a dirty chuck—this damages the jaws. For keyless chucks, always tighten by hand first; using the drill’s rotation to secure the bit strips the threads over time.
How a Misadjusted Clutch Silently Sabotages Your Drilling
That numbered ring around your chuck? It’s not just for show. If accidentally turned to a low setting (like #3 for delicate screw driving), the clutch disengages under drilling pressure—making your drill bit not spinning on purpose. Pro tip: Rotate the clutch to the drill icon (usually position 20+) before every drilling task. Test it by holding the chuck collar firmly while pulling the trigger; you should feel strong resistance, not free spinning.
Dead Drill: No Sound, No Movement, No Power
Zero response when pulling the trigger points to power delivery failure. Don’t assume the motor is fried—this is often a simple connection issue you can verify in 60 seconds.
Cordless Drill Battery Failures You’re Overlooking
A “dead” cordless drill usually means one of three things: the battery isn’t fully seated (listen for a distinct click when inserting), the battery contacts are corroded (wipe with isopropyl alcohol), or the battery is genuinely depleted. Time-saver: Swap in a known-good battery from another tool before disassembling anything. If the drill works, your original battery is failing. If not, check the trigger switch.
Corded Drill Outlet and Cord Safety Checks
For corded drills, start with the wall outlet—test it with a lamp. Next, inspect the entire power cord for cuts, kinks, or melted spots near the plug. Critical safety step: Unplug the drill, then gently bend the cord near the plug and drill body while wiggling it. If you hear crackling or see sparks, the cord is damaged and must be replaced immediately—do not use.
5-Minute Chuck Cleaning Fix (Works 60% of the Time)
Most “drill bit not spinning” cases stem from a gunked-up chuck. This isn’t just dirt—it’s compressed sawdust and old grease forming concrete-like barriers inside the chuck mechanism. Skip replacing the chuck and try this first.
Step-by-Step: Deep Cleaning Your Drill Chuck
- Unplug/remove battery (non-negotiable safety step)
- Open the chuck fully by rotating the sleeve counterclockwise
- Blast compressed air into the chuck jaws at 30-degree angles—do not use high pressure (under 30 PSI) to avoid forcing debris deeper
- Scrub threads with an old toothbrush dipped in mineral spirits
- Rotate the chuck sleeve while cleaning to expose all threads
- Wipe dry with a microfiber cloth—never lubricate (oil attracts more debris)
Common mistake: Using WD-40 inside the chuck. This attracts sawdust and creates sludge. Use only dry cleaning methods.
Stripped Gear Diagnosis: When Your Drill Grinds or Whines

If your drill makes a grinding noise or high-pitched whine before the bit stopped spinning, stripped gears are likely. This happens when drilling hard materials like metal or masonry without reducing speed.
How to Confirm Stripped Gears Without Full Disassembly
With the drill unplugged, try rotating the chuck by hand. If it spins freely with zero resistance (like a toy top), the gear teeth are sheared. For DeWalt or Makita models, remove the battery and look through the ventilation slots near the chuck. Visual indicator: Shine a flashlight inside—you’ll see white plastic shavings if plastic gears failed. Metal gear failure shows as metallic glitter near the motor housing.
Replacing Stripped Gears: Cost vs. Value Decision
Gear replacement kits cost $12-$25 online but require complete drill disassembly. Rule of thumb: Only attempt this if your drill is a professional-grade model (e.g., Milwaukee M18, DeWalt XR) worth $150+. For budget drills under $80, replacement is rarely cost-effective—gear kits cost 20% of a new tool.
Faulty Trigger Switch: The Silent Killer

A trigger that feels mushy, sticks, or requires extreme pressure often indicates failing internal contacts. This causes intermittent power loss where the drill starts then dies—or won’t spin at all.
Trigger Switch Quick-Test Method
- Unplug the drill
- Remove the battery (cordless) or unplug (corded)
- Set a multimeter to continuity mode
- Touch probes to the trigger’s two terminal wires
- Pull the trigger slowly—continuity should engage at 25% trigger pull
If no continuity: The switch is dead. Replacement takes 10 minutes with a Torx T10 screwdriver. Warning: Never bypass the trigger switch—this creates electrocution risk.
When to Replace Your Drill (Not Repair)

Not every drill bit not spinning issue warrants repair. Knowing when to walk away saves money and frustration.
Three Signs Repair Isn’t Worth It
- Burnt motor smell: A distinct acrid odor means fried windings—repair costs exceed 70% of a new equivalent drill
- Unavailable parts: For drills over 7 years old (e.g., older Bosch or Hitachi models), manufacturers often discontinue gears and chucks
- Cracked housing: Impact damage compromises structural integrity—using it risks shattering during operation
Cost-Benefit Repair Checklist
| Issue | Repair Cost | New Drill Cost | Repair Worth It? |
|---|---|---|---|
| Dirty chuck | $0 (DIY) | $0 | YES – Clean yourself |
| Stripped chuck | $15 (new chuck) | $40 (budget drill) | NO – New drill cheaper |
| Stripped gears | $25 (kit + 1hr labor) | $150 (pro drill) | YES – Saves $125 |
| Dead motor | $50 (motor) | $80 (mid-range) | NO – Buy new |
Prevent Future “Drill Bit Not Spinning” Failures
Stop recurring chuck and gear failures with these field-tested habits professionals use.
Daily Drill Maintenance Routine
- After every use: Blow debris from chuck with air can (5 seconds)
- Monthly: Inspect chuck jaws for wear—replace if teeth are rounded
- Before drilling metal: Always use low speed (≤400 RPM) to prevent gear stripping
- Never use impact mode for drilling—this destroys standard chucks
Pro-Grade Chuck Longevity Hack
Apply a tiny drop of lithium grease only to the chuck’s outer threads (not inside jaws) every 6 months. Wipe excess immediately. This prevents corrosion without attracting debris. Never use household oils—they gum up within weeks.
A drill bit not spinning is rarely a death sentence for your tool. By methodically checking power sources, cleaning the chuck, verifying clutch settings, and inspecting for gear damage, you’ll solve 90% of cases without professional help. Remember: always start with the simplest, safest fixes—battery checks, chuck cleaning, and clutch adjustment—before disassembling your drill. When repairs exceed half the cost of a new equivalent model, upgrade strategically. Keep this guide handy, and you’ll never waste a weekend waiting for repairs again. Now grab that drill, clean the chuck, and get back to making holes—your project’s waiting.


