
Your ceramic nail drill bit suddenly loses cutting power mid-service, forcing you to press harder and risk damaging your client’s natural nail. That frustrating clog isn’t just ruining your workflow—it’s a serious hygiene hazard. A single dirty bit can transfer bacteria between clients, potentially causing infections and destroying your reputation. Learning how to clean ceramic nail drill bits properly is the #1 thing you can do to protect clients, prevent tool damage, and avoid costly replacements. In this guide, you’ll discover four proven cleaning methods—from 5-minute alcohol wipes for back-to-back clients to ultrasonic deep cleaning—that remove stubborn debris without scratching the ceramic coating. You’ll also learn the 5 critical mistakes that destroy bits and exactly when to replace them.
Why Clogged Ceramic Bits Ruin Nail Services
How Nail Dust Bakes Onto Non-Porous Ceramic Surfaces
Ceramic bits seem smooth, but their micro-abrasive surface traps nail dust and polish like a magnet. Unlike metal bits, ceramic won’t rust, but its non-porous nature means debris bonds tightly to the grit when heat from friction “bakes” it on. You’ll notice this as reduced cutting power—your bit glides instead of filing, requiring excessive pressure that damages natural nails. This isn’t just inefficient; baked-on biological matter creates breeding grounds for bacteria.
Why Pressing Harder Causes Permanent Nail Damage
When clogged grit loses effectiveness, technicians instinctively press harder. This forces the bit to “skid” across the nail plate, generating dangerous heat that weakens keratin. In under 10 seconds, this can cause micro-tears in the nail bed or even thermal injury. Worse, debris trapped in the bit’s grooves gets pushed deeper into the nail fold, increasing infection risk. Clean bits eliminate this by maintaining consistent cutting action with minimal pressure.
How Dirty Bits Spread Bacteria: The Hygiene Emergency
Real Cross-Contamination Risk During Back-to-Back Services
That quick wipe with a towel between clients? It’s dangerously inadequate. Studies show ceramic bits harbor Trichophyton (athlete’s foot fungus) and Pseudomonas bacteria for 48+ hours when improperly cleaned. One contaminated bit used on multiple clients can transfer pathogens through microscopic cracks in the ceramic coating. The CDC mandates complete disinfection between clients—anything less violates salon health codes and risks lawsuits.
Why Alcohol Alone Isn’t Enough for Deep Debris
Isopropyl alcohol kills surface bacteria but can’t penetrate caked-on nail dust. Debris shields pathogens in the bit’s crevices, rendering alcohol ineffective. For true disinfection, you must first remove all physical debris before chemical treatment. Skipping this step means your “sanitized” bit is still a contamination vector.
Ultrasonic Cleaning: Remove Deep Debris in 10 Minutes
Why Cavitation Beats Manual Scrubbing for Ceramic Bits
Ultrasonic cleaners use high-frequency sound waves to create microscopic bubbles that implode against the bit’s surface. This “cavitation” blasts debris from grooves too small for brushes—critical for ceramic bits with fine grit patterns. It’s the only method that cleans without physical contact, eliminating scratch risk.
Step-by-Step: Deep Clean Caked-On Nail Dust
- Prep Your Bits: Place bits in a non-metallic basket (never directly in the tank).
- Fill With Distilled Water: Use 1 drop of mild dish soap per 8 oz of water—never bleach or ammonia.
- Run 7-Minute Cycle: Set timer to avoid over-soaking (exceeding 10 minutes risks adhesive damage).
- Rinse Under Distilled Water: Tap water leaves mineral deposits that accelerate clogging.
- Dry Immediately: Pat with microfiber cloth, then air-dry 15 minutes before storage.
Pro Tip: Add 10% isopropyl alcohol to the cleaning solution for instant disinfection during the cycle.
5-Minute Alcohol Wipe for Back-to-Back Clients

Supplies for Salon-Ready Disinfection Between Clients
Keep these at every workstation: 91% isopropyl alcohol (70% evaporates too slowly), lint-free microfiber cloths, and a small glass jar. Avoid paper towels—they leave fibers that clog bits.
Wipe-Down Steps That Actually Kill Bacteria
- Power Off & Cool: Wait 60 seconds after use—alcohol on hot bits causes flash evaporation.
- Brush First: Use a stiff nylon brush to flick debris away from your body.
- Soak Cloth, Not Bit: Saturate the cloth with alcohol; never submerge the mandrel (metal shank).
- Wipe in Grit Direction: Circular motions damage coating; follow the bit’s filing pattern.
- Air-Dry 2 Minutes: Rushing causes moisture traps that corrode the chuck.
Warning: Never use alcohol wipes on warm bits—they leave sticky residue that attracts more dust.
Hand-Washing Ceramic Bits Without Damaging the Coating
Gentle Soap Technique for Daily Maintenance
For routine cleaning without an ultrasonic machine:
1. Mix 1 drop of ammonia-free dish soap in lukewarm distilled water.
2. Dip a soft toothbrush (never metal-bristled) and scrub with the grit pattern.
3. Rinse under running water until streams run clear—no soap residue.
4. Soak 8 minutes in 70% alcohol for disinfection.
5. Dry immediately with a microfiber cloth to prevent water spots.
Why Vinegar Fixes Mineral Buildup on Ceramic
Hard water leaves calcium deposits that mimic clogs. Soak bits 3 minutes in 50/50 white vinegar/distilled water, then rinse thoroughly. Vinegar dissolves minerals without harming ceramic—unlike abrasive cleaners that scratch the surface. Never use full-strength vinegar; it’s too acidic for prolonged exposure.
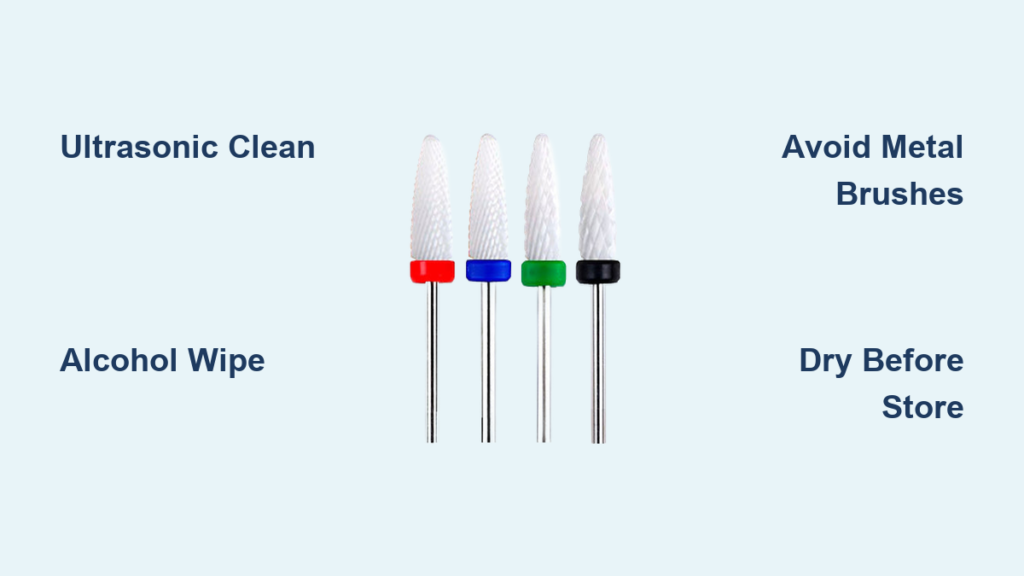
What NOT to Do: 5 Mistakes That Destroy Ceramic Bits

#1: Steel Wool or Metal Brushes (Instant Coating Damage)
Abrasive pads scratch the ceramic’s micro-grooves, creating pits where bacteria hide. Once scratched, bits lose cutting efficiency permanently. Use only nylon or soft-bristle brushes.
#2: Overnight Soaking in Disinfectant
Prolonged liquid exposure weakens the adhesive bonding ceramic to the mandrel. Bits may delaminate during use, sending shards into the nail. Always follow disinfectant dwell times (max 15 minutes).
#3: Storing Damp Bits in Closed Cases
Moisture trapped in cases causes “sweating” that corrodes metal shanks. Always air-dry 15 minutes post-cleaning. Store in ventilated foam cases—not zippered pouches.
#4: Using Autoclaves or Extreme Heat
Ceramic cracks under steam sterilizer heat (over 121°C/250°F). Never autoclave—ultrasonic or alcohol methods are the only safe options.
#5: Ignoring Hairline Cracks
Tiny cracks invisible to the eye harbor bacteria. Hold bits to light; discard if you see spiderwebbing. Using cracked bits risks ceramic shards embedding in nails.
Storing Bits to Prevent Rust and Maintain Sharpness
Best Cases for Ceramic Bit Organization
Use segmented foam cases with individual slots—not loose containers. Bits knocking together chip edges. Label slots by grit (e.g., “180-grit detail”) for instant access. Pro Tip: Add silica gel packets to cases to absorb ambient moisture.
Why Dry Storage Prevents Corrosion on Mandrels
Even brief moisture exposure rusts metal shanks. Always store bits upright in cases to avoid pooling condensation. Rust weakens the mandrel, causing bits to wobble and chatter during use.
When to Toss a Ceramic Bit: 3 Warning Signs
Smooth, Polished Grit That Won’t File
Healthy ceramic bits have a matte, sandy texture. If the surface looks shiny or glassy, the grit is worn off—you’re just polishing nails, not filing them. No cleaning method can restore this.
Chattering During Use (Even After Cleaning)
Persistent vibration after deep cleaning means the ceramic is unevenly worn. This damages natural nails and indicates internal delamination. Stop using immediately.
Visible Chips Along the Cutting Edge
Any chip wider than a grain of sand compromises cutting precision. Attempting to file with chipped bits creates jagged nail edges prone to peeling.
Final Note: A disciplined cleaning routine for your ceramic nail drill bits takes under 10 minutes daily but prevents 95% of tool failures and infection risks. By mastering ultrasonic deep cleans for end-of-day maintenance and alcohol wipes for client turnover, you’ll extend bit life by 3x while meeting strict hygiene standards. Remember: never store bits damp, never use abrasives, and always inspect for cracks. Your next client’s healthy nails—and your salon’s reputation—depend on it. Keep this guide taped to your workstation for quick reference during busy shifts.


