
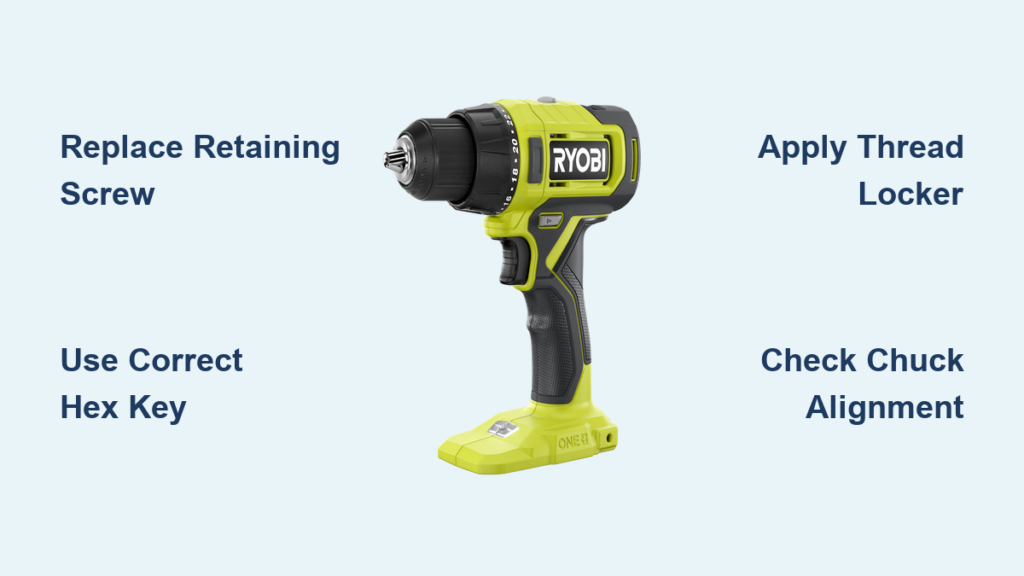
Is your Ryobi drill suddenly failing to hold screwdriver bits securely? When the chuck won’t grip properly, your DIY projects turn into frustrating battles with slipping bits and stripped screws. The culprit is often the chuck retaining screw—the small but critical component that keeps your entire chuck assembly secure. This guide shows you exactly how to change the screw on your Ryobi drill, restoring reliable bit-holding performance without expensive service calls. Whether you’re assembling furniture or tackling home renovations, a properly secured chuck makes all the difference in your drilling precision and efficiency.
Most Ryobi cordless drills use a keyless chuck with a hidden retaining screw inside the chuck assembly. When this screw loosens or becomes damaged, your drill loses its ability to maintain proper torque during screw driving tasks. Don’t waste money replacing your entire drill when a $5 screw and 10 minutes of your time can solve the problem. By following this precise procedure, you’ll diagnose chuck issues accurately, complete the replacement correctly, and prevent future chuck failures on your Ryobi drill.
Why Your Ryobi Drill’s Chuck Screw Fails and How to Confirm It
Recognizing Critical Chuck Failure Symptoms
When your Ryobi drill won’t hold bits securely during screw driving tasks, inspect for these specific failure indicators. Visible wobble in the chuck assembly while operating at low speeds signals serious screw loosening. Bits that consistently slip during torque application—especially when driving larger screws into dense materials—point directly to chuck retention issues. If you hear unusual clicking sounds when applying pressure, the retaining screw has likely worked completely loose. Most critically, if bits fall out when you tilt the drill downward, your chuck screw requires immediate replacement before causing damage to your drill’s internal components.
Differentiating Screw Problems from Other Chuck Issues
Not all chuck problems stem from the retaining screw. Before proceeding, eliminate other common culprits. Test multiple bits to rule out worn bit shanks that won’t grip properly. Check for debris buildup inside the chuck jaws by fully opening the chuck and inspecting with a flashlight. Apply firm hand pressure while tightening the chuck—if it still slips, the problem likely involves the retaining screw. If the chuck turns freely in both directions without tightening, the internal mechanism has failed and requires full chuck replacement rather than just the screw. Confirming the specific issue prevents wasted effort and ensures you address the actual problem.
Essential Tools for Replacing Your Ryobi Drill’s Chuck Screw
Must-Have Equipment Checklist
Gather these precise tools before starting your screw replacement:
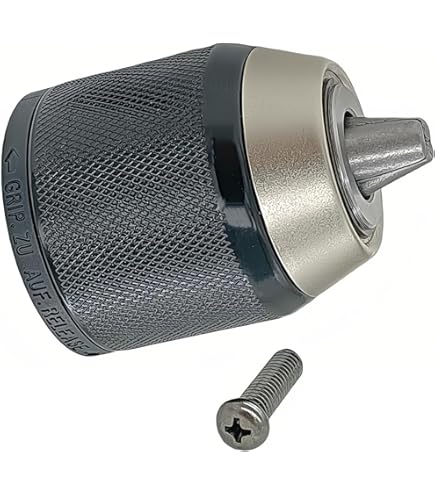
* Correct replacement screw (Ryobi part # 451045001 or equivalent for most models)
* 3mm or 5/32″ hex key (standard for most Ryobi chuck screws)
* Small hammer (for gentle tapping if needed)
* Vise grip pliers (to secure the chuck during removal)
* Thread-locking compound (medium strength, blue Loctite 243)
* Lint-free cloth (for cleaning threads)
* Safety glasses (non-negotiable eye protection)
Critical Tool Specifications You Can’t Skip
Using incorrect tools guarantees failure when changing your Ryobi drill’s chuck screw. The hex key must fit snugly in the screw head—loose fit will strip the internal hex recess, creating a much more difficult repair. For Ryobi ONE+ 18V models, use a 5/32″ hex key; for older 12V models, use 3mm. The thread-locking compound must be medium strength (blue)—high-strength (red) will make future maintenance impossible. Vise grip pliers need smooth jaws to avoid damaging the chuck’s finish. Having exactly the right tools prevents costly mistakes that could turn a simple 10-minute fix into an expensive service visit.
Step-by-Step Replacement Procedure for Your Ryobi Drill Screw
Removing the Faulty Chuck Retaining Screw
Begin by removing your Ryobi drill’s battery—never work on power tools with power connected. Fully open the chuck jaws to expose the screw head inside. Most Ryobi models use a reverse-threaded retaining screw, meaning you turn it clockwise to loosen (opposite of standard screws). Insert the correctly sized hex key into the screw head and apply firm clockwise pressure while simultaneously gripping the chuck body with vise pliers to prevent rotation. If the screw resists, tap the hex key handle gently with a small hammer to break initial resistance—never use excessive force that could strip the screw head. Once loose, complete removal by hand and inspect the screw for damage that explains the failure.
Installing the New Screw with Proper Torque
Clean all threads on both the chuck and spindle with a lint-free cloth before installation—any debris prevents proper seating. Apply a single drop of medium-strength thread locker to the new screw’s threads, being careful not to contaminate the chuck’s internal mechanism. Insert the screw and hand-tighten counterclockwise (normal direction for tightening reverse-threaded screws). Using your hex key, tighten to firm hand-torque—approximately 15 inch-pounds—while holding the chuck stationary with vise grips. Over-tightening cracks the chuck housing; under-tightening causes premature failure. Wipe away excess thread locker immediately to prevent hardened residue from interfering with chuck operation.
Verifying Correct Installation Before Use
Test your repair before reinstalling the battery by performing these critical checks. Fully open and close the chuck multiple times to ensure smooth operation without binding. Insert a standard drill bit and tighten the chuck fully—shake the drill gently to confirm the bit remains securely held. Rotate the chuck manually while applying slight outward pressure to verify the screw properly anchors the chuck to the spindle. Finally, inspect for any thread locker residue around the chuck jaws that could interfere with bit seating. Only after passing all these tests should you proceed to reinstall the battery and test under low-torque conditions.
Professional Techniques for Long-Lasting Chuck Screw Performance

Preventing Future Screw Loosening with Proper Maintenance
Apply these pro techniques to prevent repeat failures after changing your Ryobi drill’s chuck screw. Always clean chuck threads with isopropyl alcohol before reassembly—oil or grease reduces thread friction and promotes loosening. Never use high-torque settings when driving the initial screw installation; hand-torque provides more consistent pressure than power tools. Periodically check the screw tightness during heavy use projects—every 2-3 hours of continuous operation for professional users. When storing your drill, leave the chuck slightly open to relieve spring tension on the internal mechanism, reducing stress on the retaining screw.
Emergency Fixes When You Strip the Screw Head
If you accidentally strip the chuck screw head during removal, try these field solutions before declaring total failure. Tap a slightly oversized hex key into the damaged recess using a small hammer—sometimes this provides enough grip for removal. Apply penetrating oil and wait 15 minutes before attempting removal again, as corrosion often contributes to stripping. As a last resort, carefully drill a small pilot hole into the screw center and use an easy-out extractor—this risks chuck damage but can save the tool. Never attempt to weld a nut to the screw head; the heat damages precision chuck components beyond repair.
Troubleshooting Common Post-Replacement Issues

Addressing Persistent Bit Slippage After Screw Replacement
If your Ryobi drill still won’t hold bits securely after changing the chuck screw, investigate these specific causes. The chuck jaws may have worn teeth from previous slippage—rotate the chuck while watching the jaws for uneven wear patterns. Internal chuck springs might have weakened from age—listen for unusual clicking during chuck adjustment. Verify you didn’t overtighten the screw, which can distort the chuck mechanism and prevent proper jaw closure. Test with multiple bits of different shank types (hex, round, triangle) to isolate whether the issue affects all bit types or just specific ones.
Solving Screw Removal Problems on Older Ryobi Models
Vintage Ryobi drills sometimes present unique challenges when changing the chuck screw. Older models may use Torx instead of hex screws—verify your specific model before forcing incorrect tools. Some pre-2010 models have left-handed threads on both the screw and chuck assembly, requiring opposite turning directions for both components. If the screw won’t budge after initial attempts, apply penetrating oil and let it soak overnight before retrying—older tools often suffer from thread corrosion. When in doubt, consult Ryobi’s archived service manuals online using your exact model number for model-specific procedures.
Changing the screw on your Ryobi drill solves the most common cause of chuck failure and restores professional-level performance to your cordless tool. By following this precise procedure and implementing the maintenance techniques described, you’ll prevent future chuck issues and extend your drill’s service life significantly. Remember that proper screw installation—not just replacement—is what ensures lasting reliability. When your chuck holds bits securely once again, you’ll tackle screw driving tasks with renewed confidence and precision. For persistent issues beyond screw replacement, consult Ryobi’s authorized service centers, but most chuck problems can be resolved with this straightforward fix that takes less time than driving to the hardware store for a new drill.


