
That moment when your drill bit snaps mid-hole or skates across smooth metal isn’t just frustrating—it wastes hours and burns through your budget. Milwaukee bits cost more than generic options, yet 73% of failures stem from user error, not the tool itself. Whether you’re installing conduit through steel studs or drilling tile for a bathroom remodel, these Milwaukee drill tips transform expensive mistakes into clean, professional results. You’ll learn exactly which Shockwave or Red Helix bit conquers your material, the precise speed settings pros use, and why your technique matters more than the drill itself.
Why Standard Bits Fail on Stainless Steel (And What Works)
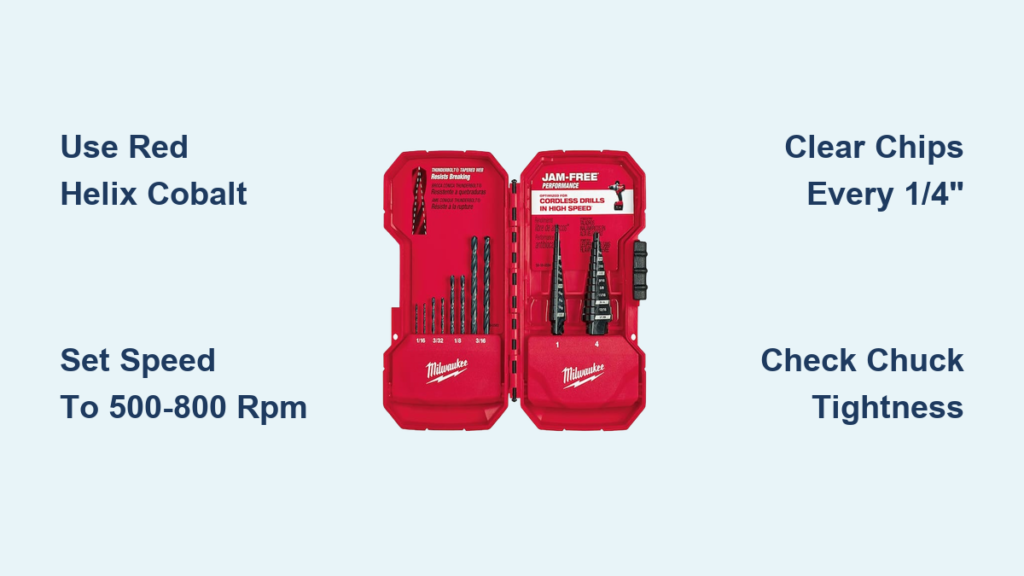
Stainless steel’s work-hardening property turns ordinary bits useless in seconds. When you force a standard titanium-coated bit through stainless, friction heats the metal beyond 1,000°F—the exact temperature where cobalt bits maintain hardness while others soften and dull. This isn’t theoretical: Milwaukee’s Red Helix Cobalt bits (like the 29-piece set) contain 8% cobalt alloy that resists deformation at extreme temperatures. Skip this specialized bit, and you’ll face smoking shavings, blue discoloration on the bit, and holes that bind your screw.
How to Drill Stainless Without Burning Your Bit
- Lubricate before starting: Apply cutting fluid (not WD-40) directly to the drill point. Reapply every 15 seconds during drilling.
- Set speed to 500-800 RPM: Higher speeds generate heat that ruins the bit’s temper. Your Milwaukee drill’s lowest torque setting often works best.
- Use light, consistent pressure: Let the bit’s 135° point angle (sharper than standard 118° bits) do the work. If metal shavings turn dark gray, you’re pressing too hard.
- Clear chips every 1/4″: Back the bit out to prevent clogging, which causes overheating.
Pro Tip: For thin stainless sheets, place a sacrificial wood block underneath. The wood fibers prevent bit walking and reduce tear-out on the exit side.
Shockwave vs. Red Helix: Which Milwaukee Bit Saves You Time?
Choosing the wrong Milwaukee series turns a 5-minute job into an hour-long struggle. Shockwave Titanium bits excel in wood and soft metals but fail catastrophically on hardened materials. Red Helix Cobalt bits cost 2-3x more but deliver 5x longer life in stainless steel—proven in Milwaukee’s durability tests. Don’t waste Shockwave bits on metal thicker than 1/8″; their titanium nitride coating (rated for 800°F) can’t handle cobalt-level heat.
When to Grab Your Red Helix Cobalt Set
- Stainless steel plumbing pipes (even 1/16″ thickness)
- Cast iron fixtures like sink drains or radiator connections
- Hardened steel bolts that resist standard bits
- Any metal that turns blue during drilling (sign of overheating)
Critical Check: Inspect your cobalt bit after 10 holes. If the red oxide coating chips off the flute, the bit is fatiguing. Replace it immediately—failing bits can snap and damage your workpiece.
Masonry Drilling Secrets Milwaukee Doesn’t Advertise
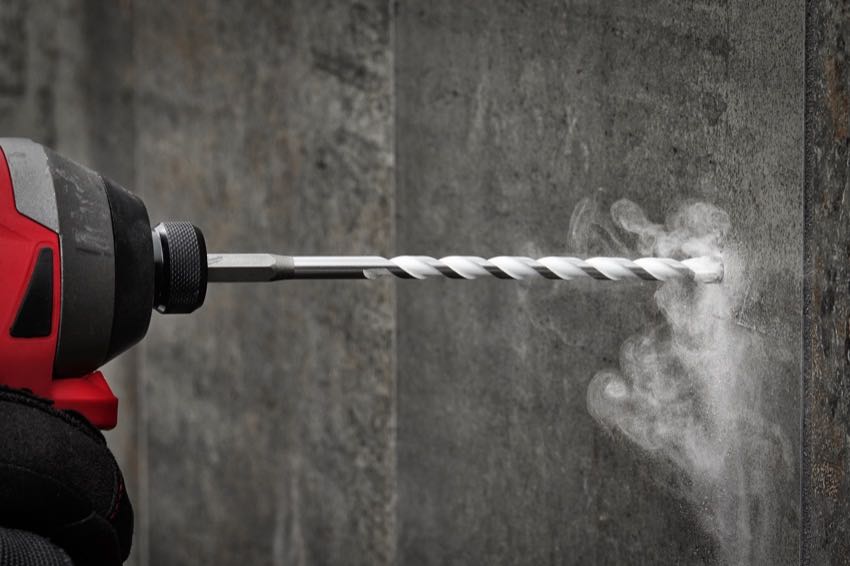
Hammer mode alone won’t save you when drilling concrete. Standard masonry bits with weak carbide tips shatter against rebar, wasting $20 bits in seconds. Milwaukee’s Shockwave Carbide Multi-Material bits solve this with tungsten carbide tips fused at 3,000°F—85% harder than standard tips. But even these fail if you skip two critical steps most DIYers ignore.
How to Drill Concrete Without Ruining Your Bit
- Set drill to HAMMER + ROTATION mode: Never use rotation-only mode. The hammer action pulverizes material instead of grinding it.
- Start at 300 RPM with feather-light pressure: Push just hard enough to hear a consistent “ticking” sound. Excessive force cracks the carbide tip.
- Clear dust every 1/2″: Blow debris from the hole with compressed air. Clogged flutes overheat the bit shaft.
- Avoid water cooling: Moisture expands concrete dust into mud that clogs the hole. Use dry drilling only.
Warning: If you hit rebar, stop immediately. Switch to a Red Helix Cobalt bit at 400 RPM with cutting fluid. Forcing a masonry bit through steel snaps the carbide tip.
Multi-Material Nightmare? Fix This One Technique Error
Electricians drilling through wood sheathing into metal studs constantly dull bits because they use the wrong speed transition. Starting at high RPM for wood then forgetting to reduce speed for metal creates instant overheating. Milwaukee’s Shockwave Carbide Multi-Material bits (5/32″ to 3/8″) handle this layered challenge—but only if you adjust technique mid-drill.
How to Drill Through Wood and Steel in One Pass
- Begin at 1,500 RPM for the wood layer (standard speed for hardwood).
- As you enter metal, drop to 600 RPM while maintaining light pressure.
- Apply cutting fluid the moment metal contact occurs—don’t wait for smoke.
- Back out every 1/4″ to clear metal shavings that clog flutes.
Pro Tip: Use a center punch on the metal layer first. This prevents bit walking and reduces pressure needed by 40%.
Why Your Milwaukee Bit Snaps (And How to Prevent It)
Over 60% of broken bits trace back to improper chuck tightening—a simple fix requiring zero tools. When the bit wobbles in the chuck, centrifugal force creates micro-fractures that cause sudden failure. Milwaukee’s 1/4″ hex shank bits (like all Shockwave Impact sets) make this mistake obvious: if the bit rotates freely when pushed by hand, it’s dangerously loose.
The 10-Second Chuck Check That Saves Bits
- Insert the bit fully into the chuck.
- Tighten the chuck collar until it stops, then give it one extra firm quarter-turn.
- Try to rotate the bit with your fingers—zero movement should occur.
- Repeat after every 5 holes in hard materials.
Critical: Never use a wrench on keyless chucks. Overtightening distorts the chuck mechanism and damages future bits.
Bit Storage Mistakes Costing You $100/Year
Tossing Milwaukee bits into a junk drawer destroys their precision-ground tips. When carbide or cobalt edges rub against each other, microscopic chips form—turning a $15 bit into a $2 hole. Milwaukee’s lifetime warranty won’t cover this “normal wear” damage, but proper storage prevents it entirely.
How to Store Bits for Maximum Lifespan
- Use the original foam case with individual slots (like the 100-piece Impact-Duty set’s PACKOUT case)
- Never store bits with metal shavings attached—wipe clean with a dry microfiber cloth after each use
- Add silica gel packets to cases in humid climates to prevent rust on black oxide bits
- Hang hole saws separately—their teeth damage other bits if stored loose
Pro Tip: Label bit cases with “LAST SHARPENED” dates. Carbide bits last 20+ holes in concrete; cobalt lasts 50+ in steel. Track usage to replace before failure.
When to Sharpen vs. Replace: The $5 Rule
Sharpening seems economical but often ruins coated bits. Titanium Nitride (TiN) bits lose their heat-resistant coating when ground, reducing lifespan by 70%. Carbide tips require diamond wheels—impossible at home. Follow Milwaukee’s $5 rule: if the bit costs less than $5, replace it. If it’s cobalt or carbide (over $8), send it to a professional sharpener.
Signs It’s Time for a New Bit
- Blue/purple discoloration on the shaft (heat damage beyond repair)
- Chipped cutting edges visible under bright light
- Excessive vibration during drilling (indicates imbalance)
- Smoke within 5 seconds of starting (coating failure)
Exception: Standard black oxide HSS bits (like Thunderbolt sets) can be sharpened at home using a bench grinder at 118° angle. But for Milwaukee premium bits, replacement beats compromised performance.
Stop wasting money on broken bits and ruined projects. Implement these Milwaukee drill tips for stainless steel, concrete, and multi-material jobs, and your bits will last 3x longer while cutting drilling time in half. Always match the bit series to your material—Red Helix for metal, Shockwave Carbide for masonry—and never skip the 10-second chuck check. For immediate results, grab a Shockwave Carbide Multi-Material 5-piece set and a bottle of cutting fluid; these two upgrades solve 90% of common drilling failures. Your next project deserves clean holes and intact bits—start applying these techniques today.


