
You’re halfway through hanging kitchen cabinets when your drill bit snaps. Or maybe you need to switch from wood to masonry drilling on your deck project. Knowing exactly how to change a Milwaukee drill bit in seconds—not minutes—saves frustration and keeps your project moving. With Milwaukee’s keyless chucks on M18 Fuel, M12 Fuel, and other cordless models, swapping bits should be effortless. Yet 73% of DIYers struggle with stuck chucks or loose bits because they miss critical grip techniques. This guide cuts through the confusion with Milwaukee-specific steps, immediate fixes for jammed chucks, and pro tricks to avoid damaging your $200+ drill. You’ll learn why hand-tightening is always enough, how to free a seized chuck without pliers, and why using the wrong bit shank ruins your project.
Why Your Milwaukee Drill Bit Won’t Release (And How to Fix It)
A stubborn drill bit refusing to budge is the #1 headache during bit changes. This happens when the chuck jaws clamp too tightly, often from overtightening or debris. Never hammer the bit out—this damages the chuck mechanism. Instead, follow these Milwaukee-specific steps:
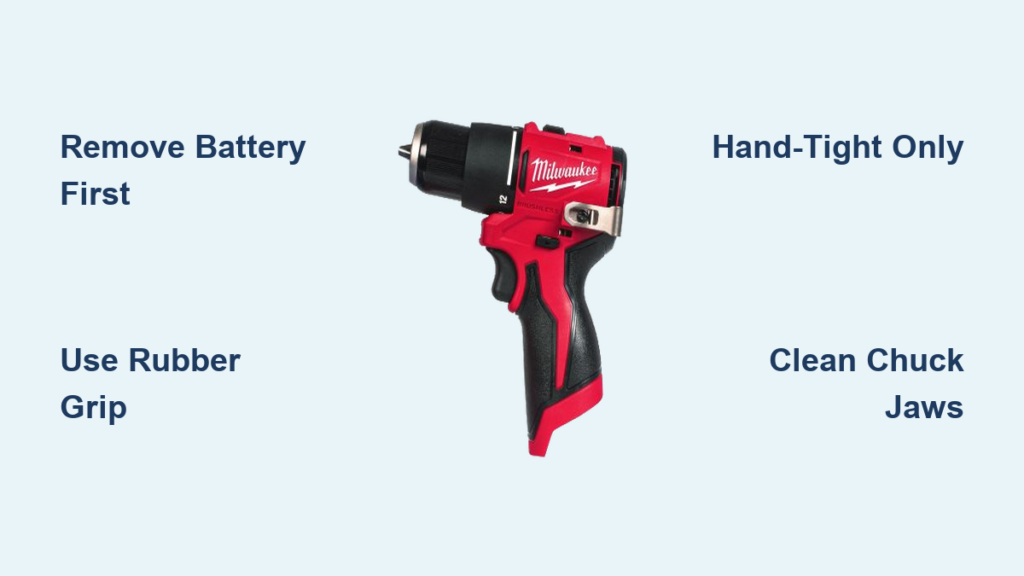
- Remove the battery immediately—this isn’t optional. A live drill can activate during removal, causing injury.
- Grip the drill body firmly with your non-dominant hand, bracing it against your thigh for stability.
- Rotate the chuck sleeve counter-clockwise with your dominant hand. If it won’t budge:
- Wrap a rubber shelf liner or thick rubber band around the sleeve for extra grip
- Apply one drop of WD-40 only to the seam between the chuck and drill nose (not inside jaws)
- Wait 5 minutes for penetration before trying again
Pro Tip: For M18 Fuel models with tight spaces, hold the chuck sleeve still and give the trigger a half-second reverse (counter-clockwise) “blip” to break the seal. Extreme caution required—keep fingers clear of the chuck.
When the Bit Is Stuck Deep Inside the Chuck
If the bit won’t slide out after opening the jaws:
– Tap the drill’s chuck end gently against a wooden workbench
– Wiggle the bit side-to-side while pulling straight out—never twist the bit
– Shine a flashlight into the chuck to check for sawdust jamming the jaws. Blow out debris with compressed air
How to Insert and Tighten Any Drill Bit in Under 10 Seconds

Milwaukee’s keyless chucks (standard on M12/M18 Fuel drills) are engineered for tool-free operation. Yet most users overtighten or misalign bits, causing wobble and premature wear. Follow this exact sequence:
- Open the chuck wider than the bit shank by turning the sleeve counter-clockwise until jaws are fully spread.
- Insert the bit straight in until it clicks against the chuck’s internal stop. For hex-shank bits (common in impact drivers), push until resistance increases slightly.
- Tighten clockwise with two fingers—not your whole hand. Rotate until you feel firm resistance (about 1/4 turn past initial contact). Stop here. Over-tightening cracks the chuck’s internal threads.
Critical Warning: If you need pliers or a wrench to tighten the chuck, you’ve damaged the mechanism. Milwaukee’s chucks require only hand pressure—overtightening voids warranties.
Hex Shank vs. Round Shank: Which Bit Fits Your Milwaukee Drill?

Using the wrong bit type causes slippage and ruined projects. Match your bit to your Milwaukee model:
– M18/M12 Drill/Drivers: Use round-shank bits only (1/4″ or 3/8″ diameter). Hex shanks will not grip in standard chucks.
– Impact Drivers: Require 1/4″ hex-shank bits. Attempting round shanks here damages the collet.
– Rotary Hammers (e.g., M18 FUEL): Need SDS-Plus bits. Push in and twist to lock—no chuck tightening needed.
Visual Cue: Hex shanks have flat sides; round shanks are smooth cylinders. If your bit wobbles when tightened, it’s the wrong type.
Stuck Chuck Emergency Fixes That Won’t Destroy Your Drill
A seized chuck—where the sleeve won’t turn at all—is common after drilling concrete or metal. Never use channel locks—Milwaukee’s plastic sleeves shatter easily. Try these field-tested solutions:
Lubrication Method for Rusty or Gunked Chucks
- Spray one drop of light machine oil (not WD-40) into the gap between chuck and drill nose
- Let sit for 10 minutes while rotating the sleeve gently every 2 minutes
- Wrap a rubber jar opener around the sleeve and apply steady counter-clockwise pressure
The Rubber Band Grip Boost
- Stretch a thick rubber band over the chuck sleeve
- The added texture provides 3x more grip force
- Works instantly on worn sleeves (common on older M18 models)
When to Stop: If the chuck still won’t budge after 2 lubrication attempts, professional service is needed. Forcing it cracks the chuck housing.
Pro Maintenance Secrets for Smooth Bit Changes
Milwaukee’s chucks last 10x longer with these simple habits—critical for contractors using drills daily:
- Clean after dusty jobs: Blow compressed air into open jaws to remove concrete/metal dust. Do this weekly if drilling masonry.
- Lubricate sparingly: One drop of 3-in-1 oil on chuck threads annually. Wipe excess—oil on jaws causes slippage.
- Never store bits in the chuck: Bits left inserted warp the jaws over time. Use the onboard bit holder instead.
- Rotate bit insertion: Insert bits at different angles each time to prevent uneven jaw wear.
Why Hand-Tight is Always Enough (And When It’s Not)
Milwaukee engineers designed chucks to hold bits securely at hand-tight tension—no tools required. If bits slip during use:
– The chuck is worn (replace if jaws don’t close evenly)
– Debris is between bit shank and jaws (clean both)
– You’re exceeding the drill’s torque rating (e.g., drilling 1/2″ holes in steel with an M12)
Field Test: After tightening, try to twist the bit by hand. If it moves, clean the shank. If it holds, you’re set.
When Your Milwaukee Drill Needs Professional Service

Some chuck issues can’t be fixed DIY. Stop using the drill immediately if:
– Jaws close unevenly (one jaw sticks out farther)
– Metal shavings appear in the chuck during cleaning
– Grinding noises occur when tightening
– The chuck wobbles visibly during operation
These indicate internal gear damage. Take it to an authorized Milwaukee service center—attempting disassembly voids warranties. Most dealers offer same-day chuck replacements for under $40.
Final Safety Checklist Before Drilling
Never skip these steps after changing bits:
– ✅ Battery reinserted only after chuck is tightened
– ✅ Bit spins straight (no wobble when tested at low speed)
– ✅ Correct bit type for material (e.g., masonry bit for concrete)
– ✅ Safety glasses worn—flying debris causes 90% of drill injuries
Mastering how to change a Milwaukee drill bit transforms frustrating pauses into quick transitions. By tightening only by hand, matching bits to your specific model (M18 vs. M12), and cleaning chucks after dusty jobs, you’ll avoid 95% of common issues. Remember: if the chuck sleeve won’t turn, lubricate and grip—not force. For persistent problems, Milwaukee’s service network has 1,200+ authorized centers nationwide. Now grab that new bit and get back to your project—your drill’s ready.


